Economical way for under-rack solar panel slide-out?

jeegro

Adventurer
Thanks for the idea. I know where to get 1/8 and 1/4 HDPE starboard.

I like the idea.... but I keep looking at this 80/20 glide track and feel like its perfect. I'm hung up right now on how to fasten the rails to the rack, and the glide track to the solar panel frame.

Rack: I think I would through bolt from the bottom side, insert a nut into the front runner slats, and fasten down. I think I would need to drill and counterbore each hole however, and not sure how comfortable I am with that without a drill press. The holes would have to be spaced perfectly. 80/20 offers machining services for access holes, but they only have an option to counterbore the ends. I thought about using side brackets, sounds weaker, and I don't have enough clearance to the sides for 2 of the rack slats due to gutter mount feet.

Glide track: I was thinking flathead stainless screws, however the top portion is only 0.3" across, which would only allow for a ~#8 or M4 screw... which I think is too small. I'd want to at least use a 1/4-20 screw (that has a 0.477" diameter head).

anyone worked with 80/20 before and have tips?
 

randy h

Member
I used heavy duty drawer slides from Home Depot to attach the panel to the underside of my roof rack. The slides are rated at 50 lbs and the solar panel (Renogy Suitcase) is 30 lbs. The slides were very inexpensive, around 35 dollars a pair.
The panel is automated to self deploy when the alarm system is armed. And likewise, to self retract when the alarm is disarmed.

I Installed this setup around 3 years ago. They have survived and performed flawlessly after many rough trails and washboard roads. The only time I had to replace a drawer slide was when one of the Solar Panel stand brackets dropped down and stopped the self retraction. That bent one of the drawer slides. I was relying on the twist knob of the stand bracket to hold itself up. I now velcro them out of the way.

The drawer slides allow for removal of the solar panel and with the anderson plugs I employ, I can remove the panel and install an extension on the cable to place the panel in the sun, if I am camping with the car itself in the shade. However, i must admit, that I have never used this feature. Probably because of the desert areas I ride in, there is no shade to park the car under.

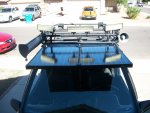
front deployed
100_5571.jpg

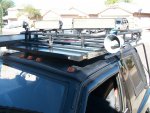
front retracted
100_5570.jpg

The drawer slides attach to the solar panel with 2 nut & bolt combos per side.
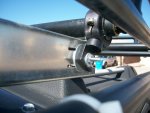
The drawer slides attach to the roof rack using 2 Power Sport PIAA universal brackets per side. These bracket have an adjustable (via different size bushings) round section that attaches to the roof rack tubing, with a flat section that pivots and attaches to the drawer slides.
100_5593.jpg

The solar panel is deployed/retracted automatically using a linear actuator attached to the back center of the solar panel and underside of the roof rack. This actuation can be achieved manually via a switch I mounted to my center console, but I rarely use that. The actuator is most often controlled by the car alarm. When I use the keyfob to arm the alarm; the windows roll up, the doors lock, and the solar panel deploys. When I disarm the alarm, the doors unlock and with a second push on the dis-arm button, the solar panel retracts. At first I had it where if unarmed the panel would retract without a second push, but I found it more convenient to require the second button press so I could unlock the car and grab something out real quick without the panel cycling through deployment.

I am going to be embarrassed to show how the actuator is attached at the middle of the roof rack with hose clamps, but I have been unable to find round to perpendicular square attachment brackets like I want. But although ugly, it has been very stable and I have not had to touch it since originally mounting it.
100_5595.jpg

Here is a short youtube video showing retraction and deployment via car alarm. The actuator is controlled by a DEI Window Control relay, which is in turn tied into Viper Alarm System.
 

jeegro

Adventurer
That's a really cool setup. How long are the drawer slides? Price? The geek in me wants the linear actuation!
 

randy h

Member
The drawer slides are labeled as 26 inch. The renogy suitcase panels I believe are 24 inches as measured from front of car towards rear. I paid around 35 dollars for a pair at Home Depot.
The Linear Actuator was around 100 dollars. If you shop around I have seen ranges from 70 to 150 and higher for 24 inch actuation. I got mine from these folks:
https://www.firgelliauto.com/products/tubular-linear-actuator
But if I were purchasing now, I would research again through Amazon and others.

The DEI window control relay was 30 dollar from Amazon:
https://www.amazon.com/gp/product/B0009SWLEQ/ref=oh_aui_search_detailpage?ie=UTF8&psc=1
The relay is not required, but is a nice convenience.
 
Now aint that slicker than snot on a door knob. I love it! I am already using the DEI window module. Now you have me wanting to do this. I have been wanting to add a slide in mount for a camp table under the rack. I could just stack the solar panel and actuator underneath the table. This would make a nice protective cover for the panels when stored.
 

jeegro

Adventurer
As I suspected, sub 24" inch drawer slides are pretty cheap. I need at least 44" of travel... and thats where to price jumps to 200$+

Sooo anyone have experience with this 80/20 track and can provide advice on fastening? I'm thinking I could fit a 1/4-20 flathead in there if I counterbore a little with a forstner, then countersink.
 

randy h

Member
Have you seen jays0n's thread on his trailer build?

A trailer for the short bus

He used 80/20 on his solar panel slider. That build thread has some pretty good pics of his method. In that or another thread he mentions you can contact 80/20 with your plans and they will help design it. Before I went with drawer slides, I contacted them for help like that. They gave me two local distributors to contact. I did that and one would never answer, and the other claimed the extruded aluminum would not handle the weight. His was ignorant of the product and lazy. But I have also heard great reports from other folks that did get good help, so i guess it depends on the luck of where you are.

randy
 

jeegro

Adventurer
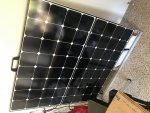
Started the project today - framed both panels. Still waiting on the 80/20 rails.

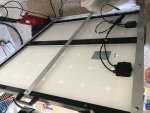
I made a mistake and first purchased regular aluminum angle, which would work, but the inside corners are curved. I bought architectural aluminum angle from Mcmaster which is commonly used for framing and has no inside curve.
For the open section of the frame I connected it with aluminum u-channel. And added a piece of flat aluminum bar down the middle for good measure.

Pretty basic, not going to win any awards. I clamped on the angle, and then eyeball-drilled holes and put in 1/4-20 pan heads and nylock nuts. Only cutting I had to do was on the u-channel.. just hacksawed it down to size.
And added a handle.

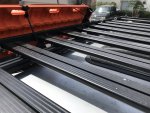
Next step will be attaching the 80/20 glide track to the aluminum angle. It will be a little tricky and involve a little counteboring and countersinking the plastic. I ordered the 80/20 rails with the access holes pre-drilled for the roof rack slats. Let's hope they line up and bolt on without issue. Then it's just a matter of sliding it in and adding a hasp lock.

IMG_0990.jpgIMG_0989.jpgIMG_0988.jpg
 
Last edited:

jeegro

Adventurer
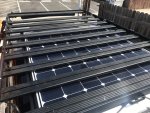
Getting there

Less than 1mm of clearance, whew

Have to add a lock, lubricate the track, and route the wires

It didn't turn out to be that economical.


IMG_1050.jpgIMG_1049.jpgIMG_1042.jpg
 

randy h

Member
Hi jeegro.
Thanks for the update.

That is looking pretty slick. Your configuration is pretty different from what jays0n did. He had extrusions framing his panel and extrusions on his trailer roof, with what I think were four short bearings, two per side. It looks like what you attached to your panel is one long bearing on each side. That is an interesting approach, and I bet much less expensive than jays0n's method. Is that correct what I am interpreting from the image, that long plastic piece is your bearing?

Will the panel slide any further out than what is pictured? I ask because it looks like the shadow from the tail piece of your roof rack is going to hit the panel pretty often. I sort of have the same issue. To minimise that, my panel extends about 4 inches past my rack when deployed. But I can still get shadow at certain sun angles if the car is not pointed correctly . My panels are oriented with the split of the two sub panels parallel to my vehicle. Your sub panels are split perpendicular to your vehicle which will minimize the shadow issue even better. Only one sub panel is shadowed, where as both of my sub panels get the shadow.

When your panel is retracted, do you get any up and down movement? I am guessing its a pretty tight marriage and minimal if any at all.

Will you share a parts list with us at some point? How was it to deal with 80/20?

Sorry for the all the questions, but as I said earlier, my first plan was to use 80/20 but could not pull it off. Although my drawer slides are doing great, I am still drawn to the 80/20 idea and if I ever had to rebuild I would like to attempt that again.

Thanks
randy
 

jeegro

Adventurer
Hi Randy,

Yes you are correct. I did look at jays0n's method, and a) those bearings were really expensive and b) it required an additional length of t-track, PLUS it took up twice the vertical room, neither of which I have. It's an incredibly tight fit as it is. It's very stiff at the moment to slide it in and out... I need to play with it for a bit. I may have tightened the flathead screws too tight, causing the glide track to bulge a little. I'm not sure.

Yeah so the panels together are 40x40, and I framed it in 48x40, so the panels slide out further to clear the rack. And yeah I wanted to be able to only pull out 1 panel, for a stealthy trickle charge while car is parked, so I oriented them that way.

No movement whatsoever. As I said, probably too little movement as they are not sliding very smoothly yet. Haven't driven yet, I need to add a lock and/or deadbolt.

I asked 80/20 a ton of questions over the phone, and by live chat. They were super helpful, though I ultimately came up with the idea to run a 48" long glide track. I would have framed the panels in 80/20, but I had no space for it, and honestly, framing it in the aluminum was super easy as I didn't have to do any miter cuts or anything.

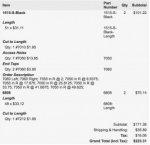
Parts list is pretty easy. attached
Screen Shot 2017-07-19 at 8.06.28 PM.jpg

Hardware:
M8 50mm stainless steel bolts
M8 Fender washers
M8 locknuts
10-32 1.5" flathead stainless machine screws
10-32 flanged nylock nuts
1.5x1.5" aluminum angle
1.5x1" aluminum u-channel
1/4-20 3/4" pan head machine screws
1/4-20 flanged nylock nuts

Renogy eclipse 100w panels
 

jeegro

Adventurer
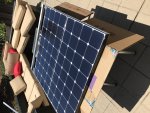
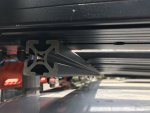
Here's some photos of the t-slot mounted. I lucked out because the front runner rack is made of the same kind of stuff, so I could just hang M8 bolts off the rack slats, and secure using a fender washer and nut. Took about 2 hours to mount these, because all the bolts had to be put on the t-slot first (because there isn't enough vertical room to hang the bolts first, and then put the track in), then each individual bolt head aligned so it could slide into the rack slat, and hold in place using cardboard, then try to slide them all in at the same time.

IMG_1033.jpgIMG_1031.jpgIMG_1034.jpg
 
Last edited:

randy h

Member
Thanks Jeegro, that part list is helpful info to have.

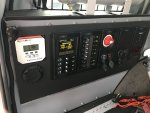
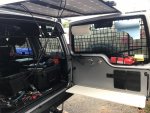
By the way, looking at your pics, you have a cool setup. Your control panel looks factory. And on your back door, that is really cool: The drop down table, extinguisher, Opener, knife rack. Cool stuff.

randy
 

jeegro

Adventurer
Hey so a quick update

Everything is bolted up and done. 80/20 makes a deadbolt latch that I used. I also plan to add a padlock hasp.


Rolls smoothly after adding some silicon lubricant and shaving down the plastic in a few places. My screws were not perfectly center down the track, so it caused the track to bulge in some places, adding friction to the slide.

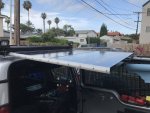
On a cloudy day in San Diego, with the panels stowed away, I was getting 1.5 amps into the battery, battery voltage 14.5v. My batteries were already fully charged, so that plus the clouds, I suspect I could get double that on a sunny day. Very happy even with the 1.5a trickle and 14.5v. Batteries should stay in tip top shape now. With panels fully extended, I get about 7-8amps each on a sunny day.

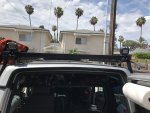
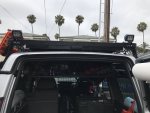
While the panels don't need any support to stay extended, I found that they rest perfectly on top of my open barn door. So no prop needed. Without the door support, they sag down about 2"

IMG_1084.jpgIMG_1083.jpg
 

Forum statistics

Threads
188,055
Messages
2,901,634
Members
229,411
Latest member
IvaBru
Top