Expo / Daily-driver JK build (Pic-heavy)

ventura911

Adventurer
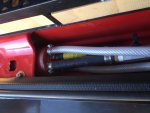
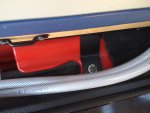
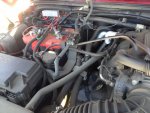
Here are some pics of the Helton set up:

No longer using the standard jack, this space was available, though difficult to fit:
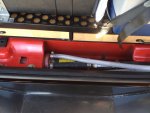
IMG_0872.jpg IMG_0873.jpg IMG_0874.jpg

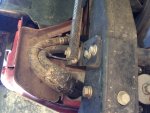
The hoses were routed through a foam knockout piece on the passenger side, then underneath to engine. Sorry, didn't take pics all the way up, but the hoses run along the driver's-side of the fuel tank:
IMG_0875.jpg IMG_0876.jpg IMG_0877.jpg

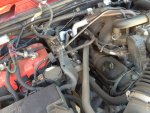
Connected up front:
IMG_0883.jpg IMG_0884.jpg
 
Last edited:

iRagedoYou

Member
What an awesome build. I sure will be stealing some ideas off of this one.. Thanks for sharing it with us. Cheers.


2013 JKUR Commando Green 6 Spd
2012 R1200 GSA
 

ventura911

Adventurer
I was asked for some further details on the rear cargo rack, so here you go. I hope the measurements are accurate, but as I took them myself, you should definitely double- and triple-check them if you work off of this!

Rear cargo rack.jpg
 

Cooldanish

New member
Here are some pics of the Helton set up:

No longer using the standard jack, this space was available, though difficult to fit:
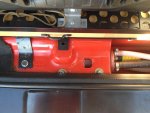
View attachment 189699 View attachment 189700 View attachment 189701

The hoses were routed through a foam knockout piece on the passenger side, then underneath to engine. Sorry, didn't take pics all the way up, but the hoses run along the driver's-side of the fuel tank:
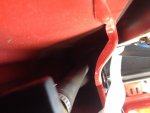
View attachment 189702 View attachment 189703 View attachment 189704

Connected up front:
View attachment 189705 View attachment 189706

Thanks for taking the time to show the Helton heat exchanger setup!. Have you tried it out yet? Any likes/dislikes?
 

ventura911

Adventurer
The only issue I've had is that in use, the water temperature varies from warm to very hot to cool, then through the cycle again. When we installed it, we did not set it up so that the temperature was regulated by the HVAC controls. Now we're waiting for the right parts so we can install a temperature regulator and a drain valve at a low point (it takes awhile to empty using the sprayer). After the first near-scalding surprise, it's been pretty easy to sense when the temperature's about to change and point it away. Doing so wastes water, though.

If you're ever a bit closer down this way and want to check it out, let me know.
 

waterboy222

Adventurer
What kind of cover are you using on your tent-cot? I love the idea since I travel alone a lot and don't need a huge RTT. In one pic it looks like its stored in a hard top luggage carrier and the other one it looks like a soft cover.. Any help or close ups?
 

ventura911

Adventurer
What kind of cover are you using on your tent-cot? I love the idea since I travel alone a lot and don't need a huge RTT. In one pic it looks like its stored in a hard top luggage carrier and the other one it looks like a soft cover.. Any help or close ups?

It's a heavy-duty vinyl cover that I had made for it by a guy who makes tent trailers, repairs RV awnings, etc. It cost a bit more than the Tentcot itself, but I hope to use it for many years. It has a large zipper on the front, passenger, and rear sides, covered by a flap to minimize water from getting in. It also has cut-outs for the cot's legs, or rather, the mounting points.

If you'd like any more info, let me know.
 

waterboy222

Adventurer
What a great idea.. I'm building a trailer now out of a compact utility bed and I think the double size tent cot is the perfect solution to save $1000 on a RTT.. I have a guy here in town that does all our boat covers, he could sew one up for me.. Thanks!
 

ventura911

Adventurer
What a great idea.. I'm building a trailer now out of a compact utility bed and I think the double size tent cot is the perfect solution to save $1000 on a RTT.. I have a guy here in town that does all our boat covers, he could sew one up for me.. Thanks!

Based on what I've read/heard, the double size has a center bar that can make it uncomfortable. Try it out first!
 

ventura911

Adventurer
Headlight upgrade

After researching the options, reviewing Hilldweller's threads (across many forums!), and speaking with Daniel Stern, I opted to replace my craptastic headlights with Cibie E-code H4's, H4-H13 pigtail adapters, 70/65w Osram bulbs, and Narva Rangepower+50 H3 bulbs for my IPF 968's. After an easy install and a bit of aiming, I'm now able to see the world around me. :victory:

I'd considered going LED, but after determining the only ones I liked were the mucho dinero JWSpeakers, I decided to stay with quality at a price I could justify; I just don't drive enough at night to go that route at this time.
 

ventura911

Adventurer
It's been quite awhile since I've updated this thread, so here we go...

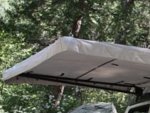
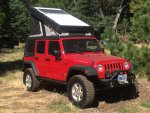
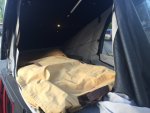
First, I replaced my TentCot and roof rack with the awesome Ursa Minor Vehicles J30 camper top (http://www.ursaminorvehicles.com):
image.jpg
image.jpg

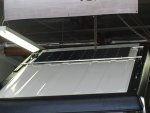
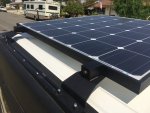
I originally had a Renogy 100w flexible solar panel, but when it was recalled for a design problem that could lead to a fire, I upgraded to a Renogy 150w rigid panel:
image.jpg
image.jpg

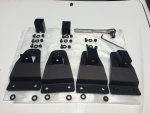
The new panel was mounted with really nice brackets, made by Impact Products (http://m.ebay.com/itm/131702371613?_mwBanner=1), after trimming the slides (sorry, not shown) to fit the roof rails:
image.jpg
 
Last edited:

ventura911

Adventurer
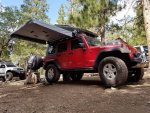
My search for an awning lead me to So Cal Teardrops' Scipio (https://www.socalteardrops.com/options.php?cid=8&oid=71) and annex (https://www.socalteardrops.com/options.php?cid=8&oid=109):
View attachment 363801
image.jpg

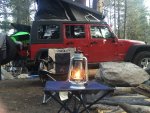
I had originally planned on adding Rigid SRM2 LED's, two to each side, and using the SwitchPros 8100 switch panel to control them. As nice as those products are, however, I ultimately decided to go the opposite direction for camp lighting (http://www.lanternnet.com/Merchant2...&Product_Code=WTK1&Category_Code=WTK-Lanterns) for an old-fashion camping experience (especially nice when you can't sit around an old-fashion campfire):
image.jpg
 
Last edited:

Forum statistics

Threads
188,200
Messages
2,903,704
Members
229,665
Latest member
SANelson
Top