Hi, I just finished replacing the hinges on my Flippac yesterday. I was planning to write an account with photos and sources so I'll do so right here. The whole thing took most of 3 days.
I bought the hinge and torsion bar replacement kit from Sway-A-Way Torsion Bars. $771.00 including tax. They are located near Los Angeles in Chatsworth. Their web site wasn't working so I phoned them. I picked them up on will call so I can't tell you shipping costs. The new hinge parts are more robust than the originals.
I will attempt to upload all 15 images. It will be up to you to figure out the relationship between this explanation and the photos. I'm not taking the time right now to assemble it into a cohesive presentation.
The kit comes with 2 page instructions which I partially followed. It says it's easier to remove the shell from your truck first, I didn't remove mine. It says to open it to vertical, remove the torsion bar and old hinge parts, close it, replace the hinge parts, then open it to vertical again to insert the torsion bar. I opened it to vertical and kept it there for the whole procedure. With it in the vertical position I had plenty of room to work inside.
Mine, when mounted on the truck and opened to vertical, is 12 feet tall, so I had to work outdoors which meant building a jig for lifting and holding in place. The photos are mostly self explanatory but here is a partial materials list; Lumber, For the vertical portion, 2x4's, 2 @ 14', 2 @ 10', 2 @ 8'. I built the base from old lumber I had lying around, you could use narrower pieces, 2 @ 2x10x10', 2 @ 2x6x8'. Plus several scrap pieces for spacing, wedging, making a wider place for the truck tires to sit, support the 2x10 under the main vertical piece, etc. I bolted the 2x10s on top of the 2x6s then parked the truck on the 2x6s to hold down the base. I think the photos are sufficient to give an idea of how to assemble the vertical portion. You can respond with questions if you need more details. I attached pulleys to the top cross bar and cleats to the vertical pieces for the rope. I attached the top pieces and inserted the rope before lifting it into position. Without a compound pulley system I needed a helper with a pole to help push the lid up to vertical. When it was vertical I put a flat piece of ¾ ply on the roof of the cab and used a scissors jack to help support the lid keeping about half of the weight on the ropes. Once it was vertical I moved the tent catcher to the side and removed the mattress.
I had to dig a lot of caulk out of the hinge receiver holes using a sharp knife and a 90 degree
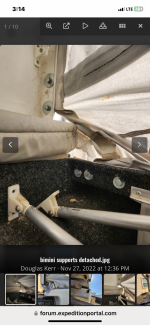
dental pick. To get at the bolts that hold the hinge pieces it is necessary to unscrew the bimini struts, or tent struts, and push them to the side. After removing the hinge bolts it is fairly easy to remove the unbroken hinge halves with a hammer and block of wood. Getting out the broken hinge piece in the lid was at least an hour of banging with a drift punch, clamping with vise grips and banging on that, spraying with lubricant. I had to check frequently that the lid wasn't slipping off of the scissors jack. You can see in one of the photos that the old part was cracking in more than one place. There are also many pieces of shims of various thicknesses in the receiver tubes most of which slide right out but some needed needle nose pliers to retrieve. You won't need the shims with the new parts.
I scrubbed out the rectangular receiver tubes with a wire brush then sprayed with rust fixative and later rustoleum primer before inserting the new hinge parts. I cranked the bolts down to the recommended 40 ft/lbs then discovered that the torsion bar wouldn't quite line up. So I backed off the bolts and that enabled me to insert the torsion bar and then I retightened the bolts. It helps to twist the torsion bar just a little to get the splines to line up. I found the old hinge part a useful tool for that purpose.
The torsion bar is splined at both ends but not for the same length. I think it would have been better if I had put mine in the other way. I have the longer splines on the passenger side but it would be better if the longer splines were on the driver side. I wound up putting the keeper collar on the passenger side which is wrong according to the directions. I'll find out if the bar starts creeping out passenger side. I was tired and inserting the torsion bar was hard so I didn't reverse it.
Last step was to inject silicone caulk around the new hinges where they enter the shell.
It works fine and I'm happy with the result.

