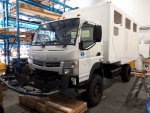
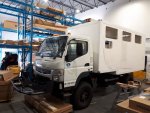
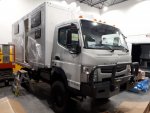
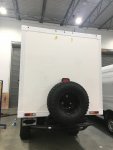
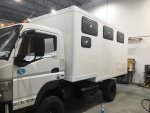
Fuso FG 4x4 Custom Expedition Vehicle Build

jetstreamin

Active member
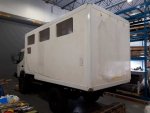
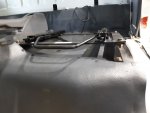
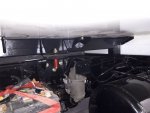
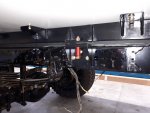
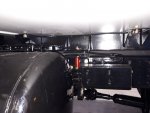
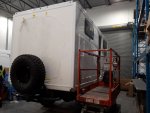
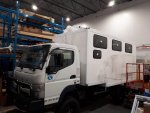
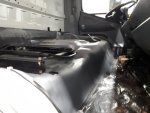
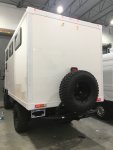
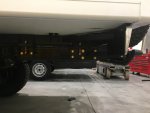
Real progress on the build this week, kinetic sub frame in place, body mounted, and new seat mounts almost complete. Still lots to do but getting there
 

Attachments

  • F3879F7E-5ABA-41C5-833E-467AAC66E0E7.jpeg
    F3879F7E-5ABA-41C5-833E-467AAC66E0E7.jpeg
    239.7 KB · Views: 477
  • B5A3AD61-9713-4CA8-8937-AE33C5EA9AEC.jpeg
    B5A3AD61-9713-4CA8-8937-AE33C5EA9AEC.jpeg
    269.4 KB · Views: 482
  • 95C7B3F9-2A1D-4BF0-8399-1DC06C074E0F.jpeg
    95C7B3F9-2A1D-4BF0-8399-1DC06C074E0F.jpeg
    113.6 KB · Views: 485
  • 1F6D78CE-E714-4AE0-A160-AF55930CAAFE.jpeg
    1F6D78CE-E714-4AE0-A160-AF55930CAAFE.jpeg
    215.5 KB · Views: 511
  • 2B2E050C-A212-46B1-9A87-7EDE14D1C794.jpeg
    2B2E050C-A212-46B1-9A87-7EDE14D1C794.jpeg
    206.9 KB · Views: 493
  • 580CDC9E-8794-4A30-9B04-D8C16144B0F6.jpeg
    580CDC9E-8794-4A30-9B04-D8C16144B0F6.jpeg
    194 KB · Views: 498
  • 13BE164C-8221-45D0-8B44-E2DF95911F36.jpeg
    13BE164C-8221-45D0-8B44-E2DF95911F36.jpeg
    205.4 KB · Views: 490
  • A24049DF-F66C-4B78-BF8F-E0D8640B3709.jpeg
    A24049DF-F66C-4B78-BF8F-E0D8640B3709.jpeg
    150.2 KB · Views: 476

Marko1960

New member
Top notch build, makes mine seem pedestrian! Any info on planned systems...power, refrigeration, water etc?
 

glennm01

Active member
Beautiful stuff. I'm curious -- not critical, really just curious -- what led you to go with having the shape of the box accommodate the FG's stepped frame? (i.e. instead of just going with a "regular" box that sits at the level of the FG frame's top step) Is it just to keep the overall height down, or is their another good reason to go this route?
 

Third

Member
Lowering the CG would be my thought. A lot of folks mount their boxes high on the rails but given the nature of the beast, I want to sink my amob box down as far as I can get away with doing.
 

jetstreamin

Active member
Top notch build, makes mine seem pedestrian! Any info on planned systems...power, refrigeration, water etc?
More details to come for sure as the build unfolds, next step is wiring, we are installing 720Watts of solar with a Full Victron System and Lithium Battery bank ;o) Will post more as we progress ;o)
 

jetstreamin

Active member
Beautiful stuff. I'm curious -- not critical, really just curious -- what led you to go with having the shape of the box accommodate the FG's stepped frame? (i.e. instead of just going with a "regular" box that sits at the level of the FG frame's top step) Is it just to keep the overall height down, or is their another good reason to go this route?
No problem at all and the box actually started out that way on Rev 1.0 of the drawings and although it was more complex and costed more to add the step it is 100% worth it in my view to keep the all-important centre of gravity low and also the overall height. The stepped area with reduced headroom is where the dinette seating is so no drama on the lower height there ;o) Athletically having a lower step up from the cab roof to the living area roof works and once the cab roof rack is mounted with fuel cans and the aluminium expedition boxes it will look the part ;o)
 

jetstreamin

Active member
Lowering the CG would be my thought. A lot of folks mount their boxes high on the rails but given the nature of the beast, I want to sink my amob box down as far as I can get away with doing.
100% on the same page and the reason for adding the step ;o) to further aid this my grey tank is actually going to be mounted between the chassis rails under the box in a heated insulated basement box ;o)
 

jetstreamin

Active member
More details to come for sure as the build unfolds, next step is wiring, we are installing 720Watts of solar with a Full Victron System and Lithium Battery bank ;o) Will post more as we progress ;o)
PS i would not call your build Pedestrian!! i just took a look at your threads and it looks amazing!
 

jetstreamin

Active member
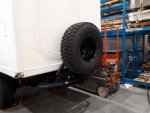
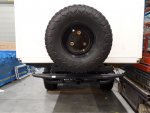
Latest build pics updates.... Arctic Turn Windows fitted, new seat mounts in place, rear bumper with swing arm a 2" receiver added.

Next steps: The articulated passthrough, wiring for lighting and heated seats, entry door and roof escape hatch fitting.

Watch this space......
 

Attachments

  • IMG_0380.jpg
    IMG_0380.jpg
    180.1 KB · Views: 347
  • IMG_0377.jpg
    IMG_0377.jpg
    203.7 KB · Views: 352
  • IMG_0379.jpg
    IMG_0379.jpg
    50.2 KB · Views: 338
  • IMG_0378.jpg
    IMG_0378.jpg
    200.2 KB · Views: 351
  • IMG_0375.jpg
    IMG_0375.jpg
    186.7 KB · Views: 363
  • IMG_0376.jpg
    IMG_0376.jpg
    175.5 KB · Views: 364

jetstreamin

Active member

Marko1960

New member
Mine comes in a tad under 3.1m.....I've put a sticker on the windscreen as a reminder.....arbitrarily chose 3300 as a "safe" height....all will depend on dips etc.
20190109_085715.jpg
 

jetstreamin

Active member
A few more pics of the build with the entry door in place and the start of the cutout for the articulated passthrough tunnel.
 

Attachments

  • IMG_2951.jpeg
    IMG_2951.jpeg
    1.7 MB · Views: 243
  • IMG_2952.jpeg
    IMG_2952.jpeg
    1.6 MB · Views: 257
  • IMG_2947.jpeg
    IMG_2947.jpeg
    1.7 MB · Views: 250
  • IMG_2949.jpeg
    IMG_2949.jpeg
    1.8 MB · Views: 236
  • IMG_2950.jpeg
    IMG_2950.jpeg
    1.6 MB · Views: 230

NYON

New member
Started following your build from the beginning! It's coming along fast and looks great! Was wondering...was the composite box and subframe at ITB designed at the same time to work together or was the composite box designed first and subframe designed by ITB independently after the box was designed?

Also, were there some type of "anchors" embedded in the composite box to allow it to be attached to the subframe? Thanks in advance for any light you shed on this!!
 

Forum statistics

Threads
188,136
Messages
2,902,650
Members
229,582
Latest member
JSKepler
Top