Imnosaint
Gone Microcamping
As promised in the Gen III Hour Tour Thread, I tore into the Monty's interior, removing the headliner to access the mounting points for the roof rack and see what I could do to repair the sunroof mechanism.
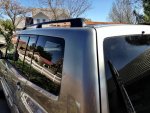
I've considered alternate roof racks but for the time being want to put the serious money into suspension and recovery. The stock rack has served its purpose fine with a Thule system that holds the RTT and awning, but I want a tray in between the stanchions to hold other recovery and camping gear.
To this end I removed the headliner.
It's pretty straightforward, removing all the hardware of grab handles, interior lighting modules, sun visors, etc. The only hang up is in removing the sun visor clips with tabs that tend to break easily.
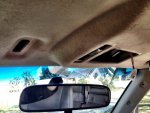
Remove the weather stripping on all doors. The A-pillar covers snap out being careful to keep retention clips in place, and second row seatbelt mounts on the B-pillars need to come off to remove the covers. The rear covers that surround the wing windows between the C and D-pillars snap out, again being careful to keep the retainers in place.
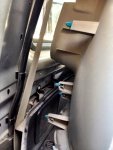
With the headliner free, the last step is to remove the electrical connection from the sunroof junction in the A-pillar,
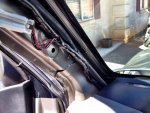
...and then the main connector that attaches behind the driver's side footwell panel. The dead pedal needs to be removed to access this.
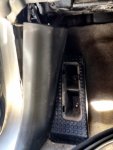
There are a number of attachment points along the route of this cable, the first of which is just above the main connector, the rest of which on the A-pillar are taped into place. Carefully remove the attachment points and feed the cable up behind the dash to the A-pillar junction being carful to route the cable so the connector egresses without snagging. Sounds harder than it is to remove.
With the cable free, remove the headliner.
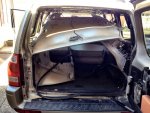
Next out is the rear AC/Heating ducts, eight screws total holding it in place. It's U-shaped around the cargo area with a air-feed tube that goes up the passenger D-pillar.
With the ceiling cleared, the five nuts per side can be located, two at the rear and front and one in the middle.
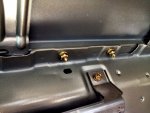
Remove the nuts and the racks pop right out.
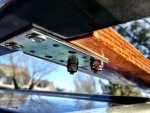
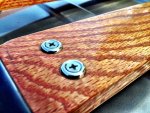
I considered a number of materials to use for the cross-members and settled on 1/2"X3"X4' oak planks from Lowe's connected to 2.5"X1 and 3/8" Stanley zinc plated mending braces attached with Arrow 3/16" aluminum rivets with 1/4" grip.
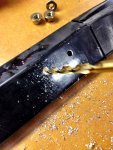
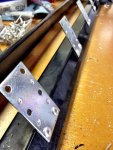
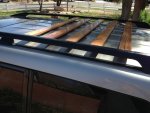
I wanted to allow varied placement of the Thule Crossroad Railing Feet while keeping the cross-members close enough to create parallel support to prevent sagging. I came up with 3" spaces between the 3" planks giving me 6" centers to mount the mending brace, resulting in room for five cross-members.
With the braces attached, I remounted the roof rails and reassembled the interior.
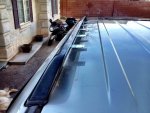
With these back in place I measured the width and cut down the oak planks to 41 and 5/8" in length, and mitered at the ends to fit the 22.5 degree angle of the stock rack.
The bummer of this project is that Lowe's had only three of the five planks I needed and despite a search of the area's lumber and hardware stores, I came up empty handed and will have to wait until Lowe's is restocked to get the rest of the lumber. Had I a planer this wouldn't be an issue.
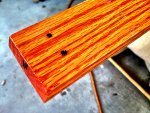
I test fit the three planks I had, fitting them underneath the mending braces to mark the holes, a pair on each end, to attach them. I number each plank to correspond to their position on the rack.
For the past two days now, I've been staining and varnishing the planks with a marine-grade product and am reduced to waiting on Lowe's to restock to finish the project.
Hopefully I'll be able to post the final stages on this project by next weekend.
I've considered alternate roof racks but for the time being want to put the serious money into suspension and recovery. The stock rack has served its purpose fine with a Thule system that holds the RTT and awning, but I want a tray in between the stanchions to hold other recovery and camping gear.
To this end I removed the headliner.
It's pretty straightforward, removing all the hardware of grab handles, interior lighting modules, sun visors, etc. The only hang up is in removing the sun visor clips with tabs that tend to break easily.

Remove the weather stripping on all doors. The A-pillar covers snap out being careful to keep retention clips in place, and second row seatbelt mounts on the B-pillars need to come off to remove the covers. The rear covers that surround the wing windows between the C and D-pillars snap out, again being careful to keep the retainers in place.

With the headliner free, the last step is to remove the electrical connection from the sunroof junction in the A-pillar,

...and then the main connector that attaches behind the driver's side footwell panel. The dead pedal needs to be removed to access this.

There are a number of attachment points along the route of this cable, the first of which is just above the main connector, the rest of which on the A-pillar are taped into place. Carefully remove the attachment points and feed the cable up behind the dash to the A-pillar junction being carful to route the cable so the connector egresses without snagging. Sounds harder than it is to remove.
With the cable free, remove the headliner.

Next out is the rear AC/Heating ducts, eight screws total holding it in place. It's U-shaped around the cargo area with a air-feed tube that goes up the passenger D-pillar.
With the ceiling cleared, the five nuts per side can be located, two at the rear and front and one in the middle.

Remove the nuts and the racks pop right out.
I considered a number of materials to use for the cross-members and settled on 1/2"X3"X4' oak planks from Lowe's connected to 2.5"X1 and 3/8" Stanley zinc plated mending braces attached with Arrow 3/16" aluminum rivets with 1/4" grip.


I wanted to allow varied placement of the Thule Crossroad Railing Feet while keeping the cross-members close enough to create parallel support to prevent sagging. I came up with 3" spaces between the 3" planks giving me 6" centers to mount the mending brace, resulting in room for five cross-members.
With the braces attached, I remounted the roof rails and reassembled the interior.

With these back in place I measured the width and cut down the oak planks to 41 and 5/8" in length, and mitered at the ends to fit the 22.5 degree angle of the stock rack.
The bummer of this project is that Lowe's had only three of the five planks I needed and despite a search of the area's lumber and hardware stores, I came up empty handed and will have to wait until Lowe's is restocked to get the rest of the lumber. Had I a planer this wouldn't be an issue.
I test fit the three planks I had, fitting them underneath the mending braces to mark the holes, a pair on each end, to attach them. I number each plank to correspond to their position on the rack.
For the past two days now, I've been staining and varnishing the planks with a marine-grade product and am reduced to waiting on Lowe's to restock to finish the project.

Hopefully I'll be able to post the final stages on this project by next weekend.
Last edited:

