You are using an out of date browser. It may not display this or other websites correctly.
You should upgrade or use an alternative browser.
You should upgrade or use an alternative browser.
Gnarvan AWD Express build.
- Thread starter TeleSteve
- Start date
kntr
Observer
As far as I know there is no complete body lift kit available. I bought the spacers individually off ebay and then ordered 2" longer bolts (1" in your case) from McMaster. You will have to work out the fan to shroud clearance. I lowered the bottom half of the shroud with 1x2 rectangular aluminum tube (1x1 in your case) and longer bolts. It did require a little minor shroud trimming around the frame.
Do you have a link? How many 1" pucks do I need? What size bolt hole do I need?
Replacing the foam on the used bench seat/bed to get ready for new upholstery. I went with 70 density 3" foam on the seat and 70 density 4" foam over the back platform boards. I built up the edges wrapping the frame with 1/2" 40 density (green in photos).


While the seats and cushions were at the upholstery shop I worked on the rear door panels and speaker install.
Building the box for the cubby hole and wrapping it with carpet.

The panels are 1/4" Baltic birch wrapped in vinyl. the door curves where I wanted to mount the speakers so I made tapered trim rings wrapped in gray carpet.


The upholstery shop knocked the seat and cushions out in two days and I just picked them up this afternoon. I bought OEM neutral wicker to match the front seats. I googled and printed out some pictures of factory express bench seats so they could make the seat look factory. I wanted them more flat with no bolsters so it would be flatter in bed mode.
I am pretty happy with the outcome.


The rolls you see under the seat are the black out window screens I made by sandwiching Reflectix with black foam lined headliner on one side and automotive carpet on the other. All three layers were glued together with contact cement and then I sewed 1" nylon webbing all around the edges. I will post some more pictures when I can, it's been raining and snowing here lately.
The wood pieces next to them are the start of the rear corner trim pieces.
Sent from my iPad using Tapatalk
Love your van! Planning to possibly purchase an AWD van next year, and have been lurking here to see some builds. So far, I think you have made the most of the space and also allow for passengers. Curious - what sort of seat did you use for your fold down bed, and would lit also be safe enough for seatbelts? How large is the bed once folded down?
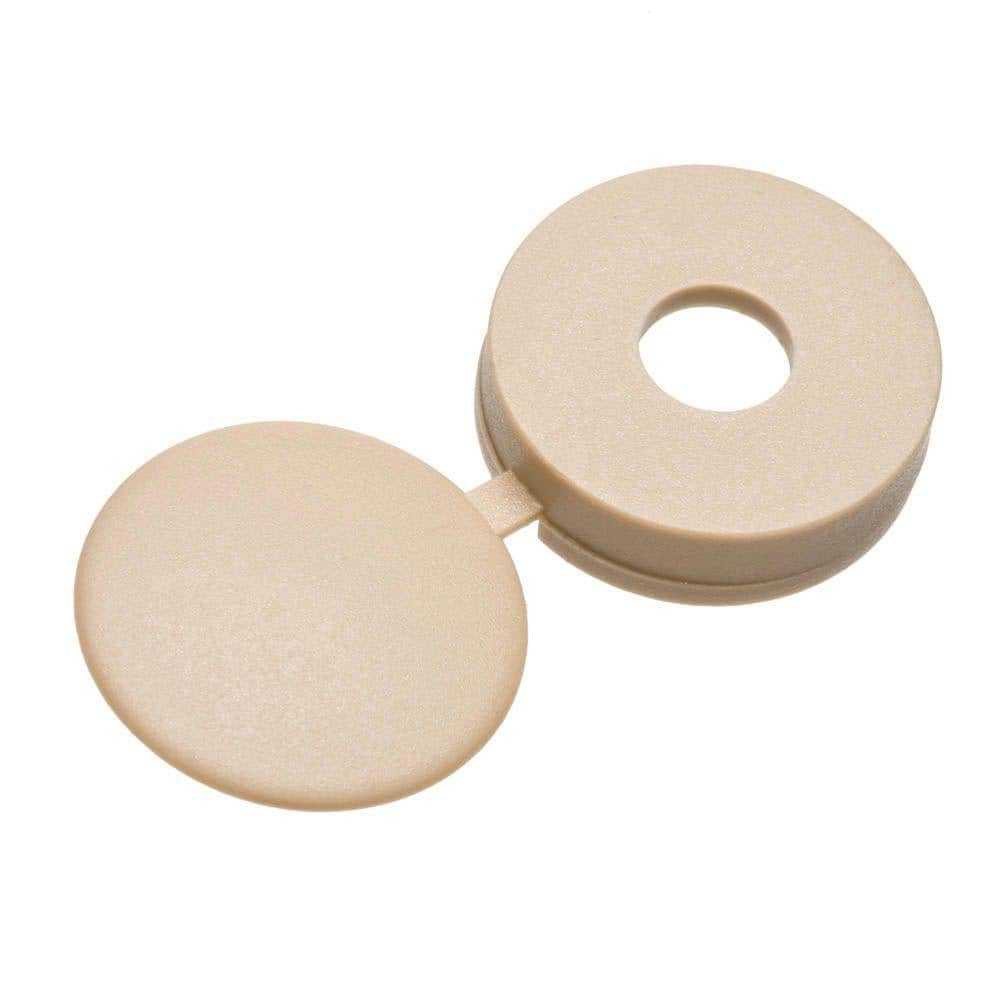
They are fastened with screws in color matched caps I found at Home Depot.Any extra info on how you attached your rear pillar trim panels? I'm trying to hide as many fasteners as possible and it looks like you've achieved that on those pieces.
I used twelve from zone offroad.Do you have a link? How many 1" pucks do I need? What size bolt hole do I need?

Zone Offroad 3296 Black Nylon Resin Body Lift Kit Blocks 2" Tall x 3" Wide | eBay
Find many great new & used options and get the best deals for Zone Offroad 3296 Black Nylon Resin Body Lift Kit Blocks 2" Tall x 3" Wide at the best online prices at eBay! Free shipping for many products!
www.ebay.com
Not sure who the seat manufacture was it was a take out from a van Sportmobile Fresno was redoing. It was setup to run seat belts. My only complaint with the seat is that the frame and sliders consume a lot of the under seat space limiting some storage.Love your van! Planning to possibly purchase an AWD van next year, and have been lurking here to see some builds. So far, I think you have made the most of the space and also allow for passengers. Curious - what sort of seat did you use for your fold down bed, and would lit also be safe enough for seatbelts? How large is the bed once folded down?
kntr
Observer
I used twelve from zone offroad.

Zone Offroad 3296 Black Nylon Resin Body Lift Kit Blocks 2" Tall x 3" Wide | eBay
Find many great new & used options and get the best deals for Zone Offroad 3296 Black Nylon Resin Body Lift Kit Blocks 2" Tall x 3" Wide at the best online prices at eBay! Free shipping for many products!www.ebay.com
Thanks but Im looking for a 1"
Looks like Zone makes a 1-1/4".Thanks but Im looking for a 1"
Zone Offroad 2196-CLR Body Lift Blocks 1-1/4" Tall x 2" Wide | eBay
These guys make 1".
Body Lift Blocks, Pucks 2"-3" diameter with variety of lengths | eBay
kntr
Observer
Looks like Zone makes a 1-1/4".
Zone Offroad 2196-CLR Body Lift Blocks 1-1/4" Tall x 2" Wide | eBay
These guys make 1".
Body Lift Blocks, Pucks 2"-3" diameter with variety of lengths | eBay
Which diameter would be be better; 2" or 3"? 5/8" bolt hole? How many will I need?
Last edited:
I used 3" diamater. It takes 12. 14mm bolts so at least 9/16" holes, 5/8" woukd work.Which diameter would be be better; 2" or 3"? 5/8" bolt hole? How many will I need?
kntr
Observer
I used 3" diamater. It takes 12. 14mm bolts so at least 9/16" holes, 5/8" woukd work.
What length 5/8" bolts will I need?
Are all 12 bolts the same length?
I wanna have all the parts before we tear into this. I have twelve 1"x3" pucks with 5/8" holes.
kntr
Observer
Kntr are the 1x3 blocks going to give you any lift since the original body mounts are about 3/4 inch thick or are the new blocks 1 3/4 x 3
Oh crap, I dint think about that. I just got 1" body pucks.
So if I want to lift the van 1" I need 1 3/4" blocks? Maybe TELESTEVE can clarify.
Last edited:
Herbie
Rendezvous Conspirator
Similar threads
- Replies
- 2
- Views
- 1K
- Replies
- 1
- Views
- 325
- Replies
- 5
- Views
- 2K
- Replies
- 1
- Views
- 482


