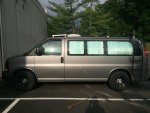
Goonie - 09 Chevy Express AWD Camper Van

Goonie

Member
This is a somewhat after-the-fact build thread. I was quite lazy about taking pictures throughout working on my van but quite enthusiastic about the work! I did not consider showing off what i was going to build because the main goal was to keep the modifications functional, inexpensive, and simple. There was not much concern about aesthetics or finishing touches. As I progressed I realized that much of the inspiration I got for the van from Expedition Portal was from users just like me, not able to throw $50k to $100k at a van for a well crafted luxury camper so I should share my van to either be an inspiration or an example of what not to do :victory:

Spending time outdoors and on the road was something my wife and I loved before a camper van ever became an option. Our first type of camper was a simple teardrop camper which we bought on the cheap. The cab was in good condition, the frame was rusty, and the torsion suspension was seized. This allowed me to teach myself how to weld and feed my desire to create...... it was our van gateway drug!

The teardrop camper:
17400_10152772222521783_2463885588177812719_n.jpg

Quite Rusty:
551547_10152772222516783_4868250124582383419_n.jpg

Removed the rust and sealed with POR 15:
11351476_10152772222716783_4359150764502104940_n.jpg

First welding project, tie-downs and brackets:
11141762_10152773678141783_4045982921550994406_n.jpg

Replaced the axle:
11425124_10152791197406783_3043945364489590075_n.jpg

Finished Product!
11407182_10152780651961783_2711695104354719584_n.jpg

Taken on the night we left from virginia, to utah, california, and back home. An epic road trip:
12063713_10152991994276783_990263844778708463_n.jpg


The constant hitching, unhitching, difficulty parking, difficulty backing up, etc led us to seek a budget alternative after a year or so. After scouring the internet we decided the best option for our budget and lifestyle is was a Chevy express AWD. Finding one was difficult but finally a cluster of them popped up in Ohio, they were all bought by an owner of some dealerships out there at a government auction! We grabbed a rental car and drove out from VA to Ohio and bought a 2009 Chevy Express AWD with around 50k miles. We talked them down in price.... quite easily which should have been a red flag as the front drivers side wheel bearing started to go out on the drive home but thankfully it held together! I had to change it in the parking lot of our condo.... the HOA was not very happy but I had no option, any attempt to move was halted by a horrendous grinding noise from the bearings!
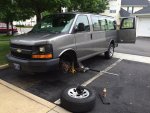
13321652_10153455707816783_7777103688138916847_n.jpg

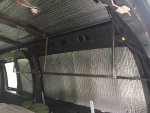
Once the van was road worthy we did what everyone else with a camper van does i suppose. We installed some cheap reflectix on the walls, installed a MaxxAir fan on the roof, put in some lights, a battery, a solar panel, etc. Unfortunately I did not do a very good a job at getting pictures of this work.

My Wife, Bee, helping with the fan install
13445279_10153489630996783_5629746666768461783_n.jpg

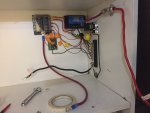
A re-purposed IKEA scratch-and-dent shelf unit used to house fuses, charge controller, grounding block, remote control light switches, isolation solenoid, and the battery.
13921082_10153579346041783_1493896382743178616_n.jpg
 

Goonie

Member
We used large tupperware boxes to store our items under the bed frame i built our of .5" square tubular steel. This was cheap but quite annoying when you wanted to reach an item buried between other boxes! Also, anytime I had to hit the brakes hard i would pucker-up expecting a poorly secured box to come screaming forward and ********** the back of my seat :Wow1:

This brought about the most expensive investment besides the van itself, 60" full extension drawer sliders rated to 500 lbs for about $220. These were installed under the bed and attached to a Birch plywood frame and drawer which I enlisted the help of my dad to help complete, he has a wood workshop to drool over!

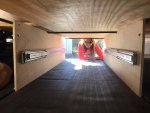
Bee providing quality control inspection of the slider installation:
15078592_10153850604511783_4526236374140692844_n.jpg

Construction of the drawer by my father and I:
15073459_10153850604546783_6618777293330495852_n.jpg

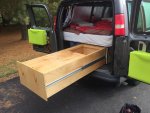
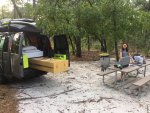
Finished product after 4 coats of polyurethane, also visible are the Ikea shoe boxes we used to hold cooking supplies and mist gear at the rear of the van, the top of the drawer has two sliding boards which act as worksurfaces, they can be removed or slid for easy access to the contents of the drawer:
14991829_10153850604796783_6650845469962589440_n.jpg
 

Goonie

Member
Despite Living on the East coast, we love to surf and SUP, we spend most of our leisure time Mountain Biking but when the waves and wind are right we run to the beach! I purchased some generic ladder racks from amazon for $60 i believe, and re-used my Dakine Surf Pads and Thule Hang Two rack to carry our boards to the beach.

Ready for the beach!
13692493_10153543759826783_126089478143662793_n.jpg

After 5~10 times loading and unloading the boards it became apparent that it was a pain in the butt, time to put on a ladder! I searched online but ladders are either quite expensive or, in my opinion, quite chintzy. I made a run to the local BMG Metal supply and purchased some 1" square tubular steel and had a blast making my own ladder. I borrowed inspiration from other users on this site and the internet for the design, finishing touches were Rustoleum spray on bedliner as the finish and rubber stripping in-between the van and the ladder to prevent damage to the paint.

Mocked up to the van to take measurements.... so tedious and tricky to get just the right cuts with an angle grinder:
983973_10154254850426783_5030823109160396226_n.jpg

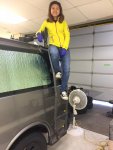
Bee providing quality control and weight testing again..... of course this was the preliminary LIGHT weight testing :jumping:
17426258_10154254850421783_3782476310137085915_n.jpg

Ready for paint! weighing in just a little under 20lbs if i remember right.
17796604_10154254850431783_3412222636206798449_n.jpg

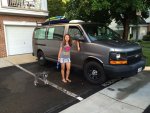
Finished product! you may also notice the somewhat low ground clearance.... this will be fixed at a later date!
IMG_1801.jpg
 

Goonie

Member
At this point we had taken many trips to Assateague island National Seashore where we can drive on the beach and spend the day surfing..... or trying to surf at least! We had no issues with the AWD or stock tires aired down to about 22 psi. We took a long weekend road trip to St. Augustine Florida and and discovered that the ground clearance was not all i thought it was. The grooves and tracks in the sand were much deeper than they are at Assateague and we ended up plowing quite a bit of sand with our underside but thankfully did not get stuck!

On the beach at St. Augustine:
18581799_10154373636901783_5135224611613964233_n.jpg


Quick stop in North Carolina on the way back from florida:
18557289_10154371130651783_7194039337557924082_n.jpg


I decided it was time to do something about the ground clearance and the saggy butt of the van. Using the wonderful information in the GMC and Chevy AWD information thread provided by expedition portal I purchased new Bilstein Shocks, Chevy Suburban Leaf springs, U-Bolts, and adjustable Torsion bar keys. This was probably one of the most time consuming and awkward modifications i performed to the van, it took about 14 hours to complete the work but the end result was very much worth it!

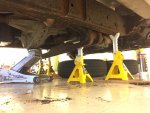
The torsion bars were stuck in the support bracket and the transfer case cross member prevent them from dropping out, no amount of beating with a BFH would get them out so the cross member had to be lowered in order to separate them from their support
18922092_10154428537786783_5438203446535851961_n.jpg

Rust made the job a little tricky but nothing a little patience and lubricant didn't fix, i should buy stock in PB Blaster!
19030724_10154428537791783_165307353214177945_n.jpg

Difference between the stock and adjustable torsion keys, the torsion keys had 4 levels of adjustment i believe, here they are set to the 3rd position:19059105_10154428537826783_2548625027316660803_n.jpg

Old crummy shocks and new shiny ones!
18952859_10154428538181783_8330959966021209432_n.jpg
19029195_10154428537801783_2953381813551660096_n.jpg

I took some measurements at the time but do not remember the exact lift, i believe it was about 4" in the back and 2.5" in the front.
 
Last edited:

Goonie

Member
There have been a few other small modification along the way. The IKEA shelf for the electronics finally gave out after doing its best to support the battery aver many bumpy miles so i relocated the electronics under the bed

Relocation in progress:
IMG_1631.jpg

We removed both of the rear windows and replaced them with pop our windows for added ventilation:
Untitled.jpg

We had a Coleman canopy which we would set up at the beach for shade, it took up quite a bit of room on the inside of the van and was a bit of a hassle to set up. after shopping around for a while we found a deal on a used ARB 8' awning. Bought another ladder rack and welded up some mount so the ladder rack. This was a great addition, it causes no wind noise, frees up space in the van, and is quicker to set up!

Here is the awning in use at a local Rallycross Race, you can also see the increased wheel gap from the lift installed earlier:
19030352_10154429293796783_4609163213210200610_n.jpg
 

Goonie

Member
My most recent addition is a small storage bin, we're trying to utilize the most space we can and constantly find small items on the bed in our way. Another trip to get some metal! this time .5" square tubular steel like the bed frame. I welded tabs in place to mount it to the van as well as make mounting surfaces for .25" birch plywood, Bee picked the color and painted the frame once it was complete, i used a leftover luggage compartment net from our old Jeep we sold for the face.

Test fitting
IMG_1867.jpg

IMG_1868.jpg

Pretty much complete:
IMG_1874.jpg

Painted and mounted, letting the paint dry before installing the wood
IMG_1898.jpg

Tadaa!!
IMG_1899.jpg
 
Thanks for sharing your build!! Looks great. I too came from a teardrop camper background. An ARB awning is on the short list for my van. Do you have any close up pics on how you attached it to your ladder racks? That is exactly how I will be doing mine soon and not sure if I need to buy or fabrication some additional brackets.
 

Goonie

Member
Thanks for sharing your build!! Looks great. I too came from a teardrop camper background. An ARB awning is on the short list for my van. Do you have any close up pics on how you attached it to your ladder racks? That is exactly how I will be doing mine soon and not sure if I need to buy or fabrication some additional brackets.


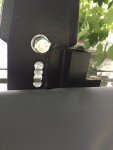
I used 1" tubular steel and 1" angle iron to make a small bracket. I welded a piece of the angle iron on either side of the tubular steel and welded that onto the upright for the ladder rack. This could have been bolted together but i had a welder so for me it was simpler. I used the 1" tubular steel to space the slightly away from the bracket for clearance. Then just drilled some holes to line up with the ARB awning bolts going to the extruded aluminum backbone.

Picture from the backside:
IMG_1902.jpg

picture from the outside:
IMG_1903.jpg

from the bottom looking upwards:
IMG_1901.jpg
 
Last edited:

bdog1

Adventurer
I sold my E350 Quigley and have recently picked up an 05 Exp AWD. I'm still in the get acquainted phase.

Did the AWD meet your expectations for beach sand? I was considering a 4WD case swap, but would be delighted if it's not necessary.

How's the MPG on your rig?

Thanks for sharing your build.


Sent from my iPhone using Tapatalk
 

Goonie

Member
I sold my E350 Quigley and have recently picked up an 05 Exp AWD. I'm still in the get acquainted phase.

Did the AWD meet your expectations for beach sand? I was considering a 4WD case swap, but would be delighted if it's not necessary.

How's the MPG on your rig?

Thanks for sharing your build.


Sent from my iPhone using Tapatalk

I have had absolutely no problems in sand, I've had it on Assatueague beach 6~8 times and on St Augustine beach in Florida 3 times. I'll have it on OBX sand this weekend coming up.

I have the stock 245/70/16 tires and air down to 24~ lbs I think. as long as you're familiar with correct sand driving techniques you should have no problems.

I've added quite a bit of weight to the van but I'm not sure what the weight is, I'm sure that would affect the performance on sand and MPG.

I average 18mpg around 55mph but getting on the freeway has mpg drop to 13~14 when going 80mph. I normally have a bike rack on the back or surfboards on the roof which I'm sure doesn't help!

I hope you enjoy your new van!
 

bdog1

Adventurer
Thanks so much. I'm expecting a comparable rack. That really helps.


Sent from my iPhone using Tapatalk
 

Forum statistics

Threads
188,296
Messages
2,905,089
Members
229,959
Latest member
bdpkauai
Top