Goonie - 09 Chevy Express AWD Camper Van

On Belay

Observer
We removed both of the rear windows and replaced them with pop our windows for added ventilation:
View attachment 407519


Love the build. Any more info on replacing the fixed rear windows with popouts? I have the fixed rears on my express cargo and would love to get a set of popouts for better airflow. I've found a set locally. Best I can tell you can use a razor blade to cut through the gasket holding the fixed glass in place. Then put in the popout weatherstripping and hardware. Are the doors predrilled from the factory for the popout hardware or did you make a template? How did you attach the popout hardware (rivnuts, rivets, machine screws)? Any other photos or tips would be super helpful!
 

Goonie

Member
We removed both of the rear windows and replaced them with pop our windows for added ventilation:
View attachment 407519


Love the build. Any more info on replacing the fixed rear windows with popouts? I have the fixed rears on my express cargo and would love to get a set of popouts for better airflow. I've found a set locally. Best I can tell you can use a razor blade to cut through the gasket holding the fixed glass in place. Then put in the popout weatherstripping and hardware. Are the doors predrilled from the factory for the popout hardware or did you make a template? How did you attach the popout hardware (rivnuts, rivets, machine screws)? Any other photos or tips would be super helpful!

Thanks dude, the windows we bought off of ebay and they came with the hardware, there were two "spring" hinges up top and the lever mechanism on the bottom.

I was worried about doing the process initially but it's pretty darn simple. I bought the weatherstripping and a long razor blade holder from amazon, you could probably do it without the extended blade holder but i highly recommend it especially since it is not too expensive. I found myself applying quite a bit of force while cutting the OEM gasket/adhesive and it was nice to have the extra leverage it provided.

here are the parts:
https://www.amazon.com/gp/product/B000OUXAGM/ref=oh_aui_detailpage_o00_s00?ie=UTF8&psc=1

https://www.amazon.com/gp/product/B00NDR2CDU/ref=oh_aui_detailpage_o00_s00?ie=UTF8&psc=1

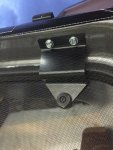
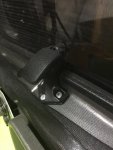
Cutting out the window was done from the inside of the door while my wife held it from the front. It was simple except for the two little holders/tabs installed from the factory at the bottom of the glass, i assume they were used to hold the window in place while the adhesive dried at the factory. these little tabs extend inwards and blocked access to the adhesive slightly. a long pocket knife can get access to that section relatively easily.

i cleaned up most of the left over gasket material so it had a flat surface to minimize the possibility of a leak, i would guess it was about .5 to 1" thick material you have to cut through with the razor blade, a couple extra sharp blades makes it go quickly.

I put the gasket material in place and felt I did not need any adhesive or glue, I've had them on for 6~8 months now with no leak but if you're paranoid about leaking I'm sure you could take extra precautions at this point. Please note that this is not OEM gasket material and i did not try and match the dimensions of the OEM material. I bought it with a roll of the dice and as far as i can tell it works fine! I ended up with some extra length of the gasket material, maybe 6', but i bought extra just in case i goofed and had to re-do a section :)

There were no pre-existing holes in the door frame so i used some strong duct tape to hold the window in place from the outside and drilled holes in the door frame. the top part of the frame was sealed so i used sheet metal screws to hold the top in place. I have un-finished door frames so for the bottom i was able to use machine bolts and could reach behind the door to put nuts on the bolts.

I'll try and remember to grab some pictures tonight of the finished product, I don't think i have any pictures of the swap in progress.
 

Goonie

Member
eh, kinda poor quality with the low light and mosquito netting in the way but It's better than nothing!

IMG_1906.jpg

IMG_1907.jpg

IMG_1908.jpg
 

fire_strom

Adventurer
Great stuff. Thanks for sharing. Can you show more pictures of the bottom mount of the ladder? I couldn't tell if you went into the body or down to the frame rail. I'd love to do one that went from the rack to the frame with no body panel drilling.
Thanks,
-G
 

Goonie

Member
Great stuff. Thanks for sharing. Can you show more pictures of the bottom mount of the ladder? I couldn't tell if you went into the body or down to the frame rail. I'd love to do one that went from the rack to the frame with no body panel drilling.
Thanks,
-G

No prob, I did not tie into the framerail, I bolted into the body. I'll grab some pictures in a couple days, I only have my iPhone at the beach and I don't know how to upload pics from the phone. The body mount is surprisingly sturdy but I guess I am not a heavy guy, only around 160 lbs.
 

Goonie

Member
Thanks, I'll keep an eye out for them.
-G

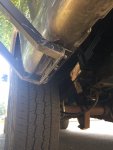
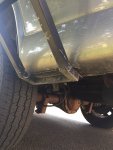
Here you go dude, made with angle iron and some bolts.

I placed some rubber in between the body and the bracket to hopefully protect the paint. Here you can see the two surfaces, the angle iron on the right is bolted to the body and the left side is the ladder mount which is bolted to the body mount..... if that makes sense
IMG_1911.jpg

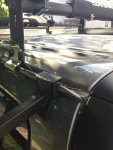
here is a pic from the inside, i used a wider bracket to help distribute the weight a little, there's only two bolts holding it in place:
IMG_1914.jpg

a different angle from the outside:
IMG_1915.jpg

one of the top mounts with more of the same rubber in between the body and the ladder:
IMG_1916.jpg
 

fire_strom

Adventurer
Thanks! Very nicely done on the bottom mount. I will put that into the options when I get to doing the ladder. It might work for me too. It is a great loophole in the body panel drilling avoidance.
-G
 

SirMrManGuy

Observer
We removed both of the rear windows and replaced them with pop our windows for added ventilation:
View attachment 407519

Love the build. Any more info on replacing the fixed rear windows with popouts? I have the fixed rears on my express cargo and would love to get a set of popouts for better airflow. I've found a set locally. Best I can tell you can use a razor blade to cut through the gasket holding the fixed glass in place. Then put in the popout weatherstripping and hardware. Are the doors predrilled from the factory for the popout hardware or did you make a template? How did you attach the popout hardware (rivnuts, rivets, machine screws)? Any other photos or tips would be super helpful!

I have a few photos in my build as well. http://forum.expeditionportal.com/threads/169757-Vanessa-the-Jersey-Girl . I think there is a video on youtube as well of someone doing it.

I bought some windshield cutout wire from NAPA for about $12, poke a hole through the glue with a knife, feed it through with a screwdriver then wrap both ends around some bits of wood and saw away (tape the edge of the window to avoid rubbing the paint). It makes cutting the rubber glue really easy. After that scrape the rest of the glue off with a blade, put the weatherstrip on, line up the windows, mark centers with a sharpie, and drill the holes. I did 1/4in rivnuts, but plain pop rivets work, and that's what Chevy did from the factory (the earlier vans had inserts and screws, later chevy got lazy and started pop riveting). If you go pull a set from a junkyard take a cordless drill and some bits with you in case you have to drill rivets out.

I found a set of popout side windows at the junkyard on the same van I got my rears from; it was hot and close to closing time so I didn't get them but I wish I did. If you find those take them, they are pretty rare.
 

On Belay

Observer
Thanks for information and pictures Goonie and SirMrManGuy looks like a fairly easy swap. Off to go see if the local salvage yard still has the set they've got listed.
 

Goonie

Member
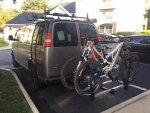
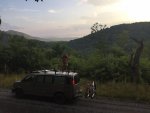
Since there's been not much surf lately we were able to dust off the Downhill Bikes and get out for the first time this year. We made a two day trip of it, first out to Massanutten Bike park, it was our first time there. After biking for the day we explored some gravel roads near Wolf Gap in the George Washington National Forest and found a nice secluded field on top of the mountain to camp for the night, ends up it was an abandoned parking lot! Then off to Bryce Bike Park which is still our local favorite. Not much work done to the van recently, just getting materials together for some normal routine maintenance next week.

Loaded up and ready to go!
van and bikes.jpg

Great views in the forest:
gwnf.jpg

Abandoned parking lot campground:
gwnf camp.jpg
 

On Belay

Observer
I just ordered a pair from this seller:

lilyautoglass


I haven't received the windows yet, so I can't say anything about their quality but the price was pretty decent. I spent an inordinate amount of time calling and travelling to salvage yards before realizing there was an easy aftermarket alternative.
 

Goonie

Member
It was on my wife's evay account, I cannot remember the actual seller but the one On_Belay lists looks almost identical in price and appearance.
 

Forum statistics

Threads
188,462
Messages
2,905,318
Members
230,428
Latest member
jacob_lashell
Top