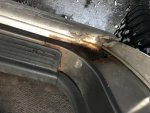
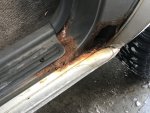
There's no substitute for elbow grease. I don't have the tools/skills for metal work either, but managed to stave off rust on my '97 XJ that has lived in the northeast its whole life: rust spots above the windshield and along the drip-rail of the roof, mostly. I used fiberglass reinforced body filler and it's held up. Plan for a lot of prep and a dry, warm place to work on the issue over at least a couple days.
Here's what I would do: First, remove all the trim near your rust, so you can see the whole area and none of the edges of the rust are hidden. Then hit it hard with a really stiff, wire hand-brush to remove any loose and flaky rust. That process will reveal what kind of holes in the body work that might be hidden and you can come up with a plan. If you have huge holes, there's no great solution except metal work, but if the holes aren't too big, you can repair them with body-filler. I used a fiberglass reinforced body filler called "Kitty Hair," by Evercoat. It's not as good as replacing it with metal, but its a simple process and works.
Before doing any filler, you need to prep the material. After the hand-brush, I used a grinder with a wire-wheel to get the area as clear of rust as possible and then I used a liquid rust converter (Rust Seal, by SEM) to handle any residual rust in the nooks and crannies. Let that dry overnight and then you'll have a rust-free starting point for your filler. The rust converter can be primed and/or the body-filler will adhere to it.
Two useful tips when applying the body-filler: 1) I used expanding foam to fill the area behind the hole that I needed to repair. The foam fills the cavity and then can be shaped (cut/sanded) to form the contours of the missing metal that you're replacing. This creates a backstop onto which you can easily apply the filler, rather than trying to get it to span a gap without any support. If you can find it, use a closed-cell foam (rather than open cell) because it won't soak up water. After the repair, remove whatever foam you can still get access to so it won't trap any water over time. 2) Once you spread the wet filler in place, immediately cover it with a sheet of wax paper while the filler is still malleable and use that wax-paper to evenly smear the filler into a uniform layer. Leave the wax-paper in place while the filler dries. The wax paper makes the process less messy, makes it easier to place the filler consistently and creates a smooth finished surface when the filler dries. I read about that trick on a forum and it works incredibly well and saves a ton of sanding effort later.
After the filler dries, the wax-paper pulls right off. Do some finish sanding, fill in any bubble holes with more filler (let it dry again) and then apply a quality automotive primer to EVERYTHING the next day. After primer, you can finish paint it with whatever color you want. One last thing, read the primer directions closely: a lot of them instruct you to apply finish paint within a certain window of time, or you need to re-sand the primer again before finish paint.
I have pictures of my process on this build thread, which might be helpful:
http://forum.expeditionportal.com/threads/160503-On-Island-XJ-Build
I had no experience with body-work but with some research and planning, I pulled it off satisfactorily. Good luck.


