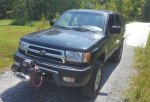
Griffin the 1999 T4R Build

aardvarcus

Adventurer
So I wanted a vehicle to accomplish a few things, namely: Haul my family of four comfortably, daily drive to work getting decent MPG, Tow/Haul a reasonable amount of tools/supplies, be capable of off-roading, and camping. My mandatory features were: 4x4, stick shift, real frame, reliability. I already have a major project vehicle (1994 Diesel Suburban), so I wanted something I could keep closer to stock.

Enter Griffin, the 1999 third gen 4Runner, 5 speed stick, V6, 4.10s, SR5, 150k when purchased earlier this year. Name came from the previous owner, but it stuck with my three-year-old. All of my mods will be done for specific purposes balancing on-road MPG and drivability with off-road capability, if you are looking for assorted bolt-ons to achieve a look this thread isn’t for you.
J2.jpg

Modifications completed thus far:
Complete suspension refresh (Bilstein 5100s, OME Rear Springs, New Bushings all around)
OEM Toyota Front End Refresh (Bearings, CV Rebuild with Boots, Ball Joints, OTRE, etcetera)
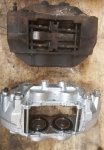
Tundra Front Brake Upgrade
Daily Driving Tires: 245/75R16 Michelin Defender LTX Daily Drivers on Factory 2nd gen Tacoma Alloys
Off-road Tires: LT255/85R16 Cooper Discoverer ST on Factory 3rd gen 4Runner Alloys
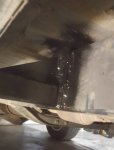
Hidden front hitch recessed behind crumple zone with removable extension tube (No errant air bag deployment)
Rear factory bolt together hitch with center flipped. (Ground Clearance)
Warn VR EVO 8 winch, swapped to synthetic line, on receiver mount (Stowed inside)
Roof Rack Delete/Fender Flare Delete (Reduce wind drag)
Assorted Tools/Recovery Gear

Modifications Underway:
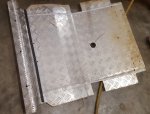
Skid plates from ¼” aluminum, one built several to go.
Sound deadening and extra insulation are done in roof and cargo area, doors and cab floor still needed.
Custom “Lightweight” 2” 3/16 Steel Square Tube Rock Sliders/Steps halfway completed.
Aerodynamic rear “wing” mostly complete
“Expedition Style” camping trailer is also slowly being built

Modifications Planned:
Storage solution for tools/gear in cargo area
Custom Mud Flaps
Heat rejecting light window tint
Factory E-Locker Axle Swap
Dyna Overdrive Gear Swap
Backup Camera

F4.jpgF5.jpgH3.jpgJ3.jpgJ5.jpgJ6.jpgH1.jpgH2.jpgI1.jpg

As for meting my stated criteria, it holds my family comfortably and has become the go to family hauler. It has been meeting my expectations for MPG, but I actively work to improve it. I keep meticulous records of my modifications and how they impact my fuel economy, which are documented on a fuel economy related website. Since owning it the vehicle has averaged 25+ MPG, good tanks are 27+ MPG bad tanks are 23 MPG. (Yes, I have checked the distances and accounted for tire size, yes it actually gets this MPG in real life.) I have plans to execute additional fuel economy related modifications to get it over 30 (gearing and aerodynamics) which will be done in a way to not inhibit off-road capability. For towing, the vehicle is rated to tow 5K lbs, I just need to add a trailer brake controller. It hauls whatever fits in the cargo area just fine. Most of the camping capability will come from towing my under construction mid-sized camping trailer, which I hope to keep under 3k lbs loaded. As for reliability the engine is stock and is going to stay stock, I have used OEM parts everywhere reliability is critical.

I am open for your suggestions on my plans or for other things I should add or do to make it better both on-road and off-road. I am not building a rock crawler, nor a mall crawler but a jack of all trades. My biggest limitation currently is time to work on it.
 

RyanC-PNW

Observer
I'm really interested in that front-mounted winch. Do you happen to have any photos or more info about mounting the hitch behind the bumper like that?
 

aardvarcus

Adventurer
RyanC,

Several companies make front receivers, however they either hang too low and/or replace the factory crumple zone neither of which I found desirable. I decided on a design that largely stayed behind the factory crumple zone which was left intact, with plate sandwiched between it and the front of the frame to catch those six bolts. It also catches all four bolts for the factory tie down/recovery points. Trying to stay that far back and not hit anything was not easy as it is very tight in there with not a lot of room to mount things around the protrusions/ac lines/factory crossmember/etcetera. I basically field fit the parts, clearancing as I went, tack welded, and then did final weldups. Then more clearancing so it could be installed. You quickly learn why nobody mass produces one like this, it is quite difficult.

Once the base is installed, you then stick an extension into the receiver when you need to use it, as the receiver on the first bracket is intentionally very far back to allow the crumple zone to crumple as it was designed. The extension is the blue item in the previous photos, brings the hitch out a few inches past the bumper.
 

Attachments

  • K1.jpg
    K1.jpg
    196.6 KB · Views: 33
  • K2.jpg
    K2.jpg
    330.6 KB · Views: 34
  • K3.jpg
    K3.jpg
    143.3 KB · Views: 37

99Yota

Observer
Sounds like you've covered the big mechanical items; here are some maintenance items I've dealt with:
- Radiator: the oem unit will eventually develop a hairline crack on the top tank. This seems somewhat common on higher mileage vehicles so it may have something to do with heat cycling. Better to replace n your schedule versus having it crack during a trip. This would be a good time to replace hoses and thermostat.
- Transfer case output seals: you'll see a small drip of gear oil on the transfer case skidplate. Seals are easy to replace- front one will most likely leak first since it gets used less but I'd replace them both. Have an impact gun or breaker bar as the nut is quite difficult to remove even after unstaking it.
- Valve cover gaskets- if you live in a warm climate and don't drive in freezing conditions, you may not have an issue with oil getting past the valve cover gaskets.
 

aardvarcus

Adventurer
99 Yota,
Good thoughts, thanks for the feedback. I have dealt with the valve cover gaskets on my wife's 2000 T4R, mine aren't leaking (yet). I have the radiator hoses on hand to swap out, but I will see about ordering a new radiator while I am at it. The previous owner thought the transfer case front seal was leaking so I ordered a new one, but I think that was wind-blown oil from the leaking oil cooler (I already fixed) because I haven't seen any seepage out of them yet. I will order a rear seal and add that to my PM list though.

I haven't had a lot of time to work on it recently, however I just got a notice from one of my old friends that he is going to a local offroad park on an upcoming weekend. Thus I am going to prioritize finishing as many of my in-progress projects as I can.
 

99Yota

Observer
99 Yota,
Good thoughts, thanks for the feedback. I have dealt with the valve cover gaskets on my wife's 2000 T4R, mine aren't leaking (yet). I have the radiator hoses on hand to swap out, but I will see about ordering a new radiator while I am at it. The previous owner thought the transfer case front seal was leaking so I ordered a new one, but I think that was wind-blown oil from the leaking oil cooler (I already fixed) because I haven't seen any seepage out of them yet. I will order a rear seal and add that to my PM list though.

I haven't had a lot of time to work on it recently, however I just got a notice from one of my old friends that he is going to a local offroad park on an upcoming weekend. Thus I am going to prioritize finishing as many of my in-progress projects as I can.
Happy to help!

One more item which might come in handy is a set of Firestone airbags for the rear coils. They're cheap ($100 or so) and can make a big difference in load capacity and keeping your headlights pointed in the right direction when loaded up.
 

jeff parker

Observer
Is it just the highway tires or do you drive really slow? I have the same vehicle on very mild A/T's 265/75-16. The best tank was 21 MPG. Mostly it's 17-18 MPG.
 

aardvarcus

Adventurer
Is it just the highway tires or do you drive really slow? I have the same vehicle on very mild A/T's 265/75-16. The best tank was 21 MPG. Mostly it's 17-18 MPG.

Jeff,
On my last truck (2005 Tacoma), going from street terrain to all terrain of the same size was a 1-2 MPG hit. (Michelin M/S2 to Cooper ATW, both 235/85R16) Wider tires are an additional hit. To get good MPG I focus on driving steady, not slow. I accelerate briskly (about 1/2 throttle) and row the gears, but then put it on cruise. I let off the gas early when I see that I am going to have to stop. When I start the truck, I immediately put it in gear and go without idling. I don't tailgate so that I can react to the traffic flow without having to slam on the brakes. Those things add up if you do them consistently.
 

jeff parker

Observer
I drive with cruise control constantly. With Texas speed limits of 75 mph or 80 mph on I-10 out west there is no way I can even get 19 mpg. Even my 22re 2wd 94 pickup on little highway tires rarely does more than 22 mpg. Now if I hold my speed to 60-65 and become a rolling roadblock my MPG's go way up. 25-26 on the pickup and 20-21 for the 4Runner.
 

aardvarcus

Adventurer
Jeff,
On my usual drive it is a mixture of 70MPH interstate, 55 MPH highways and a few sections of 40MPH towns with red lights, all with lots of hills. I get my best fuel economy on the 55 MPH portions, with the steep hills, 70MPH sections, and the towns w/ red lights dragging down my average. Filled up this morning and got 25.91 MPG. My 2005 Tacoma i4, 5Speed, 4x4, 4.10 returned 25-28 MPG on this same commute. My highly modified but still a work in progress 1994 K2500 Suburban 6.5L Diesel, NV4500 w/ 0.648 OD, 4x4, 4.10 gets 22-24. My old 1991 K2500LD 350, NV4500 swap, 3.73, 4x4 got 15-18. My 2001 2500HD tow pig 8.1L, Allison, 4.10 gets 12-14.
 

aardvarcus

Adventurer
In other news, I was thinking about my front to rear weight distribution, and I decided that I wanted to try and move some weight out of the cargo area more to the middle of the vehicle. I had been pondering the utilization of the space under the front drivers seat, so last night I mocked up a box out of cardboard, did some iterations to make it fit, and then rebuilt the box out of coroplast. It is roughly 10" wide, 2-2.5" tall, 19-21.5" long. I angled some of the sides to maximize the available space I put a layer of tape over the hinged parts to help with durability after repeated flexing. The box is relatively stout, being jammed under the seat will hold it still and closed. You can only remove it with the driver door open.

I got it built but haven't loaded it up yet. I will have to experiment to see what fits under there well, but I am planning to try some tools, maybe in a pouch or roll to keep them from rattling. Also plan to try my winch pulley and shackles, wrapped in cloth to keep from rattling.L1.jpgL2.jpgL3.jpg
 

aardvarcus

Adventurer
Had some time to work on the 4Runner. Finished my “lightweight” rock sliders. These were built flat to double as steps. I had a set of purchased bolt on rock sliders on my last truck, but did not like the weight of them so they were taken off. To reduce weight, a single 2” square tube 3/16 thick was used, instead of the typical inner and outer tubes. Also only two supports to the frame were used per side, instead of the usual four. To maintain adequate strength with fewer attachments, the attachment to the frame was ¼” plate top to bottom 3” wide out of 1/4” steel spanning the side of the box frame. Also a much larger triangle gusset was used than typical. The total weight with the plates and gussets was 35 lbs per side, significantly lighter than usual options. In testing the slider held the weight of the vehicle without issue. This approach may not be for everyone, but because this vehicle is not a rock crawler, I prefer to have these built lighter as they are more for the occasional bump and scrape than dedicated bash point.
 

Attachments

  • M2.jpg
    M2.jpg
    294.8 KB · Views: 16
  • M7.jpg
    M7.jpg
    193.1 KB · Views: 16
  • M8.jpg
    M8.jpg
    165.2 KB · Views: 14
  • M9.jpg
    M9.jpg
    64.5 KB · Views: 14
  • M10.jpg
    M10.jpg
    130.5 KB · Views: 13

aardvarcus

Adventurer
The next bit of lightweight protection was some additional skid plates under the transmission and transfer case. Bent these up out of ¼” aluminum, once again going for light weight protection not hardcore slamming or skidding. They are relatively strong, but if they were used hardcore would eventually be bent or damaged. I would like to go back and weld on some additional vertical supports to add some more strength over some of the spans between cross-members. I stopped the plates before the exhaust on the passenger side, to prevent trapping heat and creating an oven. I would eventually like to skid the gas tank better than factory and under the spare tire.
 

Attachments

  • M4.jpg
    M4.jpg
    202.3 KB · Views: 10
  • M3.jpg
    M3.jpg
    184.5 KB · Views: 10
  • M5.jpg
    M5.jpg
    159.9 KB · Views: 10
  • M6.jpg
    M6.jpg
    328.7 KB · Views: 11

aardvarcus

Adventurer
Lastly I went over my tools, supplies, and recovery equipment. I had to replace some sockets that had wandered to the garage tools. I stocked up my kit with some trail-repair supplies. I swapped over to my dedicated offroading wheels and tires (Cooper Discoverer A/S 255/85R16) and went out on a day of trail riding with some friends. The 4Runner did perfectly over the terrain, mostly easy to moderate trails with a few tricky spots. This was a great test run for the 4Runner. Luckily I didn’t need to utilize any of my tools, supplies, or recovery equipment. The 4Runner still drove and rode reasonably well with these modifications, obviously the offroad tires ride rougher and with taller gearing than the 245/75R16 street tires.
 

Attachments

  • M1.jpg
    M1.jpg
    390.1 KB · Views: 13

aardvarcus

Adventurer
I don’t get on here much anymore (ratio of “show” to “go”…) but I wanted to bump this thread with a minor update. I have built some more aluminum armor for the bottom. I have taken this 4Runner on some more trail riding trips.

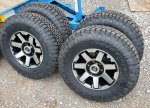
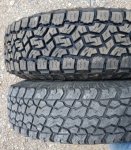
Anticipating a trip coming up, I got some new tires for the 4Runner which were Toyo Open Country A/T 3 (III) in a 255/80R17. Since these are fairly new, it has been hard to find measurements so I thought I would post some up. A fully inflated but not on the vehicle brand new tire measures right at 33” tall, 7 5/8” tread width (measuring from the tallest point to alternating tallest point), and the overall tire is 10 1/8” wide when mounted on a factory 2021 Toyota 4Runner TRD Offroad Wheel (specs on wheel available elsewhere online).

B1.jpgB2.jpg

These are replacing a set of old Cooper Discoverer S/T (not Maxx) 255/85R16s that have served well but are beyond the end of their useful life to me. One of those will become the spare for the new set, and I hope to fit it in the factory spare location.


I did not want to switch to 17’s, however I have found that tread pattern matched to the task at hand is more important than size. For my needs and uses I prefer an all-terrain pattern with some siping. Based on available tread patterns I settled on the new Toyo Open Country which necessitated the move to 17s to get a larger size than 31.8” without excessive width. I looked at BFG, but pricing was excessive for 34 10.5 17s and reviews were not so good.

I also have noted my older factory 16” 4Runner wheels are having more issues with corrosion and leaks, so probably a fitting time to switch over to new factory wheels. I do not daily drive on these wheels/tires. I have a set of 245/75R16s Michelins that burn up the highway. Thus these tires will last me a very very long time trail riding, probably until the 4Runner is beyond its useful life.
 

Forum statistics

Threads
188,071
Messages
2,901,933
Members
229,418
Latest member
Sveda
Top