Guess who's back!?! Atl-atl's K5 Blazer + Four Wheel Camper "The Crawlin Cabin" documentation thread!

locrwln

Expedition Leader
Great looking rig. Can you take a close up picture of the Blazer's SPID? That is the blue and white sticker that has all of the options that the Blazer came with when it left the factory.

I love looking at them to see how they were optioned out.

Thank you,

Jack
 

zoomad75

K5 Camper guy
I honestly think that if Four Wheel Campers started make new campers for the old K5 Blazers, they would sell a ton of them.....even with the footnote that there may be sealing problems between the back of the Blazers cab and the camper. I know if they started them back in production, I'd be looking for a K5 Blazer right now. The size and platform would be an epic overland truck.

The K5 platform is just so easy to modify and pretty easy to work on compared to most modern SUV's.....I miss my K5.

They are epic overland trucks. Mine gets tons of looks out on the trail in a sea of Jeeps and Toyotas. Extremely capable, easy to modify and repair and get parts for.

As far as the sealing problems between the camper and the cab go, there is an easy fix. Get a second stock K5 top. I found one for free on Craigslist somebody wanted hauled off. Cut off the very front section that interfaces with the cab with the seal. We mounted the section on the cab, slid the camper back in place and locked it down with a couple of screws to temporarily hold it in place. Pull the camper back away from the cab and now drill the holes where the stock top normally bolts to the cab from the front side. We ended up pulling mine back off to skin that will with aluminum and remounted the section back on. A small bead of silicone was used to seal the backside of the top section to the aluminum. New seals were installed, one on the top section and one on the cab and then the stock bolts for the top were fed in from the inside of the camper to the cab to lock it all in place. I have zero leaks from this area and no longer have the camper trying to lift in this area at highway speeds since the original mounting did not use any bolts into the cab to retain the camper. FWC only used bolts down the bedrails on each side.

Here's the section we installed during the build out process on mine.
25099998978_44aaaa20ed_b.jpg


Any Blazer running one of these campers needs to do this since leaving the channel open where the factory top seal normally sits will funnel drainage right into the inside since there is a hole at the bottom on each side.

Great progress on the wiring Atl-atl!
 

SexyExy

Observer
They are epic overland trucks. Mine gets tons of looks out on the trail in a sea of Jeeps and Toyotas. Extremely capable, easy to modify and repair and get parts for.

As far as the sealing problems between the camper and the cab go, there is an easy fix. Get a second stock K5 top. I found one for free on Craigslist somebody wanted hauled off. Cut off the very front section that interfaces with the cab with the seal. We mounted the section on the cab, slid the camper back in place and locked it down with a couple of screws to temporarily hold it in place. Pull the camper back away from the cab and now drill the holes where the stock top normally bolts to the cab from the front side. We ended up pulling mine back off to skin that will with aluminum and remounted the section back on. A small bead of silicone was used to seal the backside of the top section to the aluminum. New seals were installed, one on the top section and one on the cab and then the stock bolts for the top were fed in from the inside of the camper to the cab to lock it all in place. I have zero leaks from this area and no longer have the camper trying to lift in this area at highway speeds since the original mounting did not use any bolts into the cab to retain the camper. FWC only used bolts down the bedrails on each side.

Here's the section we installed during the build out process on mine.
25099998978_44aaaa20ed_b.jpg


Any Blazer running one of these campers needs to do this since leaving the channel open where the factory top seal normally sits will funnel drainage right into the inside since there is a hole at the bottom on each side.

Great progress on the wiring Atl-atl!

Wow, that is a great solution. Boom....another problem solved!
 

zoomad75

K5 Camper guy
Man, that is exactly the info I need for an item that is like #37 on my to do list hahaha.
Wow, that is a great solution. Boom....another problem solved!

That fix should go along with replacing the particle board FWC used on that cab wall and in the cabover floor. Mine was swelled and rotten due to a roof leak, but I wouldn't trust sleeping up there on particleboard as it lacks support over a larger area than other FWC model campers like a Grandby.
 

arveetek

Adventurer
One odd thing I noticed is my trans cooler must have been replaced because one of the hard lines has a similar fitting and flare to a brake line but it had a rubber hose just clamped to it. I couldnt find the correct adaptor at the parts store so I decided to just redo the same hose clamped onto the pipe that was there and it seems to be holding. ?


You can see the fitting left of center in the picture below.

49783409437_7962bdf365_c.jpg


Little fixes like this make me very happy.


That is an aftermarket transmission cooler. The original transmission cooler was located inside the radiator and used no rubber hoses; it was 2 steel lines from the transmission to the radiator and back. Whoever installed the aux cooler in front of the radiator simply cut the OEM steel hard line, and then spliced the rubber lines from the aux cooler in line to that original steel line. The fitting in your picture above would have actually been part of a complete one-piece steel line from the transmission to the radiator.

Casey
 

nitro_rat

Lunchbox Lockers
That ball is a vacuum reserve canister. The ac controls, cruise control, power brakes all need vacuum to work properly. It wouldn't be convenient if, say, you nailed it to pass someone and you blend door suddenly went from dash to defrost! Or you were pulling a hill in cruise, the transmission down shifted, secondaries opened, vacuum dropped and suddenly the cruise decelerated because there wasn't enough vacuum to hold the throttle open...
 

nitro_rat

Lunchbox Lockers
The vacuum diagram was on the emissions sticker on the core support, looks like yours is long gone...

What "broken lines" do you have? I have a box of old GM emissions connectors and check valves and stuff. If you need something weird I probably have it...
 

Buddha.

Finally in expo white.
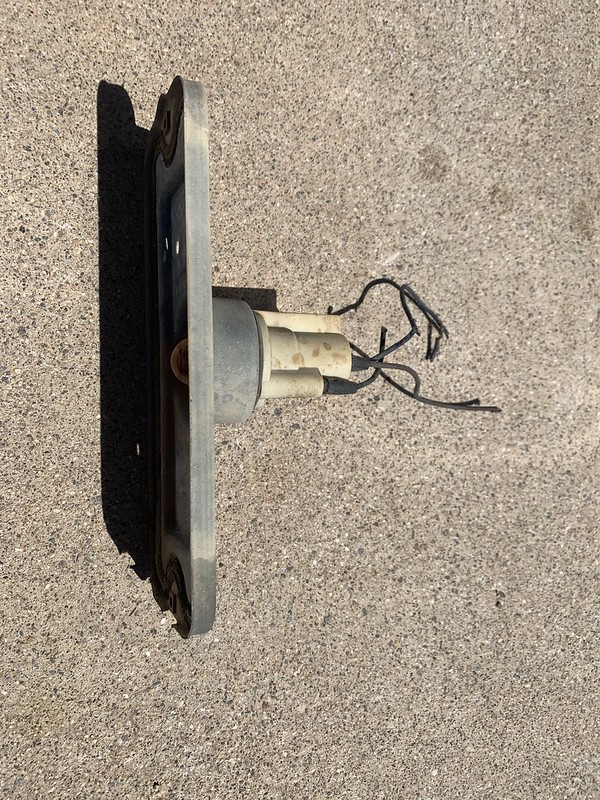
Well I spent an entire 8 hours today cleaning up a literal rats nest. My front right turn signal wasnt working even after a new bulb so I pulled the housing out to find this...

49778257901_d16deea035_c.jpg


A rat had chewed through the wires and there was a nest underneath the battery tray. There were chunks of wood, twigs, thorns, lots of actual ****, fur, dirt, you name it.

49778579222_9e452dfcf9_c.jpg


After cleaning it up this is what it looked like. I had noticed a damp spot in this area under the coolant overflow. Now Im curious if there is a leak or the nest was holding onto moisture. Obviously the nest was there for a long time because it rotted through the sheet metal which sucks but I guess its not that big of a deal since its not noticeable when everything is put back in place.

49778250111_5aecf4863d_c.jpg


These two chunks of wood were inside the fender

49777727038_05970eca15_c.jpg


Nothing a little solder and shrink wrap cant fix!

49779544002_4c96c41514_c.jpg


49779544057_e2bcff67d5_c.jpg


Then I went to town on the rest of the wiring, mostly the battery terminals. I had planned to get a little more wiring done but the rats nest delayed my plans. I did manage to replace a few chassis grounds, replace some random ring terminals, degrease and clean the crap out of the terminal ends, battery tray, cables and some other misc. items in the area. The amount of sticky gunk on the terminals was something Ive never seen before. I wonder if it was actually used to keep them from corroding because there isnt any real corrosion, just a lot of gunk. I used some citrus degreaser from my bicycle tool box and it worked like a charm.

49779543752_49f9dc85a6_c.jpg


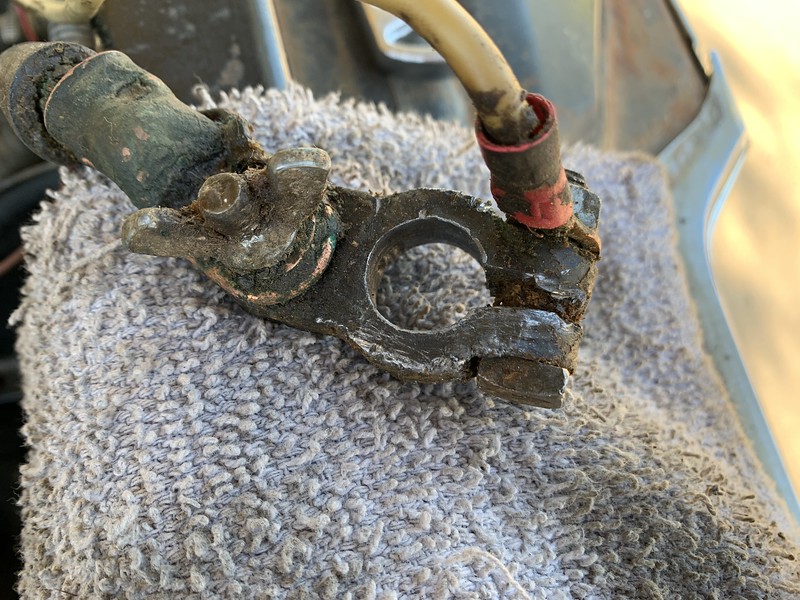
The after picture of these terminals is ridiculous. Things were so incredibly dirty. Even if it didnt change how anything works with the electrical system, Im happy because of how much nicer it looks. The white wire you can see is the positive wire going to the relay to charges the house battery for the camper which lives on the other side of the radiator. The small red wire goes across the radiator and then back through the firewall, I have not traced it yet but its definitely not factory, obviously.

49779544012_1cc41eb095_c.jpg


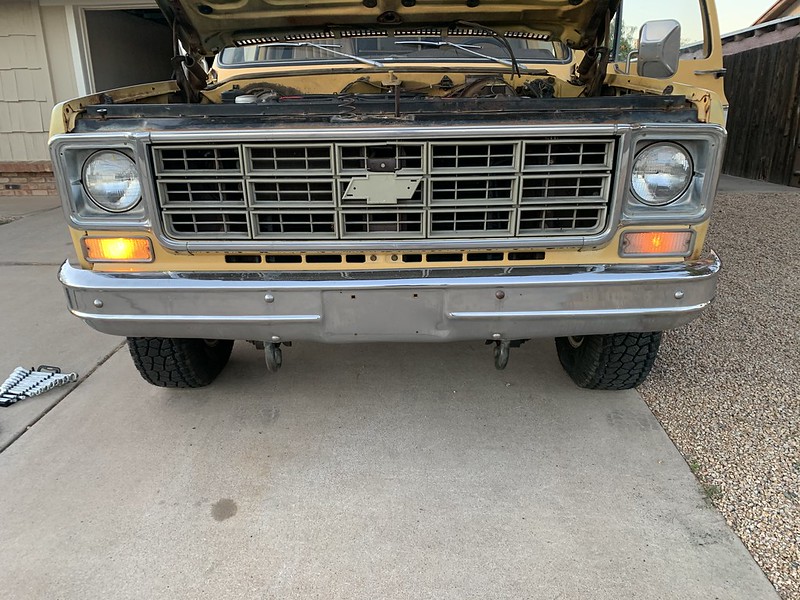
My turn signal is now lit up but its constantly on the bright half of the dual filament bulb. I think I crossed two wires. Does anyone have a wiring diagram so I can figure out which ones I crossed. There are three wires going into the bulb; black, brown and blue.

49779543822_54537a9385_c.jpg
Looks good.
On my ‘84 plow truck the charge wire coming off the alt was a wimpy ten gauge that went to the other side of the engine bay before coming back to the battery. I took some 2 gauge and went right from the alt to the battery. It helps keep the battery charged when using the power hungry snow plow, I think. Maybe I did it for nothing but the stock setup didn’t seem optimal.
 

nitro_rat

Lunchbox Lockers
That air cleaner lid is not original or correct for your truck. The diagram may gove you some insight to where things go but it's not 100%. It's off a 1987 1-ton truck...

I'm sure someone swapped it on so they could use the "tall" filter!
 

nitro_rat

Lunchbox Lockers
And for a little more bad news...

That fan shroud isn't correct either. You need a thinner "big block" shroud. The fan should be about 1/2 in and 1/2 out of the shroud. You may develop a cooling problem on a hot day with the fan "buried" in the shroud like that.

79A879A6-E81B-4CFD-8300-E454B47827EA.jpeg

You could cut it on the red line until you get the right one...

Repops are available. Just remember, anything that LMC sells that you can get somewhere else is usually cheaper somewhere else! The diagrams are useful for reference though!
 

Forum statistics

Threads
189,261
Messages
2,914,865
Members
231,959
Latest member
lkretvix
Top