Hiker Trailer 5x9 Off-Road Build

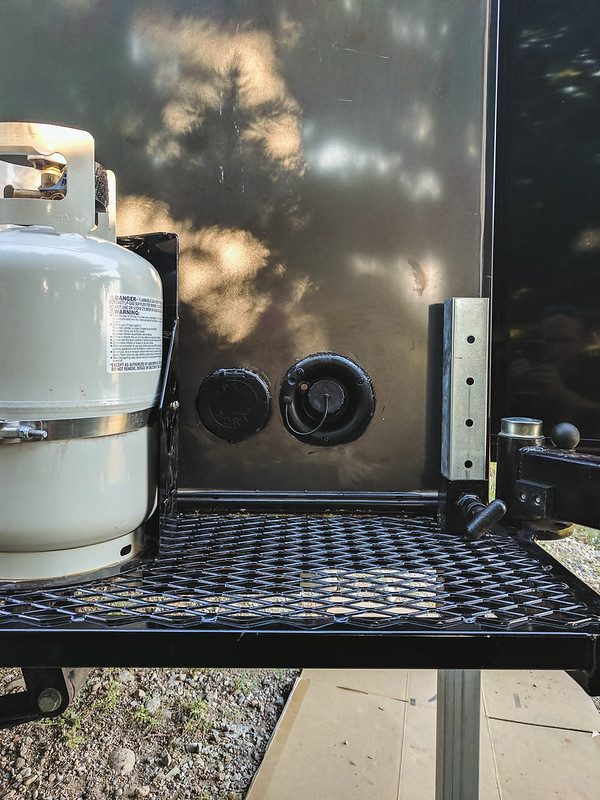
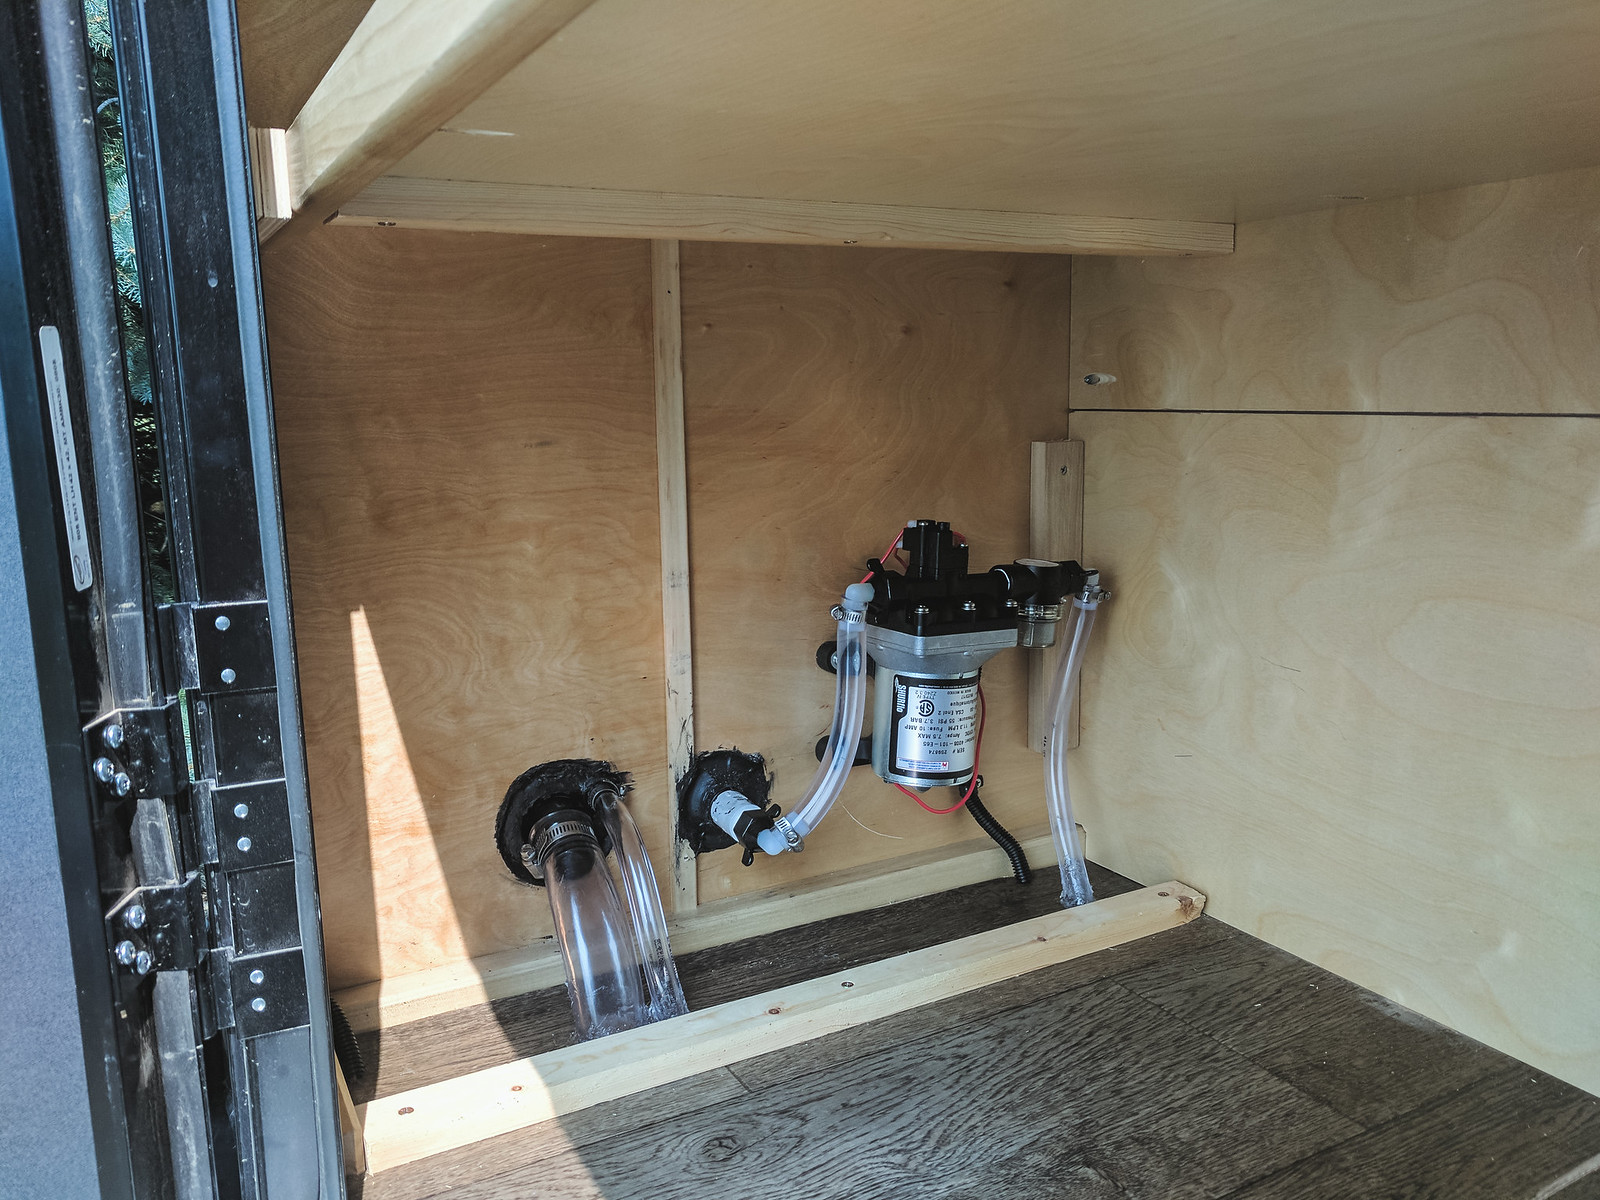
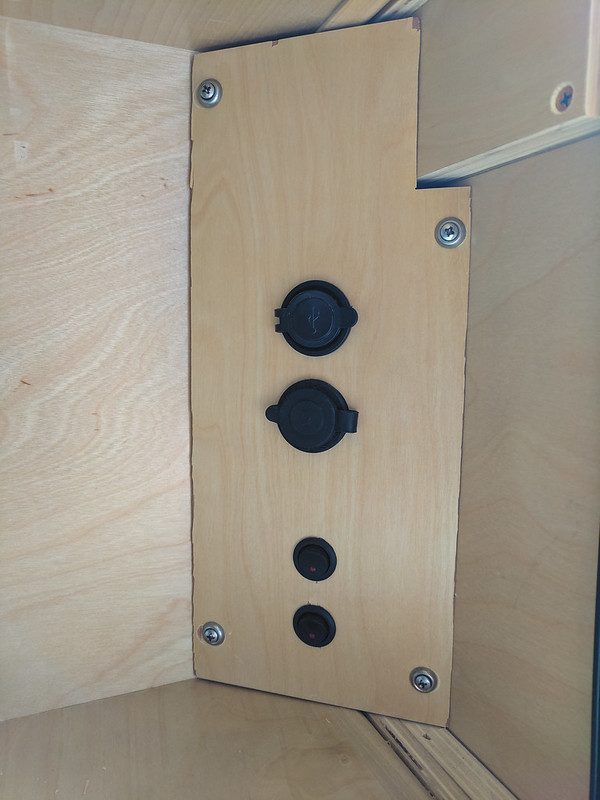
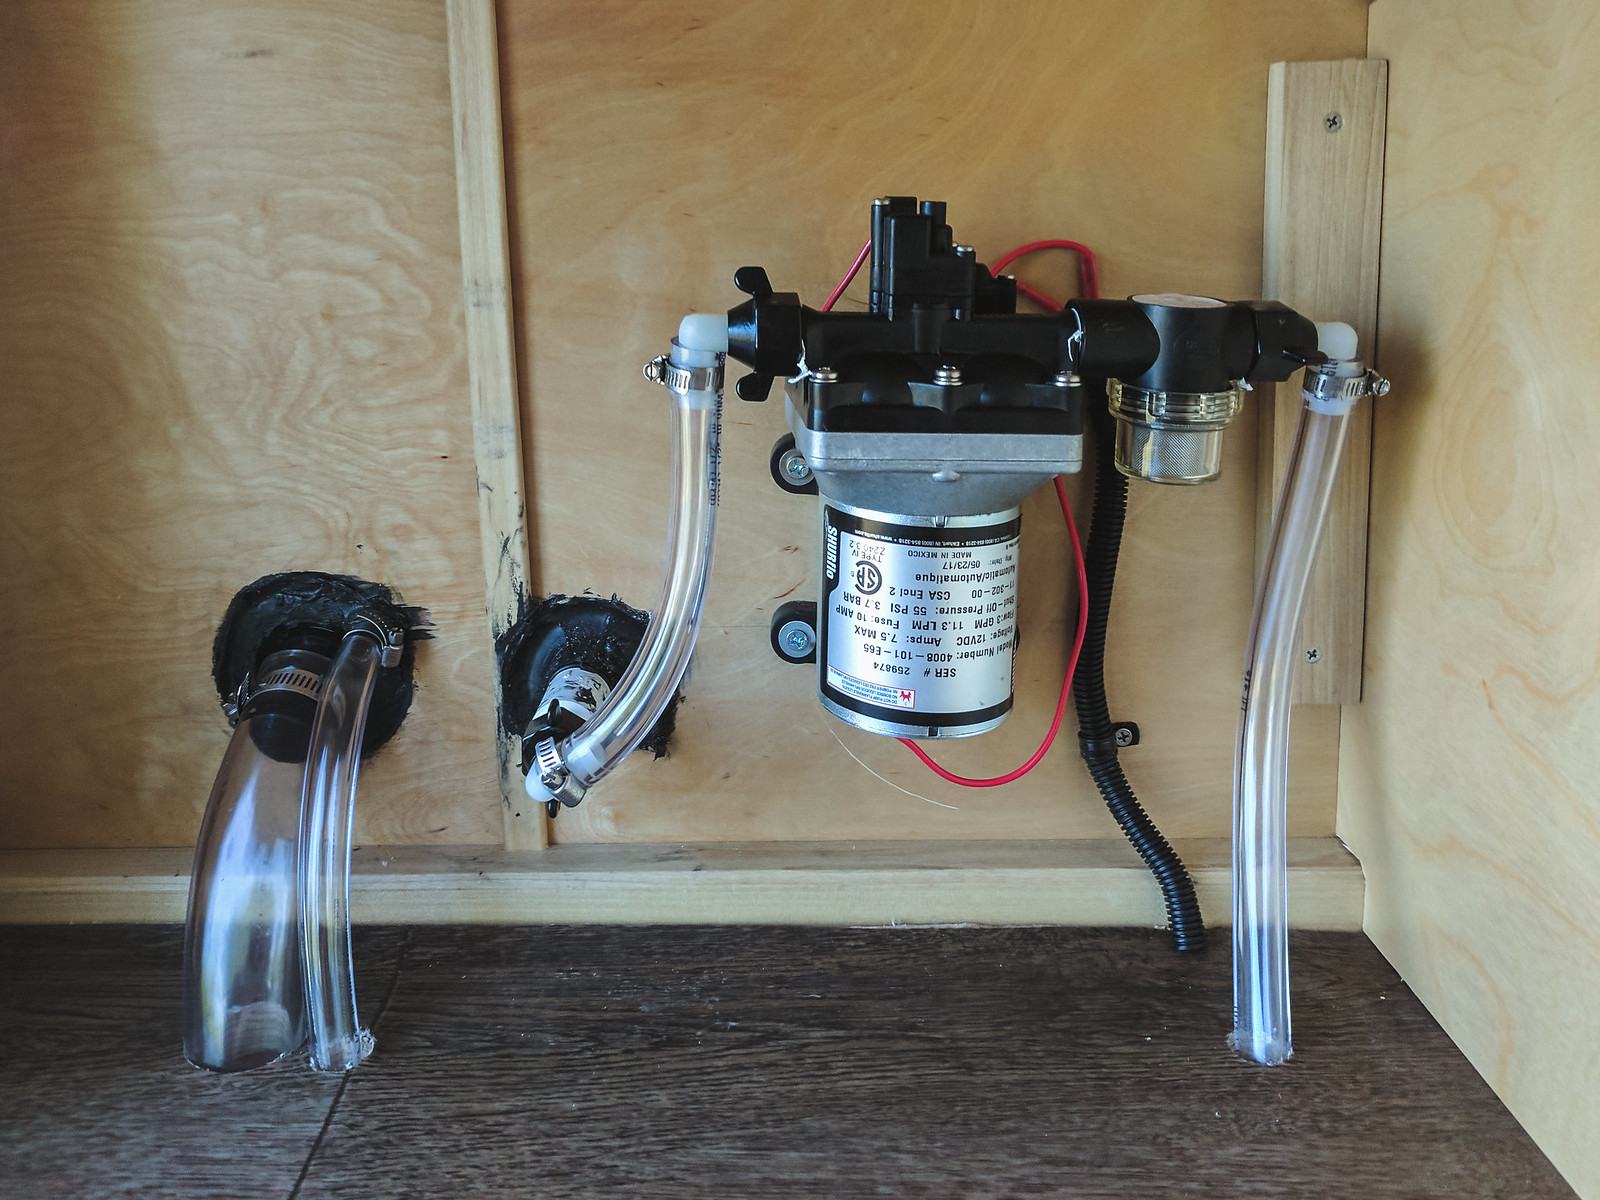
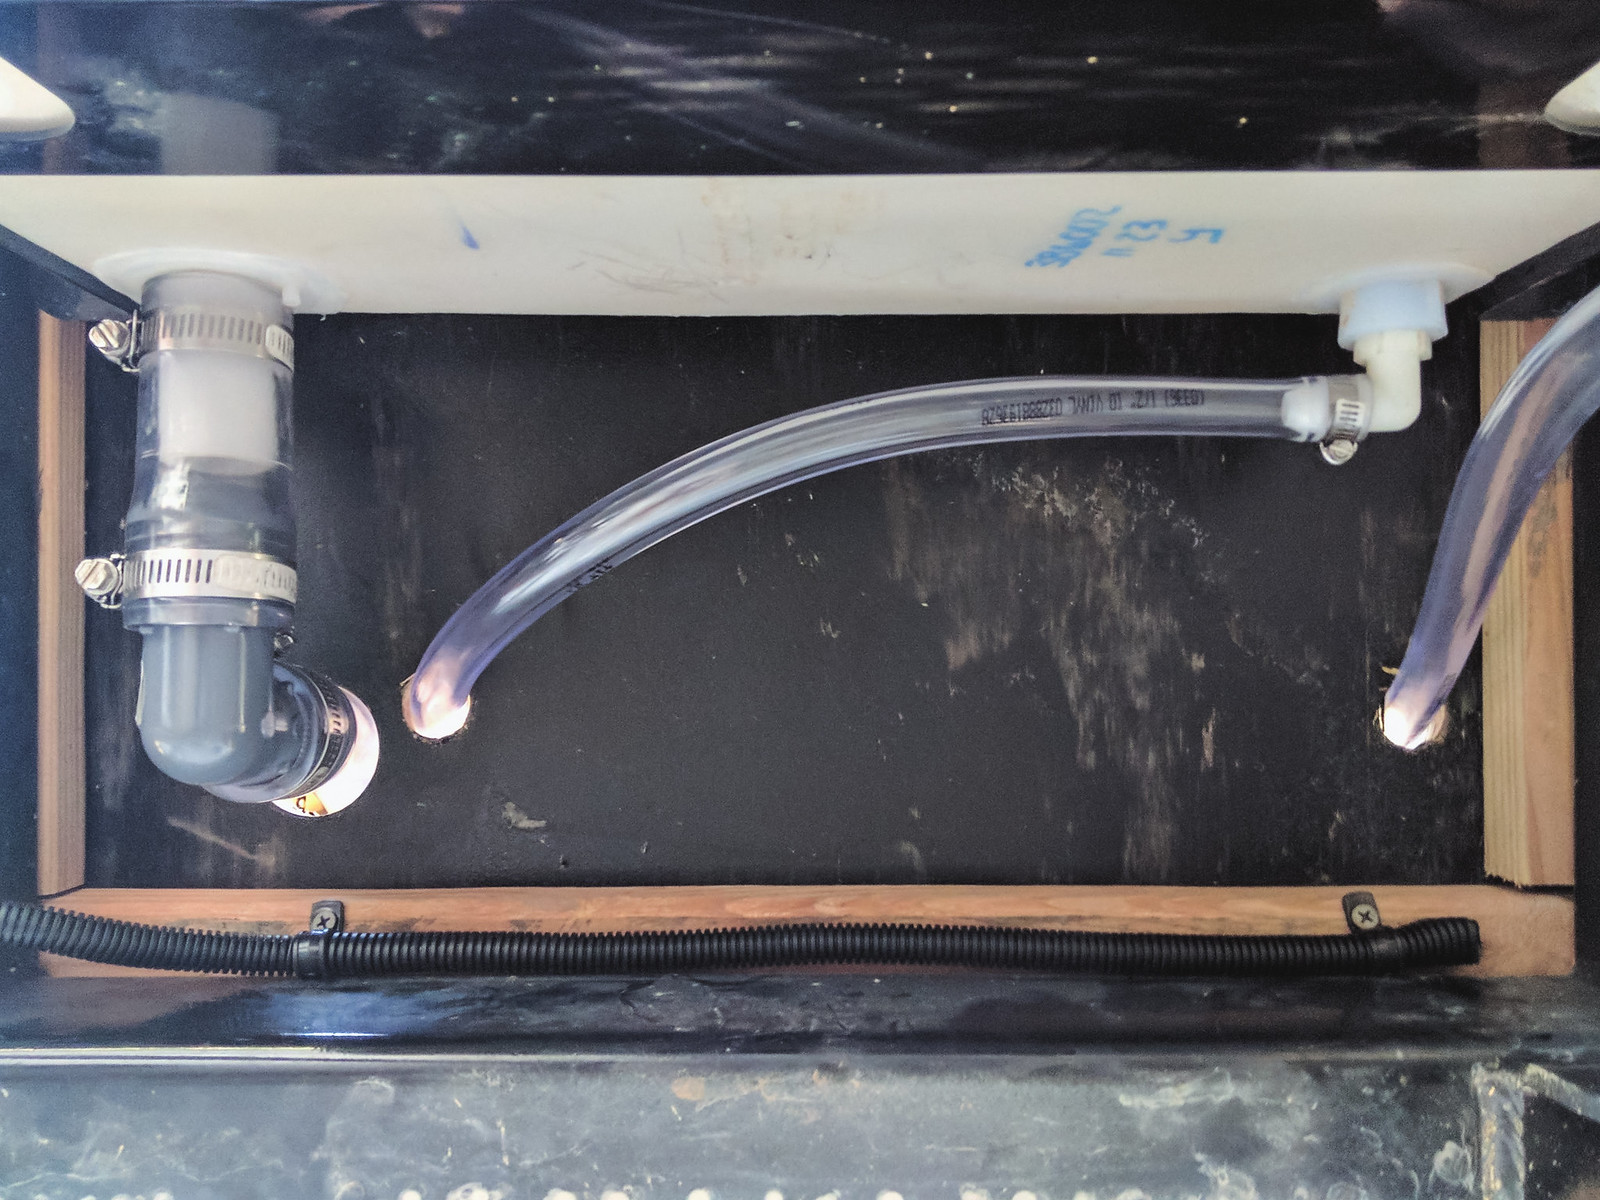
Finally got around to installing the electrical, plumbing, and water pump for the 21 gallon water tank.
36292984641_c31c61141e_h.jpg


36033203940_c1b8a7b6fd_h.jpg


36429863705_52713d3508_c.jpg


36429846995_c58fa5f094_h.jpg


36384204396_d27c8f1811_h.jpg


35594752364_f833c6636f_c.jpg


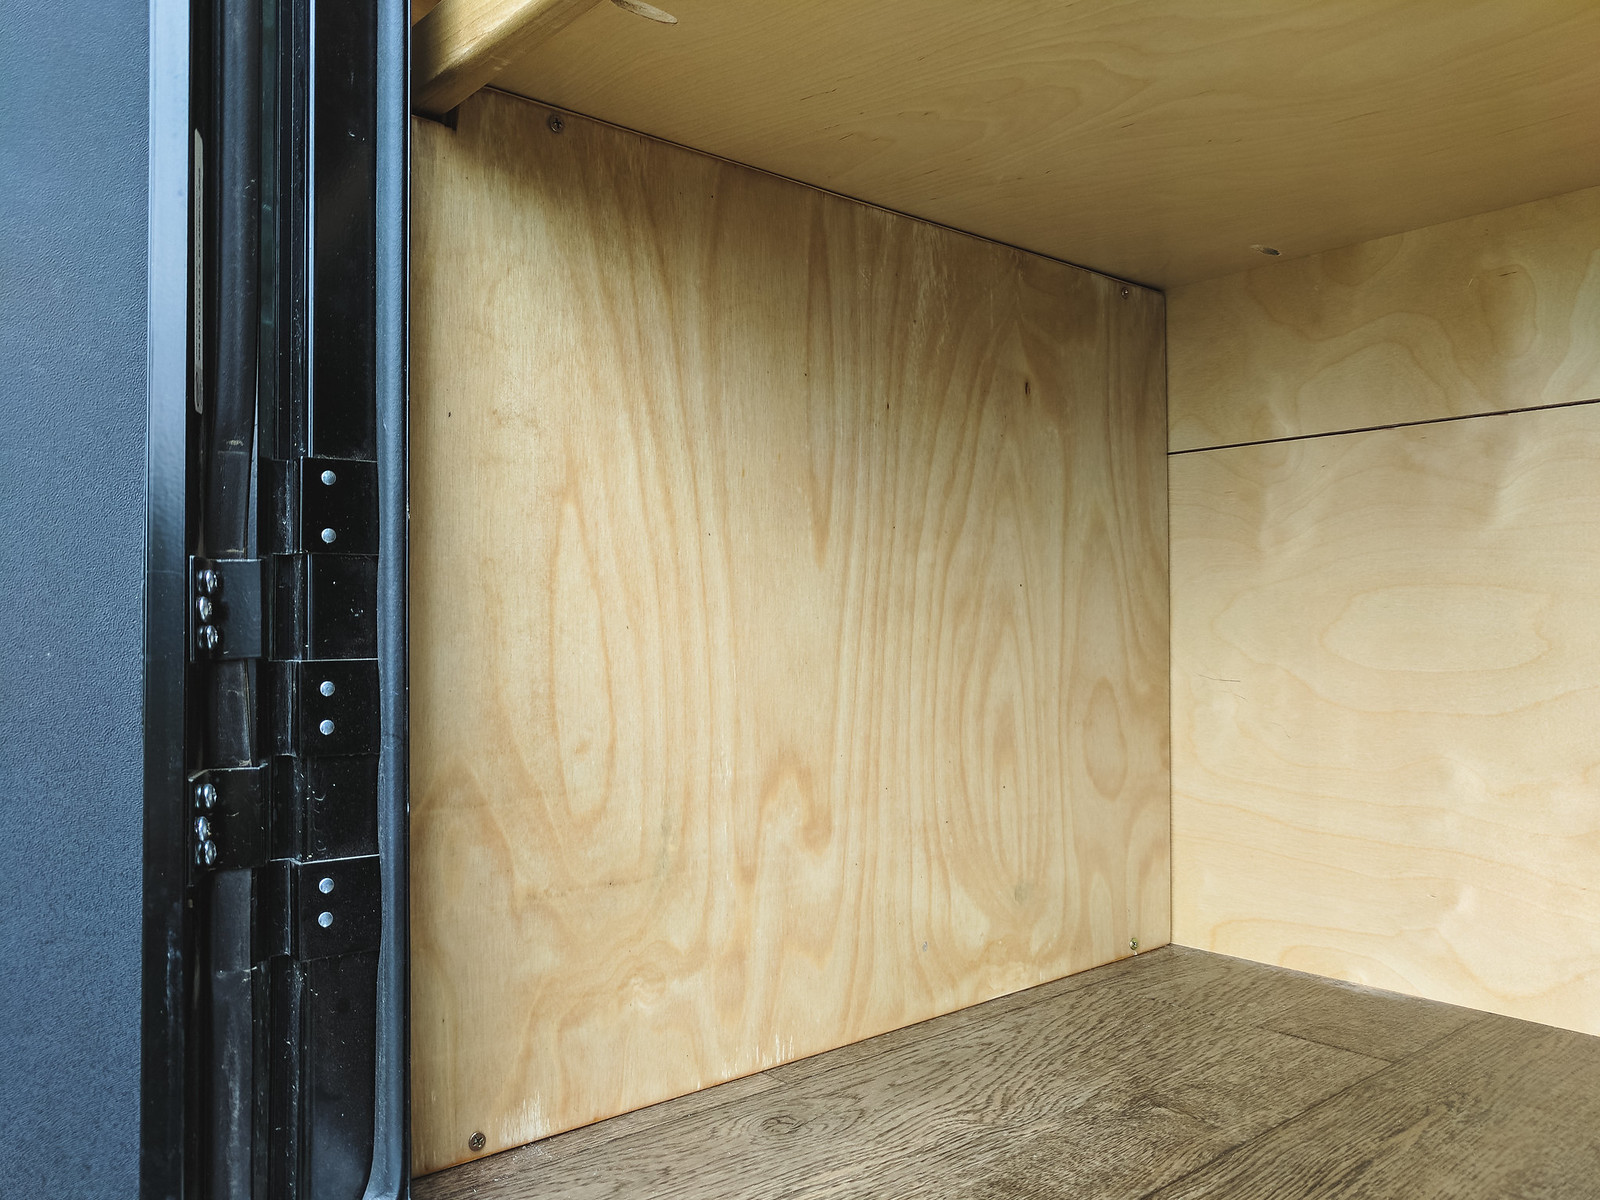
I decided on mounting the pump on the inside of the trailer as opposed to underneath. This eats up a bit of storage space but we're eventually going to build a set of drawers in the bottom shelf of the galley and so this space would be mostly unusable anyway. Having the pump inside should keep it better protected from the elements too. I also cut and fit a panel to cover the space where the pump is to protect it and the plumbing from things sliding into it and knocking something loose. I may cut in an access door but there are only 4 screws holding the panel in place, so removing the whole piece isn't very difficult. Only major mishaps were one of the screws holding the outer ring of the fill port stripped out and so I had to drill a new hole in the ring and relocate the screw. Oh, and I suck at silicone. My seal job looks a bit messy but I'm pretty confident there won't be any leaks. Overall, not too difficult of a project after tracking down all of the parts other than having to make multiple trips to the hardware store for random sized hole saw bits that weren't in my kit. And I ended up buying another set of 1/2" thread to 1/2" barb adapters for the Shurflo because it came with straight fittings and after lining it all up I decided 90 degree fittings would be better.
 

80t0ylc

Hill & Gully Rider
Finally got around to installing the electrical, plumbing, and water pump for the 21 gallon water tank......I decided on mounting the pump on the inside of the trailer as opposed to underneath. This eats up a bit of storage space but we're eventually going to build a set of drawers in the bottom shelf of the galley and so this space would be mostly unusable anyway. Having the pump inside should keep it better protected from the elements too. I also cut and fit a panel to cover the space where the pump is to protect it and the plumbing from things sliding into it and knocking something loose. I may cut in an access door but there are only 4 screws holding the panel in place, so removing the whole piece isn't very difficult. Only major mishaps were one of the screws holding the outer ring of the fill port stripped out and so I had to drill a new hole in the ring and relocate the screw. Oh, and I suck at silicone. My seal job looks a bit messy but I'm pretty confident there won't be any leaks. Overall, not too difficult of a project after tracking down all of the parts other than having to make multiple trips to the hardware store for random sized hole saw bits that weren't in my kit. And I ended up buying another set of 1/2" thread to 1/2" barb adapters for the Shurflo because it came with straight fittings and after lining it all up I decided 90 degree fittings would be better.
Looks interesting & fun. Just remember to winterize your plumbing, pump & tank. Which brings up a good point and one I'm at a dilemma with. I'm close to ordering a 4x4 extreme and I'm choosing the 21 gal water tank as an option. Below freezing camping with this is going to be difficult if not impossible. The tanks and water system are all sealed up on my Lance camper, so it's possible to camp with it at below freezing temps. But, I don't think the way it's installed on the Hiker/Lead Dog trailers, it's going to be usable in below freezing weather. Any ideas?
 
Last edited:
Looks interesting & fun. Just remember to winterize your plumbing, pump & tank. Which brings up a good point and one I'm at a delemma with. I'm close to ordering a 4x4 extreme and I'm choosing the 21 gal water tank as an option. Below freezing camping with this is going to be difficult if not impossible. The tanks and water system are all sealed up on my Lance camper, so it's possible to camp with it at below freezing temps. But, I don't think the way it's installed on the Hiker/Lead Dog trailers, it's going to be usable in below freezing weather. Any ideas?

No ideas other than drain it once it gets down into the 30s. We've been camping with only water in jugs for years so the tank is definitely a luxury for us. Also, we've camped in teens and twenties but the Hiker is definitely more of a three season setup.
 

SethJ

Observer
No ideas other than drain it once it gets down into the 30s. We've been camping with only water in jugs for years so the tank is definitely a luxury for us. Also, we've camped in teens and twenties but the Hiker is definitely more of a three season setup.

I am currently planning my build and I'm curious if it would be worth it to build a sealed and insulated carrier for the tank?
 

80t0ylc

Hill & Gully Rider
I am currently planning my build and I'm curious if it would be worth it to build a sealed and insulated carrier for the tank?
If your travel & camping trips are limited to occasional temp dips below freezing at night, I think this might work well. If you camp and/or travel in temps where freezing is your high for the day or where the temp remains below freezing, you'll need not only insulation, but a heating source. And so will your living (sleeping & kitchen) quarters. Otherwise you'll need to winterize the water system & go back to water jugs, until your climate warms up. Next time you're around RVs, check out their water sytems - both waste and fresh water. If they're exposed - like you can see the dump valves and fresh water hose bib, the rig is not designed to be lived in or camped in year around - at least in Northern climes. They do build sealed RVs for those that do and that area of the RV is not only sealed & insulated, (fresh, gray & black water tanks) but is also heated by the RV's heating system. That's my dilemma. I live in Eastern Oregon, where it's necessary, in the colder months, to protect your water system. But if I order or install a water tank in my trailer, and am headed South for a trip in winter, I won't be able to fill it until I get to warmer weather. And before I come home, if it's still cold, I'll need to drain & winterize the system. I guess it's a small price to pay for the convenience. If you come up with a carrier, share it! I'd love to see your idea and solution.
 

80t0ylc

Hill & Gully Rider
No ideas other than drain it once it gets down into the 30s. We've been camping with only water in jugs for years so the tank is definitely a luxury for us. Also, we've camped in teens and twenties but the Hiker is definitely more of a three season setup.
Just in case you don't have RV water system experience, when you drain your system, run some RV anti-freeze through your pump. If there's any water trapped in it, it could crack the housing. The anti-freeze will help prevent that. By the way, it's non-toxic.
 

SethJ

Observer
If your travel & camping trips are limited to occasional temp dips below freezing at night, I think this might work well. If you camp and/or travel in temps where freezing is your high for the day or where the temp remains below freezing, you'll need not only insulation, but a heating source. And so will your living (sleeping & kitchen) quarters. Otherwise you'll need to winterize the water system & go back to water jugs, until your climate warms up. Next time you're around RVs, check out their water sytems - both waste and fresh water. If they're exposed - like you can see the dump valves and fresh water hose bib, the rig is not designed to be lived in or camped in year around - at least in Northern climes. They do build sealed RVs for those that do and that area of the RV is not only sealed & insulated, (fresh, gray & black water tanks) but is also heated by the RV's heating system. That's my dilemma. I live in Eastern Oregon, where it's necessary, in the colder months, to protect your water system. But if I order or install a water tank in my trailer, and am headed South for a trip in winter, I won't be able to fill it until I get to warmer weather. And before I come home, if it's still cold, I'll need to drain & winterize the system. I guess it's a small price to pay for the convenience. If you come up with a carrier, share it! I'd love to see your idea and solution.
I live in southeast Texas so winterizing isn't a thing down here since we never get freezing temps so insulating the tanks is kind of useless for me. However we do take winter trips North, last January we went to Petit Jean state park in Arkansas and tent camped in 17°. We're a Lil odd I guess, maybe that's cause it's normal to be 80° on Christmas day here. So insulating it isn't a big deal but would help in the few times we actually see cold weather. I want to build a case around the tank to protect it from rocks and debris so I may add a little insulation if I feel like it.

Sent from my SAMSUNG-SM-G891A using Tapatalk
 

LMO

New member
Bike Rack and Spare Tire

As a lot of people on forums all over the interwebs are discovering this week, Photobucket sucks. They now want $400/yr to share photos from them to other sites. ******?!

Anyway, I got the important photos moved over to another host so this thread still has something to look at. There's probably a few broken links in here still though.

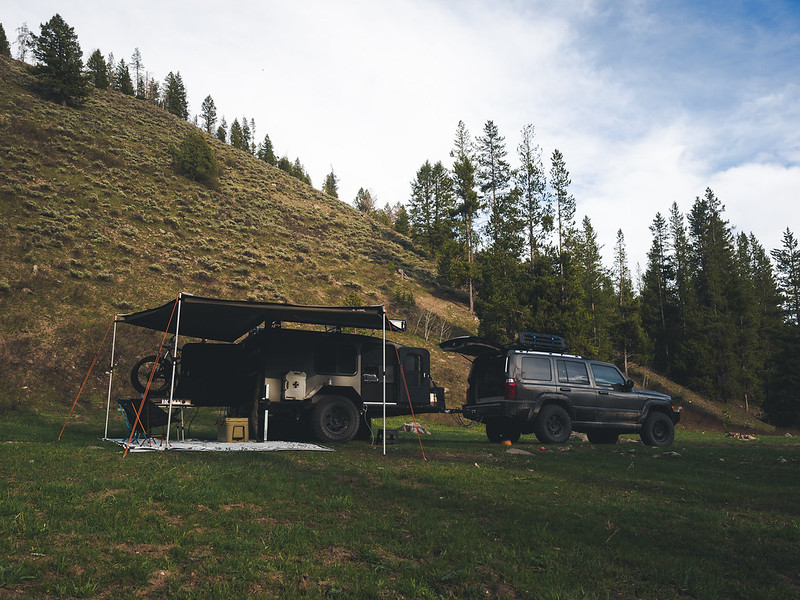
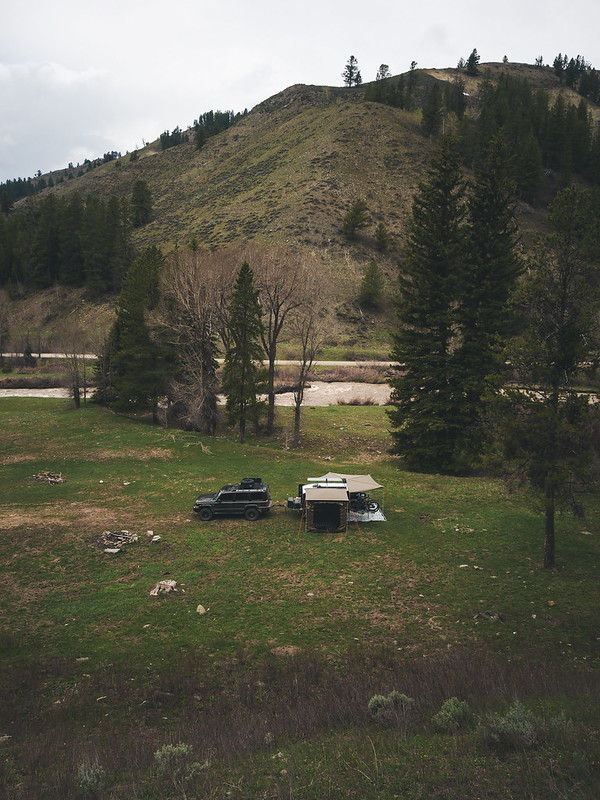
I also have a couple from a trip earlier this spring on the Greys River Rd near Alpine, WY:

35464725252_88a39966bf_c.jpg


34791554314_833ef30c18_c.jpg


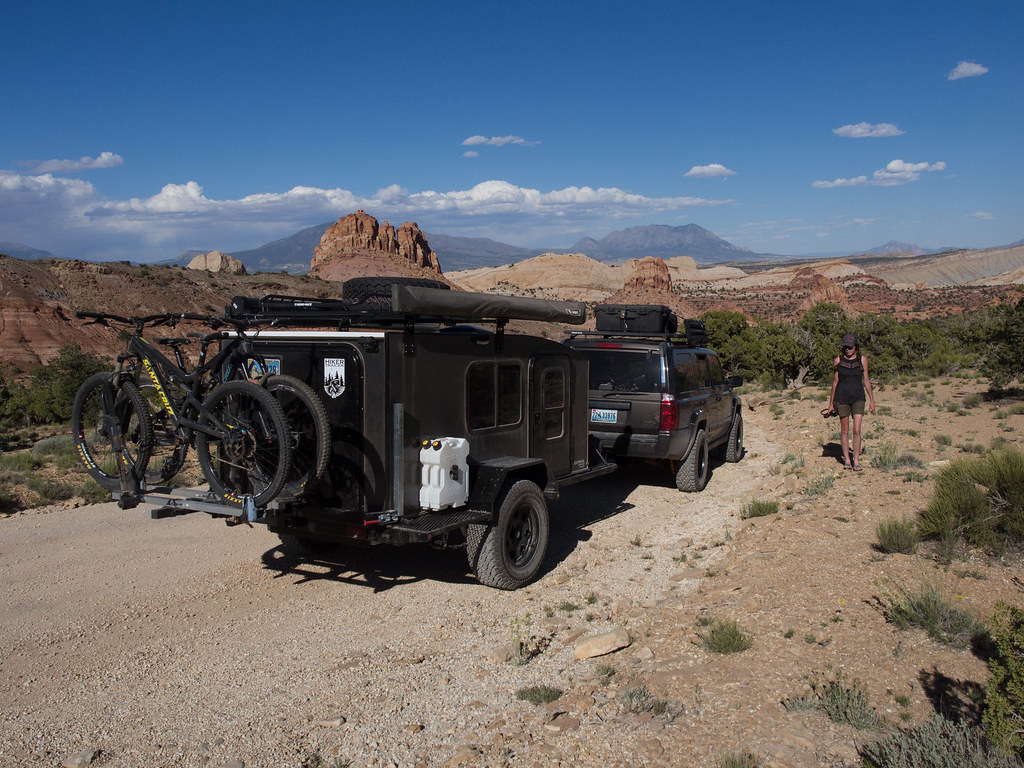
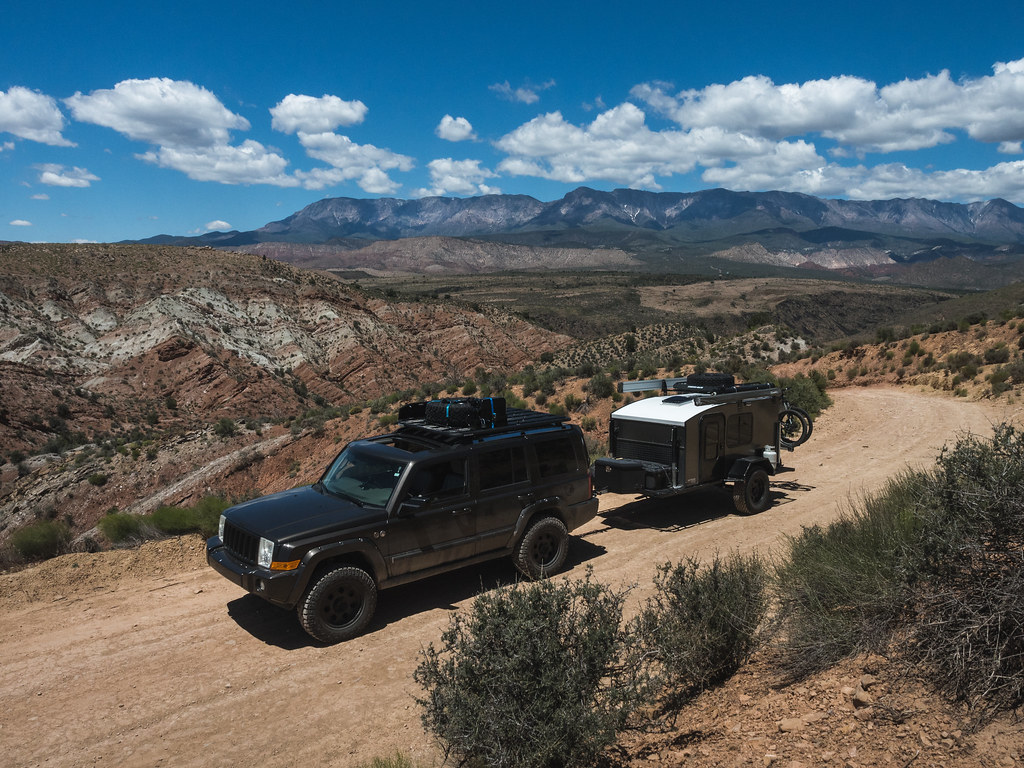
We recently spent two weeks travelling around southern Utah and visiting Zion, Bryce Canyon, and my new favorite NP, Capitol Reef. Still sorting through those pics but will get them uploaded soon.

Great pics thanks for sharing. Question on your bike rack set-up.
1. What rack are you using?
2. Do you have any issue with the bikes clearing the spare tire on the rear?
3. If so are you using an extender?

I'm considering a build similar to yours but was going to put the spare tire up front so that my Thule T2 4 bike rack can go on the back. Problem with using an extension is it reduces the load of the bike rack by 50%.

Also, question on a picture in your first post, what are the pillars between the main cab and the tool box? Are those leveling jacks?

Thanks in advance.

Thanks and to answer your questions:

1. That is a Thule T2 rack that I've had for 13 years! It is mounted to a 2" receiver we had added to the spare tire carrier. That way the rack/bikes can be moved to access the galley w/o having to take everything off the trailer. The 2" receiver in the frame is too high to open the galley door with the rack mounted even if you drop it down and remove the bikes.
2. Yes, in order to use the bike rack on the tire carrier along with the tire, we have to use an extension. I already had a 6" or 8" extension (not sure on exact length) b/c it's needed for me to open the tail gate on my Jeep even with the rack dropped down. Without the tire mounted, the rack doesn't need an extension for the inside bike to clear the back of the trailer. The other thing I should mention is that with the spare, the bike rack on an extension, and two bikes on the rack, you have a lot of weight out behind the axle which felt a little unstable to me. That's why we ended up adding a basket to the roof rack of the trailer to carry the trailer spare when we're taking the bikes. Having the spare up there is more difficult to reach and replace if you do have to use it but it kept that front tray open for storing a trunk w/gear.

36234063494_0eaa2cd927_b.jpg


3. Yes, those are the two front leveling jacks. Most of the time only one is needed unless you're on super uneven ground and then both can be setup, along with the two rear jacks, to get the trailer pretty even.
 

Martyinco

Adventurer
Awesome trailer! Couple questions, you wouldn't happen to know what brand the exterior lights are? Those things are slick! Also how deep is the under floor storage?
 
Awesome trailer! Couple questions, you wouldn't happen to know what brand the exterior lights are? Those things are slick! Also how deep is the under floor storage?

Thanks, we've really enjoyed using it!

I bought the lights of of another expo member here on the forum. It looks like he's out of that model but he still has a few of one model down. Those are probably still fine as the ones I got are bright as hell. They're not very campground friendly but super awesome for setting up in the dark. Anyway, here's the FS thread: http://forum.expeditionportal.com/threads/167938-Exterior-Scene-Camping-LED-Lights-Labcraft-Si7-from-Europe

The rear light was just a cheapo off Amazon but it works great too.

The in-floor storage box is 6" deep, 27" wide, 38" long on the bottom, 48" long at the top (tapered on the ends).
 
Last edited:

Martyinco

Adventurer
Thanks, we've really enjoyed using it!

I bought the lights of of another expo member here on the forum. It looks like he's out of that model but he still has a few of one model down. Those are probably still fine as the ones I got are bright as hell. They're not very campground friendly but super awesome for setting up in the dark. Anyway, here's the FS thread: http://forum.expeditionportal.com/threads/167938-Exterior-Scene-Camping-LED-Lights-Labcraft-Si7-from-Europe

The rear light was just a cheapo off Amazon but it works great too.

The in-floor storage box is 6" deep, 27" wide, 38" long on the bottom, 48" long at the top (tapered on the ends).

Awesome thanks man! Going to have to get myself some of those lights.

Thats a pretty good size storage space. May have to take a field trip to Hiker and check one out in person.
 
Welcome, glad I could help!

Yeah if you're close enough to Denver then stop in and ask them to show you around. Super nice folks.
 

bluebruin

Adventurer
OP - question about the hiker trailer offroad axle setup

Hello - beautiful trailer and rig! I am wanting to build something similar. I was wondering if you could see if your axle/suspension has any part numbers or info on it? I am hoping to order something similar. I like the simplicity of the axle, leaf springs, and shocks. I believe its a 3500lb axle and hiker states its a "long soft ride leaf spring" setup. Perhaps this is a standard dexter axle or something, or perhaps its a standard axle that they combine with another companies leaf springs, and then weld on shock perches? The trailer I saw had pro comp shocks. The rest I wasn't sure what it was. Appreciate any info. thanks!
 

Forum statistics

Threads
188,225
Messages
2,904,087
Members
229,805
Latest member
Chonker LMTV
Top