You are using an out of date browser. It may not display this or other websites correctly.
You should upgrade or use an alternative browser.
You should upgrade or use an alternative browser.
Hummelator Off-road teardrop build
- Thread starter Hummelator
- Start date
ottsville
Observer
I am going to 48" high because that's a standard plywood sheet size. Don't want the hassle and extra cost and work of splicing more plywood to gain a few inches.
I know this is an old post and you have already decided to change the direction you are going - but for others who read this it should be known that a good lumber yard should be able to order sheets of plywood in a 5' width.
Hummelator
Adventurer
Thanks!Great build.
Where did you buy your steel from?
I bought steel from a couple of places. Majority of it was from Federal Metals, the steel for my tongue was from Varsteel and the bent sheet metal was from Quest Fabrication.
If I had to go buy steel for another trailer and knew exactly what I wanted and how much I wanted I would go buy from Varsteel. They have way better pricing than Federal Metals as Federal buys their steel from Varsteel. Only thing with buying from Varsteel is they have an order minimum of $250 ( if I am remembering correctly) though they made an exception for me so I'm sure they would for others.
Hummelator
Adventurer
Just a tid bit of info for those in Alberta who are building a trailer.
Today I got the trailer registered. Before you get it registered you need to get a VIN #. This can be done by contacting IBC (insurance bureau of Canada) cost me about $135 and the guy comes out and rivets a VIN # tag onto the frame and also stamps the last 8 digits directly on the frame. I was under the impression that he was to come and basically inspect the trailer- what the axle rating is, making sure the lights are all done correctly but he said that the safety aspect of the trailer is up to you. I'm sure if the cops pulled you over and found that the trailer was not built to proper regulations that they could fine you.
He did as from some receipts for materials used to build the trailer. Basically they are making sure it's not a stolen trailer that you are trying to get back on the road with a different vin.
Anyways, figured this info might help someone down the road..
PCO6
Adventurer
What a difference compared to how it's done in Ontario. I've registered 3 home made trailers. The first one was about half built when I got it plated. I had barely started the second one and the third one is an old frame I bought and is a project I plan to start later this summer. No inspections required, no design drawings or photos, material lists, lighting plans, axle specs, etc. I simply paid $25 and that licence is good for life. I could put any one of the three plates on any trailer and they wouldn't know the difference. I was told when I licenced the third one earlier this year that system will be changing in 2027 ... so I better get a few more done quickly (lol).
Your trailer is coming along nicely. :clapping:
Your trailer is coming along nicely. :clapping:
Hummelator
Adventurer
Didn't do anything to my trailer but didn't something for my trailer.
Last year I removed a section of my fence and built in a gate. Built the gate square assuming the posts in the ground would be square because hey, everyone builds every square. Right? HA! One post was twisted one way and leaning on way and the other post was twisted the other way and leaning the other way.
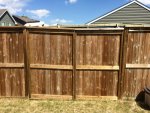
Clearly I couldn't make this work.
Also, this section of fence was about 88" between the posts and my trailer fender to fender is 84". Tight squeeze, especially when backing the trailer over the ruts my trucks have left in the parking pad when the ground softened.
So I rebuilt the fence and moved the gate.
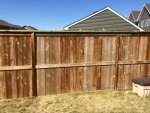
The section of fence behind where I park my truck was a little over 100" post to post. Posted we're also twisted and not plumb so I have to make it plumb. Two pieces of wood screwed together in an L shape and screwed to the post plumb and straight. Then built my gates straight and square.
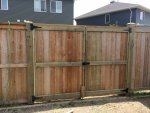
Now I can back and trailer in straight back. Nice and simple.
I'm on call until Thursday morning so I'm hoping to pick up the space Kap and get going on that. Have a trip planned for two weekend from now and hoping to be able to take it out, it will be primitive at that point but will still be rewarding using something that was a pile of metal before I began.
Last year I removed a section of my fence and built in a gate. Built the gate square assuming the posts in the ground would be square because hey, everyone builds every square. Right? HA! One post was twisted one way and leaning on way and the other post was twisted the other way and leaning the other way.

Clearly I couldn't make this work.
Also, this section of fence was about 88" between the posts and my trailer fender to fender is 84". Tight squeeze, especially when backing the trailer over the ruts my trucks have left in the parking pad when the ground softened.
So I rebuilt the fence and moved the gate.

The section of fence behind where I park my truck was a little over 100" post to post. Posted we're also twisted and not plumb so I have to make it plumb. Two pieces of wood screwed together in an L shape and screwed to the post plumb and straight. Then built my gates straight and square.

Now I can back and trailer in straight back. Nice and simple.
I'm on call until Thursday morning so I'm hoping to pick up the space Kap and get going on that. Have a trip planned for two weekend from now and hoping to be able to take it out, it will be primitive at that point but will still be rewarding using something that was a pile of metal before I began.
Hummelator
Adventurer
Thursday night I finally arranged for enough of my buddies to give me a hand to load the space kap onto the trailer. Pizza and beer was of course tendered. I was under the impression that this space kap was going to weigh about 500-600 LBS. Well once we got it loaded onto the trailer and strapped down, I took it to the scale to weight it again. The space kap weight just shy of 800 LBS
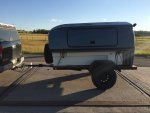
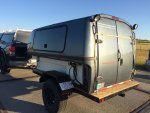
In these photos you can see that the kap is sitting as far forward as possible. This put quite a bit of weight on the tongue, around 220 LBS if I had to guess.
Got it home and opener her up, took some measurements and started to formulate a game plan..
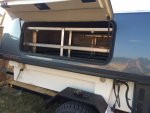
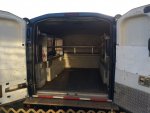

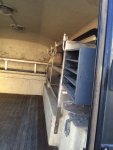
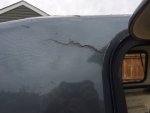
As you can see the paint needs some attention as well as a few cracks- though they don't go completely through.
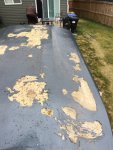



In these photos you can see that the kap is sitting as far forward as possible. This put quite a bit of weight on the tongue, around 220 LBS if I had to guess.
Got it home and opener her up, took some measurements and started to formulate a game plan..


As you can see the paint needs some attention as well as a few cracks- though they don't go completely through.


Hummelator
Adventurer
While I'm still not certain about my end goal one thing I knew for sure right away- this thing needs a good cleaning!
Removed all the aluminum shelving,the rubber mat on the floor, as well as the clamps that hold the kap to the truck body. Went and bought a shop vac and vacuumed out years of dirt and other goodies.

I wanted to see how moving the kap back flush with the rear of the trailer would effect the tongue weight. It's only 6" but what a difference! I think the tongue weight is right in the money spot (10% of total trailer weight). It also gave me a spot to stash my gas cans. Will need to put a few tie down point on the kap but should work nicely.
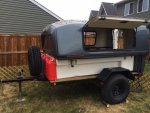
Got a little carried away and decided to remove the side doors to get a good cleaning but now that they are out I'm kind of thinking I'd like to put windows in instead of the original doors.
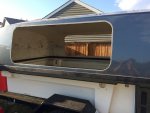

I'm pretty stoked about this cap now that I have it. I'm not totally thrilled about the condition of the doors- they don't seem that secure so I may look at replacing the rear barn doors with a custom door or doors.
I'm thinking I'm going to build a platform across the parts the shelves used to sit on and keep underneath for storage. Bed will be the length of a standard queen, 80". Should leave around 20" or so between the end of the bed and the door. Just enough space for shoes or what ever. My other thought was to perhaps build a table sitting area the food down into a bed like travel trailers do. It would kind of be nice to to be able to sit inside during a rainy day but also, camping for me is all about being outside. So I'm not really sure.
Any input or suggestions would be appreciated. And thanks to all compliments on the build thus far if I havnt already acknowledged it!
Removed all the aluminum shelving,the rubber mat on the floor, as well as the clamps that hold the kap to the truck body. Went and bought a shop vac and vacuumed out years of dirt and other goodies.

I wanted to see how moving the kap back flush with the rear of the trailer would effect the tongue weight. It's only 6" but what a difference! I think the tongue weight is right in the money spot (10% of total trailer weight). It also gave me a spot to stash my gas cans. Will need to put a few tie down point on the kap but should work nicely.

Got a little carried away and decided to remove the side doors to get a good cleaning but now that they are out I'm kind of thinking I'd like to put windows in instead of the original doors.


I'm pretty stoked about this cap now that I have it. I'm not totally thrilled about the condition of the doors- they don't seem that secure so I may look at replacing the rear barn doors with a custom door or doors.
I'm thinking I'm going to build a platform across the parts the shelves used to sit on and keep underneath for storage. Bed will be the length of a standard queen, 80". Should leave around 20" or so between the end of the bed and the door. Just enough space for shoes or what ever. My other thought was to perhaps build a table sitting area the food down into a bed like travel trailers do. It would kind of be nice to to be able to sit inside during a rainy day but also, camping for me is all about being outside. So I'm not really sure.
Any input or suggestions would be appreciated. And thanks to all compliments on the build thus far if I havnt already acknowledged it!
Hummelator
Adventurer
I've made some slight progress since my last post... but it's actually kind of one step forward two steps back.
Based on how easy the windows and trim were to remove I decided I wanted to remove the rear doors as well. As it turns out they were not fastened in the same manner-they were glued. After some hammering and beating and finally bending I removed the trim ring for the doors.
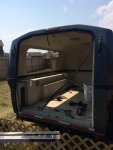
suffice to say the rear door assembly is now garbage. I had contacted a company about getting a custom door made up but they said that can't work with the curve of the cap.
Onto the next step for now...
The fiberglass repairs. Now I have never worked with fiberglass and quiet honestly it intimidates me a little. But like any DYI'r I watched a few YouTube videos and decided to give it a go anyways. Started by grinding down any holes and cracks to prepare the area for new glass and resin repairs. Once I starting grinding I ran into two things that I wasn't expecting. First was under the outer layer of fiberglass is a honey comb material. Second, the fiberglass layer and the honey comb layer seem to be delaminated in some spots.

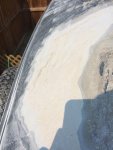
While I wasn't expecting to see the honey comb I'm not concerned about it. However, with the honey comb layer and the fiber glass layer delaminating from each other, it has me wondering if this cap is salvageable or even worth the time and materials it would take to repair.
Can someone who is familiar with fiberglass work chime in on this? Am I completely out to lunch at what I'm looking at? Is it worth my time to repair this thing?
Thanks
Based on how easy the windows and trim were to remove I decided I wanted to remove the rear doors as well. As it turns out they were not fastened in the same manner-they were glued. After some hammering and beating and finally bending I removed the trim ring for the doors.

suffice to say the rear door assembly is now garbage. I had contacted a company about getting a custom door made up but they said that can't work with the curve of the cap.
Onto the next step for now...
The fiberglass repairs. Now I have never worked with fiberglass and quiet honestly it intimidates me a little. But like any DYI'r I watched a few YouTube videos and decided to give it a go anyways. Started by grinding down any holes and cracks to prepare the area for new glass and resin repairs. Once I starting grinding I ran into two things that I wasn't expecting. First was under the outer layer of fiberglass is a honey comb material. Second, the fiberglass layer and the honey comb layer seem to be delaminated in some spots.


While I wasn't expecting to see the honey comb I'm not concerned about it. However, with the honey comb layer and the fiber glass layer delaminating from each other, it has me wondering if this cap is salvageable or even worth the time and materials it would take to repair.
Can someone who is familiar with fiberglass work chime in on this? Am I completely out to lunch at what I'm looking at? Is it worth my time to repair this thing?
Thanks
1.9TDIZook
Observer
The gates have sagged because there are no diagonals going from bottom hinge side up to
top latch side.
Hummelator
Adventurer
The gates have sagged because there are no diagonals going from bottom hinge side up to
top latch side.
Nope.
I originally built these gates square and then when I realized the posts weren't square, I disassembled the gate and basically reassembled them out of square to try and make them work in the opening.
I built the new gates with the exact same design, except perfectly square, and they have stayed to within 1/16 of an inch despite being wider gates.
Hummelator
Adventurer
Hummelator
Adventurer
After my last post about my fiberglass conundrum, I became more and more discouraged from continuing with the fiberglass shell. Eventually I wrote it off all together and took it to the dump.
The trailer sat for several months with its fate unknown.
In January, I started on the idea that I would get a roof top tent. Treeline outdoors isn't far from me so I arrange to stop and and check the tents out. The day after I called and said that I would like to put a deposit down for a certain color that was coming on the next shipment. I send a message twice trying to give them my credit card number for the deposit but both times was told that they would call me when they got into the office. I never heard back from them and I stopped trying- kind of an odd way to conduct business... maybe he got a bad feeling from me??
Anyway, this gave me some time to think. For the cost of a treeline tent I could nearly finish my trailer- and at that the spark was reborn.
I decided to go with the idea of using the overhead door panels. I am staying with the original shape but I have decided to change the layout a little bit.
Instead of having doors on the sides and having a lift back hatch at the rear I decided I will have windows on the sides and a single door at the rear. Eventually the idea will be to have a slide out kitchen from beneath the bed area. At this point my main goal is to get the shell built and habitable, then works on the extras. The plan for next year is to build an aluminum frame fastened together with rivets. Wont rust and with cut a significant amount of weight off of the current trailer weight.
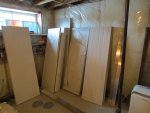
Overhead door panels: my shops brings in 28'-30' slab panels and cuts them down to the size that is required. Often times we will get odd sizes requested which leaves a 5'-7' panel (a width that is rarely if ever ordered) left over after cutting the longer slab up. So after the last few months, I have accumulated enough of these left over panels to build the camper- Completely free
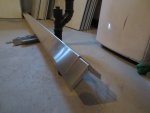
The panels don't have a finished edge so i had some .100 3"x3" aluminum bent for capping the entire camper
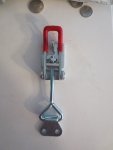
Originally I wanted the camper to be removable and I still do so I will be securing the trailer with 12 of these
We have had a brutal winter this year- way more snow than usual and it was consistently cold. Between that and working a lot, I didn't get much of a chance to work on the trailer until the last week of two.
Got all the panels cut to the size needed and glued the floor together (yesterdays teaser photo)
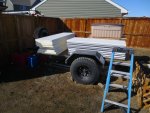
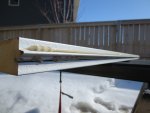
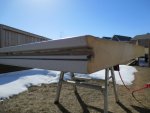
And pretty much brings you up to speed.
Yesterday I glued and clamped the floor and I'm giving it 2 days to cure because its still not "warm" although after our winter I'd considered this warm.
Tomorrow if I get off work at a reasonable time I will glue and clamp one of the side walls and then Sunday the other wall.
I am planning to take a few days off after the job I am on is done as I have worked every day for the last 3 weeks. Will have to do some paperwork for my corporate taxes and GST but I'm hoping to get the shell of the trailer done then too.
My door and windows are in transit and I'm hoping to have them early need week.
Super stoked to be going again on this and even more excited that I will get to use the trailer this year finally!
The trailer sat for several months with its fate unknown.
In January, I started on the idea that I would get a roof top tent. Treeline outdoors isn't far from me so I arrange to stop and and check the tents out. The day after I called and said that I would like to put a deposit down for a certain color that was coming on the next shipment. I send a message twice trying to give them my credit card number for the deposit but both times was told that they would call me when they got into the office. I never heard back from them and I stopped trying- kind of an odd way to conduct business... maybe he got a bad feeling from me??
Anyway, this gave me some time to think. For the cost of a treeline tent I could nearly finish my trailer- and at that the spark was reborn.
I decided to go with the idea of using the overhead door panels. I am staying with the original shape but I have decided to change the layout a little bit.
Instead of having doors on the sides and having a lift back hatch at the rear I decided I will have windows on the sides and a single door at the rear. Eventually the idea will be to have a slide out kitchen from beneath the bed area. At this point my main goal is to get the shell built and habitable, then works on the extras. The plan for next year is to build an aluminum frame fastened together with rivets. Wont rust and with cut a significant amount of weight off of the current trailer weight.
Overhead door panels: my shops brings in 28'-30' slab panels and cuts them down to the size that is required. Often times we will get odd sizes requested which leaves a 5'-7' panel (a width that is rarely if ever ordered) left over after cutting the longer slab up. So after the last few months, I have accumulated enough of these left over panels to build the camper- Completely free

The panels don't have a finished edge so i had some .100 3"x3" aluminum bent for capping the entire camper

Originally I wanted the camper to be removable and I still do so I will be securing the trailer with 12 of these

We have had a brutal winter this year- way more snow than usual and it was consistently cold. Between that and working a lot, I didn't get much of a chance to work on the trailer until the last week of two.
Got all the panels cut to the size needed and glued the floor together (yesterdays teaser photo)


And pretty much brings you up to speed.
Yesterday I glued and clamped the floor and I'm giving it 2 days to cure because its still not "warm" although after our winter I'd considered this warm.
Tomorrow if I get off work at a reasonable time I will glue and clamp one of the side walls and then Sunday the other wall.
I am planning to take a few days off after the job I am on is done as I have worked every day for the last 3 weeks. Will have to do some paperwork for my corporate taxes and GST but I'm hoping to get the shell of the trailer done then too.
My door and windows are in transit and I'm hoping to have them early need week.
Super stoked to be going again on this and even more excited that I will get to use the trailer this year finally!
Hummelator
Adventurer
Similar threads
- Replies
- 42
- Views
- 8K
- Replies
- 12
- Views
- 721
- Replies
- 0
- Views
- 1K
- Replies
- 12
- Views
- 574

