ImNoSaint's 2.5 Thread

Imnosaint

Gone Microcamping
Would love to see how the MPG's are affected.

I bought the same rack and I too, wanted to lower it. There are some garages (including my own) that my montero doesn't fit in anymore.

No change in MPG on last week's commute, which is a good thing. But, one 700 mile trip is a pretty limited sample and I had a strong headwind on my northbound leg. I'll log a couple of more commutes to see what the numbers say, then load the rack with the awnings and see what difference they make as well.
 

Imnosaint

Gone Microcamping
O/D Switch Swap

IMG_1554.jpg


One of the perils of not consulting the FSM on any job is taking a risk that might disable a perfectly good working function, like the over drive switch. When I replaced the transfer case shifter my initial thought was that the gear selector knob would have to come off in order to get the rest of the console below it out. That's what I had to do with my Gen III, so my reasoning was the same would apply with the 2.5. It doesn't. I discovered that when I removed the stock over drive switch which had little slack, and when exploring inside the housing for the switch for some kind of release screw, one of the soldered contacts snapped off the switch, disabling the Montero's ability to go into over drive. Damn.

The stock switch is embedded in a plastic housing through which the wires are soldered into a small circuit board. I tried to solder the broken red wire but lacked the finesse and tools for such a tiny connection.

I lived without OD for awhile during the summer, but getting back into my commute routine I wanted the high gear back, so I dug in for a fix (again, without the FSM).

Once I got the console out (for the record, there's no need to remove the gear selector, it fits through the opening of the console by simply depressing the release button), I noted the wiring path for the OD switch. My first thought was to relocate the switch on the console somewhere, but I reconsidered after measuring the hole for the factory switch in the shifter and finding a low amp switch at an auto parts store that fits well into that opening.

I fed more of the factory wiring up through the shifter to get the slack needed to work and after I determined accessory and 12V leads on the switch, I soldered all three contacts (ground) and fit the switch back into the hole feeding the slack back down below the selector and buttoned up the console.

It illuminates when OD is on and gives me the same control as the factory switch. Over drive gets me another 1.5 miles to the gallon, not much, but when I commute seven hundred miles a week, every one counts.
 

SONICMASD

Adventurer
Ps- seeing as you’re always finding neat hardware hacks I thought I would pass along a new gadget made by a business contact of mine and local to you, SLC company: https://www.griplockties.com

Rubber coated zip ties so they won’t slide out of place. Interesting idea.


Sent from my iPhone using Tapatalk
 

Se7en62

Adventure Seeker
Nice progress! I just ordered those same Nilight reverse lights and will be doing that install today. Any new updates since November?
 
DSCF4667.jpg


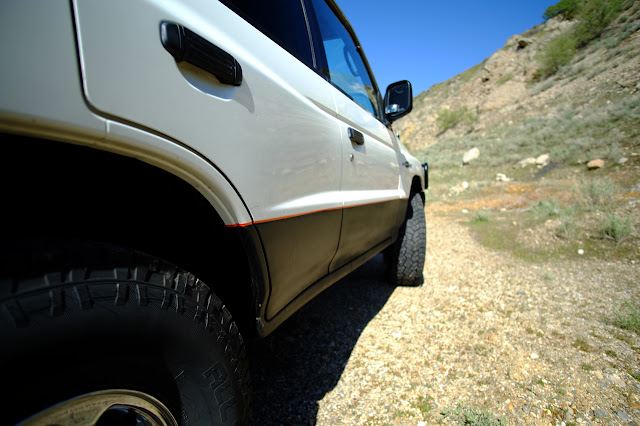
I used Duplicolor's Spray Truck Bed Coating to black out the rockers and bumpers. I made the mistake of using their rolled on product to begin with, resulting in bad surface continuity.

DSCF4670.jpg


The coating was sealed at the seam to the factory finish with 1/4" pin striping in signal orange as a nod to the Montero/Pajero's history with the Camel Trophy.

DSCF4669.jpg

Amazing thread, thanks for all of the detail both in explanation and pics. Noob question: Did you remove or rough up the factory rocker decals prior to spraying? I've tried to remove mine with a couple of different methods thinking the liner would adhere better to a clean, decal free surface but the decals REALLY wanna stay put..
 

Se7en62

Adventure Seeker
Amazing thread, thanks for all of the detail both in explanation and pics. Noob question: Did you remove or rough up the factory rocker decals prior to spraying? I've tried to remove mine with a couple of different methods thinking the liner would adhere better to a clean, decal free surface but the decals REALLY wanna stay put..

Have you tried using a heat gun or hair dryer and a plastic razor blade?
 

Imnosaint

Gone Microcamping
Roof Rack Hack 2.0
photo%2B62.JPG

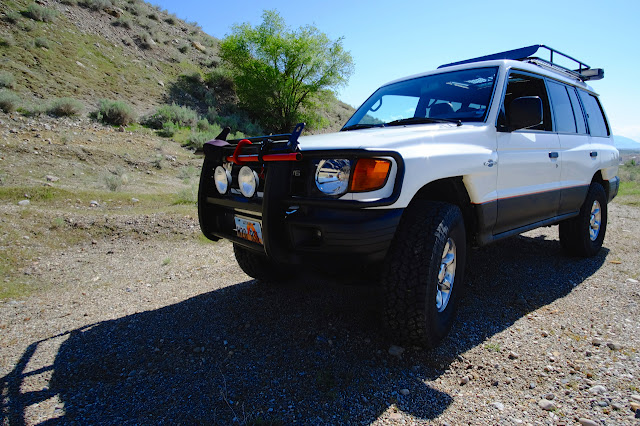
You might recall the roof rack hack on the Apex cargo basket where I cut some length out of the risers to lower the rack and hopefully reduce drag. The mod worked well and supported our recovery and camp gear without issue.

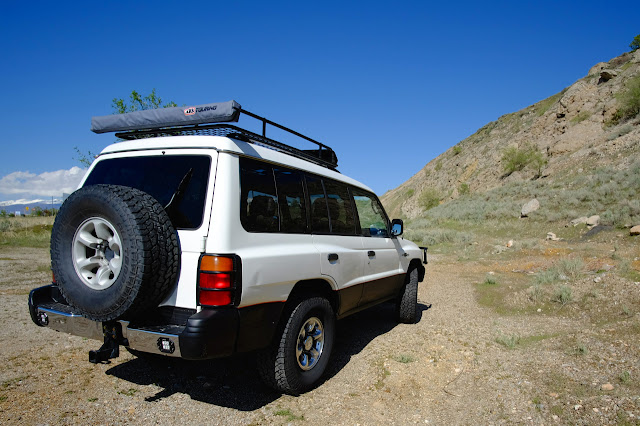
But I wasn't ever pleased that the rack wasn't full length, leaving the last eighteen inches of the side awning unsupported and putting the off-road lights too far back on the roof just ahead of the sunroof opening, losing the bottom half of their beams and creating a lot of noise.

To remedy these issues I picked up another Apex rack to modify to fit in the space left by the existing rack after it's repositioned at the front of the Nomad's roofline.

photo%2B54.JPG

With the original rack in place forward on the roof, I measured the distance from the end of the rack to the end of the roofline and came up with 29.5" of length. That meant cutting the new rack down from 62.5 inches. The rack ships in four pieces that, two halves of the bottom basket and two of the top rail. I removed the connecting hardware by drilling out the tack welds and breaking out the inner tube. I then used a Sawsall to cut the basket halves to the new length and used a pipe cutter to cut the tubing.
photo%2B53.JPG

I then fit the inner connecting tubes and riveted them in place.
IMG_0403.JPG

I assembled the basket platform and did a test fit on the Nomad.
photo%2B60.JPG

The footprint of the basket served as a jig to fabricate the upper rail. I cut the uprights down to 2.5" each, cut the upper tubing to size, secured the halves the same way as the basket, and fit the top rail to the basket.
IMG_0405.JPG

The stanchions on the original rack are at 32" centers, so I measured that distance from the rear stanchion back to where the stanchions would be at that distance on the small rack and drilled 5/8" holes through top to bottom to mount the stanchions directly to the uprights like I did on the original rack. The stanchions are Surco roof rack gutter mounts. I mounted two on the sides and two on the rear to help support the rear ARB awning along with work light fixtures.
IMG_0382.JPG

I did a test fit and made some adjustments and then shot the rack with Krylon's truck bed liner, the best liner I've found for spray applications.

Before mounting the rack I fit a QuickFist on the passenger side stanchion to go along with the one I fit on the existing rack to hold a Hi-Lift jack. I also bolted two studs on the back stanchions for the work lights. The rack mounted without issue and I bolted it down.
photo%2B55.JPG

I've since mounted the awnings, the recovery gear box and the Hi-Lift and I'm happy with the results.
photo%2B61.JPG

I used four 2.5" hose clamps to mate the two racks together (that's a cellular signal boost antenna on top).
photo%2B57.JPG

The Surco stanchions are supported on the roof with some hardware out of the Hillman bins. The stanchions themselves were rigid to begin with, but I wanted some kind of rubber insulation between them and the roof.
photo%2B64.JPG

The QuickFists are mounted on the passenger side Surco stanchions. There are two bolts that assemble the lower stanchion to the upper strut, the top of which was replaced with a 2.5" long 1/4" bolt mounted with a lock nut against the strut, then the QuickFist that has a brass bushing with a flange slipped over the bolt that mates up against the lock nut through the QuickFist. With the jack in place it's secured with a fender washer, lock washer and wing nut, finished with the strap of the QuickFist. Phew.
photo%2B65.JPG

photo%2B63.JPG

The rack is rock-solid, no rattles even from the Hi-Lift and with the sunroof open, it's as quiet as if the rack was not mounted. (Some pics aren't uploading to this thread. You can see the whole build and other modes here.)

Now it's time to hit the electrical.
 
Last edited:

Imnosaint

Gone Microcamping
Auxiliary Lighting
Illuminated.JPG


With the roof rack finally where I want it to be, I pulled the trigger on new off-road combo lamps on the bull bar, and finally wired up the trail lights on the roof rack.

It all begins with the addition of a Blue Sea Blade Fuse block and a 100 amp breaker.
IMG_0414.JPG

Blue Sea Systems make a variety of marine and automotive application 12v fuse blocks. The ST Blade box comes in 6 and 12 circuits with or without a negative bus. I won't be adding many accessories so I opted for the six circuit ST Blade with the negative bus to make grounding something I won't have to troubleshoot.
IMG_0413.JPG

Both the fuse block and the breaker are mounted atop the fuse box cover and the relays are mounted on the driver side fender wall. The Blue Sea circuit is wired with a jumper from the positive terminal of the battery to the breaker and then a second jumper to the positive terminal of the fuse block. The block is grounded to the rig. Two circuit relays are grounded at the same spot with positive leads connected to the fuse block. The pos/neg switch leads are also connected to the fuse block with their switch hot lead to the relays. Two fuse block circuits remain open for other accessories.

I drilled two 5/8ths holes through the firewall just above and to the driver's side of the master cylinder and lined both with heavy-duty grommets. Leads for switches and the circuit for the top lights were passed through. I used two Lamphus Cruiser 40A relay/wiring harnesses for the install, modifying both to connect to the fuse box, eliminating the inline fuse. All exposed wiring was insulated in heat shrink tubing.
IMG_0410.JPG

The switches are mounted on the blanks to the right of the steering column. I've used Daystar rocker switches on a previous install, but the factory blanks are too small to accommodate them on this one, so I went with a more generic rocker switch shipped with the harnesses. The factory blanks have plastic tabs on the back side that need to be trimmed before drilling the 7/16ths holes for the switches. They illuminate when in the on position, but are a bit too bright. At night the whole front seat is awash in blue light when the switches are on.
IMG_0412.JPG

The two bull bar mounted fixtures are 80w Auxbeam 7" spot/flood combination driving lights.
IMG_0411.JPG

The four top mounted fixtures are 40w AKD 5" spot/flood combination trail lights mounted on Lamphus Cruiser bar clamps. The leads are ran from the firewall, behind the dead pedal, under the door trim and up the B-pillar through the moulding. They transition out the top back corner of the driver's door to the rack.

I've had these top fixtures mounted since last Fall and should've known better to replace the cheap mounting hardware with stainless. On the list. The rubber inserts on the bar clamps aren't wearing well either.

The light output far exceeds my expectations. I'll post beam patterns soon.
 

SONICMASD

Adventurer
Looks great!

One thing I can't figure out though - what's the point of the Quick Fist for the hi lift mount? It looks like the bolts and nuts going through the Surco Gutter Mount hold up the hi lift so what does the rubber Quick Fist do? Is it for limiting vibrations? Thx
 

Imnosaint

Gone Microcamping
Looks great!

One thing I can't figure out though - what's the point of the Quick Fist for the hi lift mount? It looks like the bolts and nuts going through the Surco Gutter Mount hold up the hi lift so what does the rubber Quick Fist do? Is it for limiting vibrations? Thx

Thanks. The QuickFists are to eliminate vibration and provide secondary security point.
 

Forum statistics

Threads
188,238
Messages
2,904,384
Members
229,805
Latest member
Chonker LMTV

Members online

Top