I've just been doing a few various small jobs; tying up loose ends here and there. Or, in some cases not. But at least making progress. In some cases not. I guess I don't know how to classify what the ffff I've been doing.
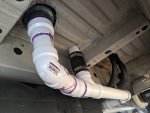
Let's start from some random spot in the middle, since none of it matters anyway. We have to get our lightly-soiled water into the appropriate tank. That tank sits on the spare tire carrier under the van floor. Our spare is on the ladder, remember? So I worked opposite the flow of water and started at the tank port. I just threw together some PVC fittings so I could cut approximate lengths; none of it is finalized and glued. I wanted to get a start since I had a little downtime, but we don't have the sink or shower installed yet, so I can't connect the other ends and make sure everything is right. So this whole assembly was only installed for a short time, but I at least have a pathway sorted, and some lengths cut. So, when I have the other connection locations, it should go in quick. The lion's share of van building is in the figuring, not the execution.
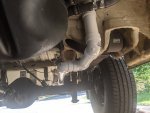
It looks like it's hitting the axle because it is, but it was also just resting in there so I could take the photo. It easily lifts off the axle and away from the bump stop. And I'll obviously have to incorporate some hangers. This preliminary install gave me the opportunity to see what that might look like and plan ahead. Shouldn't be a big deal when I get around to finishing it off.
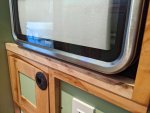
We've had a plan for a while now to have an "outdoor shower". That's just what we call it for simplicity. But more accurately, it's a garden hose. But we don't have a garden. I think in the marine world it's called a washdown connection? Something like that. We won't be showering with it, unless we're a place where none of you people are around. I'm aware you don't want to see that. So, you're welcome. It will mainly be for washing muddy boots, muddy dog, muddy van, etc. Call it a mud hose. I don't know. Anyway, there was a plan and zero action. So, I banged out the plumbing pretty quickly the other day. It's just another T off the pressure side of the system, and a Pex line to the back doors.
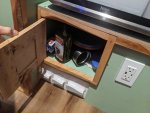
We got a hose connector from Aquor a while ago that's super nice. Not affiliated, I just really like it. It's just a quarter-turn type deal, with a check valve inside both pieces. So theoretically, you could leave your hose full of water if you wanted. Ours is an expanding-type jobby, so we have to drain it to fit it back in its container to store it. But basically, when you disconnect the hose, there's just a tiny dribble of water that comes out and that's it. And you're not constantly compressing and uncompressing the rubber washer inside the hose end, so it should last much longer. You know how those always fail and you get that tiny trickle of water down the hose every time you use it? Or down your arm. I hate that. This should help prevent (or at least prolong) that. Plus it looks awesome.
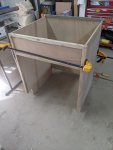
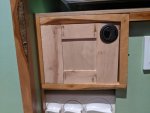
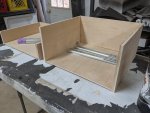
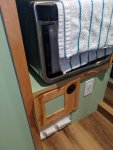
So, I made up a panel for it to sit in. It's nothing too crazy, but it was a few days' worth of glue-ups because of the order of operations. I couldn't do it all at once. The panel will also act as a sort of knee wall to help prevent anything falling out of the storage space when we open the door. I'm hoping my ski boots will fit in this space, we'll see once this rain stops. I did test it out yesterday, since I needed to drain the tanks anyways. Our hose reaches all the way around the van so we should be able to do a full wash periodically to keep it nice and nice. And the stretch action of the hose actually works really well as a sort of accumulator, so the water pump doesn't have to run 100% of the time. It's probably approximately 50% duty cycle. I didn't measure it, that's just a guesstimate. But the hose throbs the whole time which is creepy. Looks like a weird giant worm.
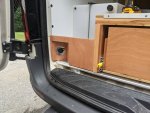
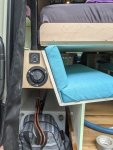
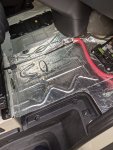
A while back, I forget if I wrote this or not, I installed a level sensor on the tanks. I'm not sure if SCAD is the brand or the technology, honestly. It's basically an adhesive foil with wires coming off it, and you stick it to the outside of the tank. You can see it two pictures up on the grey water tank. Through the process of magic, this creates an electric signal that corresponds to the amount of liquid inside the tank. I don't know. I just followed the directions for once. The tanks sat at this stage for a while, because I didn't have the final location for the gauge. Then I did, and it wasn't priority because I had other stuff to get done.
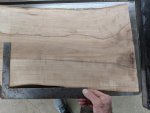
But anyways, I made up a panel that's definitely temporary. It's ugly as hell. But it will act as a stencil for the final product. This has been the best operating rhythm I've found for making weird shapes that aren't exactly measurable. I make something approximate using a piece of scrap, and then I can write on it; add half inch here, remove 3/16" from this section, etc. So when I trace it onto the final piece, I account for the notes, and then it usually works first try. Would that be the second try? In any case, this allowed me to get the final length on the wiring harness to the gauge. It might not land in exactly the same spot, but there's a bit of extra length, it should be able to move a few inches. I installed the water fill port panel thing as well, but I think we're going to use something different. Imagine this, but without all the wires showing, because this is the best picture I have:
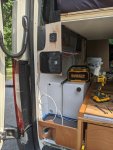
Spoiler: In the end, it looks nothing at all like that. The point is that we have a gauge to read while we're filling the water tanks. It's not in the ideal location for regular checking, but it's not difficult to access, and I suspect once we're in a rhythm of daily use, we'll have a decent feel for when we'll need to fill the fresh tanks and drain the grey tank. The most important function of the gauge will be to ensure we don't overfill the fresh tanks because it will spill out the vent. So that's one job as done as I can get it at this point. Once the bench is in place on that side, I will re-make the panel to fit more betterer and look all nice and nice.
Update: Since we've been living in this for a while now, I would advise against using this gauge. Perhaps ours is defective, I'm not really sure. It seems to forget its calibration periodically, which is annoying. Additionally, and I think this is by design, there's a significant time delay for accurate readings. It's probably a few minutes or so. So it's not really useful as we're filling the tanks, because it's a few minutes behind the actual level. We've learned to just put a flashlight on top of the tank which allows us to see through the tank to the water level. Not ideal, but that's vanlife. One other issue, not related to the gauge, but to water-filling business, is that I should have used a larger diameter pipe for the crossover connecting the two tanks. The driver's side tank fills much faster than the water transfers over to the passenger's side tank. So the passenger's side tank may only get half to 3/4 full by the time the driver's side tank is full. Ultimately, this is a very minor issue since we carry SO MUCH water anyways. We don't really sweat it. It's just a minor annoyance that I'll probably address someday. Or maybe not. Who knows? Not me.
Let's start from some random spot in the middle, since none of it matters anyway. We have to get our lightly-soiled water into the appropriate tank. That tank sits on the spare tire carrier under the van floor. Our spare is on the ladder, remember? So I worked opposite the flow of water and started at the tank port. I just threw together some PVC fittings so I could cut approximate lengths; none of it is finalized and glued. I wanted to get a start since I had a little downtime, but we don't have the sink or shower installed yet, so I can't connect the other ends and make sure everything is right. So this whole assembly was only installed for a short time, but I at least have a pathway sorted, and some lengths cut. So, when I have the other connection locations, it should go in quick. The lion's share of van building is in the figuring, not the execution.

It looks like it's hitting the axle because it is, but it was also just resting in there so I could take the photo. It easily lifts off the axle and away from the bump stop. And I'll obviously have to incorporate some hangers. This preliminary install gave me the opportunity to see what that might look like and plan ahead. Shouldn't be a big deal when I get around to finishing it off.
We've had a plan for a while now to have an "outdoor shower". That's just what we call it for simplicity. But more accurately, it's a garden hose. But we don't have a garden. I think in the marine world it's called a washdown connection? Something like that. We won't be showering with it, unless we're a place where none of you people are around. I'm aware you don't want to see that. So, you're welcome. It will mainly be for washing muddy boots, muddy dog, muddy van, etc. Call it a mud hose. I don't know. Anyway, there was a plan and zero action. So, I banged out the plumbing pretty quickly the other day. It's just another T off the pressure side of the system, and a Pex line to the back doors.
We got a hose connector from Aquor a while ago that's super nice. Not affiliated, I just really like it. It's just a quarter-turn type deal, with a check valve inside both pieces. So theoretically, you could leave your hose full of water if you wanted. Ours is an expanding-type jobby, so we have to drain it to fit it back in its container to store it. But basically, when you disconnect the hose, there's just a tiny dribble of water that comes out and that's it. And you're not constantly compressing and uncompressing the rubber washer inside the hose end, so it should last much longer. You know how those always fail and you get that tiny trickle of water down the hose every time you use it? Or down your arm. I hate that. This should help prevent (or at least prolong) that. Plus it looks awesome.
So, I made up a panel for it to sit in. It's nothing too crazy, but it was a few days' worth of glue-ups because of the order of operations. I couldn't do it all at once. The panel will also act as a sort of knee wall to help prevent anything falling out of the storage space when we open the door. I'm hoping my ski boots will fit in this space, we'll see once this rain stops. I did test it out yesterday, since I needed to drain the tanks anyways. Our hose reaches all the way around the van so we should be able to do a full wash periodically to keep it nice and nice. And the stretch action of the hose actually works really well as a sort of accumulator, so the water pump doesn't have to run 100% of the time. It's probably approximately 50% duty cycle. I didn't measure it, that's just a guesstimate. But the hose throbs the whole time which is creepy. Looks like a weird giant worm.

A while back, I forget if I wrote this or not, I installed a level sensor on the tanks. I'm not sure if SCAD is the brand or the technology, honestly. It's basically an adhesive foil with wires coming off it, and you stick it to the outside of the tank. You can see it two pictures up on the grey water tank. Through the process of magic, this creates an electric signal that corresponds to the amount of liquid inside the tank. I don't know. I just followed the directions for once. The tanks sat at this stage for a while, because I didn't have the final location for the gauge. Then I did, and it wasn't priority because I had other stuff to get done.
But anyways, I made up a panel that's definitely temporary. It's ugly as hell. But it will act as a stencil for the final product. This has been the best operating rhythm I've found for making weird shapes that aren't exactly measurable. I make something approximate using a piece of scrap, and then I can write on it; add half inch here, remove 3/16" from this section, etc. So when I trace it onto the final piece, I account for the notes, and then it usually works first try. Would that be the second try? In any case, this allowed me to get the final length on the wiring harness to the gauge. It might not land in exactly the same spot, but there's a bit of extra length, it should be able to move a few inches. I installed the water fill port panel thing as well, but I think we're going to use something different. Imagine this, but without all the wires showing, because this is the best picture I have:

Spoiler: In the end, it looks nothing at all like that. The point is that we have a gauge to read while we're filling the water tanks. It's not in the ideal location for regular checking, but it's not difficult to access, and I suspect once we're in a rhythm of daily use, we'll have a decent feel for when we'll need to fill the fresh tanks and drain the grey tank. The most important function of the gauge will be to ensure we don't overfill the fresh tanks because it will spill out the vent. So that's one job as done as I can get it at this point. Once the bench is in place on that side, I will re-make the panel to fit more betterer and look all nice and nice.
Update: Since we've been living in this for a while now, I would advise against using this gauge. Perhaps ours is defective, I'm not really sure. It seems to forget its calibration periodically, which is annoying. Additionally, and I think this is by design, there's a significant time delay for accurate readings. It's probably a few minutes or so. So it's not really useful as we're filling the tanks, because it's a few minutes behind the actual level. We've learned to just put a flashlight on top of the tank which allows us to see through the tank to the water level. Not ideal, but that's vanlife. One other issue, not related to the gauge, but to water-filling business, is that I should have used a larger diameter pipe for the crossover connecting the two tanks. The driver's side tank fills much faster than the water transfers over to the passenger's side tank. So the passenger's side tank may only get half to 3/4 full by the time the driver's side tank is full. Ultimately, this is a very minor issue since we carry SO MUCH water anyways. We don't really sweat it. It's just a minor annoyance that I'll probably address someday. Or maybe not. Who knows? Not me.


