Jeep Livin Lite Extreme Trailer EXPO upgrades

Xbcasey

Adventurer
I looked at your Thread and love your hitch! I don't have the skills to make something like that. I'm also very happy that I didn't post closeup pictures of my welds after looking at yours. Mine are strong but your are strong and artistic!

Haha thank you! All it takes is practice and time, my welds didn't always look like that! Strength is far more important than looks and the way my welds look is dictated by what I'm working on and what it has to do.

I've built ten or so of those hitches and everyone's seems to be really happy with them. The are dead quiet and about as simple as it gets to hook up. My original one has about three years of fairly heavy use and doesn't show any wear, it's just not as pretty and refined looking as the later versions!

I like where you're headed with your trailer and will be watching the progress!
 

TomP

Observer
Haha thank you! All it takes is practice and time, my welds didn't always look like that! Strength is far more important than looks and the way my welds look is dictated by what I'm working on and what it has to do.

I've built ten or so of those hitches and everyone's seems to be really happy with them. The are dead quiet and about as simple as it gets to hook up. My original one has about three years of fairly heavy use and doesn't show any wear, it's just not as pretty and refined looking as the later versions!

I like where you're headed with your trailer and will be watching the progress!

Thanks! I can tell you I have a whole new appreciation for the design and fabrication process!
 

TomP

Observer
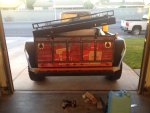
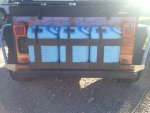
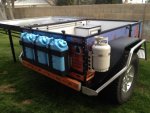
This trailer was equipped with a very nice double holder of four Daystar Cam Cans. These provided for eight gallons of water storage. I wanted more capacity for longer trips (I was carrying another five gallons inside the trailer). I also want my water storage to be carried externally. This so water could be replenished at a gas stop, for example, without opening the trailer top, which is hard, and it was necessary to open the top, to open the trailer door, to reach the inside. In addition because of the double mounting the cans protrude from the back wall of the trailer a fair amount. This would not be a problem per se if it wasn't necessary to work my way around them while opening the top. Which was hard! It's even more difficult to open from the front because of the mounted cooler and having to step over the trailer tongue which was almost impossible.

jtr23.JPG

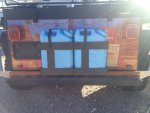
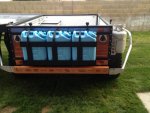
In looking through posts I noticed Rugar Trailers in Colorado and really liked the Specter water can holders they made. I purchased two and Specter water cans to go with them to replace the Cam Cans.

jtr24.JPG

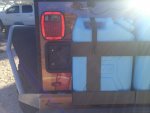
As I was looking at this I noticed that I had room to install three cans and holders. The problem was the trailer's license plate. It was to large!

jtr26.JPG

Luckily, Nevada allows some trailers to use motorcycle sized licence plates. So off to to DMV and came back with a small plate! So I called Ruger Trailers back and presto!

jtr25.JPG
 
Last edited:

TomP

Observer
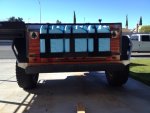
A picture of the rear of the trailer ready for the new can holders.

jtr31.JPG

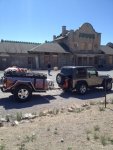
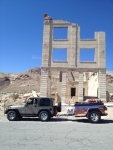
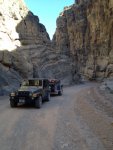
Looking at this picture reminded me of a funny thing that happened on a trip to Death Valley. Here are a few pictures of the trip! The first two of which show another issue between these two vehicles. The trailer is taller than the Jeep!

jtr27.JPGjtr28.JPGjtr29.JPG

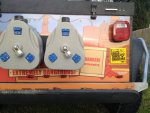
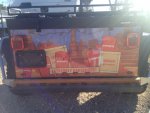
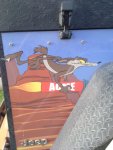
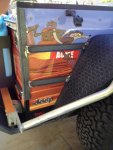
The funny part of the story occurred in the parking lot of Scotty's Castle. A friend was standing near the trailer when a car pulled up. The driver and passenger got out and the driver became imminently and visibly upset. Pointing at the rear of the trailer he said, "I don't think someone should be able to park a trailer containing dynamite in a National Park." They then headed to the visitor center. My friend thought to turn me in to the rangers! I counted myself lucky they didn't see the side of the trailer!

jtr30.JPG

Dynamite is one thing but a coyote riding a rocket is real trouble!
 
Last edited:

TomP

Observer
I maybe getting older but I refuse to grow up!

Did I mention that the top was hard to open by myself? I thought so. I'm definitely getting older and I also have to take some of the blame for the top being hard to open because I added the rooftop cargo rack. But I believe opening the top is the biggest problem for the Livin Lite Jeep trailers. I think Livin Lite even in a small way admits this with the slide out beds they use on their road trailers. The top is very important for the off-road trailer because it adds to the structural rigidity of the trailer box. It is not really a problem if you always travel with two people, as a couple or with friends, but shows when you often travel by yourself. I'm still in good condition and can lift the top's weight, I estimate it at about 75 to 80 lbs initially, tall so I can manage it as it reaches the vertical and starts down the other side, but I sure didn't look forward to it. Throw in a strong wind during setup or brake-down and I had a real worry. It is awkward to say the least! I was trying to think of something to help me open and close the top and when I saw this post I came to believe I found the solution.

http://www.expeditionportal.com/forum/threads/110671-Trak-Shak-in-the-US?highlight=trak+shak

This trailer opens very much like the Jeep Livin Lite and this action is assisted by two gas springs. After a little more thinking I decided to try to add gas springs to my trailers top.

I was flying by the set of my pants in the selection of the gas springs. So I picked out some with a 562 lb rating, but they are adjustable to reduce the rate by bleeding off some of the pressure. 1124 lbs THAT ought to do it! I was sure that the ball mounts would require reinforcement to support the stress of these springs.

There was something else that I needed to attach to the outside of the trailer box. I had purchased a Propex Heater to warm the inside of the trailer on cold nights or even days as I found out at EXPO West 2015! The heater requires a fixed gas supply and I also wanted to carry a spare propane tank to use for the kitchen. And of course the water cans.

All of these requirements, after looking at the framing drawings, required a support system externally mounted to the trailer box. Call it an exoskeleton if you will. So I set out to build one.
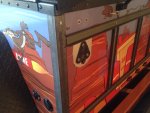
jtr34.JPGjtr33.JPGjtr32.JPG

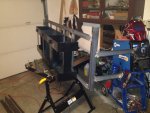
I tack welded the pieces while attached to the box and then finished the welds on the bench.
 

Attachments

  • jtr35.JPG
    jtr35.JPG
    109.6 KB · Views: 94
Last edited:

TomP

Observer
jtr37.JPGjtr36.JPG

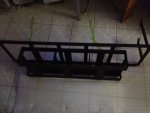
Here are a few more pictures of the frame.

jtr38.JPG

Ready for powder coating!

jtr39.JPG

Powder coating makes my welds look great!
 
Last edited:

TomP

Observer
jtr42.JPGjtr41.JPGjtr40.JPG

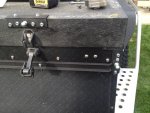
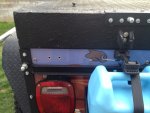
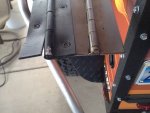
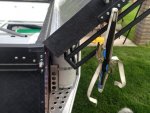
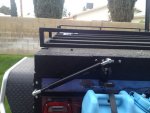
Here is the frame work attached to the trailer box. The propane tank in these pictures is the removable tank for the kitchen and other propane needs. The permanent tank will be mounted to the driver-side in front of the wheel. Horizontal frame members provide a sharing of the load from corner to corner. The lower gas spring mounting point is a nut welded to the driver-side angle iron corner. This will prevent it from spreading under the spring load. The upper horizontal bar made it necessary to lower the taillights. As luck would have it, the aluminum reinforcement backing was large enough to allow this.

The rear attachments for the rock rails are disconnected from the rear bumper and the skid plates have been removed.
 

TomP

Observer
jtr45.JPG

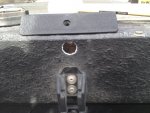
To help spread the spring load at the top's attachment point, a steel reinforcement plate was made. The spring's ball mount will be screwed into a nut welded to the back of the plate. This nut and the surrounding weld were recessed into the top by filing a hole matching the weld so that the nut can carry some of the spring load. J B weld was applied around the weld on the plate just before it was pushed into position to help strengthen the joint.

jtr46.JPG

The front of the trailer also was fitted with a bar supporting the corners and a reinforcement plate for the top. Here is a view of them.

jtr47.JPG

jtr44.JPG

Here are the front and rear gas spring attachment positions with their ball mounts installed. The lower mounts required some shimming so that the springs would operate on the same plane and not bind during movement of the top.

That should do it! All reinforced and ready for springs! Or so I thought!
 

TomP

Observer
562 lbs gas springs could not be compressed by anything that I had at home. It was necessary to compress the springs because they would never reach full extension while the top was moving through its arc of travel. I brought them to my son's shop and used a hydraulic press to compress them to about the midpoint and held them in this position with two ratchet straps. I propped the top open at an angle which produced the correct distance between the ball mounts to install the first gas spring. Once it was on and locked with the retainer clips I released the ratchet straps. I am sorry that I don't have any pictures of this but I was busy trying to prevent the spring from ripping the piano hinge from the trailer! After reinforcing the mounting locations I had not thought of reinforcing the hinge. Big mistake! The hinge installed was a light weight aluminium hinge with a small diameter pin. The knuckles of the hinge, were about 2" long each which left the first 2" of the hinge unsupported on one side. This is the area that the spring was applying the most force to.

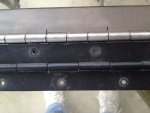
So I located a much heavier stainless steel hinge to replace the original. The pin was a full 1/4" and the knuckles were about 1" apart.

Here are the two hinges together.

jtr49.JPGjtr48.JPGjtr50.JPG

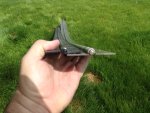
In these pictures you can see the size difference in the pin and the thickness of the metal. Notice that the new hinge has three knuckles to the old one's two. In the bottom picture the distortion and bending of the old hinge can be seen. It was much worse under load! You can also see that when I cut the new hinge to length I left some of the left side's knuckle on the end (not cutting it at the joint) so that neither side would be unsupported at the ends.

The first six inches of each end of the hinge was installed top and bottom with stainless steel binding posts to prevent them from pulling through under spring load.

jtr53.JPGjtr52.JPGjtr51.JPG

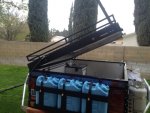
On the right side is a picture of the gas spring being installed onto the front of the trailer. It is still contained by the ratchet straps. The other two pictures show the top being held in the half open position by the gas springs. Their lift force was so great that I had to pull them down to latch the trailer top closed and when released they returned the top to the half open position unassisted. This was more effort than needed so I slowly reduced their pressure to the point where with the tent installed they will hold the top about six inches open while being closed. This allows me to walk around the trailer and tuck in any tent material that may be between the top and the trailer body before locking it closed.

What a difference this has made to opening and closing the top. It is now an easy one handed job!
 

TomP

Observer
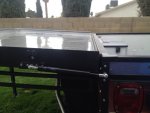
Here are two pictures showing the spring positions with the top fully closed and fully open.

jtr54.JPGjtr55.JPG

You can see that in the closed position the springs provide some vertical lift, while in the open they provide almost no vertical lift. The top has no tendency to try to close by itself.
 

Forum statistics

Threads
188,286
Messages
2,904,885
Members
229,961
Latest member
bdpkauai
Top