Jeepster Commando Build - A Different Sort of Jeep Thing - Stoffregen Motorsports

SkiWill

Well-known member
Luckily, I know how to cut through metal without disturbing the paint.
How? While I'm sure the answer is longer than can be posted on a forum, any tips you can list for ham fisted folks like myself would be appreciated. I always appreciate learning something new.

Beautiful work as always, and I love the attention to detail to make things removable and serviceable. I'm constantly thinking of future servicing needs on industrial projects that I am involved with.
 
Thank you for waiting. Posting on social media takes valuable time out of the day, and I tend to bank it so I can catch up all at once. I know. Not the right way, but it's all I got...

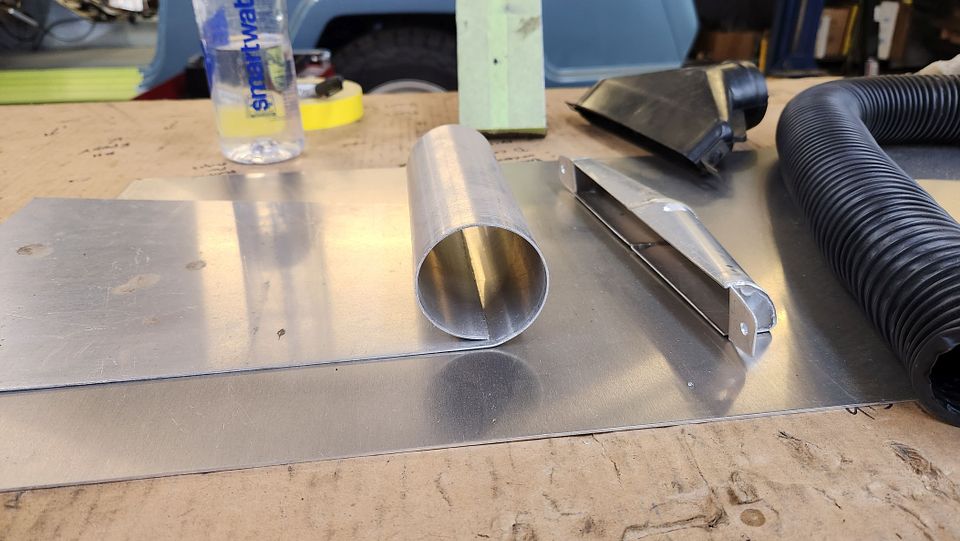
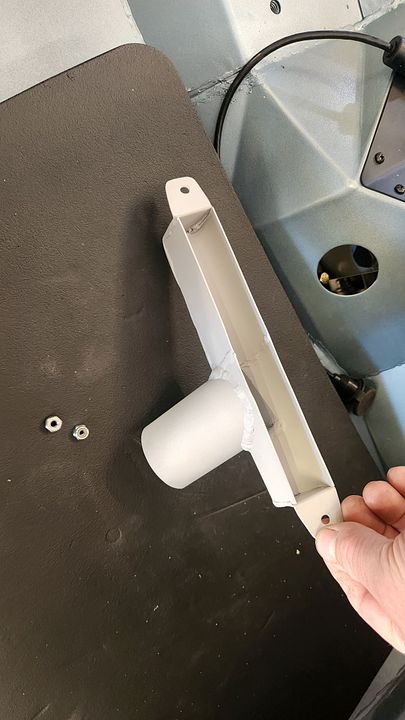
More pics. Here is the passenger side defroster duct. The original duct hit the A/C unit, so I made a new one out of aluminum.


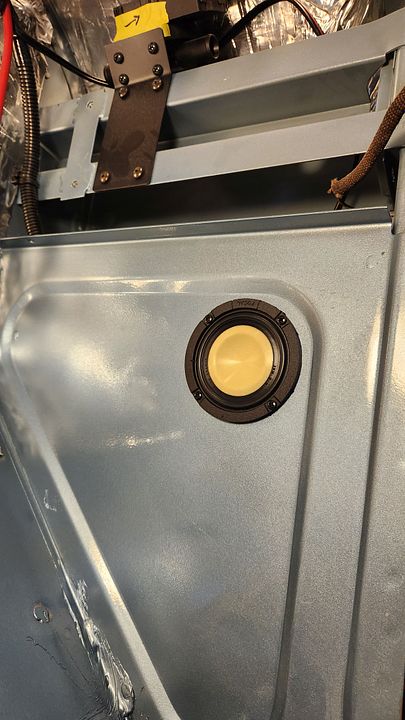
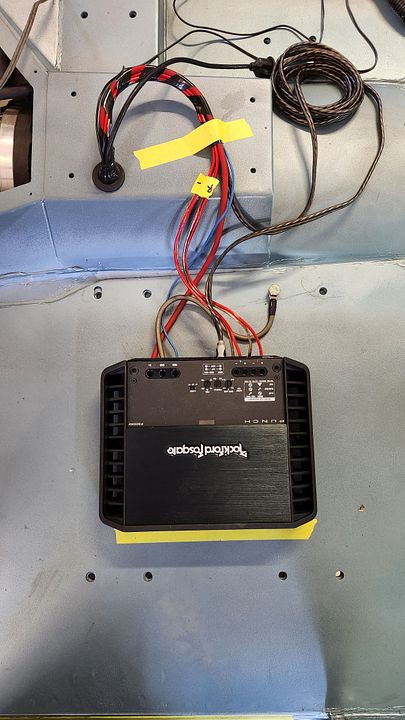
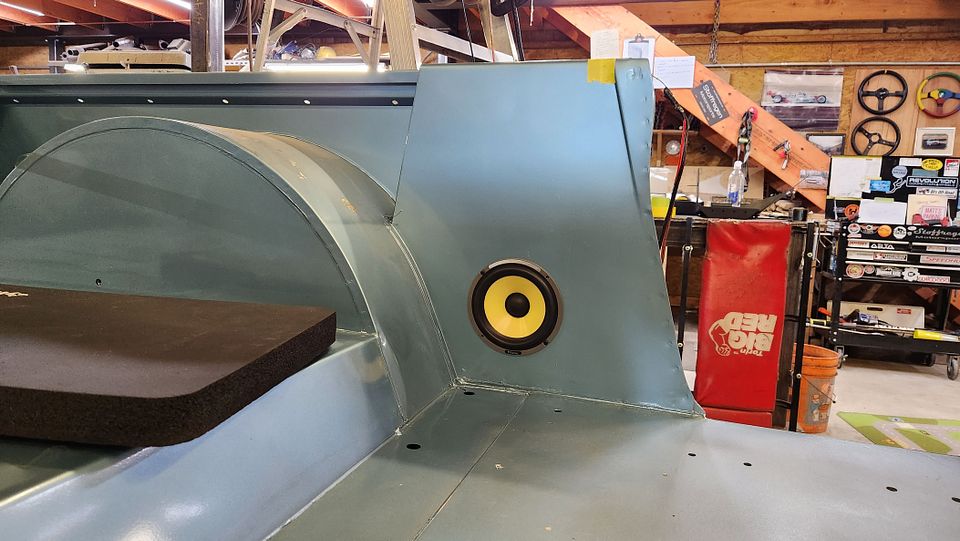
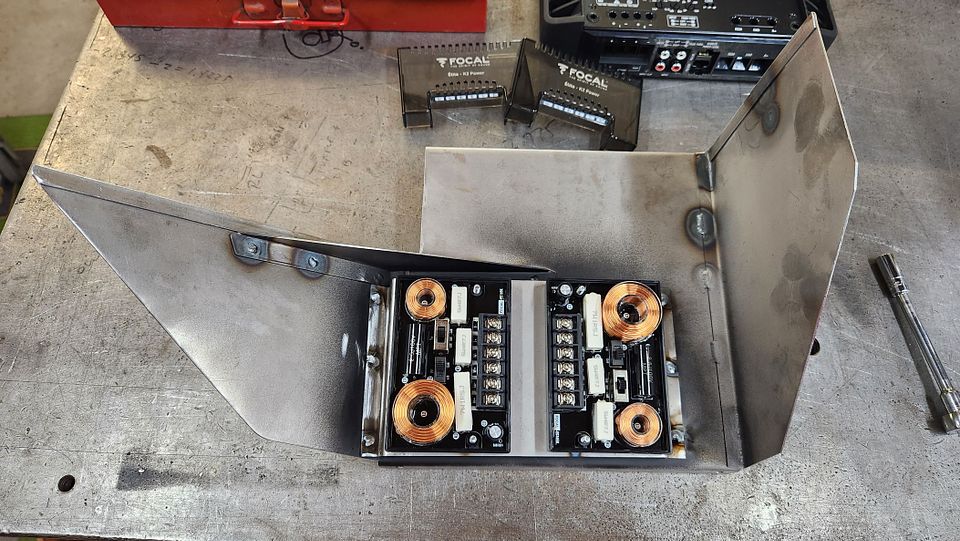
Once the A/C was done, I kept going under the dash. The sound system we chose is a vintage looking unit from Retro Sound, with a Rockford amp and speakers from Focal. There isn't a lot of room for any of this stuff in a Jeep, but I did my best to hide everything. The amp will be mounted under the driver seat, which is pretty normal, but the speakers which are mounted int he side panels will be hidden by the upholstery. The front speakers were $500 each, so those definitely need to be protected.


I then made a panel to hide the wiring under the head unit and to mount the crossovers to.


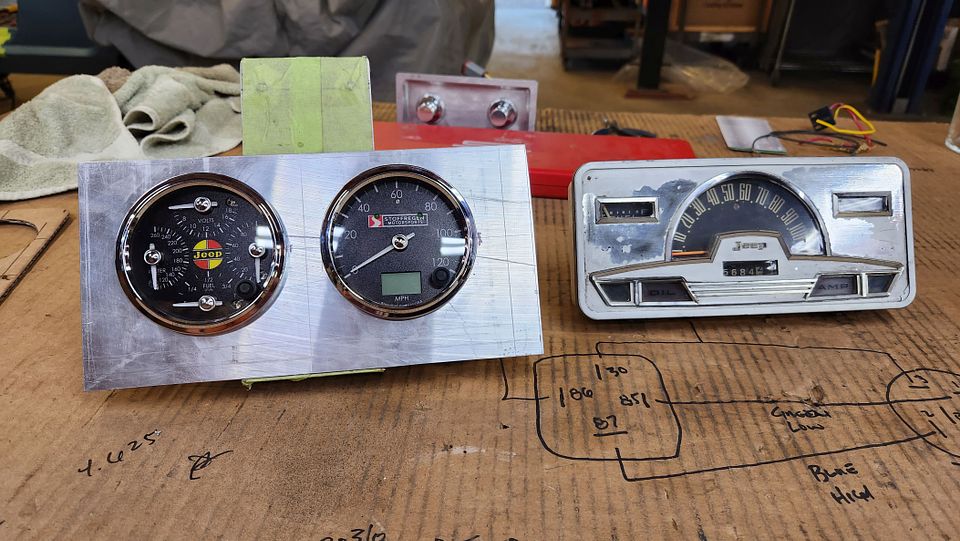
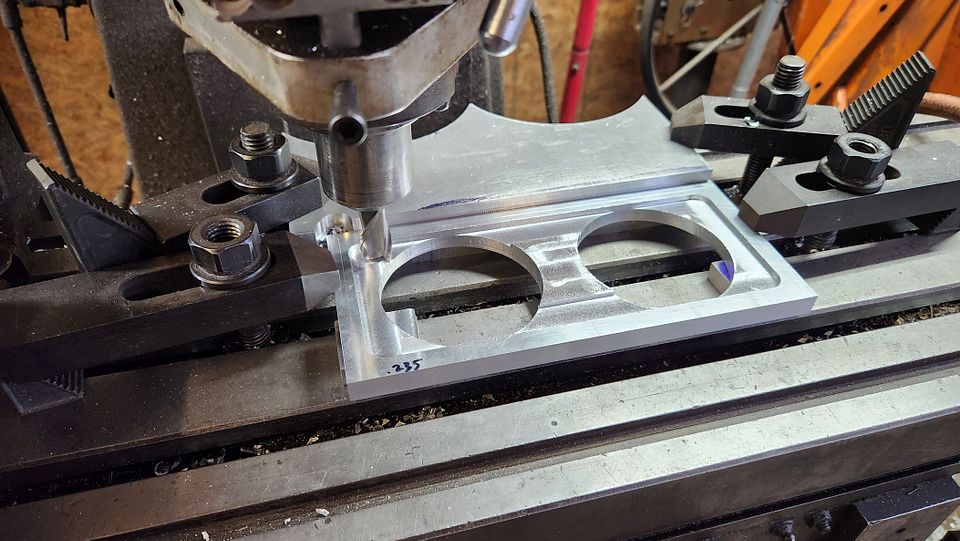
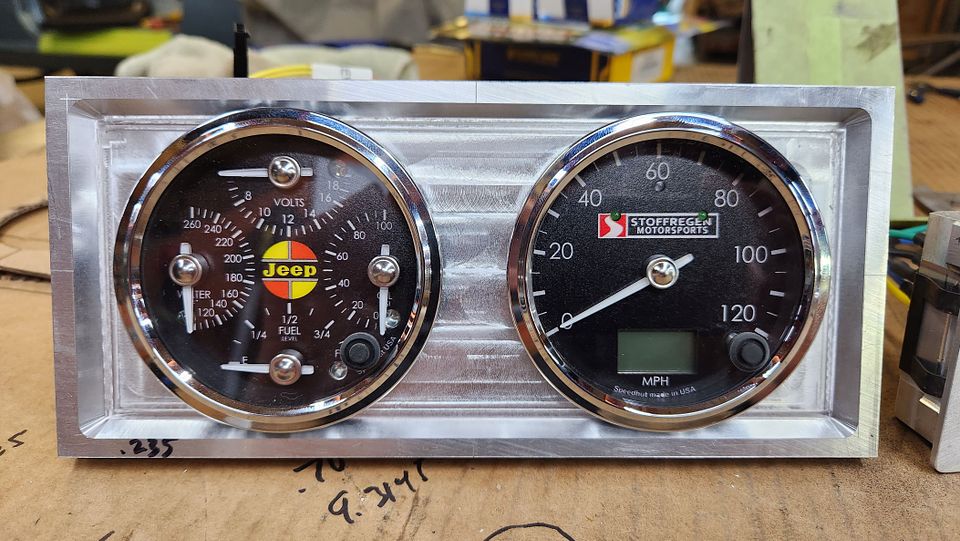
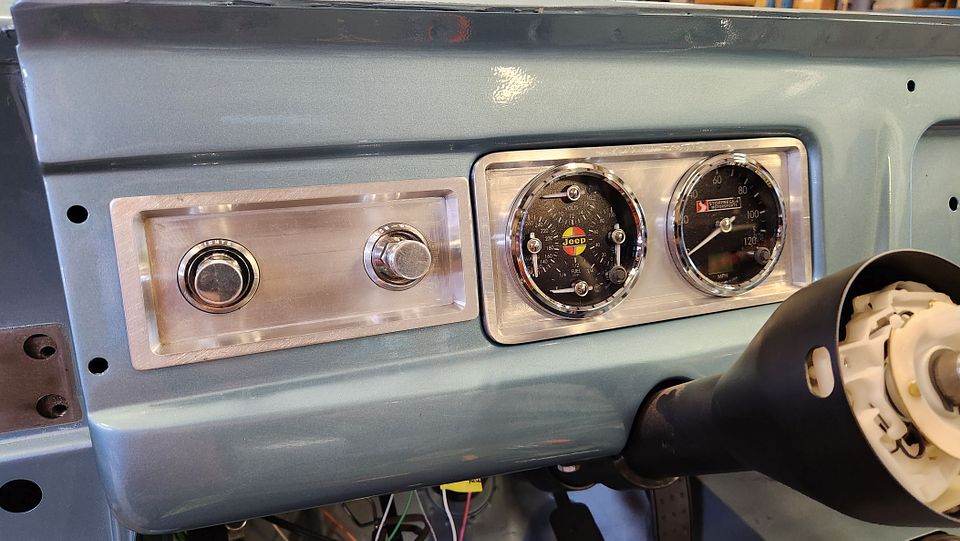
For the gauges, I really didn't have any ideas as to how to mount them, but when in doubt, try to match something else going on nearby. A couple hours spent whittling away on the old manual mill produced a clean looking gauge panel that closely resembles the panel on which the switches are mounted. I even recessed the gauges in the panel for a flush appearance.


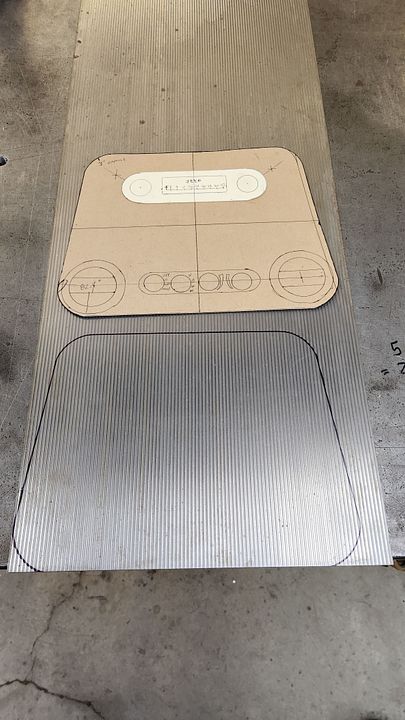
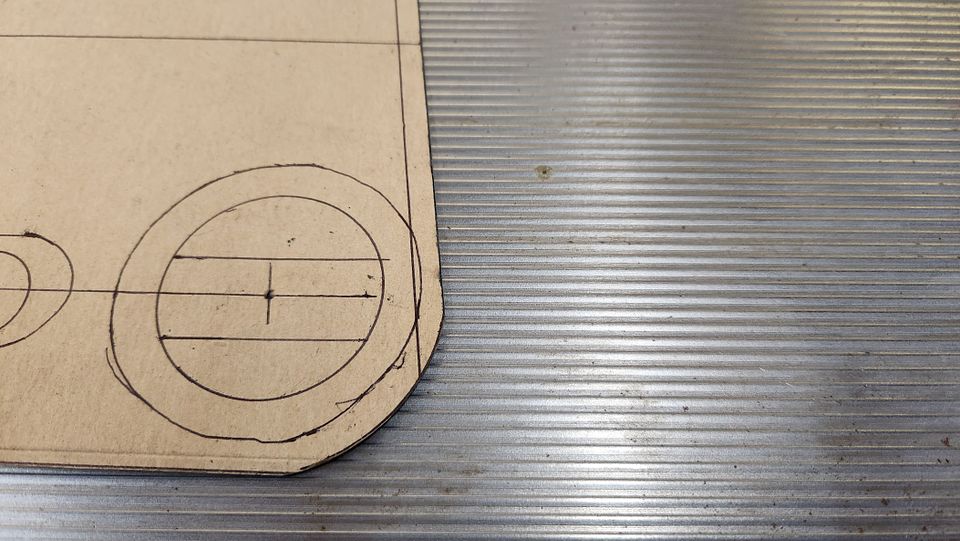
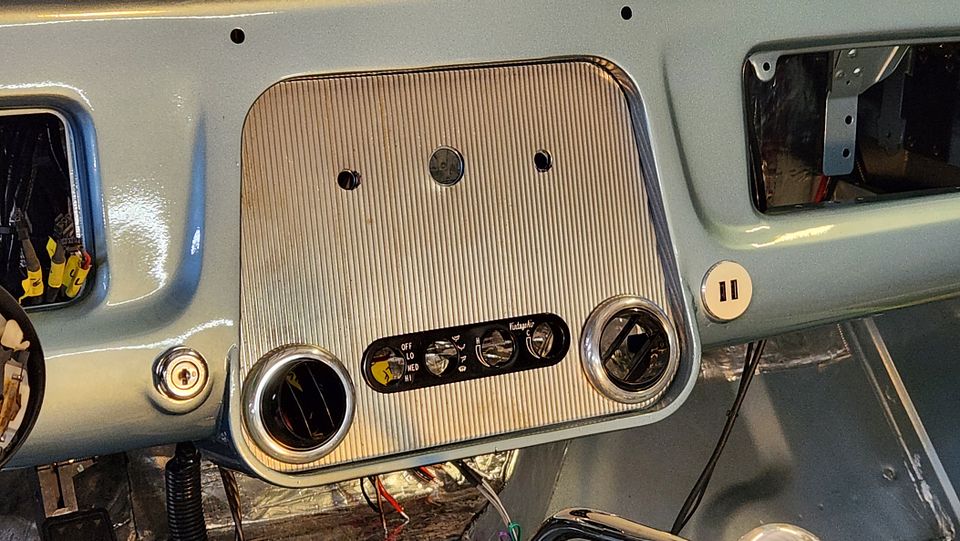
Remember the center dash portion that I cut out and modified? It needed a filler trim panel, and again, I was waiting for some great idea to hit me. And it did. I have been holding onto a sheet of finely corrugated steel for many years, hoping to find the perfect use for it, and the perfect use presented itself here. Deciding between vertical and horizontal orientation was made easy by the fact that Jeep uses vertical grille bars, so that' s what I did. It's simple, but elegant.


How? While I'm sure the answer is longer than can be posted on a forum, any tips you can list for ham fisted folks like myself would be appreciated. I always appreciate learning something new.

Beautiful work as always, and I love the attention to detail to make things removable and serviceable. I'm constantly thinking of future servicing needs on industrial projects that I am involved with.
Patience and low heat. I try to use hole punches when possible.

Packaging is key to many systems, and with wiring, it's doubly tricky with circuits running all over the place.

Thank you!
 
Next up - exhaust system.

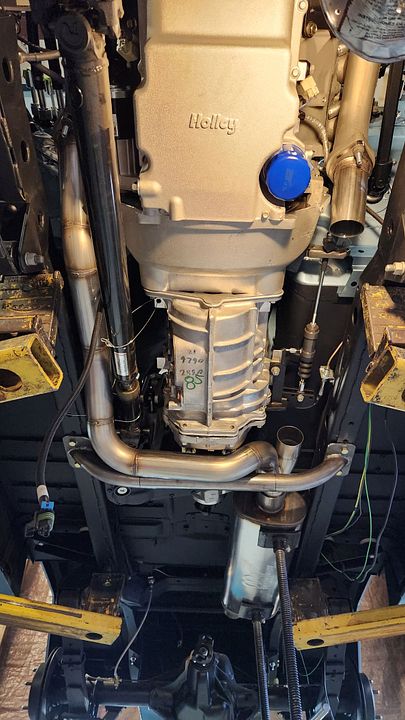
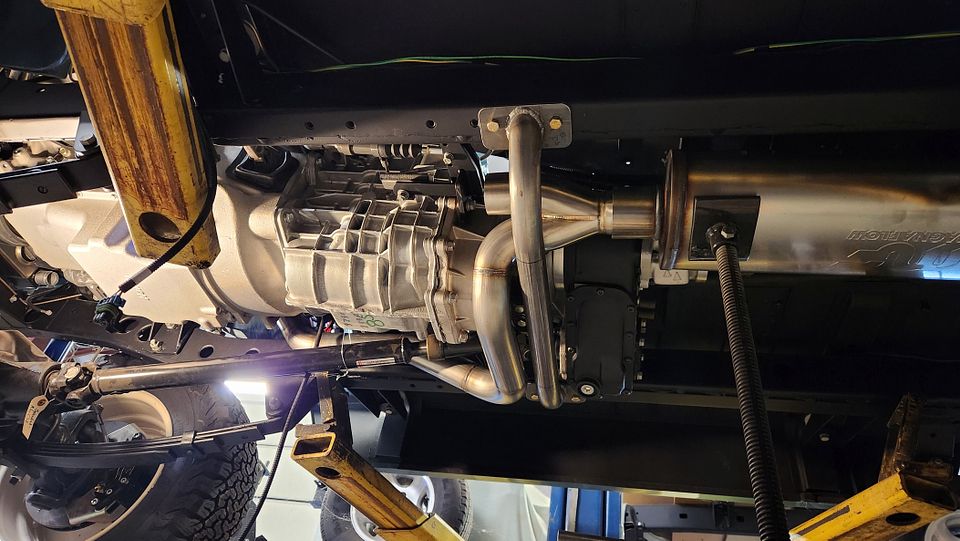
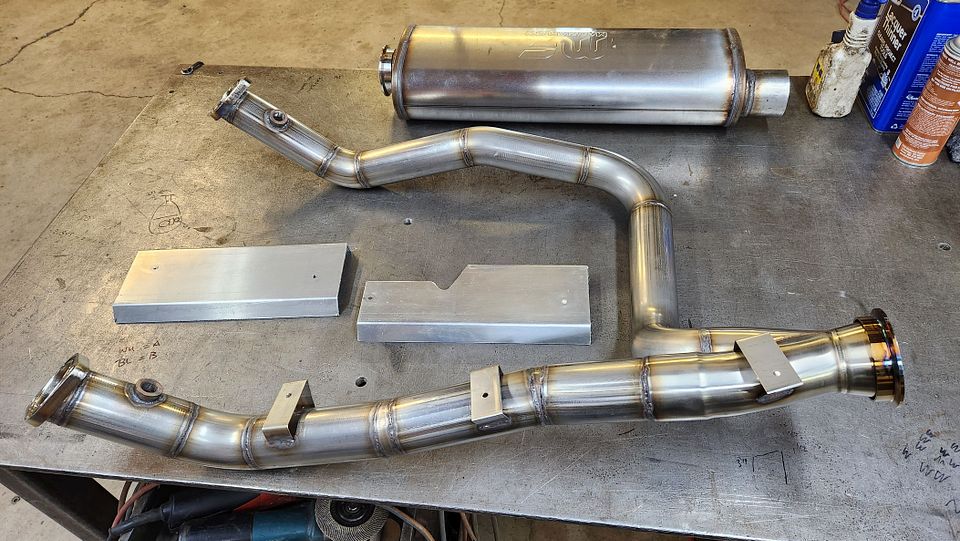
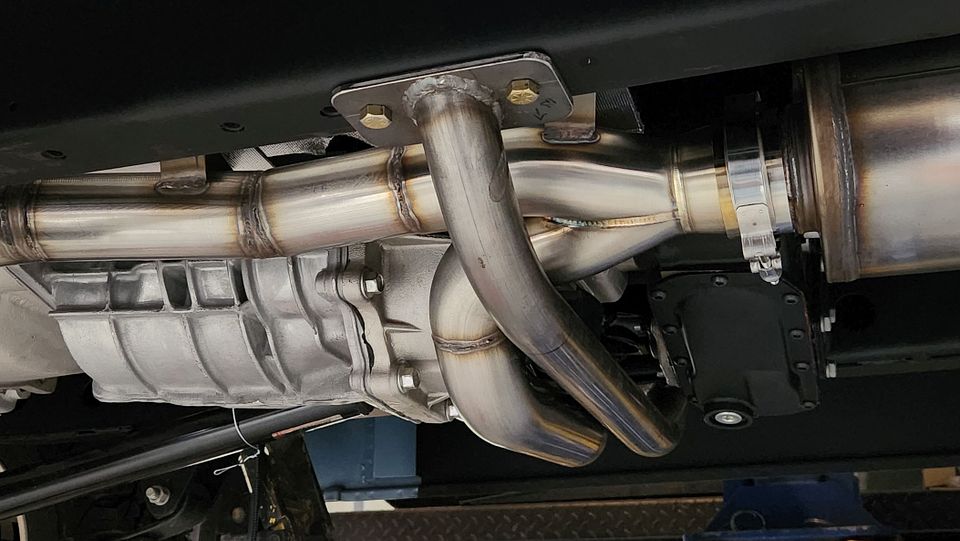
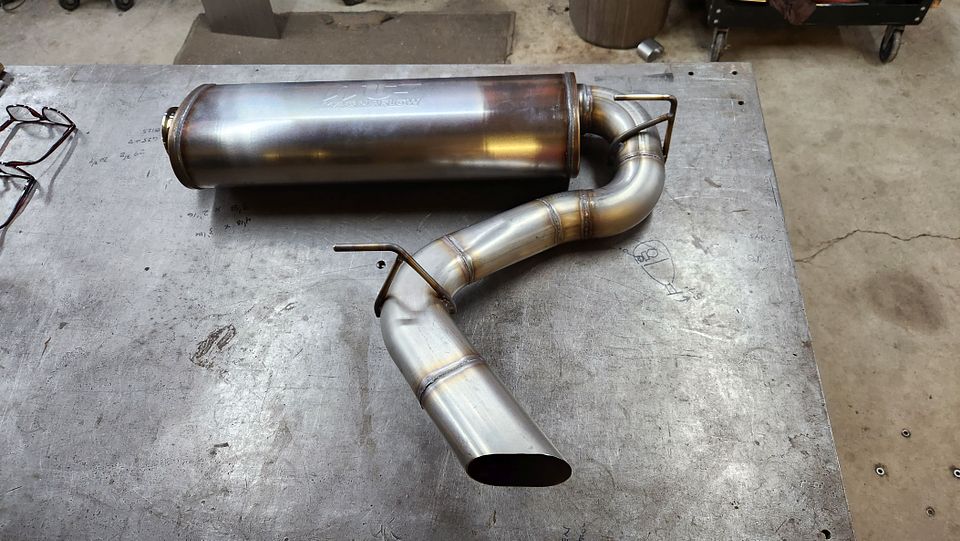
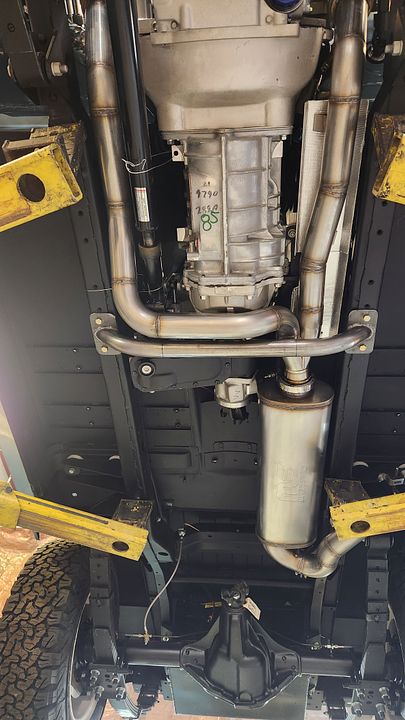
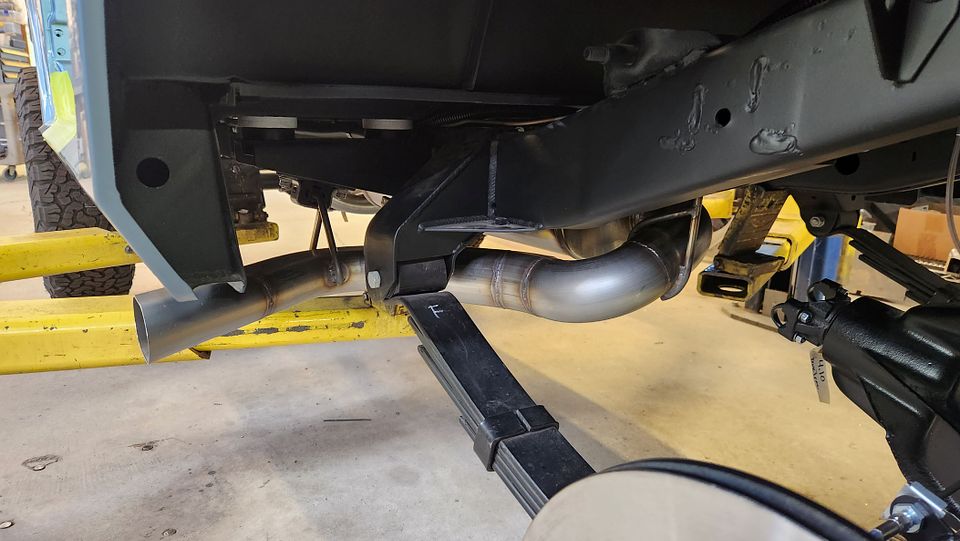
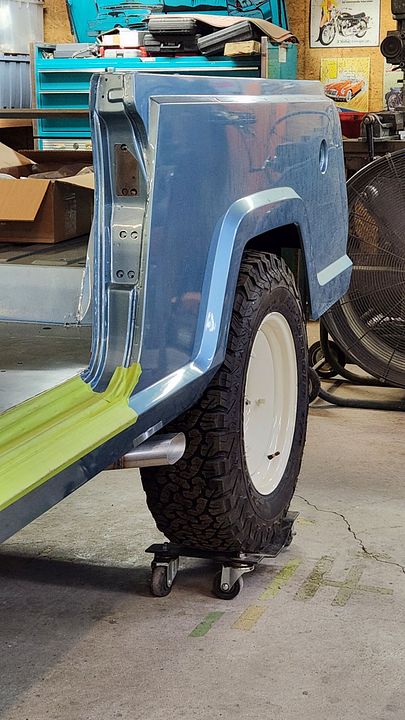
I was dead set on having a side exit exhaust. It just felt right. But packaging it was posing some pretty large problems. A - I didn't want this Jeep to be too loud, and B - the chosen muffler was so long that I was going to have to pull out my can of woop-ass to get the tip out the side, in front of the tire. In the end, it wasn't a difficult exhaust system to build, but planning took a bit of time.

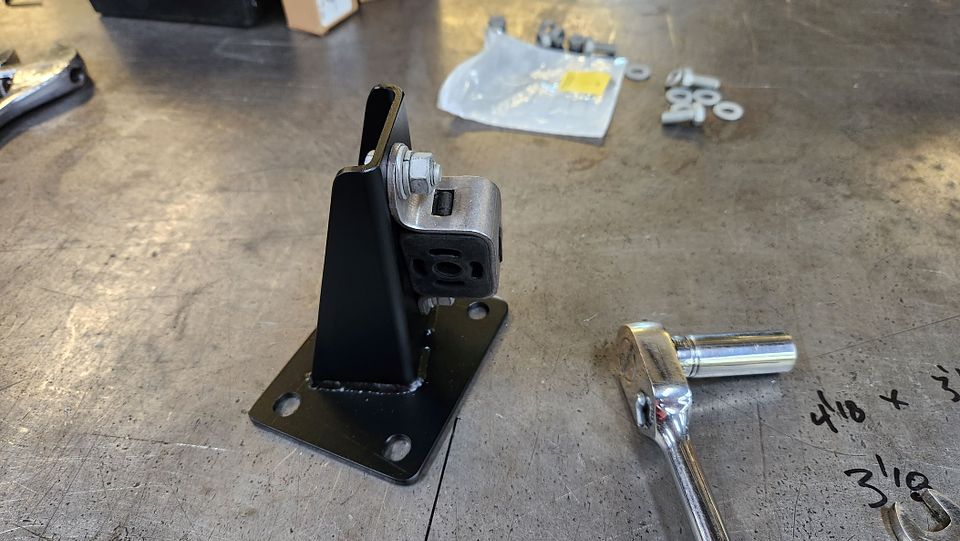
Hangers are important to long life in an exhaust system, but they ca also cut down on drone and noise. There are only two hangers in this system, but they were strategically placed to cut down on the noise and to hold up the exhaust without letting it rock around.


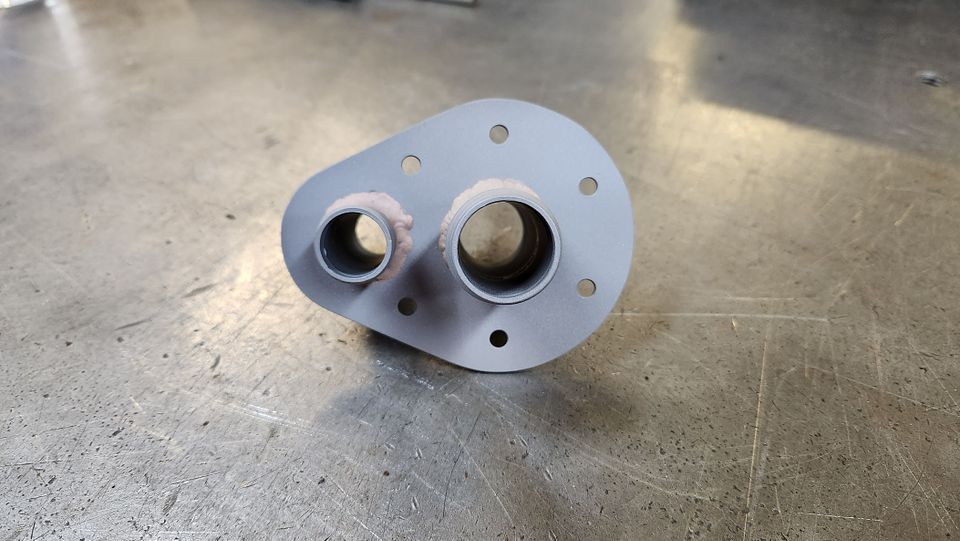
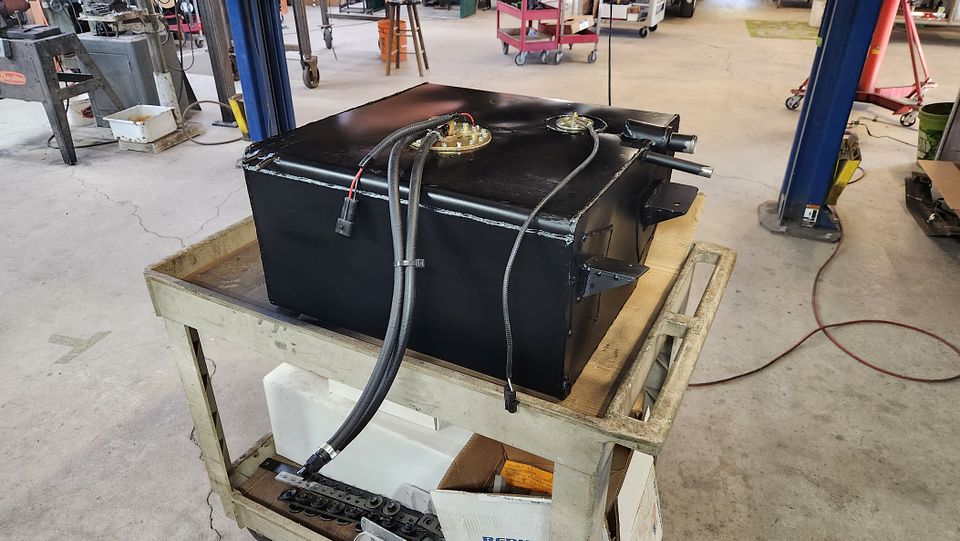
Finding a fuel tank that fits a Jeepster is not easy. As far as I know, there is only one aftermarket, non-original design for this frame. I did some research and talked to Genright about their YJ and CJ tanks, but none of them would fit without mods. Parts Dude sells a fabricated steel oversized tank for the Jeepster, so that's what I got. Could I have built a tank? Sure, but this one was priced right.

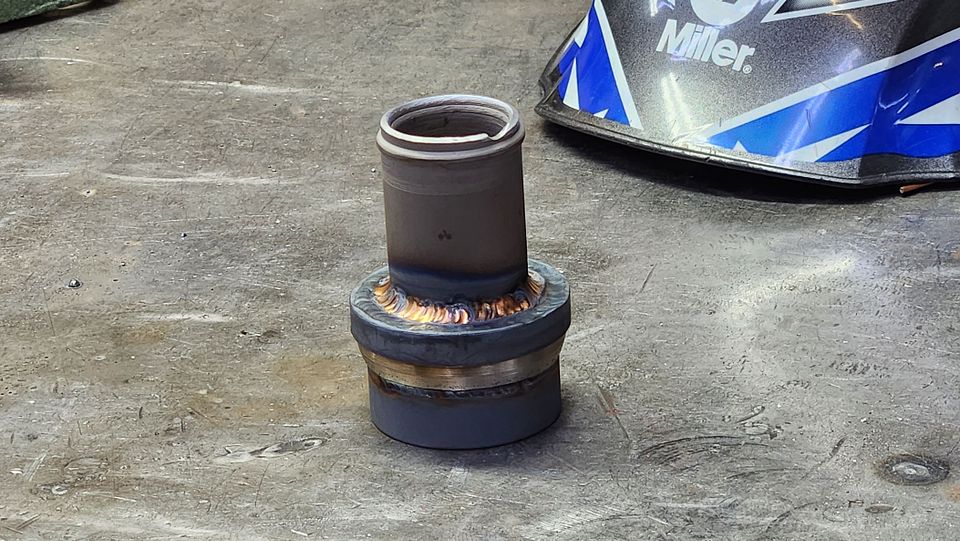
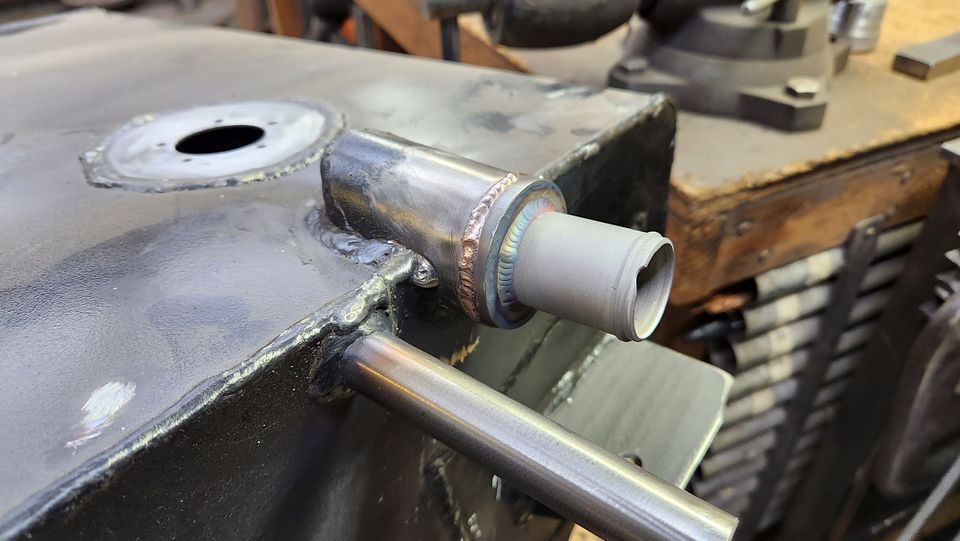
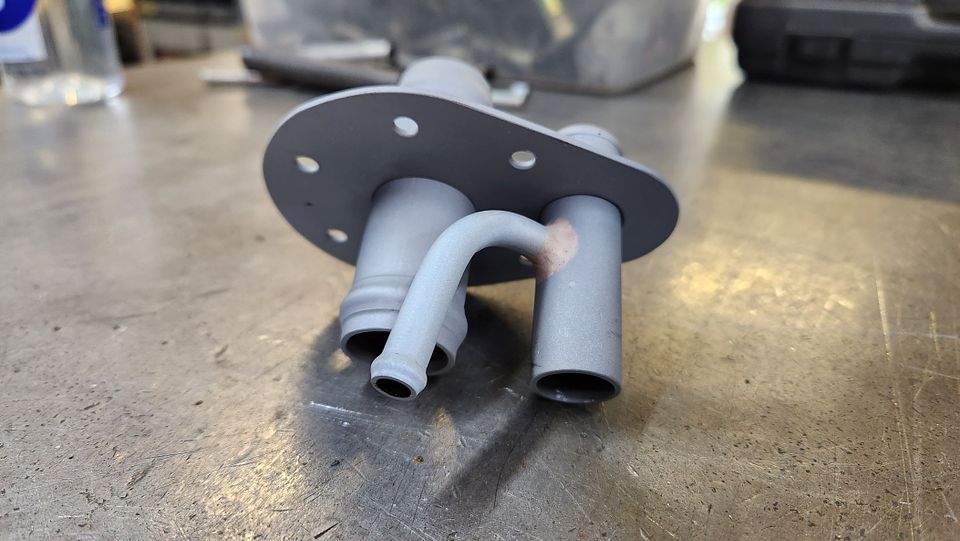
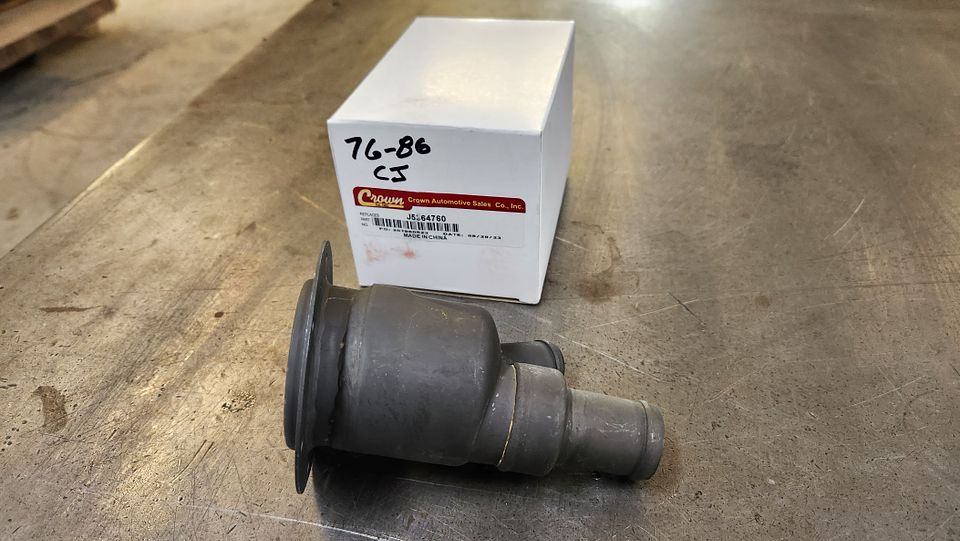
It did require some mods though. First was the fuel pump. I had to fit the EFI pump in the tank. Second, was the filler neck. I did not want to use the Jeepster filler neck so I had to shrink the filler neck connection on the tank to be able to use a CJ filler neck and hoses. Why not use the Jeepster filler neck? Because of crappy modern rubber parts. The filler that came on the Jeepster when we bought it was only a year old, and it was cracked to hell. Why can't aftermarket parts suppliers demand better wuality rubber? That's a soap box gripe for another day.

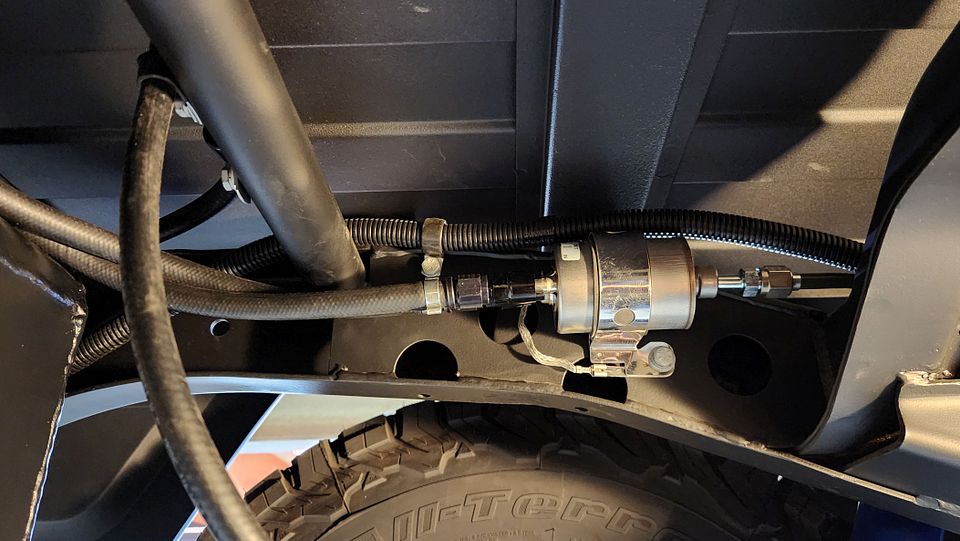
Here are some pics of the tank mods.


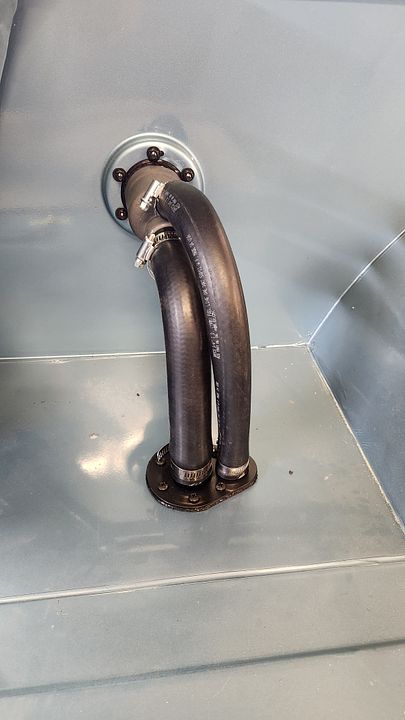
And the filler neck. This part is actually a fitting that mounts in the floor, with hoses that connect to the top and the bottom.


Finished filler neck. I wish I could have gotten the hoses to lay out a bit nicer, but whatever.. Oh, forgot to mention, the hoses, filler neck flange at the body and fuel cap are all CJ parts.


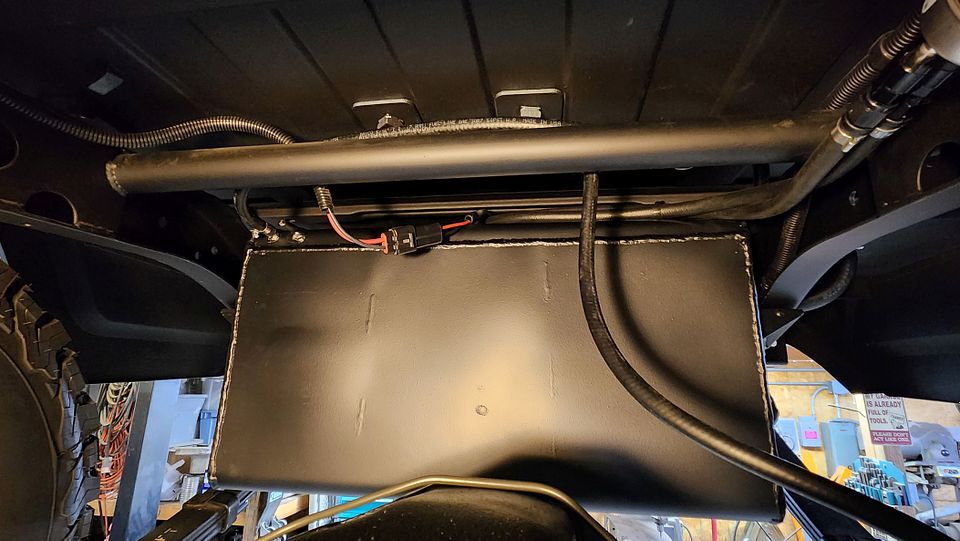
Finished tank install with hoses and wiring. The tank itself was not the nicest part I have ever seen. It had angle iron welded onto the sides as frame brackets, the welds were sharp in spots (which bugs the heck out of me) and the filler neck was welded on crooked. Oh, and the oil-canning of the panels was massive. But for the price, it gets the job done.


X3!

Todd Z.
Same! Wow 😎
It's been awhile, sure would like a update!
After a flurry of activity over the past two months, this Jeepster is nearly finished. The owner had an idea that he wanted it for his family spring break vacation, and we almost made it, but compromises began to arise and nobody likes to make compromises. We all wanted it done right, so the date was pushed.

What has happened? Well, we got the top painted and installed, flush mounted windshield glass, all chrome polished up and body mechanical assemblies refurbished, air conditioning finshed, lighting and lenses installed, parking brake system figured out and built...

When installing the top, I noticed the rear suspension sag a bit. I didn't think the top would affect the ride height much, but it did, so the rear springs came out and were re-arched for an added 1.5" of lift. It sits about an inch higher in the rear than the front now, which is perfect. Sitting perfectly flat, these old Jeepsters look low in the rear, but point the nose down a tad and they look great.

There are still a couple bugs I'm working out, like the fuel filler and tank breather system. If you live in a state that has mandated vapor recovery nozzles at the gas station, filling up an old truck with a horizontal filler neck never works out as planned. You always spill just a tiny bit of fuel. We're adding a breather to the filler neck and tank in an attempt to reduce that mess. That's one of the bugs. Another is the t-case breather. On a test drive with it in 4wd, it puked a little oil out of the breather, which really bothers me. I figured since it was in 4-hi, the whipping gears forced it to push fluid up into the breather, so theoretically it won't do it in 2wd. But I'm extending the breather anyway. For that odd occasion when the owner may need 4wd at freeway speeds. Other than that. I need to calibrate the speedo and tinker with the fuel level sender, and (dare I say) all the mechanicals will be DONE!

It still needs a trip to the upholstery shop, where it will get flooring, seats covered, sound deadening and insulation, door panels and a head liner. The owner and his family are deciding on colors and materials as we speak.

I'll get some pics uploaded soon so you all can get a glimpse of what a brand new Jeepster looks and feels like.
 

Forum statistics

Threads
188,293
Messages
2,905,020
Members
229,961
Latest member
bdpkauai
Top