jmnielsen
Tinkerer
Thought I might share this here to get some feedback and maybe some ideas from people. I started this about a year and a half ago, and while it is still a work in progress it is now campable. The frame is 2" square tubing, 1/8" thick. The cross members are 1"x2" that is also 1/8" thick.
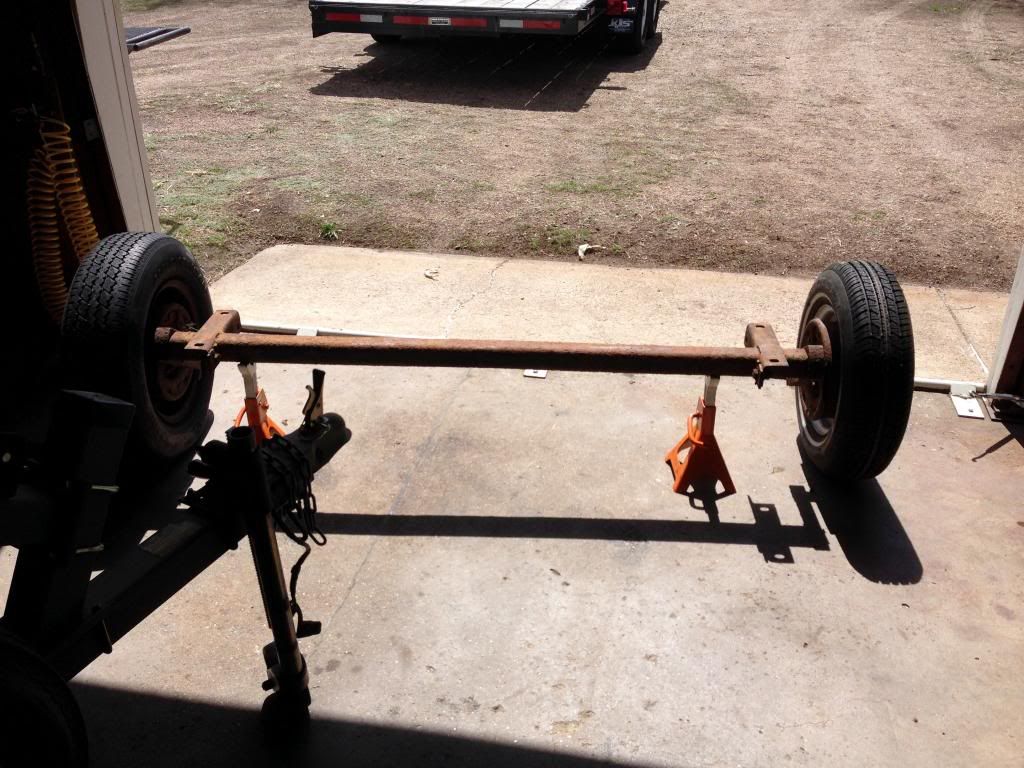
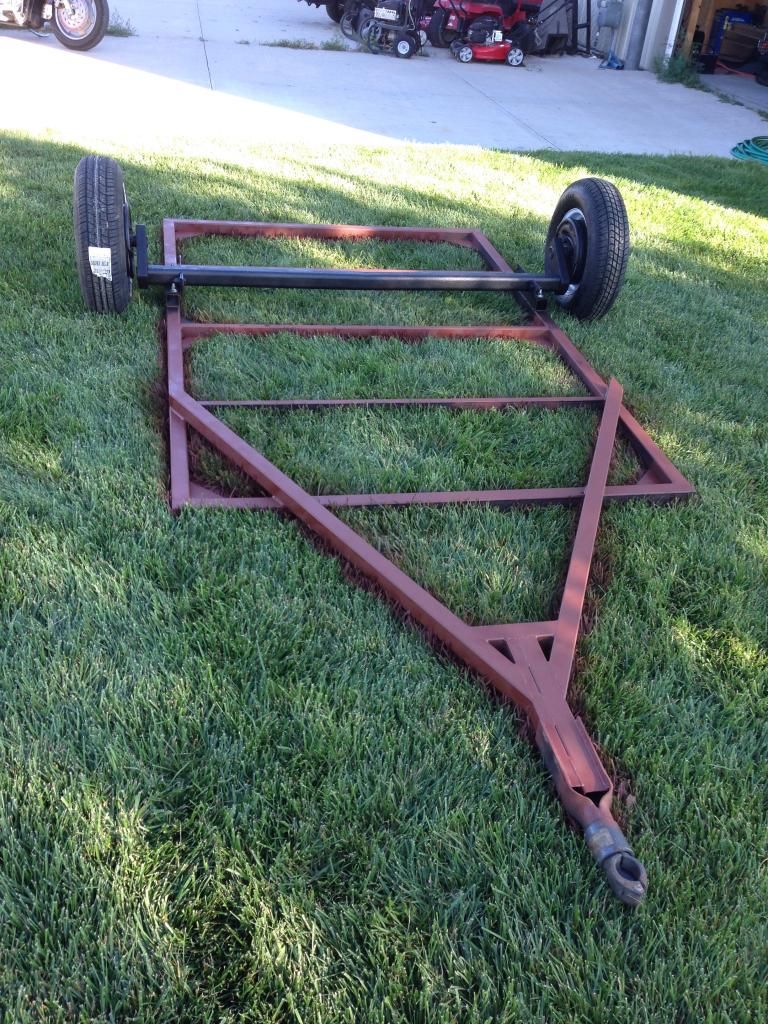
It all started when I found this axle on craigslist. It's a 2000lb torsion axle that someone was selling. Grabbed it for $20 and other than being rusty, it was in good shape.
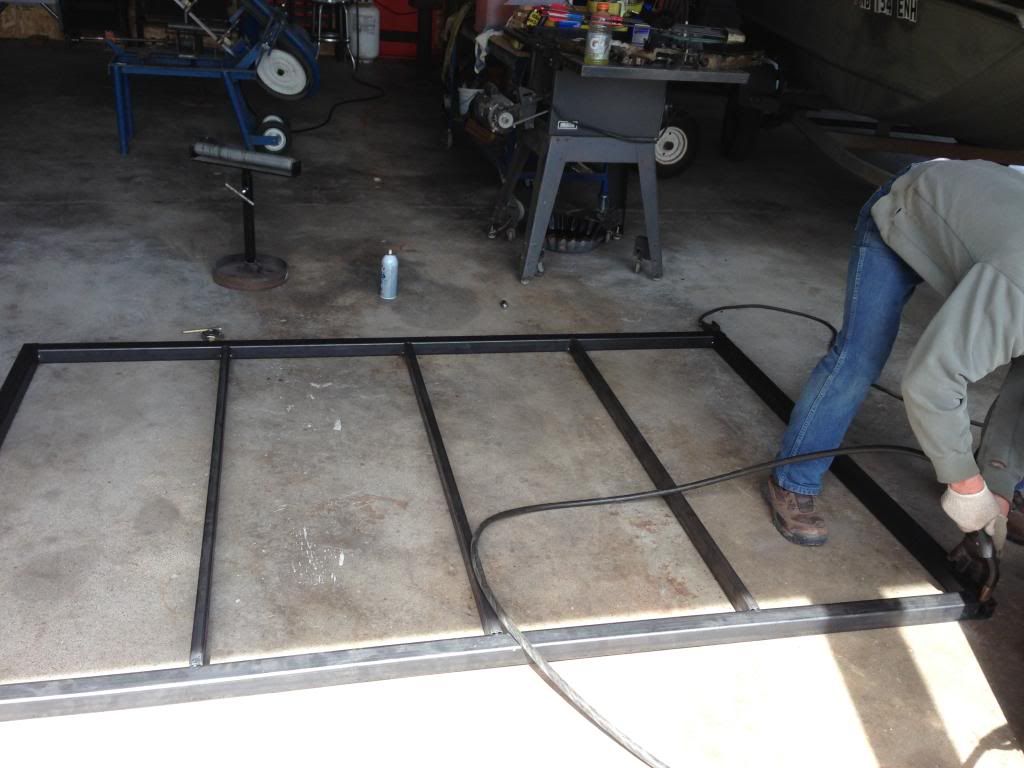
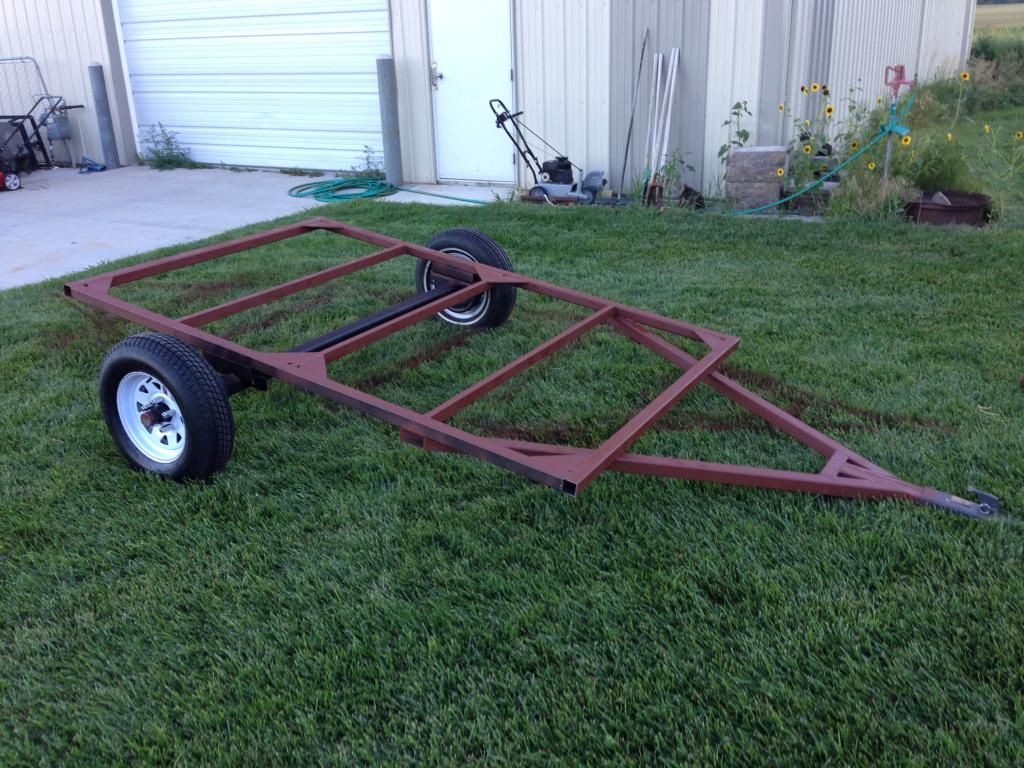
Then with some help I built the trailer frame. It's a 5x8 trailer, I wanted something small yet large enough to be comfortable to sleep in with my wife.

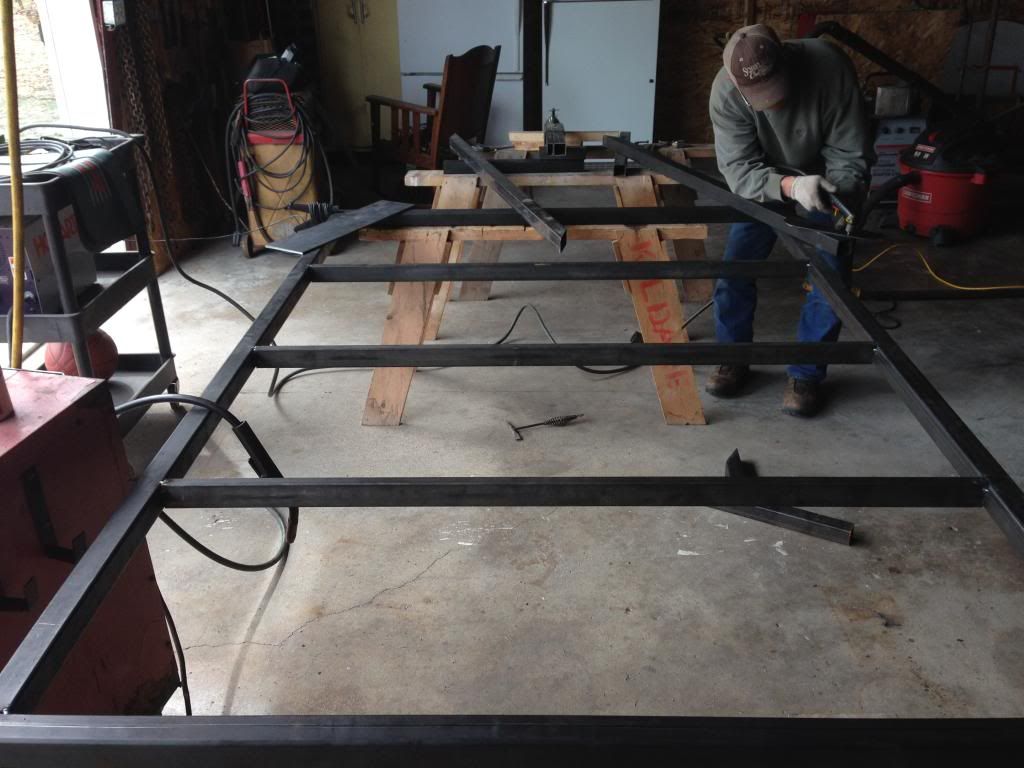
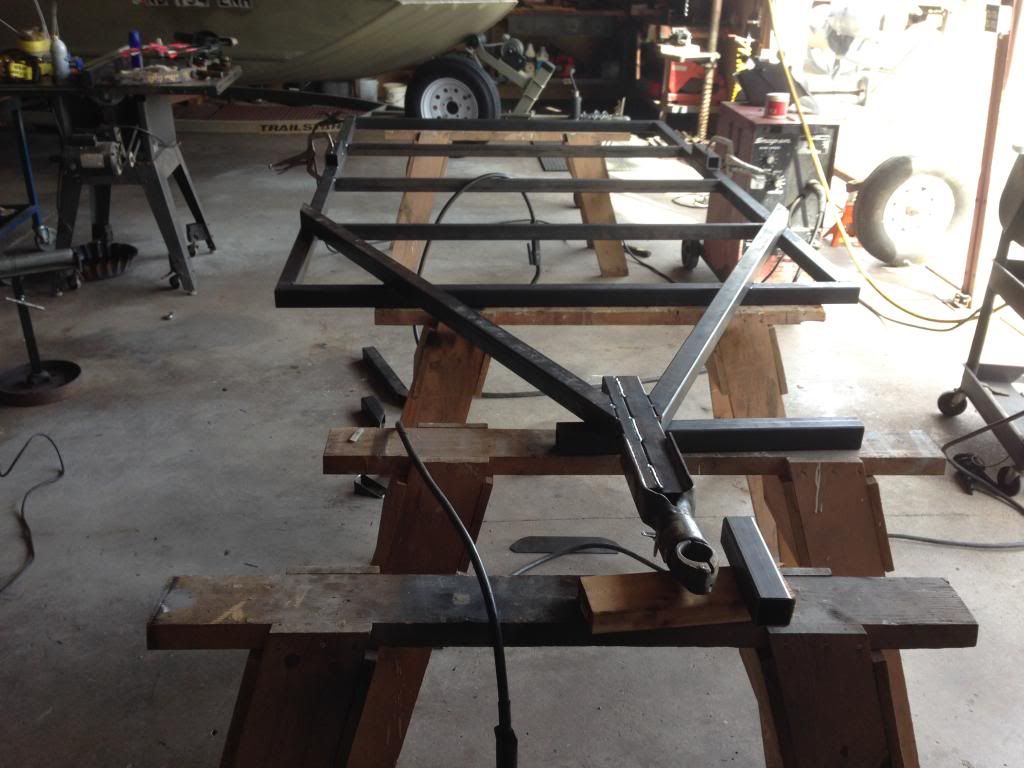
I was given a nice Bulldog coupler, so we used some of the 1x2 and 2x2 tubing to make it work.
A friend of a friend sandblasted the axle for me and put on a couple coats of primer, then I painted it with some underbody paint. Here it is mounted up, I was putting primer on the trailer.
The gussets were added for bolting the camper to the trailer. If I want, I can removed some bolts and have a blank trailer.
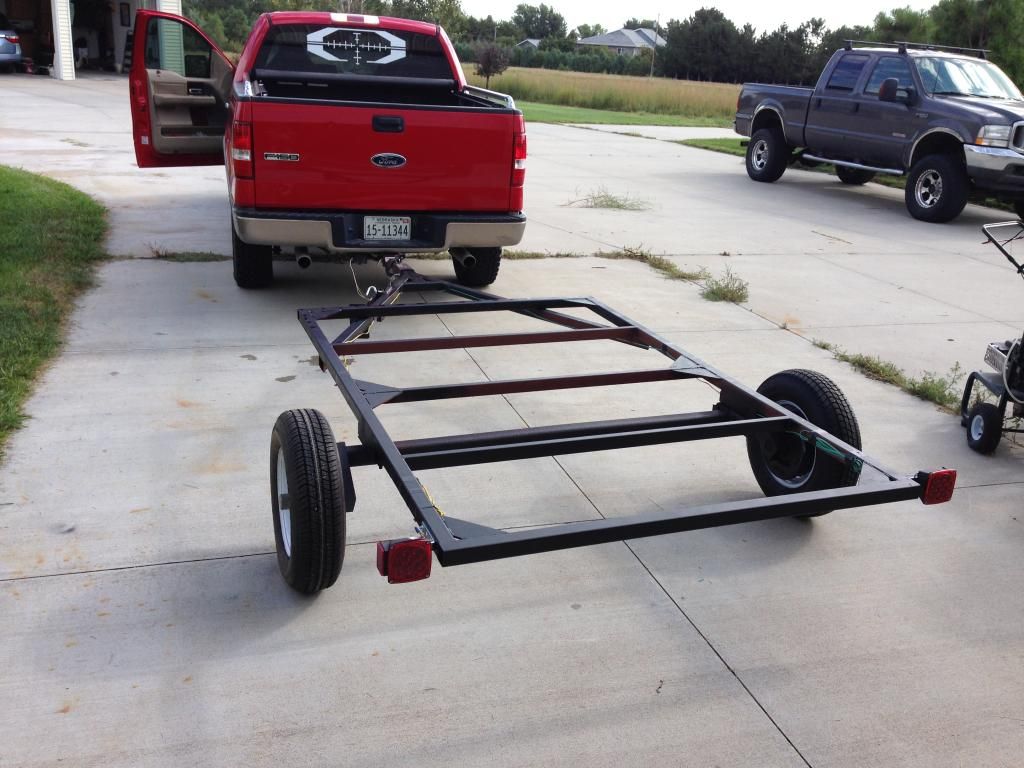
Here it is all painted up with the lights wired
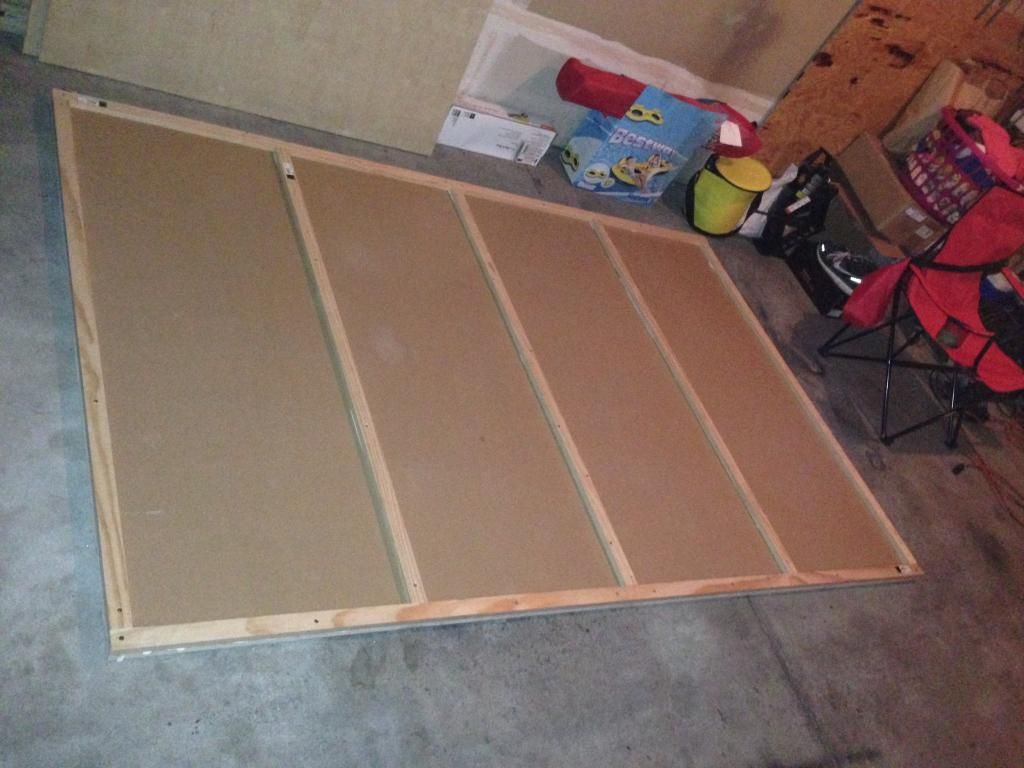
Here is the floor of the camper. I used 3/4" birch plywood with 1x2s. I don't have pictures but the underside was then coated with roofing tar and insulation was cut to fit.
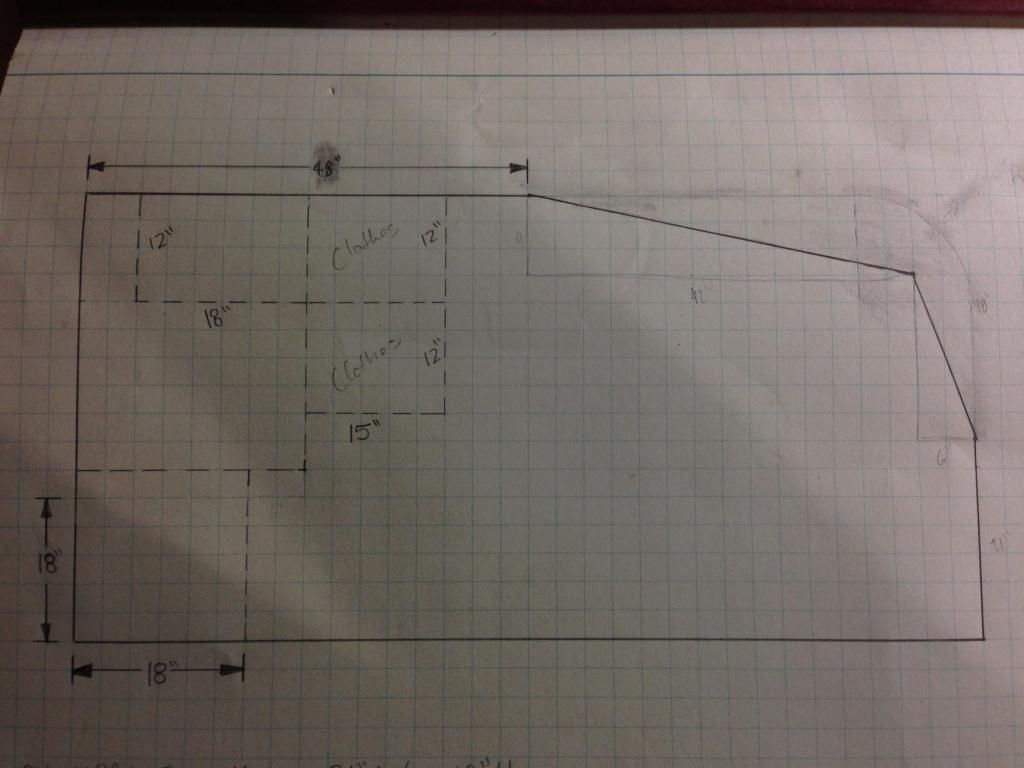
This was my initial design
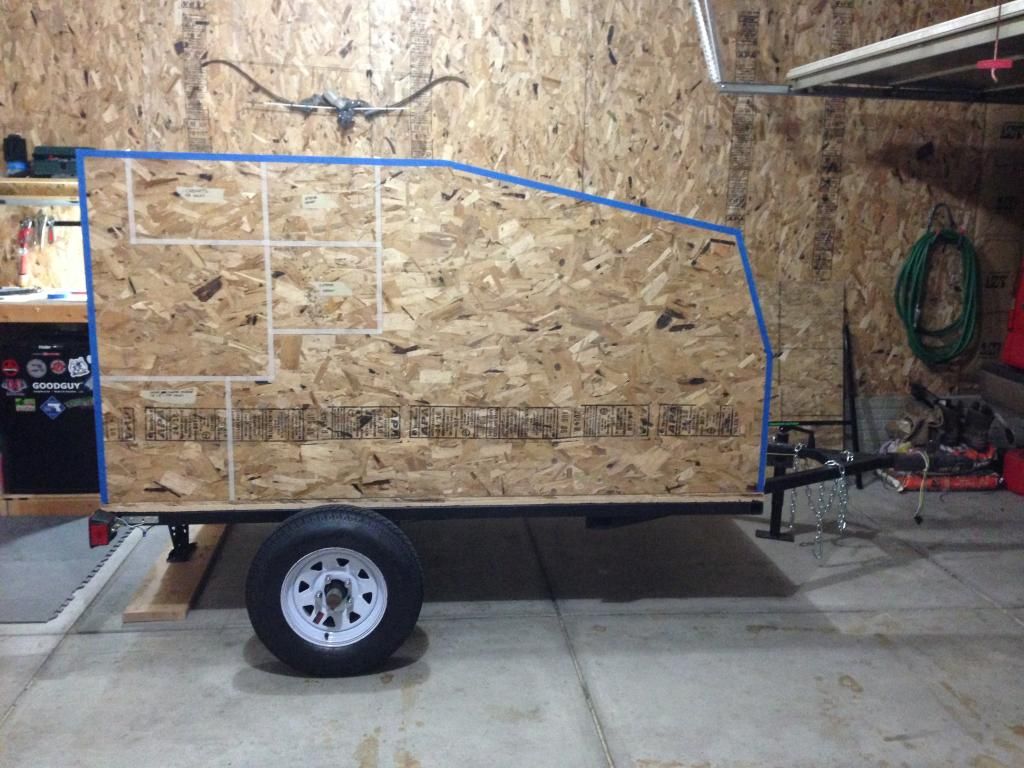
I liked to profile so I mocked up a wall with some OSB I had left over from another project. I wanted to make sure I like the profile full size.
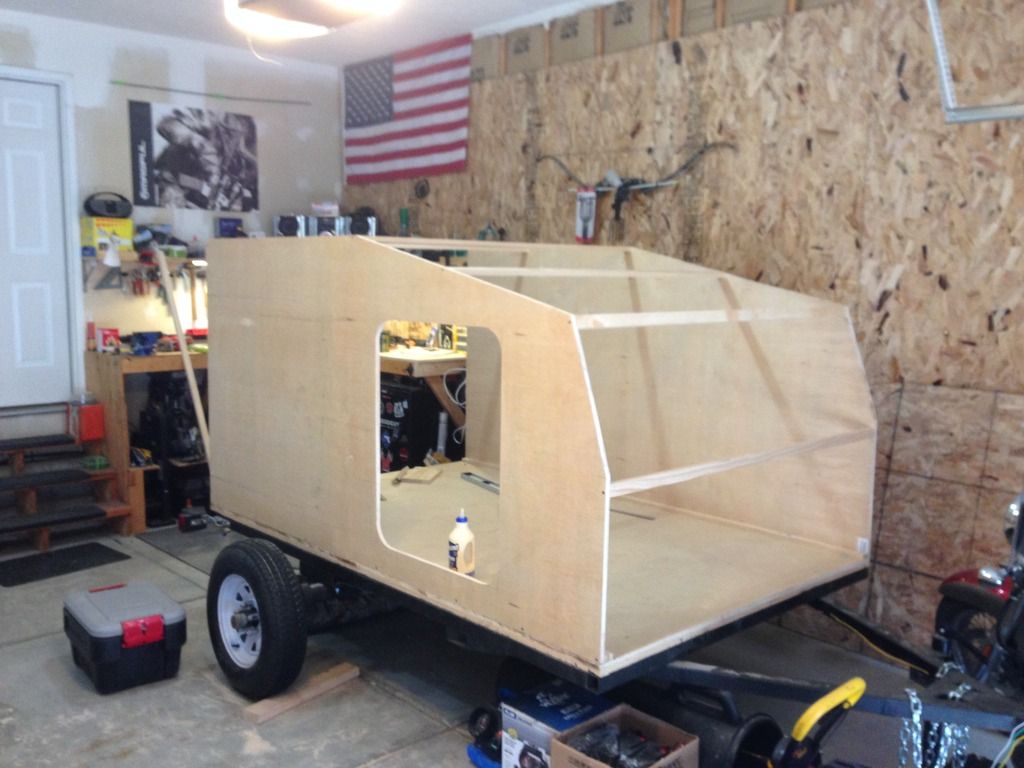
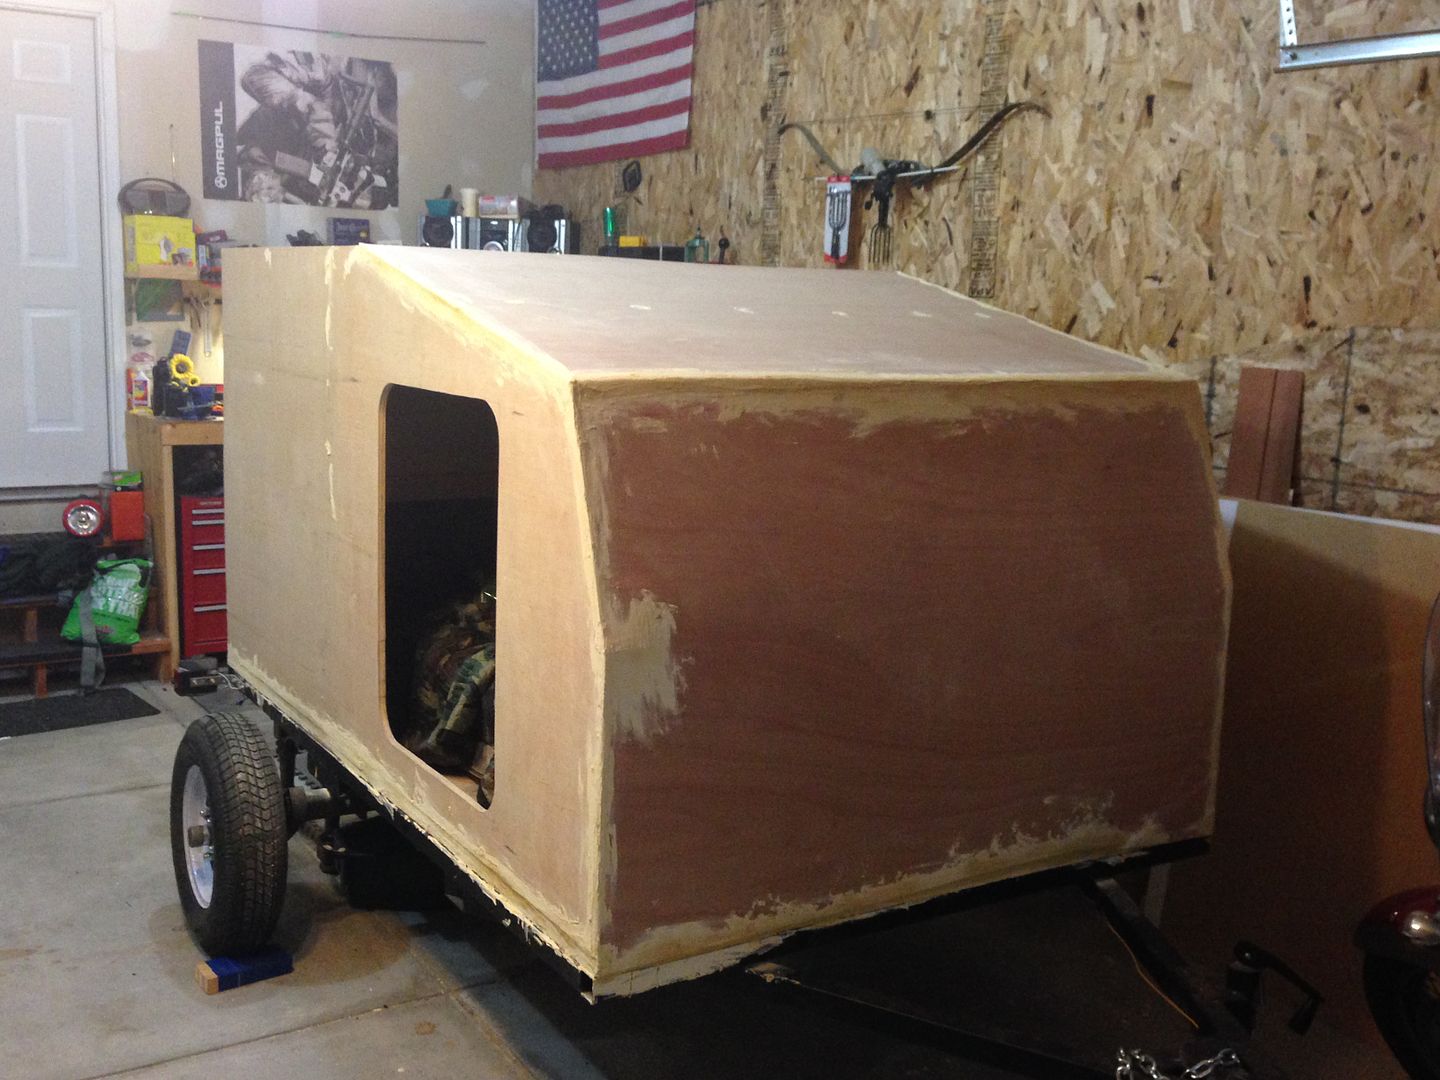
I liked the profile so that I what I was sticking with. I didn't get pictures of this process either (difficult to do all by myself), but I got the walls cut, and the door cutout and then put the walls up.
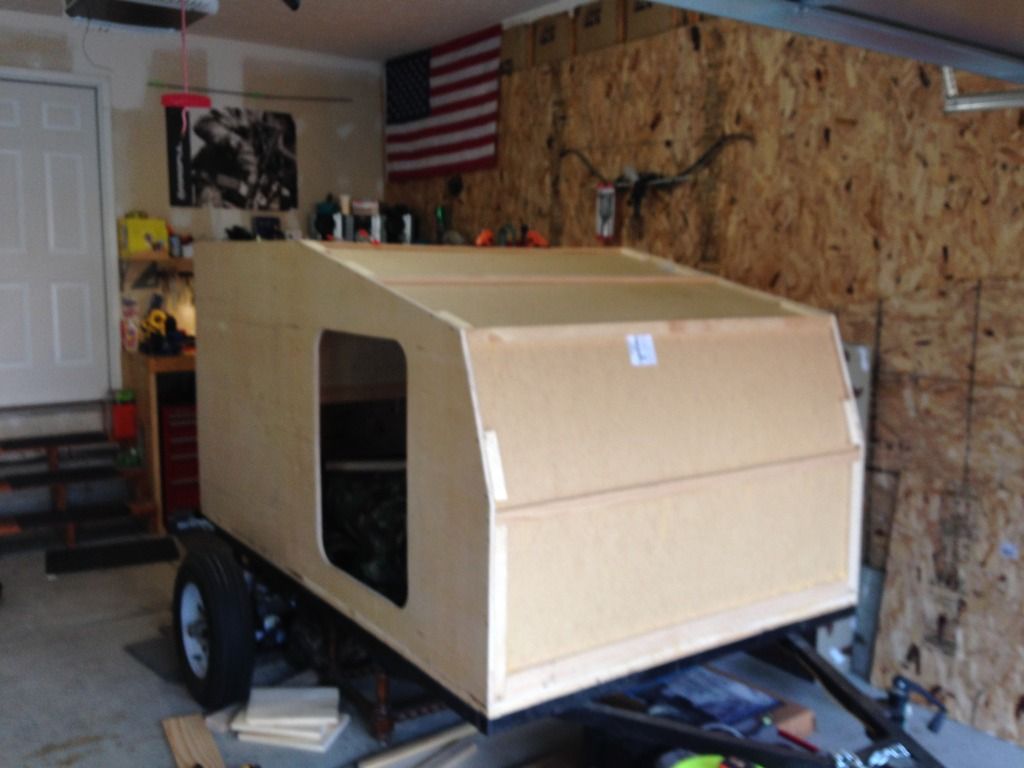
I got cabinets built and installed, a divider installed, and some other small things that I didn't get pictures of. Then I skinned the interior with hardboard. Admittedly not the best choice, but it was cheap and that's what I was going for.
Then I used some foam insulation boards that I cut to fit, and then covered with 1/4 luan. After that I covered all the seams and screws with some waterproof wood filler.

It all started when I found this axle on craigslist. It's a 2000lb torsion axle that someone was selling. Grabbed it for $20 and other than being rusty, it was in good shape.

Then with some help I built the trailer frame. It's a 5x8 trailer, I wanted something small yet large enough to be comfortable to sleep in with my wife.


I was given a nice Bulldog coupler, so we used some of the 1x2 and 2x2 tubing to make it work.

A friend of a friend sandblasted the axle for me and put on a couple coats of primer, then I painted it with some underbody paint. Here it is mounted up, I was putting primer on the trailer.

The gussets were added for bolting the camper to the trailer. If I want, I can removed some bolts and have a blank trailer.

Here it is all painted up with the lights wired

Here is the floor of the camper. I used 3/4" birch plywood with 1x2s. I don't have pictures but the underside was then coated with roofing tar and insulation was cut to fit.

This was my initial design

I liked to profile so I mocked up a wall with some OSB I had left over from another project. I wanted to make sure I like the profile full size.

I liked the profile so that I what I was sticking with. I didn't get pictures of this process either (difficult to do all by myself), but I got the walls cut, and the door cutout and then put the walls up.

I got cabinets built and installed, a divider installed, and some other small things that I didn't get pictures of. Then I skinned the interior with hardboard. Admittedly not the best choice, but it was cheap and that's what I was going for.

Then I used some foam insulation boards that I cut to fit, and then covered with 1/4 luan. After that I covered all the seams and screws with some waterproof wood filler.


")