K5 Camper. My offroad home away from home.

zoomad75

K5 Camper guy
Cool, I've been waiting to see more of this truck for a while now, basically since you guys dragged it home. I'm super envious of the camper too. It's a perfect rig when correctly built.
Thanks!

I'd be interested to hear which unit you end up going to, as my buddies and I mostly use frs band, which I believe gmrs radios cover, but I'm also interested in ham. We've had terrible luck with CB range in the Virginia mountains.

I'm looking at this one: Anytone AT-778UV. I have not bought it yet so I wouldn't consider it a review.
 

Rush4x4

New member
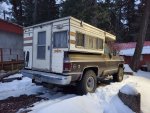
Hey Zoomad! I love your threads, but the stripped down version is pretty cool, too! I haven't worked on mine in a while. My job transferred me to New Mexico and I only got it up here last weekend. I'm about halfway through with a full rewire, then I hope to get out and use it again. Waiting to see if I paid enough taxes this year to get some parts so I can join the big block crowd! Here she sits in the snow...
 

Attachments

  • 20200209_175312_resized.jpg
    20200209_175312_resized.jpg
    1.2 MB · Views: 77

zoomad75

K5 Camper guy
Hey Zoomad! I love your threads, but the stripped down version is pretty cool, too! I haven't worked on mine in a while. My job transferred me to New Mexico and I only got it up here last weekend. I'm about halfway through with a full rewire, then I hope to get out and use it again. Waiting to see if I paid enough taxes this year to get some parts so I can join the big block crowd! Here she sits in the snow...

Hey dude! It's been a while, glad to see the K5 made it through the job change and move. Been through that before and had to thin the heard because they would only pay to move so many.

Keep at it on the refurbishing. It's worth it in the end that's for sure. It's always cool to see another one in use.
 

nitro_rat

Lunchbox Lockers
I just found your build on Wander the West and read it through. Great work on resurrecting that camper!

How does the pop up work? Thinking it would be easier for me to build one than to find one to restore, I could for sure do a better job of mounting it up if I sacrificed a stock top for the flange...
 

zoomad75

K5 Camper guy
I just found your build on Wander the West and read it through. Great work on resurrecting that camper!

How does the pop up work? Thinking it would be easier for me to build one than to find one to restore, I could for sure do a better job of mounting it up if I sacrificed a stock top for the flange...
The pop-up is pretty simple. Basically there's a bi-fold panel on each end with 3 hinges. One hinge on the bottom, one on the top and one in the middle connecting the two panels together. Push the top up and the panels unfold flat and hold that each end up. FWC hasn't changed the design since the beginning except for using better materials than thin masonite or plywood.

Personally, it's a cumbersome design that due to the material used in mine is very susceptible to water damage. My front panel was wasted due to the leak it had. I drilled out close to 200 rivets to remove the hinges to replace the rotten panels. Upon reassembly with normal pop rivets I discovered they would not work. The backside of the rivet won't let the panels sit flat when folded or open. So I scrapped the rebuild and used a single solid panel hinged on the bottom that I push into position when I push the top up.

Here's the waterlogged panel when I picked the unit up.
36418293431_746d47728d_b.jpg


Kind of a bad shot, but the panel I put in is back there. I've got some bent conduit to replicate the system. Many on Wander the west have ditched the panels for the conduit for the same reason and they work very well.
 

nitro_rat

Lunchbox Lockers
Wow, that's not anything like what I was expecting! Pretty simple I guess though. All you get in the cab over section is a small shelf when the top is popped?
 

zoomad75

K5 Camper guy
Wow, that's not anything like what I was expecting! Pretty simple I guess though. All you get in the cab over section is a small shelf when the top is popped?
It's no small shelf. That's where I sleep! It's over 6' across and over 4' deep. I'm 6' tall and can't touch both sides at the same time laying down up there. Only downside is the roof don't lift up high enough to all me to sit upright. When I finally get around making a new side skirt I'll increase the height a few inches.
 

nitro_rat

Lunchbox Lockers
It's manual from inside. Check out Tim Morrissey on youtube. He has some good videos on making the conduit lift brackets and rolling your own taller canvas. Zoomad, I guess you've already checked him out!
 

zoomad75

K5 Camper guy
Having never been in one of these I am curious on how the top gets raised. is there a crank or is just manually lifted up from inside?
Real simple. Get in, push the back side up, lock the panel in place. Move to the front and push up, lock in the front panel.

Lowering requires a slight push up again to release the lift panel and then lower.

It's a reason not to put a bunch of crap up there because you got to lift the whole thing up.

It's manual from inside. Check out Tim Morrissey on youtube. He has some good videos on making the conduit lift brackets and rolling your own taller canvas. Zoomad, I guess you've already checked him out!

I've followed Tim for a while. I've talked to him through his build over on wow and on YouTube. He's the source for me upgrading in both of those areas.
 

zoomad75

K5 Camper guy
Working on some little upgrades to the rear bumper. First, a quick look back to see what I'm dealing with.

47201569331_3cd9543629_b.jpg


We did not cut the back of the frame rail shorter to tuck the bumper closer to the body. Without doing that the gap between the inside edge of the bumper and the rear of the body and camper is pretty large. While not large enough to swallow one of my size 15 gunboats, but my wife's smaller feet could easily fit in the gap to horrible results. The 2" width of the bumper isn't a wide landing pad for a foot getting into or out of the camper. Some kind of closeout panel is needed. K5 guys know there's a filler panel on stock Blazers that fills the gap between the rear bumper and tailgate, but that would only cover half the current gap and not be nearly sturdy enough to support standing on. I got with one of my guys at work that has his own plasma table and set of dimple dies and took some measurements.

He cut it over the weekend and I brought it home after work today. The plate fits perfectly. He nailed it for sure. Once welded in there will be 6 total inches of total depth to step on.
49582203711_06fc625614_b.jpg


The notch cut for the latch is right on and allow lots of room for the bail to latch on and off the catch for it.

49582436707_a5b79cf0d1_b.jpg


We are going to work up a table for the backside of the spare tire carrier. More dimple dies to come.
 

zoomad75

K5 Camper guy
I took advantage of a warm Sunday to get my new HAM radio installed into the K5. Installation isn't much different than any other mobile radio but the Ham pros and the instructions highly suggest running the power and ground wires all the way to the battery to reduce RFI into the radio. So I used that as an excuse to clean up some wiring at the auxiliary battery.

First off was finding a place to put the radio. I thought about bolting it to the front of the Tuffy console but after messing with it I decided to go to the dash with it. So to be true to the great CK5 fabricators I broke out the blue sharpie and marked where the mount needs to be and punched a couple of holes with my drill. (note to any guys with 90-91 electric speedo clusters- remove the DRAC module before drilling as it sits right above the target)
49606709676_0c3e5c0597_b.jpg


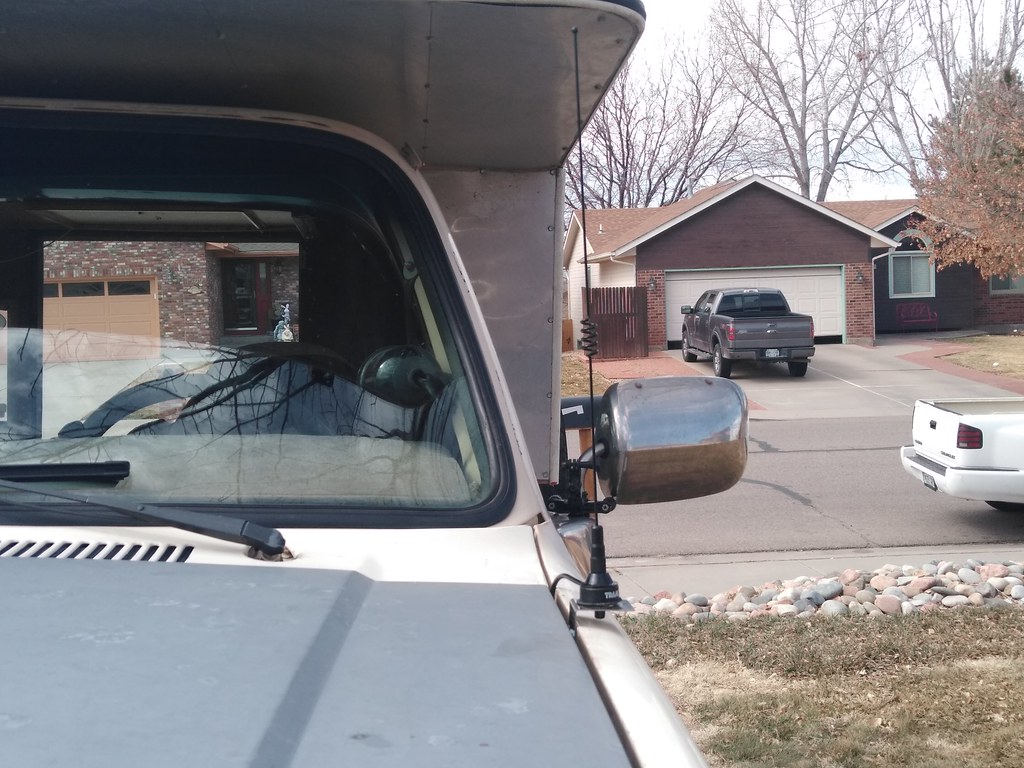
I put another hole in the firewall to run the antenna, power and ground wires. A 3/4" hole saw is perfect as it's the same size as the barrel on the antenna coax connector. I added a grommet for protection as well and set to mount the antenna on the driver side fender. My antenna cable (NMO mount) came with a simple stainless steel 90 degree bracket that fits right inside the fender. It zipped right in with some self tapping screws.
49606959452_82cd93ab74_b.jpg


The mount is pretty low profile.
49606708341_1e8560acd7_b.jpg


49606959462_3a8acf21cf_b.jpg


Thanks to the squarebody's tight body gap tolerances the mount clears the hood with room to spare.
49606197523_b739b68887_b.jpg


49606197358_29e0ae7388_b.jpg


49606706046_6bfbf97177_b.jpg


Since the power and grounds needed to run to the battery I added in a couple of buss bars I picked up at the junkyard off of early GMT400 trucks. I had too many single ring terminals stacked up on the battery clamps and felt this was a good time to clean it up. The positive bus bar is fed with a heavy gauge wire with an in-line fuse holder and 20 amp fuse. The ground side was given the same treatment, allowing future expansion without too much issue.
49606196658_d29d122951_b.jpg


The radio in it's mount powered up.
49606706256_9c8f9d36a9_b.jpg


I played around with it a little by using my Baofeng handheld to confirm the system sends and receives on any channel I tune them too. Sounds good and clear. Called my buddy Bill and we will get together and give our radios a try out next weekend. I was able to unlock the GMRS bands pretty easily too. Programming frequencies is proving to be a pain in the rear for a Ham noob like me. I've downloaded 5 different versions of the programming software to my laptop. Three are from Anytone, one from Midland and another from Retivis as they all sell a similar version of the same radio. The Anytone versions kept giving a version error even though I found 3 different versions (one coming from a Russian Ham forum that seemed sketchy, but multiple YouTube reviews called it out as the only choice).

I'd use Chirp as the way to program the radio, but Chirp does not support this radio yet. So with all the google-**** looking for the Anytone software one company kept coming up in the results for another option through a company here in Colorado that has developed software to program this radio. It's a pay to play deal and they take it one step further in making the cable they sell the only one that works with the software. There went $12 on the stock programming cable when I bought the radio. I bought the kit tonight with the cable. I thought I'd try the new software with the cable I already have and can confirm, it doesn't work so I'll have to wait for the other cable to arrive.

Meanwhile, I'll work on loading the frequencies I want to store on the radio while I wait. I'm studying for the Ham exam too.
 
Last edited:

zoomad75

K5 Camper guy
Had a productive day with the truck. Nothing major mechanical but more arts and crafts. I did go out with my buddy Bill and tried out our radios on the GMRS bands. We took off west past the local reservoir and spread out quite a ways without any loss of signal. I took off into the open space area that leads out to where the river starts filling the lake. The trail winds around and drops into little creek crossings and back up again. Bill stayed by the highway and I kept going further down the trail to check our range. We were able to stay connected 2 1/2 miles with the difference in elevation and no line of sight at all. Plus Bill rang Larry on his phone over in Pueblo West about 8-10 miles as the crow flies from us and he got on his Baofeng and we were able to talk clearly to him as well. I just need to get lined up with a local club to take my test soon.

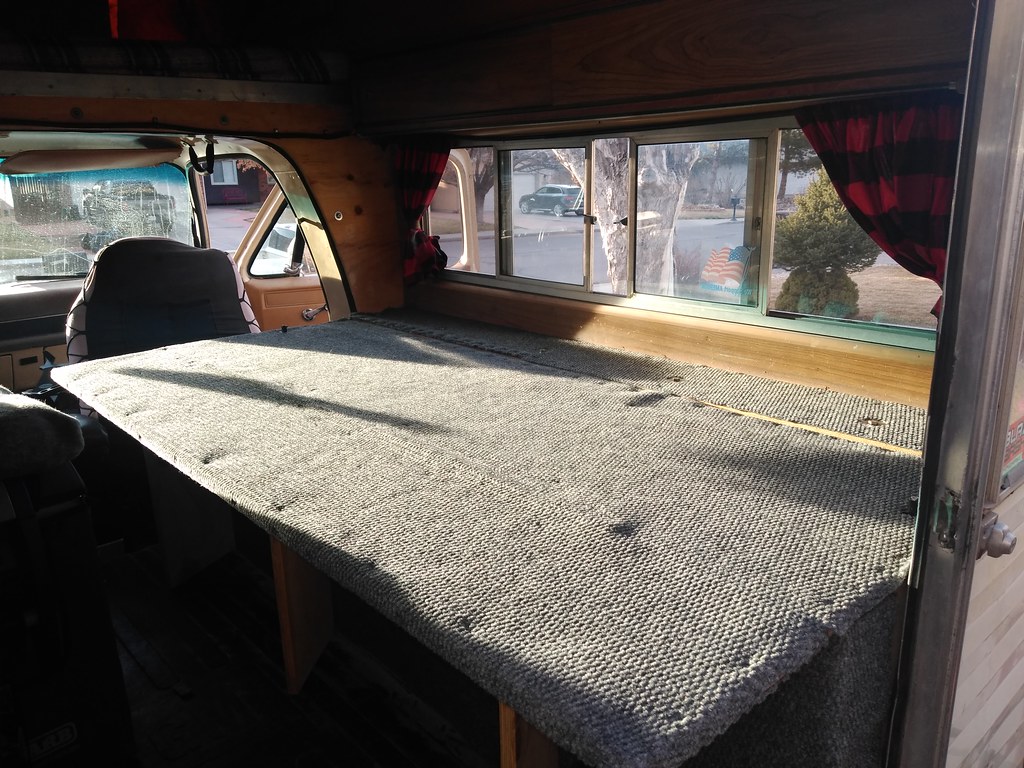
On the arts and crafts side I went ahead and lined the lower bench with some outdoor type carpet. I got a 6'x8' section at Lowes and with my son's help we chopped it up to fit. A can of spray adhesive and a few staples later and we've got an upholstered bench. We won't be going into the upholstery business anytime soon, but it's good enough for who it's for.

49636805398_6d7fb5824f_b.jpg


49637329626_2818ab7d53_b.jpg


49637602662_8ba2039ed0_b.jpg
 

Forum statistics

Threads
188,130
Messages
2,902,490
Members
229,582
Latest member
JSKepler
Top