jnelson4x4taco said:
I just built a laptop mount similar to the one offered here:
www.mobilelaptopmount.com
When i mounted it i use the existing bolt hole from the seat bracket and that made it pretty sturdy but i would like to strengthen it up some. I tried using some self drilling screws through the floor and into the side of the tranny hump, but they dont grab enough. Should i try a thicker screw? bolt and nut? lag bolt? butterfly nut? i just cant figure out why the sef drilling screws arent biting. ill post up some pics asap.
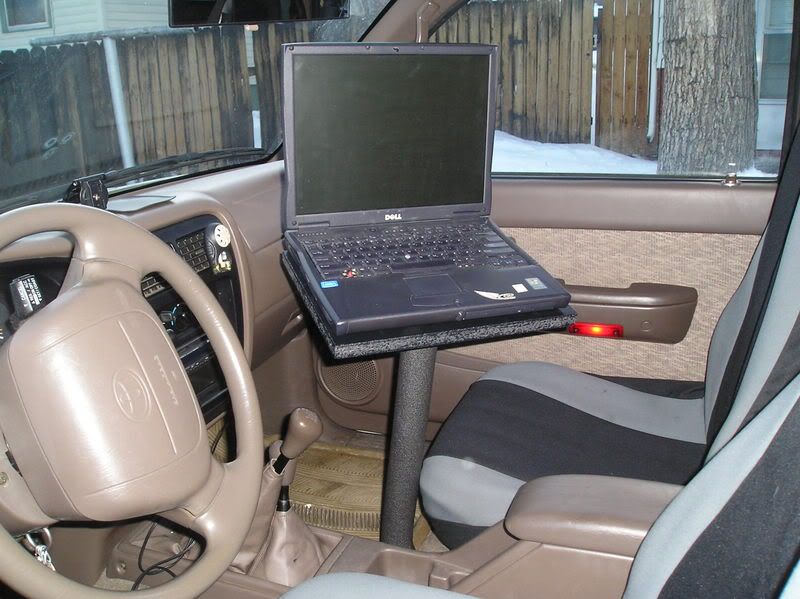
ME TOO! I saw a thread on ExPo about that laptop mount about a week ago, and went straight to Home Depot to get 1/2" pipe fittings, flanges, etc. to assemble the pedistle and wood to make the top. It's raining outside now, so I'll have to wait to get some pics to post up.
jnelson4x4taco said:
Also, any ideas of how to tie it into another point for added stability would be good.
thanks in advance
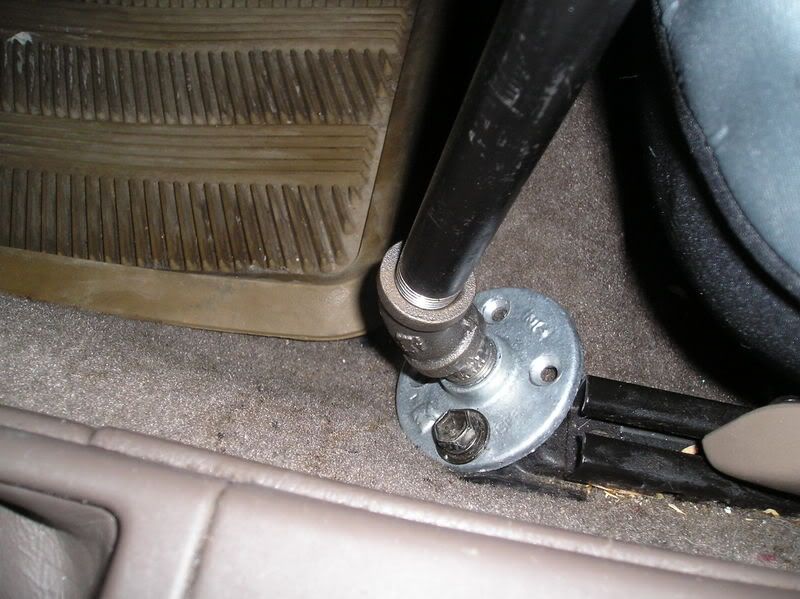
The Tundra has a strange way of mounting the forward bolts securing the front seat, compared to other installations I saw on that website. The forward seat-mount bolts are parallel to the ground, rather than perpendicular to it. My solution was to drill through the floor from under the carpet and secure it directly to the floor with some hefty #12 stainless steel sheet metal screws.
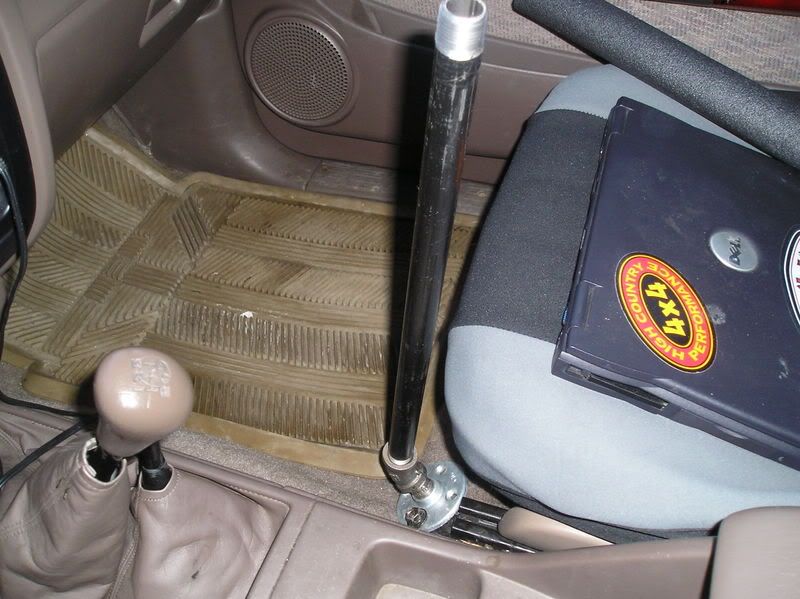
Since I wasn't able to utilize the seat-mount bolt and I still wanted a very secure pedistle (I have always heard that anything worth doing is worth overdoing), I decided to reinforce the mount by having two flanges secured to the floorboard. Figuring that the most stress would be from forward and reverse motion while a laptop was in place above, I put the two flanges in front and behind one another. This also makes less of an intrusion into the leg room on the passenger side than if they were say, at a 45 degree angle from the drive shaft line.
After the foundation part of the project is complete, however, I still notice a little too much wiggling at the table portion and was contemplating why this could be after having such a beefy pedistle system. Then it hit me...
When I pulled back the carpet to mount the flanges to the floorboard, there was some sound barrier/insulation, maybe 1/16" to 3/32" thick, on the floor. I noticed this, because I contemplated putting down some Dynomat (sp?) or similar material as additional sound insulation while having the carpet pulled back. For my first stab at this, I didn't scrape away that material before securing the flanges with sheet metal screws. One possible solution to the wiggle may be to remove the insulation from under the flanges in order to get flange against the metal floorboard directly.
In my Tundra, there is one more convenient way of stabilizing the setup, too. The forward, passenger side of the console, down below the glove box, has a single plastic fastener securing that portion of the console to a metal bracket behind it. I could fabricate a small bracket to connect the two points, adding some side-to-side stability as well.
Anyhow, there's two or three ideas... make sure the insulation is not allowing some flex under the flange, secure it with two flanges, and add lateral stability if possible.
I may go back in at some point in the future and use Scott's suggestion of using bolts and nylock nuts instead of sheet metal screws, but in order to access the area where the nuts would be located, I must temporarily remove a heat shield above my exhaust pipe. This looked very difficult at first glance. There is a buddy of mine with a lift at his shop, so I may go over there and do this another day soon.
A question for you... How are you covering the pipe and fittings? I used the insulation for water lines and wrapped electrical tape around it as evenly as possible. Eventually, I want to get some vinyl that matches my seats and sew some sleeves to cover it up. This will make it look like an OEM install. Until then, the black electrical tape will serve as my finish for the pedistle. Before I finish that, I was going to purchase a second laptop power supply and run the cable up on the inside of the insulation, making it a more clean hook-up. I may also try to conceal the cable of my USB GPS, the same way. I even thought of getting a hands-free kit for my Treo 650 and securing it to the left side of the laptop mount, freeing up my cupholder.
Good luck with your laptop mount. I'll get some pics up as things dry out in Houston and the project progresses.


