slomatt
Adventurer
I've been playing around with high-power LEDs for a couple of years now, and when a friend of mine added a LED hatch light to his 4runner it was too great of an idea to pass up on.
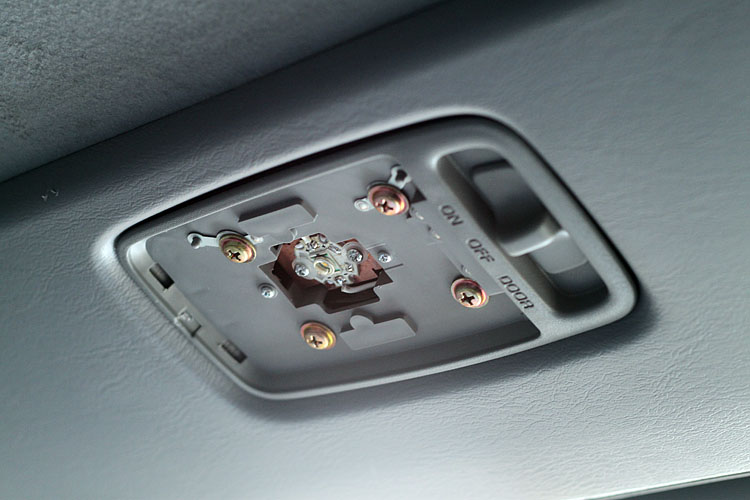
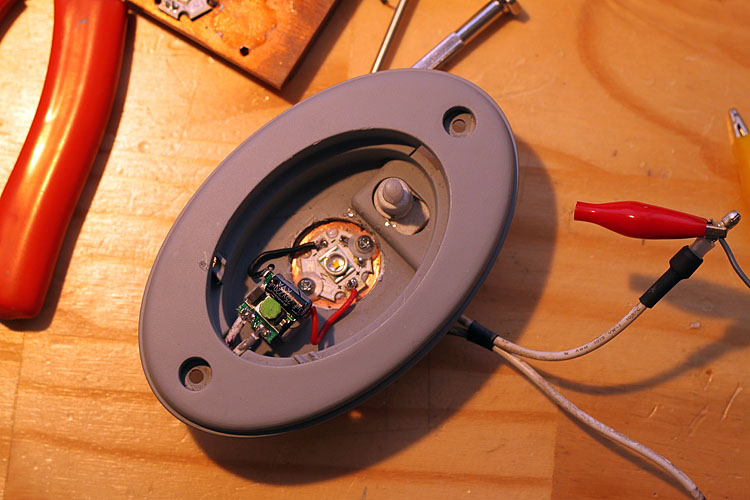
The base parts are a CREE XR-E LED, a current source driver that puts out ~650ma, a spare computer heatsink, and a $7 dome light which used to have a 5w bulb in it. The dome light has a built in switch and is the perfect size, I painted it gray to match the interior.

To test the system I wired up a quick 12v regulated supply and hooked everything up. The driver takes a ~12v input and can drive up to two CREEs at about 650ma. It uses a switching buck circuit and is about 90% efficient. You can make it a little more efficient by removing the 4 reverse voltage diodes but they are surface mount and would be a paid to de-solder.

Here's the final layout. The LED is epoxied to a part of the computer heat sink. These LEDs dissipate a large amount of heat so it is important to properly manage the thermal output.

The heat sink ended up being about 1.5" square.

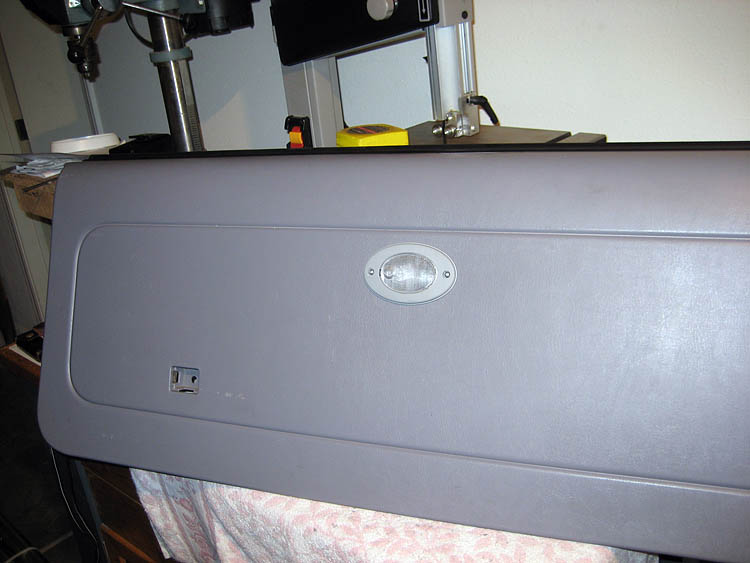
Once the cover is added to the light the LED is hidden. The switch is activated by depressing one corner of the cover.

The "fun" part of the project was wiring the light into the car's electrical harness. I first located a constant 12v wire and then went hunting for a ground that is switched by the rear hatch sensor, this way the light will turn off when the hatch is closed. After an hour of prodding the wires with a volt-meter I found the one I needed, and then found a copy of the wiring schematic for the truck and verified that it was in fact connected to the hatch switch. If anybody is interested the wire is the blue/white one in the middle of the largest connector (applies to 3rd gen 4runners).

I used wire taps to connect to the wires, hopefully these will hold up over time.

After cafefully laying out and cutting the hole (measure twice, cut once), the light was installed using screws and nuts. Here you can see the heatsink on the back, it doesn't get hot enough to damage the sound deadener on the door.

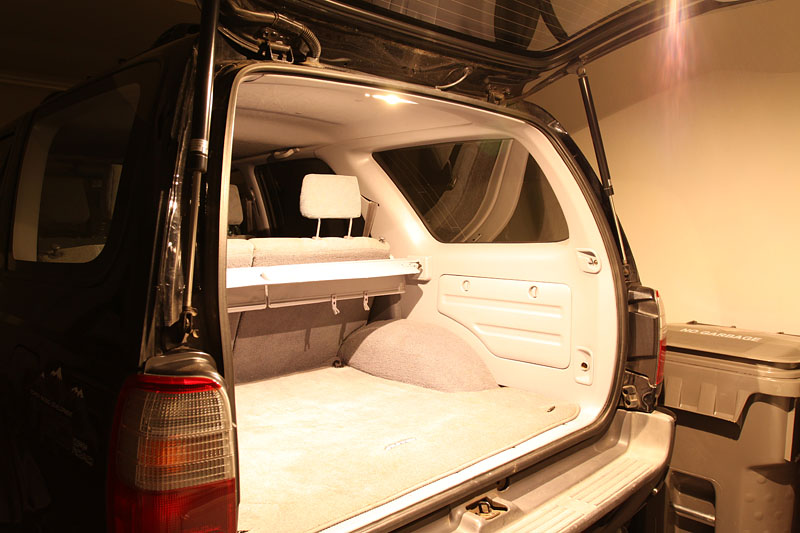
The light is installed in the center of the door and up off the floor so it doesn't get bumped. The gray is not perfect, but matches better than it appears in this shot.
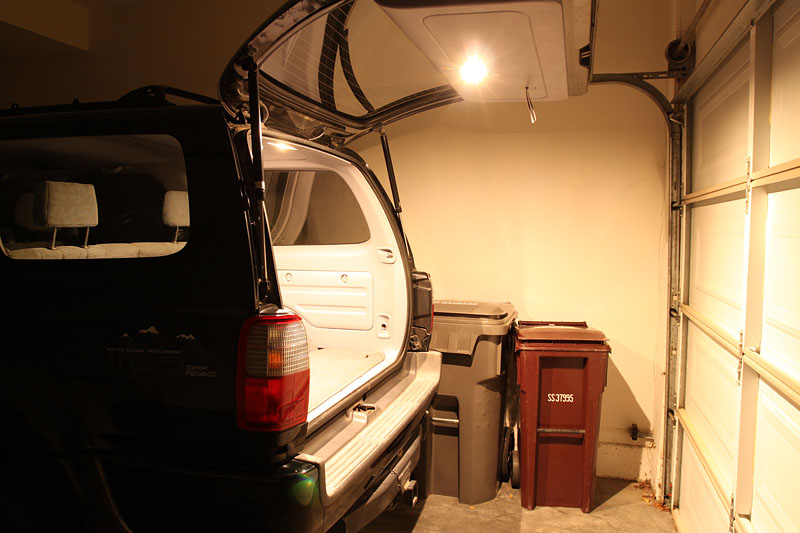
The LED is very bright and does a great job of lighting up the trunk and the ground under the hatch. Since it's only running at 2/3 of capacity it is not glaring and does not completely kill your night vision. We used it last weekend on a camping trip and were very happy with the extra light.

Next up, rock lights! And I'm thinking of adding some LED backup lights that will double as light to help with setting up camp after dark.
- Matt
The base parts are a CREE XR-E LED, a current source driver that puts out ~650ma, a spare computer heatsink, and a $7 dome light which used to have a 5w bulb in it. The dome light has a built in switch and is the perfect size, I painted it gray to match the interior.
To test the system I wired up a quick 12v regulated supply and hooked everything up. The driver takes a ~12v input and can drive up to two CREEs at about 650ma. It uses a switching buck circuit and is about 90% efficient. You can make it a little more efficient by removing the 4 reverse voltage diodes but they are surface mount and would be a paid to de-solder.
Here's the final layout. The LED is epoxied to a part of the computer heat sink. These LEDs dissipate a large amount of heat so it is important to properly manage the thermal output.
The heat sink ended up being about 1.5" square.
Once the cover is added to the light the LED is hidden. The switch is activated by depressing one corner of the cover.
The "fun" part of the project was wiring the light into the car's electrical harness. I first located a constant 12v wire and then went hunting for a ground that is switched by the rear hatch sensor, this way the light will turn off when the hatch is closed. After an hour of prodding the wires with a volt-meter I found the one I needed, and then found a copy of the wiring schematic for the truck and verified that it was in fact connected to the hatch switch. If anybody is interested the wire is the blue/white one in the middle of the largest connector (applies to 3rd gen 4runners).
I used wire taps to connect to the wires, hopefully these will hold up over time.
After cafefully laying out and cutting the hole (measure twice, cut once), the light was installed using screws and nuts. Here you can see the heatsink on the back, it doesn't get hot enough to damage the sound deadener on the door.
The light is installed in the center of the door and up off the floor so it doesn't get bumped. The gray is not perfect, but matches better than it appears in this shot.
The LED is very bright and does a great job of lighting up the trunk and the ground under the hatch. Since it's only running at 2/3 of capacity it is not glaring and does not completely kill your night vision. We used it last weekend on a camping trip and were very happy with the extra light.
Next up, rock lights! And I'm thinking of adding some LED backup lights that will double as light to help with setting up camp after dark.
- Matt