Lightweight Homebuilt Camper for my Tacoma

Raven Rider

Rev. Jerry
Spent the last hour or so reading this thread all I can say is WOW what a great camper this is going to be. BTW I would like to be first in line to buy it whae you decide to build another.
 
What series is it? 5000, 6000 and if I read correctly it is .035. It is 5000 series .032.

How difficult was it to work with being so thin. I found it easy to work with... It is the same stuff used on cargo trailers etc. I cut it with a circular saw with an aluminum blade

I just purchased 7 sheets of .035 5000 series 48" x 144" for my Expedition Trailer build and now I'm thinking I should have ordered .065. For skin on frame construction I personally think 035 is fine... but a trailer could easily carry more weight with ease.

By the way beautiful Craftsmanship on your build. Thanks

Oh and I want to thank you for convincing me to go the 3M tape route instead of Rivets. Yes the tape is super easy to use.... just get it positioned correctly before you start pressing it in place... I found I could pop it off if it just touched down in the wrong position. I am using some type of physical fastener on all edges... mostly RV trim screwed on with self drilling screws for aluminum

ROAM
 
Thanks for the feedback and ideas everyone.

Even though endless "wow good job" replies get tiring to read for those who read through the whole thread in the future.... They certainly help us builders who some days are struggling with little progress for our time commitment...or are solving some of the many challenges of one-off design/builds
 
I have been plugging away off and on.

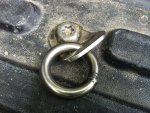
I installed some tie downs on the front truck box anchor bolts.
IMG_2168.jpg

Then I have been laminating the 1/2 inch foam to the 1/16 inch plywood. I think it is going to work perfectly for wall panels. Super light but still enough rigidity, and it adds an extra 1/2 inch of insulation over top of all the frame members... the edges will need some trim bits as they are fragile.
IMG_2197.jpg

IMG_2198.jpg

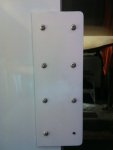
Then I cut out my lift brackets... and painted them .... and installed them... they are through bolted to plates that are welded into the frame... except one side of the back brackets, which I had to screw to the frame due to not enough clearance.
IMG_2201.jpg

IMG_2207.jpg

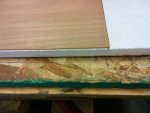
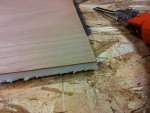
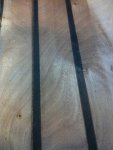
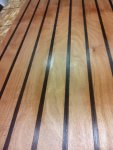
Trying out my light weight flooring idea.... staining stripes in the plywood floor with a dark walnut stain ... then cutting a very shallow kerf with the circular saw on either side of the stripe to make it look like a different piece of wood.... then 3 coats of polyurethane.

This is my test piece. I think I like the boat floor look and the weight added is only the 3 coats of polyurethane.... I only put 1 coat on this test piece.

On the left stripe I used a router and a V groove bit to cut the lines either side of the stripe... on the right stripe I used a circular saw.... the saw cut looks better to me.
IMG_2204.jpg
 
Last edited:
So what is it with us home builders always making more work for ourselves
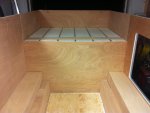
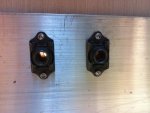
Installed the nutplates for attaching the fridge slide and the fold out counter.
IMG_2211.jpg

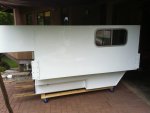
Then put the last piece of the exterior skin on the passenger side after installing the nutplates
IMG_2219.jpg

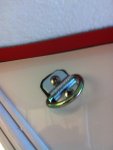
And I put the tie down D rings on sometime ago... bolted to plates welded into the frame
IMG_2215.jpg

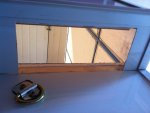
The front one is just below an access hatch
IMG_2217.jpg

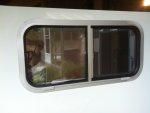
And installed the window
IMG_2221.jpg

IMG_2224.jpg

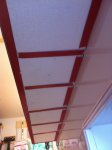
Now working on the last pieces of the interior and then on to the ceiling finish and the pop up canvas..... and the interior build...

These projects do drag on.... I cannot imagine those of you who have been working on them for 2 years or more...... I am looking forward to the completion.

I can see many things that I would do differently if this was a model for sale!
 
Last edited:

roninjiro

Explorer
I can't tell you why... but I definitely have the same issue. I am itching to see yours finished though :coffeedrink:
 
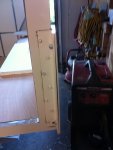
Finished installing the interior panels on the walls today... I will need to install edge trim pieces as I build out the interior
IMG_2232.jpg

Also put my flooring on the floor..... teak and holly! Nothing but the best for this build.
IMG_2226.jpg

Ok... not really... could call it faux teak and holly I suppose.... first coat of polyurethane is on... but still wet in this picture
 
Last edited:
bphang10 the window is from Motion windows..... it looks very well built... but not cheap. I tried and tried to find seitz windows but decided it wasn't worth the trouble as this is my first build... I am still dreaming of my ideal design and I am not finished this one yet... is that a good thing or am I crazy?

Don't answer that!
 

bphang10

Observer
crazy and good. these things are real "projects", they don't progress on their own! i've been at a stage of little visible progress, sanding, filling and sanding all the corner joints.
i'm hoping(and building) this thing lasts forever, but yeah, also realizing changes and improvements as i go.
i looked into the motion windows, decided to go cheaper. they sure look good though, i saw some on a sprinter van last week.
 

Forum statistics

Threads
188,387
Messages
2,904,025
Members
230,274
Latest member
mbauerus1
Top