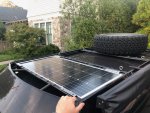
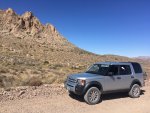
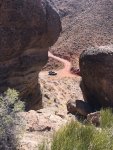
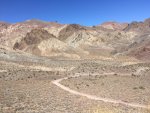
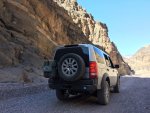
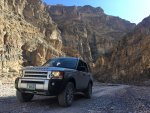
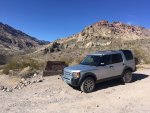
After lurking on here for a long time, I bought an '08 LR3 SE back in April. I've been a closet Land Rover fan since I was a kid – my grandpa had an RRC and then a '94 Discovery I – so roving runs in the family. I just never realized how much fun I'd have with my very own Rover!
I bought it with 60k miles on the clock and have put another 8k in adventuring on it since then. The maintenance records were in order when I bought it, but after so much time on these forums I changed all the fluids, upgraded to the AB transmission oil pan, and did minor things like replacing the front diff breather just to be safe. Maintaining road manners was important to me, so I didn't want to size the tires up too big. After trying to find the perfect load rated tire, I ultimately went with the Cooper Discoverer AT3s in 265/60/18 and have been really pleased with them so far. At the time, there were no K02s in that size for sale in the country, and I wasn't sure about going up much bigger (decided I wasn't interested/didn't need to lift this thing and risk compromising my EAS).
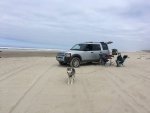
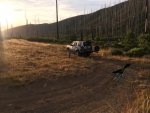
Once I was happy with its condition, I started getting out in the forest and was blown away by the ride quality and how it handled just about anything. I drove it out to the beach a few times, where my wife loved driving it in the sand in spite of me slowly driving her crazy with my newfound Land Rover obsession. A friend who drives a Subaru Outback felt like we were flying down forest roads and said he'd never been in a vehicle that handled gravel roads so well. I relished these minor victories and driving this rig has completely confirmed everything I'd read about this generation of Land Rovers. If I drive it gently I can almost eek out 20 mpg (19.54 is the best tank average so far) and the thing puts a big grin on my face every time it gets off pavement.
When I bought the Land Rover, I decided I would need something to work toward with it – a big goal to justify purchasing the truck – so I decided to prepare for a drive to the Arctic Ocean and am planning to do so next summer. To prepare for that, I've been weighing my options for upgrades and trying to decide what's necessary/feasible/economical. The first priority was arranging a secure, comfortable sleeping area. I started by removing the third row seats to free up some storage space and then took out all the second row as well.
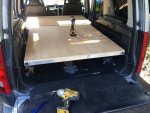
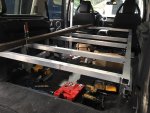
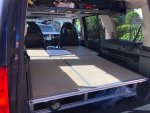
Spending time on these forums and elsewhere, I looked at various sleeping platform and storage options, ranging from simple wood platforms with drawers to elaborate aluminum designs. Ultimately, I decided to borrow elements from Victory's design and showed them to a very capable friend up in Portland. We worked through the design together and he was interested in building it out for me. We made a few changes, largely because I’m 6’7” and we wanted to squeeze every inch of sleeping space out of this thing. The platform bolts directly into the existing frame boltholes and hinges to fold up and down to accommodate the extra length: the finished product is 75” long, plus a few extra inches with the seats all the way forward. A few weeks later, the platform was ready for the finishing touches so we installed it together. The platform is made of aluminum tubing with .5" birch plywood on top and there is a gap for cooler access not depicted above. Somewhere down the line, we're going to put outdoor carpeting on top of the platform to give it a more finished look and reduce some sharp edges. Jeff did outstanding work and watching it come together from a few drawings into a finished product was incredible. Immediately after that I hit the road for Montana for the next piece of the puzzle.
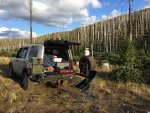
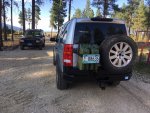
I wanted extra fuel capacity, but was initially trying to avoid getting a roof rack (I’ll probably wind up with one ultimately, but hey…) After hunting around for rear bumpers, I decided to go with one by Casey’s Custom in Montana. I’d placed the order about six weeks prior and the bumper was ready to go. After a beautiful drive on smaller state highways, we arrived in Stevensville, MT to get the bumper installed. Casey did a great job on the bumper and it was a lot of fun to check out all the other cool cars – including at least six other Land Rovers (Series, RRC, DI-III) – he had around the property. He and his wife were very hospitable, and gave us some tips for local camping spots in the area. I put my jerry cans into their new home and we headed for the hills.
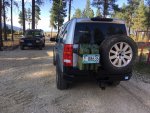
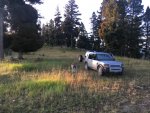
The Land Rover has upped our car camping game tenfold! The sleeping platform was finished in early August and I’ve spent at least 14 nights in it since then, so this thing has already been an incredible adventure companion. What’s next? Modifications seem to be an endless rabbit hole, but I’m looking at the usual suspects: rock sliders, front winch bumper, roof rack, etc. I’m interested in creative uses of the spare tire area and considering ways to make that into a storage area. Trying to find the perfect set up and not bankrupt myself in the process is a delicate balance. My first choice was the Prospeed rack setup for its sleek design and good aerodynamics, but I’d like to get an awning and the mounting seems challenging. The other contender is likely the Eeziawn K9 rack, which would easily mount to their awnings, but doesn’t look nearly as streamlined and I’m concerned about the noise and MPG hit.
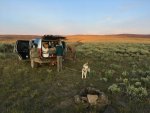
I live in Eugene, OR and just joined the PCRC, the Pacific NW’s Land Rover club. The club seems very active in Portland and Seattle, but I want to get the word out locally, so if anyone's in the Willamette Valley area and would like to do some roving, please hit me up! Thanks for reading – there's more to come!
I bought it with 60k miles on the clock and have put another 8k in adventuring on it since then. The maintenance records were in order when I bought it, but after so much time on these forums I changed all the fluids, upgraded to the AB transmission oil pan, and did minor things like replacing the front diff breather just to be safe. Maintaining road manners was important to me, so I didn't want to size the tires up too big. After trying to find the perfect load rated tire, I ultimately went with the Cooper Discoverer AT3s in 265/60/18 and have been really pleased with them so far. At the time, there were no K02s in that size for sale in the country, and I wasn't sure about going up much bigger (decided I wasn't interested/didn't need to lift this thing and risk compromising my EAS).

Once I was happy with its condition, I started getting out in the forest and was blown away by the ride quality and how it handled just about anything. I drove it out to the beach a few times, where my wife loved driving it in the sand in spite of me slowly driving her crazy with my newfound Land Rover obsession. A friend who drives a Subaru Outback felt like we were flying down forest roads and said he'd never been in a vehicle that handled gravel roads so well. I relished these minor victories and driving this rig has completely confirmed everything I'd read about this generation of Land Rovers. If I drive it gently I can almost eek out 20 mpg (19.54 is the best tank average so far) and the thing puts a big grin on my face every time it gets off pavement.
When I bought the Land Rover, I decided I would need something to work toward with it – a big goal to justify purchasing the truck – so I decided to prepare for a drive to the Arctic Ocean and am planning to do so next summer. To prepare for that, I've been weighing my options for upgrades and trying to decide what's necessary/feasible/economical. The first priority was arranging a secure, comfortable sleeping area. I started by removing the third row seats to free up some storage space and then took out all the second row as well.

Spending time on these forums and elsewhere, I looked at various sleeping platform and storage options, ranging from simple wood platforms with drawers to elaborate aluminum designs. Ultimately, I decided to borrow elements from Victory's design and showed them to a very capable friend up in Portland. We worked through the design together and he was interested in building it out for me. We made a few changes, largely because I’m 6’7” and we wanted to squeeze every inch of sleeping space out of this thing. The platform bolts directly into the existing frame boltholes and hinges to fold up and down to accommodate the extra length: the finished product is 75” long, plus a few extra inches with the seats all the way forward. A few weeks later, the platform was ready for the finishing touches so we installed it together. The platform is made of aluminum tubing with .5" birch plywood on top and there is a gap for cooler access not depicted above. Somewhere down the line, we're going to put outdoor carpeting on top of the platform to give it a more finished look and reduce some sharp edges. Jeff did outstanding work and watching it come together from a few drawings into a finished product was incredible. Immediately after that I hit the road for Montana for the next piece of the puzzle.

I wanted extra fuel capacity, but was initially trying to avoid getting a roof rack (I’ll probably wind up with one ultimately, but hey…) After hunting around for rear bumpers, I decided to go with one by Casey’s Custom in Montana. I’d placed the order about six weeks prior and the bumper was ready to go. After a beautiful drive on smaller state highways, we arrived in Stevensville, MT to get the bumper installed. Casey did a great job on the bumper and it was a lot of fun to check out all the other cool cars – including at least six other Land Rovers (Series, RRC, DI-III) – he had around the property. He and his wife were very hospitable, and gave us some tips for local camping spots in the area. I put my jerry cans into their new home and we headed for the hills.


The Land Rover has upped our car camping game tenfold! The sleeping platform was finished in early August and I’ve spent at least 14 nights in it since then, so this thing has already been an incredible adventure companion. What’s next? Modifications seem to be an endless rabbit hole, but I’m looking at the usual suspects: rock sliders, front winch bumper, roof rack, etc. I’m interested in creative uses of the spare tire area and considering ways to make that into a storage area. Trying to find the perfect set up and not bankrupt myself in the process is a delicate balance. My first choice was the Prospeed rack setup for its sleek design and good aerodynamics, but I’d like to get an awning and the mounting seems challenging. The other contender is likely the Eeziawn K9 rack, which would easily mount to their awnings, but doesn’t look nearly as streamlined and I’m concerned about the noise and MPG hit.

I live in Eugene, OR and just joined the PCRC, the Pacific NW’s Land Rover club. The club seems very active in Portland and Seattle, but I want to get the word out locally, so if anyone's in the Willamette Valley area and would like to do some roving, please hit me up! Thanks for reading – there's more to come!
Attachments
Last edited:

