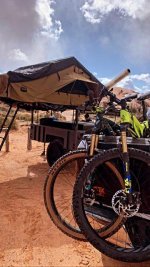
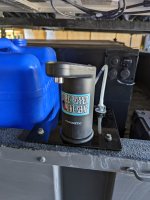
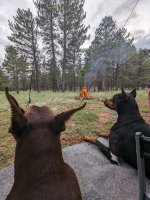
Hello everyone, I recently picked up a trailer and plan to mod it for overland camping. Back in 2012 I did a build thread for a 1988 YJ and had a lot of fun and enjoyed the support throughout the process. Its nice to look back and remember the forgotten details, and see all the help I had along the way. I’m hoping this build goes the same way.
The Trailer
I bought a 2010 Schutt Industries M1102 from GovPlanet and will be modding it for overland camping. The trailer is in great shape and doesn’t appear to have been used more than a few times. It still has the original tires from 2010 and they look brand new. The trailer was originally from the Nevada Guard 17th Sustainment Brigade. They are stationed in Vegas, and that’s where we currently live so it’s a Vegas trailer through and through. The rear left of the trailer has a coded stencil that we used to figure out its last home. I took a look at their patch and its pretty cool so I plan to incorporate that into the build.
I went with the M1102 for a few reasons.
#1. Its Big! Maybe too big, but I wanted plenty of space.
#2 Aluminum. I like the idea of the trailer being all aluminum. Rust isn’t an issue in Vegas, but the whole point of overland camping for us is to get out of Vegas. Knowing the chassis/body will never rust is a pro in my book.
#3 Lug pattern. I have a 2006 Ram with the 5.9 Cummins and the lug pattern on the truck and trailer is 8x6.5. It will be nice to have one spare for both vehicles, or 3 spares for the truck and an immobile trailer if it’s a really bad day.
#4 Durability. Schutt claims that they have never had a chassis failure on one of these trailers. Given the abuse that they see overseas, I think that’s impressive. The trailer is also rated for 4200lbs, but the spindles are for 6/7klbs GVRW, so its overbuilt for sure.
#5 Affordability. In the past, these trailers were very cheap for what they are. People are learning that... A year ago GovPlanet sales averaged $2200-2500. I paid $3700 and this was the third one I bid on. Also, if you go this route be prepared to pay sales tax, GovPlanet fees, and title fees. It cost me almost another $1000 above sale price, include that in your budget if you follow this path.

The Plan
Short term
We purchased a CVT Hybrid Rainier during the 40% off sale in December 2021. We showed up with intentions of just looking, but you know how that goes. The CVT Vegas facility is a cool spot to check out. They have a lot on display, they had their new line on the showroom floor and we got to see it before they released it on the website.
I will be building a rack for the tent and scoured the dozens of pages in the DIY trailer build thread to find inspiration. I am incorporating design aspects from a lot of different builds, but I haven’t seen any done the way I plan to build mine.
As others have before me, I want to mount a truck box on one bed rail, the side that will face camp. This will give us easy access to some storage. The tent annex and entry will be on the other side. My thought is that the tent can be out of the way, and our cooking/living space should face the side we want to spend most time on. It also keeps the tent a little farther from a camp fire and less likely to catch a floating ember.
Tent Rack Design
I want to be able to use the tent annex without much sagging at the bottom. I couldn’t find accurate information anywhere about height requirements so I called CVT and they said 75-80” from ground to tent floor is best. Unfortunately I need to be 76” or less total height to fit in the garage, so an adjustable rack is required.
The most common DIY adjustable rack is telescoping square tube, which I will be doing, but not in the traditional sense. Most builds use near equal length legs for the male/female sections. This wouldn’t work for me for a couple reasons. I want to keep the rack on the bed rails, and I want it to bolt on to keep it removable. I couldn’t build a traditional equal length male/female leg system that kept the tent low enough in to fit in the garage, and high enough to use the annex properly. I spent some time thinking and came up with exactly what I need.
I have a little experience with CAD software, but it’s been a while and most of my modeling was small individual parts, not a large moving system with multiple parts. I’ve used Fusion 360 a bit with my 3D printer so I started there and designed the brackets to mount the legs to the factory nutcerts.


Once I had a good model for the bracket I dove into the rack design. After lots of tweaks, I came up with this.


It will be slow progress for a bit and I wont be able to start building the rack until mid February, but I hope to have the rack finished by March. I plan to paint the trailer as well, I'm not exactly sure how yet, or what color. I'd love some feedback on the rack, this was my first time modeling something like this, and it seems like it will work, but if anyone sees an obvious flaw please let me know before I burn metal and money!
The Trailer
I bought a 2010 Schutt Industries M1102 from GovPlanet and will be modding it for overland camping. The trailer is in great shape and doesn’t appear to have been used more than a few times. It still has the original tires from 2010 and they look brand new. The trailer was originally from the Nevada Guard 17th Sustainment Brigade. They are stationed in Vegas, and that’s where we currently live so it’s a Vegas trailer through and through. The rear left of the trailer has a coded stencil that we used to figure out its last home. I took a look at their patch and its pretty cool so I plan to incorporate that into the build.
I went with the M1102 for a few reasons.
#1. Its Big! Maybe too big, but I wanted plenty of space.
#2 Aluminum. I like the idea of the trailer being all aluminum. Rust isn’t an issue in Vegas, but the whole point of overland camping for us is to get out of Vegas. Knowing the chassis/body will never rust is a pro in my book.
#3 Lug pattern. I have a 2006 Ram with the 5.9 Cummins and the lug pattern on the truck and trailer is 8x6.5. It will be nice to have one spare for both vehicles, or 3 spares for the truck and an immobile trailer if it’s a really bad day.
#4 Durability. Schutt claims that they have never had a chassis failure on one of these trailers. Given the abuse that they see overseas, I think that’s impressive. The trailer is also rated for 4200lbs, but the spindles are for 6/7klbs GVRW, so its overbuilt for sure.
#5 Affordability. In the past, these trailers were very cheap for what they are. People are learning that... A year ago GovPlanet sales averaged $2200-2500. I paid $3700 and this was the third one I bid on. Also, if you go this route be prepared to pay sales tax, GovPlanet fees, and title fees. It cost me almost another $1000 above sale price, include that in your budget if you follow this path.

The Plan
Short term
We purchased a CVT Hybrid Rainier during the 40% off sale in December 2021. We showed up with intentions of just looking, but you know how that goes. The CVT Vegas facility is a cool spot to check out. They have a lot on display, they had their new line on the showroom floor and we got to see it before they released it on the website.
I will be building a rack for the tent and scoured the dozens of pages in the DIY trailer build thread to find inspiration. I am incorporating design aspects from a lot of different builds, but I haven’t seen any done the way I plan to build mine.
As others have before me, I want to mount a truck box on one bed rail, the side that will face camp. This will give us easy access to some storage. The tent annex and entry will be on the other side. My thought is that the tent can be out of the way, and our cooking/living space should face the side we want to spend most time on. It also keeps the tent a little farther from a camp fire and less likely to catch a floating ember.
Tent Rack Design
I want to be able to use the tent annex without much sagging at the bottom. I couldn’t find accurate information anywhere about height requirements so I called CVT and they said 75-80” from ground to tent floor is best. Unfortunately I need to be 76” or less total height to fit in the garage, so an adjustable rack is required.
The most common DIY adjustable rack is telescoping square tube, which I will be doing, but not in the traditional sense. Most builds use near equal length legs for the male/female sections. This wouldn’t work for me for a couple reasons. I want to keep the rack on the bed rails, and I want it to bolt on to keep it removable. I couldn’t build a traditional equal length male/female leg system that kept the tent low enough in to fit in the garage, and high enough to use the annex properly. I spent some time thinking and came up with exactly what I need.
I have a little experience with CAD software, but it’s been a while and most of my modeling was small individual parts, not a large moving system with multiple parts. I’ve used Fusion 360 a bit with my 3D printer so I started there and designed the brackets to mount the legs to the factory nutcerts.


Once I had a good model for the bracket I dove into the rack design. After lots of tweaks, I came up with this.


It will be slow progress for a bit and I wont be able to start building the rack until mid February, but I hope to have the rack finished by March. I plan to paint the trailer as well, I'm not exactly sure how yet, or what color. I'd love some feedback on the rack, this was my first time modeling something like this, and it seems like it will work, but if anyone sees an obvious flaw please let me know before I burn metal and money!


