MB 1120 Coming to America! Purchase, Build and Now Travel!

VerMonsterRV

Gotta Be Nuts
Just watched this video (music is a bit dramaitc, why does everything need to have drama now?). Found it interesting as they were converting a MB firetruck (well one of the trucks was a MB). One thing that jumped out at me as it has been on my mind is they say they replaced the springs and lifted the frame 10cm (I think that is what they said). Does anyone know anything about the frame lift and how/why they did it? Also anyone in the US know a good source for new rear springs, I am now thinking ours might be a bit tired. Oh, they also mentioned doing work on the brakes, anyone know about this also. Ours seem to be good so I am wondering what changes they made.

For a project update, we have been painting the under habitat boxes. Interiors are primed, outsides are done with Raptor bed liner.

 

dwh

Tail-End Charlie
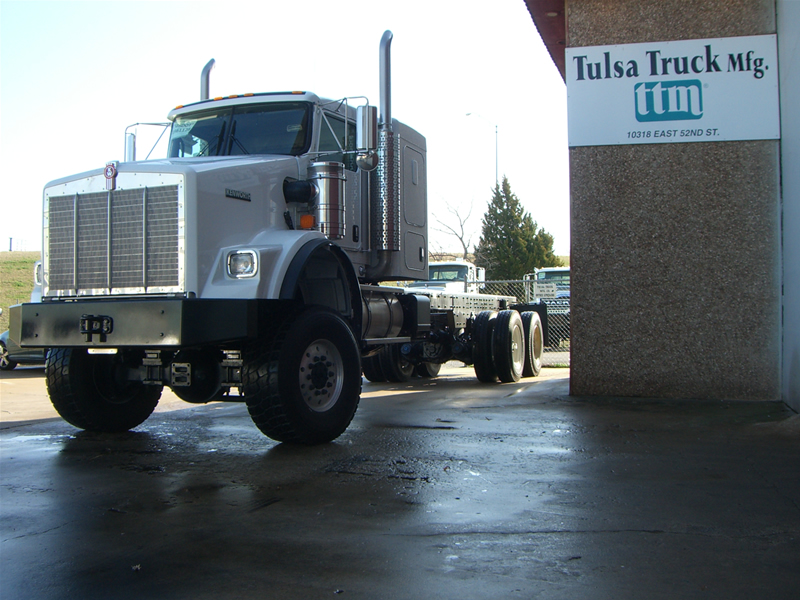
There are ton of heavy duty truck shops. Probably just about any of them could refer you to a good spring shop.

I'd call these guys and see who they get spings from...

https://tulsatruckmfg.com/


KENWORTH.JPG
 

VerMonsterRV

Gotta Be Nuts
There are ton of heavy duty truck shops. Probably just about any of them could refer you to a good spring shop.

I'd call these guys and see who they get spings from...

https://tulsatruckmfg.com/

Thanks, I'll give them a call. I did have one leaf replaced as it was broken when we bought the truck. The spring place that made the replacement could not fabricate the eye ends, I guess that is the tricky bit.
 

Sitec

Adventurer
Just watched this video (music is a bit dramaitc, why does everything need to have drama now?). Found it interesting as they were converting a MB firetruck (well one of the trucks was a MB). One thing that jumped out at me as it has been on my mind is they say they replaced the springs and lifted the frame 10cm (I think that is what they said). Does anyone know anything about the frame lift and how/why they did it? Also anyone in the US know a good source for new rear springs, I am now thinking ours might be a bit tired. Oh, they also mentioned doing work on the brakes, anyone know about this also. Ours seem to be good so I am wondering what changes they made.

For a project update, we have been painting the under habitat boxes. Interiors are primed, outsides are done with Raptor bed liner.


How strange!! I too watched this this morning! What I noticed was that the 'fire truck' was a V6 1222A at the begining.... which ended up as a V8... I'm not convinced they were the same vehicle from start to finish. Interesting none the less. Expensive too!!! Re lifting the frame/springs... Ours truck sits a little low at the front, but I think it's the weight of the crane. However, when the crane has gone and the body is all but complete and on the truck, I plan to poss add 3" to the front of ours (between spring and axle). I also plan to try and match the rear springs to the finished weight.. by removing the excess leaves that are not needed... No point in having 12 tonne suspension if there's only 5 tonnes on the rear axle. I have however got to do more research on this and see what it drives like when finished.
I also wasn't a fan of their body pivot point being well above the chassis. Doesn't seem right to me... There is another thread on here which is discussing this in length. It was also interesting seeing/reading Pairospam's tests on Merkabah in his thread. Following it all closely! :)
 

VerMonsterRV

Gotta Be Nuts
How strange!! I too watched this this morning! What I noticed was that the 'fire truck' was a V6 1222A at the begining.... which ended up as a V8... I'm not convinced they were the same vehicle from start to finish. Interesting none the less. Expensive too!!! Re lifting the frame/springs... Ours truck sits a little low at the front, but I think it's the weight of the crane. However, when the crane has gone and the body is all but complete and on the truck, I plan to poss add 3" to the front of ours (between spring and axle). I also plan to try and match the rear springs to the finished weight.. by removing the excess leaves that are not needed... No point in having 12 tonne suspension if there's only 5 tonnes on the rear axle. I have however got to do more research on this and see what it drives like when finished.
I also wasn't a fan of their body pivot point being well above the chassis. Doesn't seem right to me... There is another thread on here which is discussing this in length. It was also interesting seeing/reading Pairospam's tests on Merkabah in his thread. Following it all closely! :)
Pretty interesting they went through the time/expense to swap the truck cabs. The guy really wanted the extra cab size! Actually looked like a nice size as long as it would not impact the habitat size. Funny you mention removing some leaves, I thought the same thing about our truck and now with the weight of the lift/spare tire/motorbike I am now thinking the springs are shot. It is already resting on the helper spring pack so I am thinking they need to be replaced. With the block (it is a cast part) that is already between the axle and the bottom of the spring pack is it common to add another spacer?

I especially liked the drama around removing the fire box. We did ours with a couple of guys helping, a bottle jack and some wood blocks. Off in a few hours with the internal water tank and pump still installed.

By the way, really liking all your steel work, wish I had the skill and space to do that.
 

VerMonsterRV

Gotta Be Nuts
Just finished reading your story. Great build. Trying to get to expo east. I will try to find you, would be great to see in person. Cheers. Tim
We will be in the DIY build showcase. They have also asked we participate in the "Build vs Buy" round table. Otherwise we will either be wandering around or showing the truck. Feel free to stop in.

Got some more recent progress photos to post tonight when we are finished "work".
 

jappie

New member
We will be in the DIY build showcase. They have also asked we participate in the "Build vs Buy" round table. Otherwise we will either be wandering around or showing the truck. Feel free to stop in.

Got some more recent progress photos to post tonight when we are finished "work".
Hope to see you guys ! just bought my tickets, looong drive for me !

Jean-Pierre
 

VerMonsterRV

Gotta Be Nuts
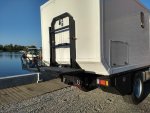
The under storage boxes are now painted and mounted. 2 of them will need to come off again to have a few holes drilled (propane and heating), but I wanted them on to align the holes with the floor. Also the gray water tank is mounted and plumbed up thru the floor. Still need to wire in the new tail lights.
IMG_20190923_171539213_HDR.jpg
IMG_20190923_171514650_HDR.jpg

The solar panels are now completely bonded down and have the glands for the wire to penetrate the roof bonded in and wired. All that is left with the solar setup is to connect the wires to the charge controller and the wires from the charge controller to the batteries (all in the battery box). Might do this tomorrow.

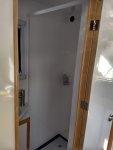
Got the Nautilus retractable shower screen installed and the shower faucet.
IMG_20190923_171848070_HDR.jpg

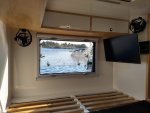
Finally got the swing arm for the computer monitor mounted. It took a little custom work but it now works just like I wanted it to. Also mounted/wired the last 2 fans in the bed area. The monitor will be viewable from sitting on the bed and sitting in the dinette. It will be mainly used to watch movies and it hooked to an Android TV. The swing arm was made for up to a 55" TV (if I am remembering right) so is pretty stout, plus it is thru bolted.
IMG_20190923_171323899_HDR.jpg

Oh, and I ran the power wire for the rear lift winch. All that is drilling a hole in the floor for the power wires to get to the 12v house panel as I decided to make it easy and use the house bank to power the winch (12v vs 24v for the truck). Thinking we might mount sand track vertical on the back wall along side the lift. We have some steel straps in the rear wall that they could mount to. Will think on that a bit more.
IMG_20190923_080442343_HDR.jpg

Really working hard trying to get it at least livable (lights, shower, toilet) for the long weekend at the expo. Would really like to get the dinette cushions done but we will see, might be a few late nights.
 

VerMonsterRV

Gotta Be Nuts
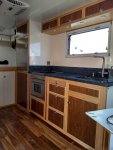
Been working away at some finishing up loose ends. I think the pressurized fresh water plumbing is complete and will test it this morning. Have decided that the shower drain will not work well as a gravity drain so have ordered up a 12v drain pump, so that is on hold for a few days. Finally got the drawer fronts in the galley done and the mirrored medicine cabinet doors will go in today. As of last evening the solar system is now complete and fully wired. The only charging bit left is the battery to battery charger but that will wait till after the Expo. Heather unwrapped the bed and it is now expanding away on the platform. Have ordered up a pair of aluminum sand ladders from Billet4x4. The propane system is now also in and have filled the tank and tested. If we have time before we head to the show we night tackle the ARB awning install.
IMG_20191004_165806534.jpg
IMG_20191004_083958274_HDR.jpg

We also took a day to bring the truck to an "authorized service center" as our new rooftop AC never blew cold air. Compressor would start but no cold. These are sealed systems to no way to check or recharge the refrigerant (got to love that). The only way to get a warranty claim is to have a service center submit it. Well, within a 48 hours the claim was not only approved but the replacement unit is sitting at the service center ready to install. Just need to carve out a day to do it as it is a 2 hour drive each way.
 

Neil

Observer
Jon. Ref the shower drain

We also had drainage issues as the waste tank is under the vehicle at the rear and the shower is up front. There is only about 200mm drop between the two. No chance if you are slightly nose down.
At first I bought one of those boxes with a built in pump to mount a a lower level but it simply wasn't man enough.
The solution I have now works perfectly.

The shower and basin drain by gravity to a Jabsco pump mounted under the floor. This is activated by a touch button ( the sort that opens doors ) in the shower. It runs for 30 second cycles allowing the pump to push the water up to the waste tank. So when the water pools by your feet you tap the button and it's gone, you actually only need to get within 4 cm of the button for it to activate.

Because the pump is fed by two feeds being the shower and the basin I have had to install non return valves in the drain hoses to allow a good suck.

In the freezing temperatures I have a simple biomass drain that sends the water directly to the outside world into a bucket.

Neil
 

Attachments

  • 20161107_105257.jpg
    20161107_105257.jpg
    399.5 KB · Views: 36
  • 20161107_105318.jpg
    20161107_105318.jpg
    689.8 KB · Views: 40
  • 20191005_090637.jpg
    20191005_090637.jpg
    837.3 KB · Views: 40

VerMonsterRV

Gotta Be Nuts
Jon. Ref the shower drain

We also had drainage issues as the waste tank is under the vehicle at the rear and the shower is up front. There is only about 200mm drop between the two. No chance if you are slightly nose down.
At first I bought one of those boxes with a built in pump to mount a a lower level but it simply wasn't man enough.
The solution I have now works perfectly.

The shower and basin drain by gravity to a Jabsco pump mounted under the floor. This is activated by a touch button ( the sort that opens doors ) in the shower. It runs for 30 second cycles allowing the pump to push the water up to the waste tank. So when the water pools by your feet you tap the button and it's gone, you actually only need to get within 4 cm of the button for it to activate.

Because the pump is fed by two feeds being the shower and the basin I have had to install non return valves in the drain hoses to allow a good suck.

In the freezing temperatures I have a simple biomass drain that sends the water directly to the outside world into a bucket.

Neil
Yup, that is very similar setup to our boat and what I ordered last evening. It is on the way and the plan is to leave for the Expo right after it arrives, along with all the bits/tools to install it while we are there. Heather ran the power wires this morning. Actually that is an interesting button, will have to try and track one down. In the boat it is a simple, non waterproof rocker switch. Can't believe it has been installed in the shower stall for 30 years and is still working fine (well, now I did it, better order a new one ;)).
 

Forum statistics

Threads
188,341
Messages
2,905,781
Members
229,959
Latest member
bdpkauai
Top