Mercedes 1222A.. The beginning!

Alloy

Well-known member
Hi Alloy.

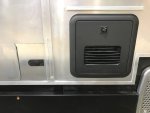
I have used small metal clamps (one every 200mm) for the gas lines. Strangely, the gas fitter who's inspecting and signing off on my work has said that the rules here require a gas shut off tap to be as close to the appliance as possible, so it can be turned off quickly in an emergency. I have installed another tap externally, where the line enters the Hab Box, and all the lines have a clear rubber hose slid over them (this was the hardest part!). I also have some fancy gauge/shutoff valves thet go between the cylinder and regulator that automatically shut off if theres a drastic pressure drop. I think that's another RV requirement here in Oz. Cheers.
Is that the requirement for a RV/vehicle or a home?

Last I checked RVs built in NA the copper needs to run continuous from the outside to the appliance. No requirement for valves.

In a home some places allow the valves to be on a manifold at an accessible location. This is my preferred method. It allows each line to be tested separately. In a panic a shut off valves behind a stove or clothes dryer is useless.

We use to use copper for the diesel lines on trucks. Seen lots of strap clamps wear into copper and flare fittings leak. I've re-wrenched a few flare nuts to stop leaks. Even had cracks at the point where the copper flared out inside the flare nut. Hasn't stopped me from using copper but I'm more careful with it.

My experience is clear hose is PVC or vinyl which cuts easily. For the guard hose I always use heavy wall (6-10mm) fuel hose that I'll split if it is too far from the end. When I've been careless and let the metal line move off center the sheet metal (less than 1mm thick) has cut into the hose. These days I oversize the hole and use urethane caulking, urethane calking around the guard hose or use a plastic strain relief if it is close to the end.

The gas alarm I use turns the propane off if it detects flammable gas. There are sensors below the appliances that can leak gas into the living space.
 

Sitec

Adventurer
Another small job done... I was looking for some non stick surface for the steps, but could only find 6" strips. A neighbour had the idea to look at skate board shops... $40 later and I have 4 non slip pads on the steps and plenty to spare for the next time!!

Final leg 3.jpg

Final leg 4.jpg
 

Sitec

Adventurer
Hi all. So it's been a slow few weeks. Finishing all the little jobs (the one's I'll do when I have to!!). There have been quite a few! The fuel filler hatch needed finishing properly, and the Aqua Go needed the holes drilled for the cover, and a J Gutter rain strip gluing above it...

Final leg 5.jpg

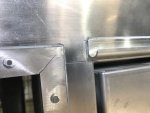
Another job that needed doing was to actually finish the crawl through doors. Making the latches fit thge steel frame and then cladding it all took some time...

Final leg 7.jpg

I've also refitted the rear 'viewing door', so I could fit trim, and a J Gutter above it. Both side lockers now also have J gutter. These allow the door to be open while it's raining and the run off from the side of the hab box does not run into the locker...

Final leg 9.jpg

Once complete, I then have to strip the cab of all it's add on's, along with preparing the workshop for truck painting. All before next month!!
 

Christian

Adventurer
Hi Sitec, I just read through your entire thread again, there wasa lot of updates since I last checked.
Again, great build with a lot of attention to detail. Looking forward to your next update.
 

Sitec

Adventurer
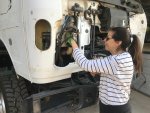
Things have been a little slow here for one reason or another, but this weekend we were back at it. Wifetec has cleaned the last traces of red dust and dirt off our truck, and we have both sanded and de stickered the cab. It's exciting work (not). The time where we have to be ready for paint is looming ever closer! We'll have got the cab all but ready this weekend, and the evenings next week will be spent cleaning and painting the walls of the workshop. I'm half way through painting the walls white, the idea being that it'll help us see better when painting! If nothing else, it's certainly brightening the place up!! :p

Final leg 11.jpg
 

Sitec

Adventurer
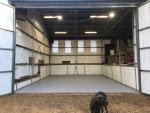
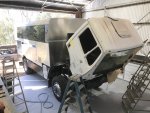
Paint shop or bust!!! The time has come! I have the next two weeks off work, and our truck is hopefully going to change colour!! I said to Nigel our painter that I'd tidy the workshop up and set up the lower bay as a paint booth... I figured by painting the walls white, it'd help with the light situation. That it did!! Wow, I should have painted the walls before starting the build! I can see! Every night for the past few weeks have been spent cleaning and painting sections! Yesterday, Wifetec finished the cab sanding, and came floor painting with me!! Here's the result at 7:30 last night!

Painting 2.jpg
 

Iain_U1250

Explorer
Wow, looks great Simon, we painted our shed white inside as well, made huge difference, and we also installed s trip of LED lights all the way around
Happy painting.
 

RoamIt

Well-known member
Holy fab skills! Dude, I finally made it through the whole thread :oops:.

Ever have a moment when you realize that despite the many, many projects you've done, you're still a newbie? I'm having that moment now...
Amazing work!
 

Sitec

Adventurer
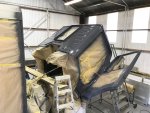
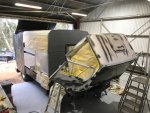
Day 1 of painting. Nigel the painter arrives. After a cuppa and a chat... Nigel likes to chat... I thought I could talk... Nigel is on another level! A plan was formulated. Fix the dents in the cab, fill the holes in the cab and high build prime the fixed spots. Snorkel holes, old badge holes, antenna holes all gone. Filled with weld, flattened, skimmed with filler, flattened and then primed. The hab box door got the treament too as Nigel wasn't happy with the two small dents in it. The plan tomorrow is to finish the cab and then apply a bar coat primer.

Final leg 13.jpg
 

Sitec

Adventurer
Day 2 saw more sanding, filling and prep work. We then applied a tinted etch primer to the back of the cab and the front of the Hab Box.

Final leg 15.jpg

Today had us lightly rubbing down the etch primer and applying the first of the top coat. With the back of the cab abd the front of the Hab Box painted, we can lower the cab and get the whole truck into the workshop again!!

Final leg 16.jpg

I'm really pleased with our colour choice, and the neighbours who have seen it tell me wwe've made the right choice too! :)
 

luthj

Engineer In Residence
Having spent some time in the Aus summer, one could conceivably argue the only appropriate color for a live aboard vehicle there, is white!

What paint system are you using? Single stage hardened urethane, or?
 

Sitec

Adventurer
Having spent some time in the Aus summer, one could conceivably argue the only appropriate color for a live aboard vehicle there, is white!

What paint system are you using? Single stage hardened urethane, or?

I hear you re the colour and heat... but most folk here don't venture far in the full summer. There will be days when we wish we had a white truck, but the plan is not to stay in Oz... We'll do a lap in winter when it's a little cooler, then either ship to NZ or Africa.

Re the paint, I believe it to be a two pack paint.. It's hard, and he needs a special filter, and when we do the whole body, the workshop will have to be closed, and a fancy extractor with filter will be set up in the small door. Had I done it, it'd have just been a simple equipment enamel! :)
 

Forum statistics

Threads
188,151
Messages
2,902,840
Members
229,582
Latest member
JSKepler
Top