Metric TLC 80 Series Leather Seat Restoration

73guppie96

New member
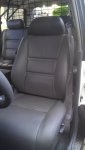
I recently restored the seats in my 1996 FZJ80 with the Metric TLC leather restoration kits. I thought I would post up some tips when doing this so as to possibly help others.

Metric TLC: http://www.metrictlc.com/
Labrak: http://www.labrak.com/

More info on seat kits: http://shop.metrictlc.com/1993-97-80-Series-Toyota-Land-Cruiser-Leather-Seat-Covers-W-01.htm


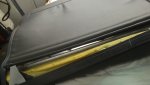
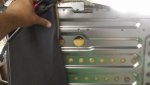
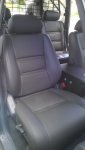
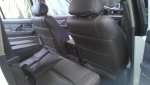
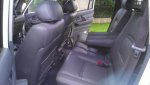
Overall I am extremely happy with the kit. The thickness and quality of the material is amazing. The new seats have really transformed my trucks comfort level. I chose to replace both front seat bottoms and install seat heaters in the front seats. I decided to do the first 2 rows as the 3rd row seats are not used in my truck.

Let me say that I am a total newbie when it comes to doing any type of upholstery work. Because of this and because I am somewhat of a perfectionist, this project took me a long time. That being said, the outcome is worth it. I actually really enjoyed the process as I am usually working with grease or some hot metal. This was a nice change of pace.

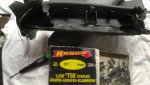
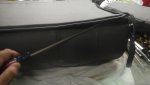
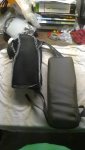
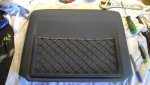
I would recommend that you purchase the hog ring kit and pliers when you order the leather kits. I also opted for the seat back netting rebuilding kits as well as the armrest covers.

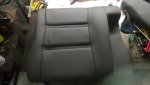
The single most important thing when doing this is to remember: ONE SEAT AT A TIME! This is imperative as I had to routinely go back and forth and compare things from the seat I was working on and how things were put together stock on the other seat. Take your time and be meticulous about how things come together.

I am not going to go a step by step route here as that would be impossible, but will try to cover each area and some of the troubles I ran into.

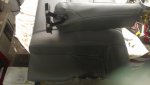
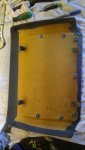
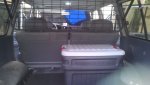
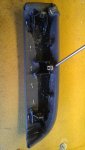
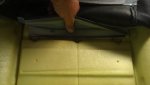
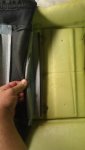
First thing I did obviously was to pull all the seats, and clean the carpets very well. I even had a little helper of mine work with the simple green to clean all the plastic trim that was pulled off. :)
 

Attachments

  • IMAG0500.jpg
    IMAG0500.jpg
    513.5 KB · Views: 63
Last edited:

73guppie96

New member
Headrests

These came together fairly quickly. I started with these as I wanted to start with something fairly easy, LOL. The key here is to view the stock headrest and how it clips together and then compare that to the new cover. The stock cover should just clip off. Notice that when you put the new cover on you need to fold the leather over and tuck it in. The metric tlc kits do a really good job and staying almost exact to the stock configuration so it is easy to see how things come together if you are comparing with the stock setup.
 

Attachments

  • IMAG0506.jpg
    IMAG0506.jpg
    485.2 KB · Views: 42

73guppie96

New member
Armrests

Again, next I did the armrests as to start with hopefully an easier part of the process. I did have some trouble here in getting the staples in. I found that staples were simply not enough and ended up using some 3M spray glue. This worked really well, to the point that staples were only needed in a few spots. The key on these is to get the leather trim line in place first and then lay everything together. In the pic I show where to have the square groove aligned before laying the glue down. If you are able to get this square cutout in place around the metal clip everything should come together in place. I would suggest spraying only the center area, then aligning the armrest on the new leather (align the leather trim line so it curves), let that dry and then spray the rest of it and fold it over where needed.
 

Attachments

  • 904679_10201061878254185_74213206_o.jpg
    904679_10201061878254185_74213206_o.jpg
    188.5 KB · Views: 42
  • IMAG0501.jpg
    IMAG0501.jpg
    466.2 KB · Views: 39

73guppie96

New member
Front Seats

Again, take one seat at a time, and compare. I did the seat bottoms and the seat tops seperate one at a time. The seat bottom will need to be removed completely from the frame. You will need to cut off all the old hog rings. Once you have the new (or old) seat bottom in front of you, you can start placing the leather over the seat.

This is probably the single most important tip I can give for this process. It is very important to get the hog ring hold down bars in place correctly FIRST THING. If you get these in place correctly the whole seat will come together as it should. If you misalign these, the whole seat cover will not overlap on the cover as it should. The pictures show how I carefully aligned these plastic "bars" and placed the hog rings into their stock locations. I worked back to front on these. It is also important to realize that where there are 2 plastic bars they BOTH need to be affixed to the seat bottom. If they are not, the leather will not lay properly.

A note on seat heater elements here. I found it was easiest to place the seat heater elements down with a little glue on the bottom and upper pad. I made a point of laying it into the crevices and just popping small 1/2 holes to have the hog rings go through. On the seat bottom cushion I moved the heater element just forward of the furthest back hog ring crevice as the seat bottom actually goes further back under the seat bottom when assembled.
 

Attachments

  • IMAG0530.jpg
    IMAG0530.jpg
    361.2 KB · Views: 52
  • IMAG0531.jpg
    IMAG0531.jpg
    491.6 KB · Views: 45
Last edited:

73guppie96

New member
Rear Seats

I found the rear seats to be a bit more involved than the fronts. Again, they come apart similar to the fronts but it is important to compare with the other stock seat to ensure everything comes together correctly.

For the rear seatbacks where the armrests lay there are round holes, pictured, that allow the installer to place the hog ring correctly. Take your time and look for where the stock hog rings are placed and ensure you place them where needed on the new leather. This will ensure that everything on the seat cover lays properly.

On the rear seat back covers I had a lot of trouble getting the back clip together. It was really tight! I ended up getting one corner started just barely and then prying and working my way across in order to get everything clipped together right. My hands hurt like hell afterwards.

On the armrest covers I found it is easiest to roll them on backwards. Basically turn the covers inside out and then roll them onto the armrests slowly.
 

Attachments

  • IMAG0537 (1).jpg
    IMAG0537 (1).jpg
    355.7 KB · Views: 41
  • IMAG0536.jpg
    IMAG0536.jpg
    381 KB · Views: 37
  • IMAG0535.jpg
    IMAG0535.jpg
    473.5 KB · Views: 36
  • IMAG0534.jpg
    IMAG0534.jpg
    391.1 KB · Views: 33
  • IMAG0533.jpg
    IMAG0533.jpg
    335.8 KB · Views: 30
  • IMAG0532.jpg
    IMAG0532.jpg
    436.5 KB · Views: 27

73guppie96

New member
Front seat back panels

For the front seat back panels I had to do a little extra work to figure everything out. When I pulled the old leather off there was a lumpy residue of old foam. I knew this would not probably look very good after applying the new leather sheet. I decided to scrape all of this foam off with a razor and then scrub / sand it flat with a 3M scotch brite pad. Once I did this I applied glue and laid down the new leather. This process helped give it a uniform appearance. If you had some thin foam it might be worth it to add this on to the backing before laying down the leather.

Once the leather was laid down on the main areas I flipped the backing over and cut slits in the corners and laid these areas down tight with glue.

The metric tlc kit came with fasteners to attach the netting bracket but they did not work for me. Unfortunately when I removed the existing fasteners the posts got completely ruined. I ended up cutting the posts flat and using some small screws and fender washers to fasten the netting bracket. After that I replaced the elastic cord and fastened everything down.
 

Attachments

  • 903234_10201061868133932_2080796264_o.jpg
    903234_10201061868133932_2080796264_o.jpg
    123.7 KB · Views: 35
  • 892653_10201061302399789_1484471190_o.jpg
    892653_10201061302399789_1484471190_o.jpg
    132.4 KB · Views: 32

73guppie96

New member
That about it for now. I will update this thread if I remember anything that needs to be added.

I will be posting up some finished photos of my interior here soon. Just got back from a week long trip to the sierras and my truck is a mess. Once I get it cleaned I will post up the other pics. Happy to report that the new seats really were more comfortable on the long drive. Seat bottoms made a huge difference and the smell of new leather in my truck is just wonderful.
 

73guppie96

New member
pics of the finished leather........
 

Attachments

  • IMAG0578.jpg
    IMAG0578.jpg
    377.9 KB · Views: 40
  • IMAG0579.jpg
    IMAG0579.jpg
    373.8 KB · Views: 35
  • IMAG0581.jpg
    IMAG0581.jpg
    376.2 KB · Views: 31
  • IMAG0582.jpg
    IMAG0582.jpg
    410.4 KB · Views: 28
  • IMAG0583.jpg
    IMAG0583.jpg
    435.7 KB · Views: 30
  • photo (1).jpg
    photo (1).jpg
    372.4 KB · Views: 28
Last edited:

krnnerdboy

Adventurer
Very nice writeup and thanks for the link. I had no idea they existed. I did a reupholstery on my 07 Titan. All I remember I'm that was that it felt like my finger nails were bruised for a couple weeks from pulling. It's well worth it though!
 

73guppie96

New member
yeah my hands were torn up for awhile after, glad to have it done. Funny I can smell the leather every time I open the door. Stoked on it.
 

dcoy

Adventurer
Leather is tempting, although I do like my Cordura seat covers. And then, of course, I would "have" to upgrade my FJ 60 seats (stock 60 series seats are pretty marginal in the comfort and support department) in the process. One (expensive) thing leads to another.
 

Forum statistics

Threads
190,133
Messages
2,924,267
Members
233,417
Latest member
dhuss
Top