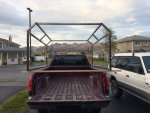
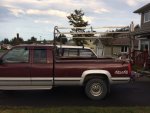
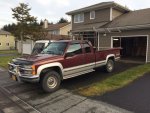
Mild 1997 Chevy 2500 build

mr_ed

Toolbag
So after much lurking I've decided to go ahead and start a thread to document my upcoming spring project.

The truck, while not what I would consider my "Ultimate Dream Truck," is one that my wife and I decided on since we needed a pickup of some sort. My family owned a 90's Chevy (TBI 350) when I was a kid with great success, and I was looking for a good dependable truck to handle hauling our ATV and anything else I may need, towing a decent-sized trailer every 4 years when we transfer (I'm in the Coast Guard), and still be easy for my wife (who is not a motor head) to drive daily if necessary.

We ended up getting a 1997 Chevy Silverado 2500, 4x4, with a 454 and only 91k miles, that also happened to have already had the problematic stock injectors replaced with Bosch injectors, the whole intake manifold re-sealed, new plugs, wires, tie rods, ball joints, wheel bearings, and brakes redone in the last 2-5k miles (with receipts). New tires too, although that males it harder for me to justify slightly bigger A/Ts haha.

As much as I would love a 1st or 2nd gen 12 valve, this truck is meeting our needs perfectly here on Kodiak, and returning high 13s-low 14s at the pump, which is better than I was expecting from a 454. Considering most of our daily driving is only a handful of miles (and there's only about 40 miles of road on the island), it suits us better than a diesel...especially considering we wouldn't be capitalizing on a diesel's benefits enough to offset the high maintenance cost and initial purchase cost.

Here's a pic from the Homer spit after we bought it a couple months ago, waiting on the ferry for Kodiak:

86f329506a80de272104f2ca2c314235.jpg


As of right meow, I plan on leaving the truck itself mostly stock. I may consider leveling kit/rear add-a-leaves for 1-2" of lift (or 1-2" body lift) and larger tires (33" max) down the road, but for now I enjoy the dependability and gas mileage as it is. Plus, if I really need to get somewhere, I have a 1998 Montero with a winter package that really doesn't take no for an answer.

The main focus of this thread will be on building my own camper shell. I had a couple of requirements that were tough to meet with off-the-shelf shells. It needed to be tall enough that I could sit up comfortably while camping in it (I'm 6' and awkward, so I don't dig cramped spaces), have an easily folded sleeping platform so I can drive the quad into the back, be relatively lightweight, simple and rugged enough to handle everyday utilitarian use, but also be insulated for some level of comfort during cold weather camping trips, and still look good (to my eye anyway) to name a few.

Most commercially available shells that would come close are rather spendy, meet maybe half the requirements, and/or look like something the power company uses or are lost in the '60s styling-wise.

I have most of the material to begin building, minus a few odds and ends. The primary structure will be a frame made from 1.5" steel tube that will essentially look somewhat like a ladder rack, then 2x2 lumber will make up the rest of the "studs." Plywood for the skin, probably sheathed in fiberglass, as that will not only completely waterproof if, but will allow for a thinner (lighter) ply skin. Foam panel insulation, with a veneer ply on the inside. The steel primary frame will also allow me to through-bolt some heavy duty roof rack crossbars and be able to carry a good amount of weight up there if necessary (kayaks etc...)

A cabover portion, while not big enough to sleep in, will allow storage of camping gear, sleeping bags, and whatever else to keep it out of the bed when hauling a quad or other large load. Ultimately, the goal is to have a well built shell that finds a compromise between the pure utility canopies and full-on slide-in campers. More camping comfort than a cab-high canopy, but more everyday useability than a camper.

Here are a few Sketchup screenshots I worked up the other day for visualization purposes. The lights and jerry can were stuck on just for poops and giggles, but the dimensions are pretty much exact (the shell is drawn to measurements I pulled off our truck; however the pickup model I found for use in the program is slightly out of proportion, so the cab top runs into the cabover section, and the bed is about 2" longer than real life)

bb1e0c18aac9d02cf3eaf449263ec502.jpg


3f51c8345643c4a29395f5ec8ac6ac51.jpg


37885e89cf654a11db9833731c661b72.jpg


Hopefully work will slow down soon and I can start cutting and welding. I still need to do some brainstorming as to what gauge steel tube to use to get decent strength without packing on the pounds. I don't need actual contractor ladder/lumber rack levels of strength; just enough to tote a kayak or two, maybe a cargo box or a couple jerry cans, and be able to climb up there without breaking it. I'm thinking 1.5 square, 16 ga. If anybody has some insight, please let me know!

Cheers!

Ed


Sent from my iPhone using Tapatalk
 

Trailboss

Senior Curmudgeon
Nice cap design, but I wouldn't hang the jerry can on the door due to stress on the hinge and potentially warping the door. If you can stay below 8.5 foot legal width, I would mount it on the right side above the taillight. Otherwise, inside or on top the cap.
 

mr_ed

Toolbag
Agreed, the jerry can was just me fooling around in Google Sketchup haha


Sent from my iPhone using Tapatalk
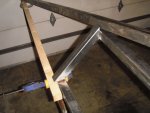
 

chilliwak

Expedition Leader
Welcome to the site Mr Ed even if you were a lurker before. Cool to see the ideas you have with your rig and the plans you have shown. The idea of a composite build with a steel frame sounds intriguing. I will be interested to follow your build to see what you do. i am a carpenter so I built a frame of wood and steel studs to make my canopy. I then later glued a thin layer of aluminum to the camper for the outside skin. Check out my build thread in my signiature if you want to see what I did. Anyways, good to see your build design and I am looking forward to seeing what you do with your rig. Cheers, Chilli...:)
 

mr_ed

Toolbag
Thanks Chilli! Yep I read through your thread quite a bit; in fact it was one of the reasons I decided to go the DIY route rather than trying to make a regular canopy work. Really love your integrated loading ramp!

I helped a buddy of mine a few years ago get his Tacoma's canopy roof-rack-ready. His was the normal fiberglass cab-high topper, and he needed to be able to carry more weight than the canopy by itself with the little bolt-on ski racks were capable of. He didn't want external bars coming up from the bed rails the way over-the-canopy contractor ladder racks do, so he bought some 2" sewer pipe from Home Depot, bent them into wide "U" shapes, and attached them to the bed rails inside the canopy, so they followed the inside curve. We welded some leaf spring pads to the top, with some repurposed mudflap rubber and sealant on them, and through-bolted the rack mounts through the canopy to these. Used some really high-end marine sealant up top to make sure it was waterproof, and it worked like a charm. It looked very clean, and all the stress was transmitted directly through to the steel inside.

I'm looking to try the same, except make the internal load bearing steel frame also be the "studs" so to speak.

I'm sure you mentioned it in your build thread, but what adhesive did you use to glue the sides to your canopy?

Ed
 

chilliwak

Expedition Leader
Hey Ed, good to hear from you. I started by using ordinary pl400 construction glue. It worked fine for a few years but the aluminum does want to let go in some spots so I went over to Sika construction adhesive. More expensive but worth every penny. I look forward to checking out your canopy with the frame inside. I am sure it will work out for you. Just take your time and think it through and you will have no problems. All this stuff is trial and error anyways and you learn as you go. Glad I could be some inspiration to you. I am always more satisfied with something I build myself. Cheers, chilli..
 

chilliwak

Expedition Leader
Thanks Chilli! Yep I read through your thread quite a bit; in fact it was one of the reasons I decided to go the DIY route rather than trying to make a regular canopy work. Really love your integrated loading ramp!

I helped a buddy of mine a few years ago get his Tacoma's canopy roof-rack-ready. His was the normal fiberglass cab-high topper, and he needed to be able to carry more weight than the canopy by itself with the little bolt-on ski racks were capable of. He didn't want external bars coming up from the bed rails the way over-the-canopy contractor ladder racks do, so he bought some 2" sewer pipe from Home Depot, bent them into wide "U" shapes, and attached them to the bed rails inside the canopy, so they followed the inside curve. We welded some leaf spring pads to the top, with some repurposed mudflap rubber and sealant on them, and through-bolted the rack mounts through the canopy to these. Used some really high-end marine sealant up top to make sure it was waterproof, and it worked like a charm. It looked very clean, and all the stress was transmitted directly through to the steel inside.

I'm looking to try the same, except make the internal load bearing steel frame also be the "studs" so to speak.

I'm sure you mentioned it in your build thread, but what adhesive did you use to glue the sides to your canopy?

Ed

Hey Mr Ed do you have any updates for us? I would be really interested to see what you are doing with your rig. Cheers, Chilli..:)
 

mr_ed

Toolbag
So after a busy summer with other projects cropping up to place the camper build on the back burner, I've finally been able to make progress on this thing!!

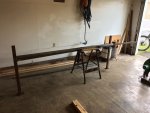
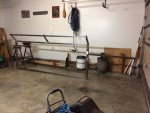
I ended up finding a pickup ladder rack for a song down at the local scrapyard, and have used it as my base. I cut out all the lateral pieces, as well as the longitudinal doublers, and have built off of that foundation. I also decided to go a bit wider than originally planned. Initially I wanted the camper to be no wider than the pickup bedrails, but after mocking up each side in the garage and then sitting "inside" it, I decided it was just too cramped and too little foot room off the end of the bed when it was oriented longitudinally. Maybe I'm picky, but I want to be able to sit with my feet off the edge of the bed in the morning to pull my pants and boots on. I ended up extending each side out 6 inches beyond its respective bed rail. The protrusion is not obnoxious, doesn't really interfere much with the view from the side mirrors, and allows me to orient the bed laterally which gives me almost 4 feet of bed space at the aft end...more once the bed has been folded up into couch/settee format.

The original ladder rack base; trimmed down to the bare essentials:

4.jpg

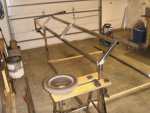
Adding the 45 degree pieces which will transition into the roof. The slight bit of overhang at each end of the angled pieces is intentional, and will be trimmed flush once the whole frame has been finalized and the spot-welded joints fully welded.

7.jpg
12.jpg

Up at the front, doing some visualization of different ways to do the over-cab section. What you see here is not how it is going to be...the over-cab sides will be angled inwards so that the very front corners are inline with the top roof length-wise runners on their respective sides.

13.jpg

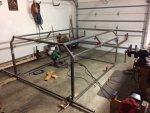
Stitching it all together, and test fitting. The test fitting turned out well. The frame, while far from complete, is somewhat lighter than I anticipated. My buddy and I lifted it up no problem. Obviously once the last few bits of steel have been welded on, the insulation and outer ply/fiberglass goes on, and the interior fitted out it will be heavy; however I don't believe it will be excessive considering what it will be and the level of strength it will have. It already is very sturdy and I believe I will have zero issues with keeping a tandem sea kayak up there, or with strapping extra stuff/fuel or walking around up there.

14.jpg
15.jpg
16.jpg
17.jpg

This is how it sits now. I still have to fit a couple lateral structural pieces in the roof, finish framing in the cab-over part, and paint the frame. All of the corners will have 2x2 lumber glued-and-screwed to the steel frame to provide plenty of base for the external plywood to attach to, as well as for the internal paneling. Exterior will be faired, wetted-out, and fiberglassed wooden boat-style. Unless I find myself needing to haul an unusually large item of some sort, it will stay on the truck and since it rains more often than not here I don't wanna fool around with leaks.

Insulation will be 1.5" high-density blue foam board, possibly with some sort of Reflectix-type material to aid with keeping heat in.

One thing I'm not sure of is whether or not I need a vapor barrier on the inside of the plywood. Scoping out all the builds on Astro-Safari and on the Sprinter forum, it seems all those folks put some sort of vapor barrier up...often impermeable reflective material, sealed up with aluminum tape, between the inside of the van body and whatever their insulation is to keep condensation down. I'm not 100% sure I'll need to do this...I'll have a layer of fiberglass and epoxy, plus 1/4" plywood for an outer skin which shouldn't be as thermally subject to the outside temp as the thin sheetmetal of the vans. Also, the inside of the plywood will be sealed, either by brushing on epoxy or deck sealer...provided the deck sealer is inert once cured and won't off-gas.

What do you guys think regarding the need to put some sort of vapor barrier between the fiberglass-and-plywood skin and the foam insulation?
 

PHeller

Adventurer
Subscribing. High top camper shells are expensive these days, and in my case with a 06 Tundra DC, I'm finding it hard to find one used.

How much do you have so far in costs for your build, and what are you expecting in terms of final costs?

What size steel tubing did you end up with? Do you think you could have gone even lighter?
 
Last edited:

chilliwak

Expedition Leader
Mr Ed good to see you back on track with your project. I say yes, go with a vapor barrior. There will be a lot of condensation and moisture inside your canopy. Also, you might want to go with some kind of soft insulation as foam board will squeak with every milimeter of flex inside your canopy. You dont want to have to have ear protection on trying to sleep on a windy night. Thanks for posting up and good luck with your build. Cheers, Chilli...:)
 

mr_ed

Toolbag
Subscribing. High top camper shells are expensive these days, and in my case with a 06 Tundra DC, I'm finding it hard to find one used.

How much do you have so far in costs for your build, and what are you expecting in terms of final costs?

What size steel tubing did you end up with? Do you think you could have gone even lighter?

It's got 16 gauge 1.5" square tubing (with the exception of the 4 corner vertical pieces...they're from the original ladder rack and are the next size up from 1/16th"...1/8" I believe. I left them there for load-bearing purposes and also cuz it was easier). I don't know if I could have gone lighter. I'm only an OK welder, so anything less than 16 gauge would have been pretty much impossible for me to weld successfully. The 16 gauge was challenging enough.

Considering how I'm building it, I probably could have just used wooden 2x2 framing for the whole thing; definitely would have made construction easier. However, the strength of it is phenomenal, and so far the weight is pretty low all things considered. I flipped it by myself in my garage to work on the bottom, and other than being awkward due to the size, it really wasn't difficult at all. I have no idea what the actual weight is, and it will definitely go up as I finish off the insulation and fiberglass, and install windows. I'm going to weigh my truck before and after loading it up to get the weight figured out.

As to cost, I'm not paying too much attention to it. The steel ran me about $120, the ladder rack I got for $50. All the external plywood was free, salvaged from old shipping crates which is why it's 3/8" rather than 1/4". The lumber hasn't been too bad, considering at least half is also salvaged, and the rest (2x2 stuff) is ripped from 2x4's. The 1/4" ply for the insides, the blueboard insulation, and of course the epoxy is a bit spendy, but that's partly because everything is priced up since I'm on an island. It would definitely be way cheaper to build on the mainland or in the lower 48. All told though, I'd estimate that I'll come in below $1000 which is fine by me considering the cheapest I could find a high top canopy on craigslist in Anchorage was $1100, and that would have involved a $1200 round trip ferry ride to go get it.
 
Last edited:

mr_ed

Toolbag
Hey hey from another coastie :victory: I was on kodiak from feb 12 to June 15.

Hot dang I just missed ya! I got here June of '16. I see you're in SD now...say hi to J Felts for me!

Is that Cape St. Elias in your profile pic? Man I'd love to spend a couple weeks in that bunkhouse they have there, just exploring the island and soaking up the complete lack of anybody there. Except for the ghost monster thing in the keeper's house haha!
 

mr_ed

Toolbag
Mr Ed good to see you back on track with your project. I say yes, go with a vapor barrior. There will be a lot of condensation and moisture inside your canopy. Also, you might want to go with some kind of soft insulation as foam board will squeak with every milimeter of flex inside your canopy. You dont want to have to have ear protection on trying to sleep on a windy night. Thanks for posting up and good luck with your build. Cheers, Chilli...:)

Huh, hadn't thought about the blueboard squeaking. So far, I've got the over-the-cab part and the bottom of the camper done, but I may consider some other form of insulation for the sides and roof. That being said, the blueboard is bonded to the inner and outer ply sheathing, so I don't know if it will be able to move enough to squeak. After I read your post, I went out and yanked and beat on the cab over section, and didn't hear any squeaking, but that could always change after several thousand miles. I may see what kind of soft insulation is available locally that would work for my application.

As for a vapor barrier I'm maybe being a bit cheap, but I'm using industrial grade aluminum foil, bonded to the inside of the outer plywood. While it probably wouldn't work in a Sprinter/sheetmetal van-type build, I figure it'll work for me considering how my walls are built up.

Going from the outside to the inside, my walls are built up with:

1. Fiberglass/epoxy (6 oz. cloth for the roof, 4 oz. for the sides)
2. 3/8" exterior grade ply, sealed with epoxy on the inside
3. HD aluminum foil bonded to inner side of the 3/8" ply sides
4. 1.5" blueboard foam insulation bonded to the foil (or possibly some other form of soft insulation to a thickness of 1.5")
5. 1/4" door veneer bonded to the blueboard and glued/screwed to the steel subframe.

I'm sure I'm overbuilding it, but I rather that than have it start falling apart on the haul road to the Arctic Circle this summer or the ALCAN next year. I'll post up some updated pics as soon as my iPhone gets done syncing with it's arch-enemy the PC and I'm able to load them up.
 
Last edited:

Forum statistics

Threads
188,337
Messages
2,905,700
Members
229,959
Latest member
bdpkauai
Top