Mounted For Adventure's Build Thread - Patagonia Or Bust!

gluebke

Mounted For Adventure
Hey guys and gals,
I've lurked enough on here now that I feel a build thread is appropriate.
The goal of this thread is to simply document what we did, if it worked, if it didn't and document for myself things to remember as I progress.
Also, we have a website and an instagram page:
https://www.mountedforadventure.com/
@mountedforadventure

For a foreword, my girlfriend (Leah) and I took my Tacoma to Alaska last fall for three weeks, and it was an amazing trip.
So amazing in fact that we decided to skip the whole buy a house and have babies phase that lots of our friends are going through, and keep driving!
We decided that completing the PanAmerican highway was the goal, and did a financial/practical/safety analysis on the different types of vehicles (truck camper, trailer, van, etc) and decided to build out a van.

In July 2019 I purchase a 2014 159" High Roof (non extended) from Salmon Arm, BC and drove it back to Calgary.
Calgary is home, it's where this build is taking place.

Initial photos: https://photos.app.goo.gl/17AyJn8fBXQcAagT9

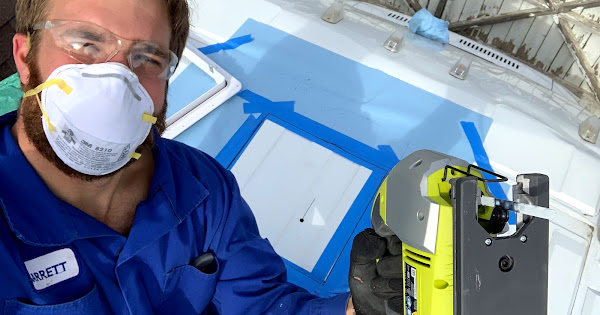
Step 1 Take it from the beat work van it was, to a blank canvas.
Had to replace an engine mount when the out of province inspection was performed.
Sanded the floor and a bunch of the doors/walls, primed and painted.
Oh also it had a busted glove box and the rear door wire looms were broke.
So I went to pick and pull and replaced those.

Step 2 Install sound deadening.
Read a lot of build threads and youtube videos that people wish they had sound deadened their vans, so we went ahead and did that.
Cut all the strips to sit in between the ribs in the floor, then cut big sheets for the panels.
Overall lots of work, but good finished product, especially in the wheel wells.

Step 3 Build the floor
Since we plan to use this van to ski tour, it needs to be really warm.
Lots of people don't insulate the floor, but cold feet suck so we did that.
Spray foam in the ribs over the sound deadening, then 1/2" styrofoam (xps?) board over top.
Lots of adhesive was used in the making of this film.
 

gluebke

Mounted For Adventure
Step 4 Cut A Hole In Your Van
Well as everyone who has done it knows, the first cut is the deepest.
Bought the Maxxair 7500k and prepared to install it.
I found this video the most useful and followed it: Painters tape and shop towels all around the top in order to catch most of the shavings.
Box underneath to catch the shavings and the 14" x 14" square of sheet metal.
The layers went: Van metal -> butyl tape -> fan bracket -> sheet metal screws -> lap sealant -> actual fan
I simply dangled the wires underneath and went about my day.

Step 5 Insulate The Walls and Roof
I don't believe there is a fantastic option for doing insulation, and the XPS polystyrene was very hit and miss.
While you can cover large areas somewhat quickly, and they do provide a pretty darn good R value (2" R10 on walls, 1" R5 on roof, 0.5" R2.5 on floor),
they also cover your entire cutting area (and coveralls, and hair, and lungs, WEAR FULL PPE) with the stupid pink shavings that are statically charged and want to cling.
We took those panels, used PL300 adhesive to adhere it to the van sheet metal, and spary foamed around the perimeters.
Panels were either held in place by 2x4s, duct tape, or weights depending where they were while the adhesive and foam cured (24 hours).

Step 6 Start buying Electrical Components
Thankfully I have been contracting for a solar company (https://www.infernosolar.com/ great company!) that had wholesale prices on panels.
Picked up two 275W panels (550W total) and the associated cables.
Purchased the roof rack out of Unistrut exactly as this thread explained:
I'm still waiting on my VanTech feet to come through customs, will assemble and update after that.
Bought a Dometic CFX75 off of a friend of a friend for a great deal ($900 vs 1500) after he used it for one trip.
Ran wires for the LED pot lights, as those will get covered up by the plywood.
Going with 8 pot lights on ribs (from the front) 1, 2, 3, 5, and all the wires ran through the central rib on the driver side, which is where I see the electronics staying.
 

gluebke

Mounted For Adventure
From the Promaster forum:
I would say we're working on it 4/7 days in a week. The last two night in a row have been 2am (which sucks for work the next day!).
I've been working on a bed design with my dad, and to be honest it's all the little things, like it took me 45 minutes to remove all the 2x4s holding the roof up and clean everything up.
So when a job takes 3 hours, it's usually 2 hours of work and 1 hour of Home Depot, cleaning, thinking, etc


Step 7 Build a bed frame
When looking into the bed, I had seen many builds with thinner material and/or supports being used.
I wanted a) an open garage b) to be able to use the bed as a structure (both for the van and for humans)
When planning how to make the frame, my dad had just framed a large deck all summer, so we had that style in mind.
I've seen the build using aluminum ramps, and other methods, so I might change later but here's the plan:

From the wall I used McMaster Carr cross nuts (1/4-20) to go into the hexagonal holes. These are all spaced out 5.5" from each other in the back of the van.
From the back I had the 3/16" angle iron lined up with the seam in the wall, then drilled 8" 13.5" 19" 30" 41" 52" 57.5" to match up.
I tried to drill 1/4" holes for the 1/4" bolts, but that was a pipe dream. Had to go up to 5/16" to get my drilling error to line up with each other haha.
From the wall to the centre of the van it will go cross nuts -> 3/8" plywood -> 3/16" angle iron -> bolts
Then the 2x6" frame will go on top of the angle iron (not in the cradle, as it would hit the bolt heads).
The wood frame is undersized to give a few options when it comes to finishing the walls.

Pics:
 

gluebke

Mounted For Adventure
Step 7.5 Realize Your Bed Frame Is A Bit Too High
After we put the bed frame in place we figured out that it could go down an inch or two.
After looking at options, I've even put the bed frame into a FEA study to see deflection of 2x6s vs 2x4s.
Results in the photos, but here's the summary:
4x - 2" x 6" - 0.013" Deflection
5x - 2" x 4" - 0.043" Deflection
6x - 2" x 4" - 0.038" Deflection
8x - 2" x 4" - 0.030" Deflection
So as of right now I'm going to have family dinner tonight and talk it over with Dad and Leah, see what we can figure.
Is 0.030" acceptable and safe over a year's worth of sleep and abuse?
Is 0.100" acceptable and I'm not worrying for any reason?

I've seen people use other materials such as steel too, but I like the woodworking aspect. Screw plywood in and such.
Any one want to weigh in on this?

Step 8.0 Begin Sheeting Plywood Walls
In order to take the van from a dirty old van to a "living space" the plywood had to go so we could quit having spray foam everywhere.
My plan is to use 3/8" plywood (might go with 1/4", but the first one went in okay) cut out oriented vertically.
Use the two horizontal van ribs with cross nuts to hold the plywood (and cabinets in the future) to the walls.
Last night I just did the holes under the bed frame (was 1:30am), but they worked out great!
Bonus cross nut diagram (brass washer is van rib, black spacer is 3/8 plywood):
 

gluebke

Mounted For Adventure
Step 8.1 Continue Sheeting Plywood Walls
Leah and I got the rear passenger wall up yesterday. Early night, made it to bed before 1am haha.
Use the cross nuts ("screw-to-intstall rivet nuts") 90186A213 for holding up plywood is a great removable system.
DO NOT use the 6-32 size, they are simply too small for this application. The 1/4-20 is significantly better, even in terms of getting a hex bolt rather than machine screws.
The driver front section of the wall has really weird hole locations, so I'll be drilling my own holes for the larger cross nuts.
The rear sections were perfect, there are hexagons every 5.5" that hold these nuts really well.
 

gluebke

Mounted For Adventure
Step 9 Attach the Roof Rack
There is a thread on this forum of a guy that built a low profile unistrut roof rack for his solar panels.
I copied that build, and I'd say it worked 90% perfectly.
I bought 10' of rail, and the front and rear feet are about 11' maybe 12' apart. But I just slid it forward and used the first 6 mounting feet, not all 8.
Using the Van Tech feet to mount to the unistrut rails, I used two sets of washers and nyloc nuts to hold them down.
Six feet total, three per side. Holds great.
The feet are expensive for what they are, but they do work well.

Step 10.0 Set Up Solar System
As 8 an 8 year old boy I loved the solar system, never thought I'd build my own haha.
But for real, it seems like every build has a main component of solar, even though it seems like a $100 isolator off the engine battery seems like it'll give me more Wh.
I suppose it does make sense to have multiple sources for different times in the trip.
Back to the task at hand though.
Yesterday I got four holes drilled in the roof, two filled with silicon, two filled with wires (measure twice!).
The panels will be 2x 275W (550W total) panels wired in series.
Solar controller is the Renogy Rover 40a.
Can't provide a review for either yet, but both seem good.
60 cell is key, as it fits perfectly sideways on the van. 72 cell is too long.
I plugged them in downstairs, didn't read anything off the panels as it was basement lighting, so here's hoping it will give me some readings this week!
They still need to be hard mounted to the roof (have to secure the cable entry gland first, going to do that tonight), and totally plugged in.

Step 11 Build a Box for the Water Tank
Small step, but had to be done.
Leah found an awesome tank off instagram that fits over the wheel wells (name?)
It was made for a sprinter, so I had to shim up the box off the floor.
Simple 2x4 C frame, and then I painted it white to blend in with the theme.

Step 12.0 First Interior Mock Up
I meant to do this earlier, but we finally had some large components (bed,fridge) that gave us a better picture of what our space is going to look like.
Basically we decided to scrap our initial idea of seats on both sides of the van, and go for a single bench seat for two.
This was due to the large fridge we purchased.
Here's my idea to have the fridge not slide out, but be accessible. Please let me know if you can think of ideas/improvements.
All in all it really gave us a greater appreciation for the tiny amount of space we're about to live in, but hey better than the Tacoma with a RTT!
The bed is lower than it will be, but the original position was too high, so we wanted to see a different angle.
 

gluebke

Mounted For Adventure
I'm looking for a review of my electrical schematic.
The WF-8945 is supposed to be able to charge my batteries off of the 120V, and also be the fuse panel for my loads.
So hopefully the attachment works and can also be used as a reference for future builds.

Notes:
I need to include manual disconnects for all three sources.
I'm nervous about grounding things to different places than my main ground, but I rigged up the light bar and it worked.
The light bar is the only one with rated W more than recommended AWG and the fuse. (26a vs 25 fuse with 14 AWG) Maybe the LEDs aren't that much wattage?
No harm in fusing the 1a appliances to 5a if the wire is good for 10a eh?
Renogy said that 8 AWG is good for 40a if it's less than 8' but the internet says go 6 minimum.
 

Attachments

  • Electrical Diagram R1.pdf
    127.7 KB · Views: 2

gluebke

Mounted For Adventure
Step 8.2 Finish Plywood Walls
Leah finished up the back doors and the passenger sliding door.
Feels much nicer to be in a "finished" environment than a industrial metal van.
Don't have a great picture of the passenger door, but you can see it's in.

Step 10.1 Finish Installing Solar Panels, LED Bar, Roof Rack
Had the whole family over to help out with the panels, and got the wiring all hooked up and ran.
Leah and I drilled the holes in the van for the screws to keep the waterproof gland (for PV cables) secured to the roof.
We screwed the cover down, tightened the gland nuts to seal the cover to the plastic, used butyl tape and lap sealant to seal the cover to the van roof.
The cover was positioned so it would run the wires right into the rib halfway down the driver wall.
This works great as it's totally covered by the PV panel, so it's triple protected from water penetration.
Unfortunately the wires that came with the LED bar didn't reach the cover, so we got a gland nut and drilled a hole closer to the front.
But the wiring worked out really well! We mounted the switch to be in the center headliner, and fused to the house battery rather than the engine battery.
The bar is curved, which I haven't had before; really throws light into the ditches well

Step 13 Buy and Install Garage Floor
Before building the battery box and everything there, I wanted to get the waterproof floor in.
That way everything that goes on it can be sealed down, rather than cutting the floor and maybe making errors, resulting in gaps.
My brother (thanks Rick!) and I burned it out in a night, felt good to have a one day project start to finish.

Step 12 Buy and Install Batteries
Originally bought 4 Trojan T105 6V 230ah batteries to run in series-parallel.
Fantastic! $1000 CAD and we have 460ah to allow us to run off grid for 4 days without power!
Unfortunately we decided that the off gas, maintenance, spill possibilty, made AGM the correct answer.
So I took back the batteries, and bought new ones.
So even though we had to downgrade output and increase cost, we got a solution I feel good about.
2x Trojan L16-AGM batteries 370ah 6V, wired in series.
Motive L16-AGM | Trojan Battery Company
These are BIG batteries, as your can see when they are in the bed of my truck.
Plus they were a total of $650 CAD and trust me, I shopped around a ton, including the US and the internet. Ended up buying local.
Also, over 100 lbs each, so fitting them in and out of the battery box was a lot of lift with the legs haha.
When I'm looking at other builds, it looks like I am significantly more worried with crash rating, but I really don't want 250 lbs moving at all.

Step 13.0 Buy and Install Power Centre
Went with the WFCO WF-8945 power center.
It takes in 120V, and outputs to the batteries on 12V.
It also takes the 12V and fuses it out, so I had originally bought a fuse block but now it is just a fancy paperweight.
The current location is a plywood panel that I will frame in once I'm back from Holland.
Pretty flush with the wheel well, so not using more space than needed.
Some of the wiring to go to the switch has been put over to the passenger sink area already, so when we are ready to put the switch panel in it should just fire up.
Wire gauges as per my PDF a few posts ago.

Misc
One of my overland/wheeling buddies (@expeditiontundrabeast) was cleaning out his garage and very nicely donated some traction board and a Hi-Lift jack!
Not sure if I'm going to mount them on the roof or inside, or the back yet, but they'll come along so we can beach cruise and get out.

Step 14.0 Cabinets - Begin Building
The bases for the driver side upper cabinet and both kitchen cabinets are bolted in securely.
These have been measured soooo many times, so hopefully they accommodate the sink, grey water, water pump, drawers, stove, cabinets, cutting boards, wiring, etc.
Currenty the bases are in and the plan for cutting the cabinet uprights is underway.
Anyone want to comment on building the cabinets and then bolting them in, versus installing the cabinets in the van first?

Misc
The morning before I flew out, we wanted to move the van from my house to Leah's place so it would be easier for her to work on it for these three weeks.
This invlolved paking EVERYTHING up and loading it in, which was quite funny.
We'll have to do the reverse on Nov 24th or so, but it'll be fine.
 

Forum statistics

Threads
186,661
Messages
2,888,562
Members
226,767
Latest member
Alexk
Top