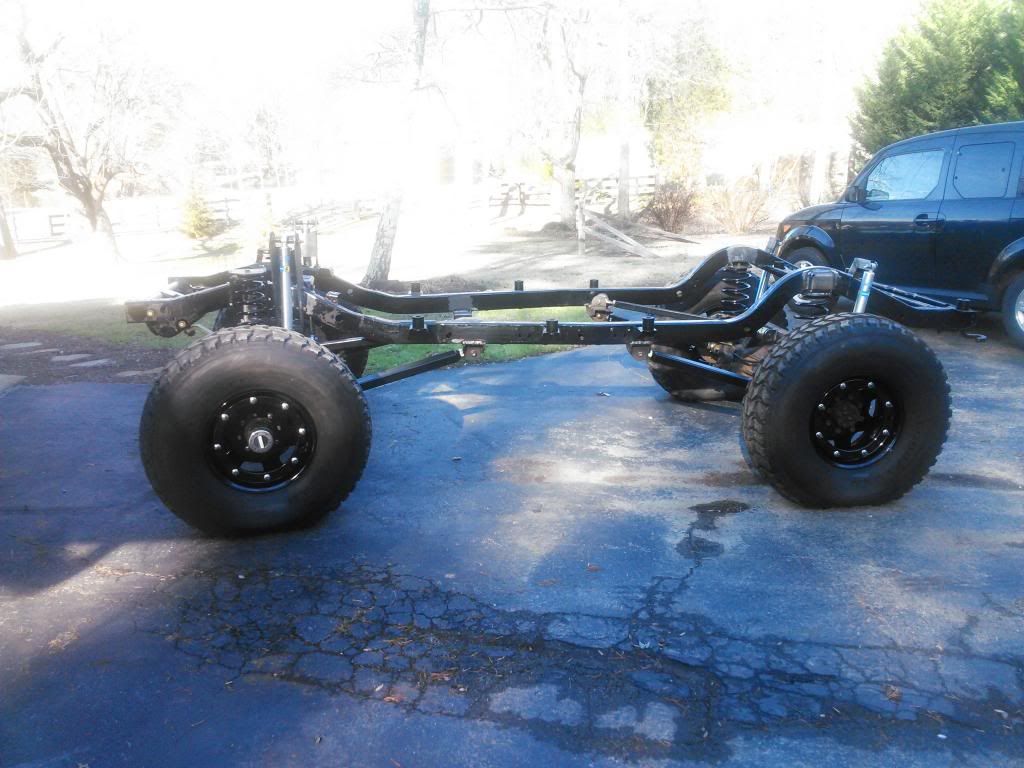
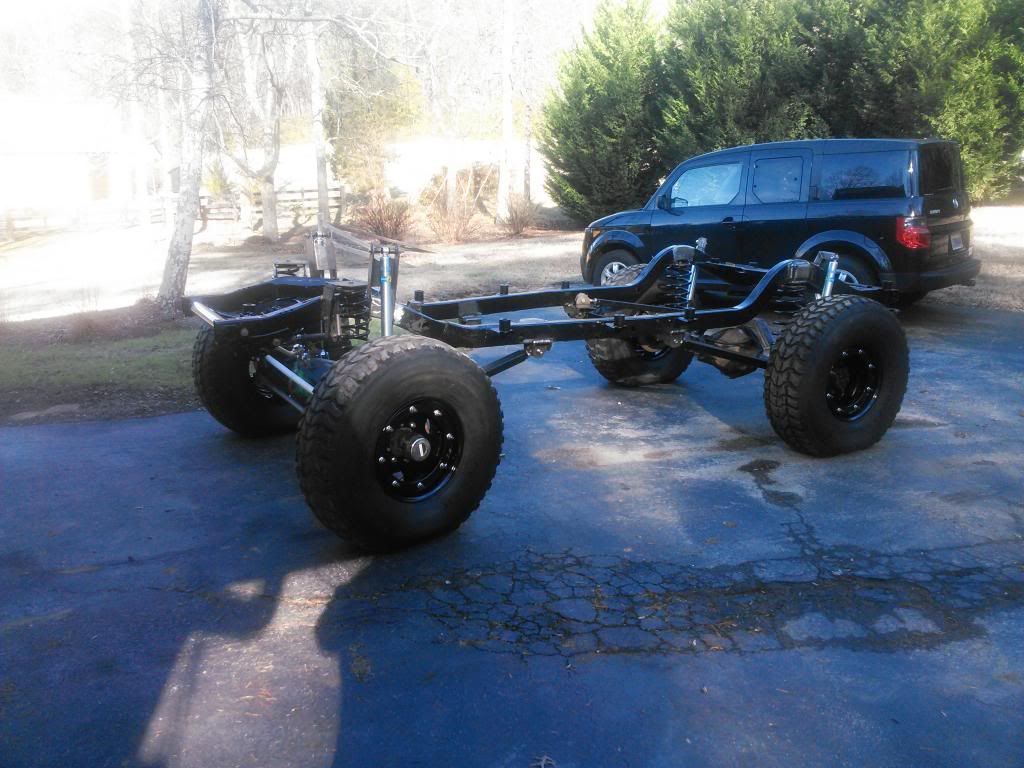
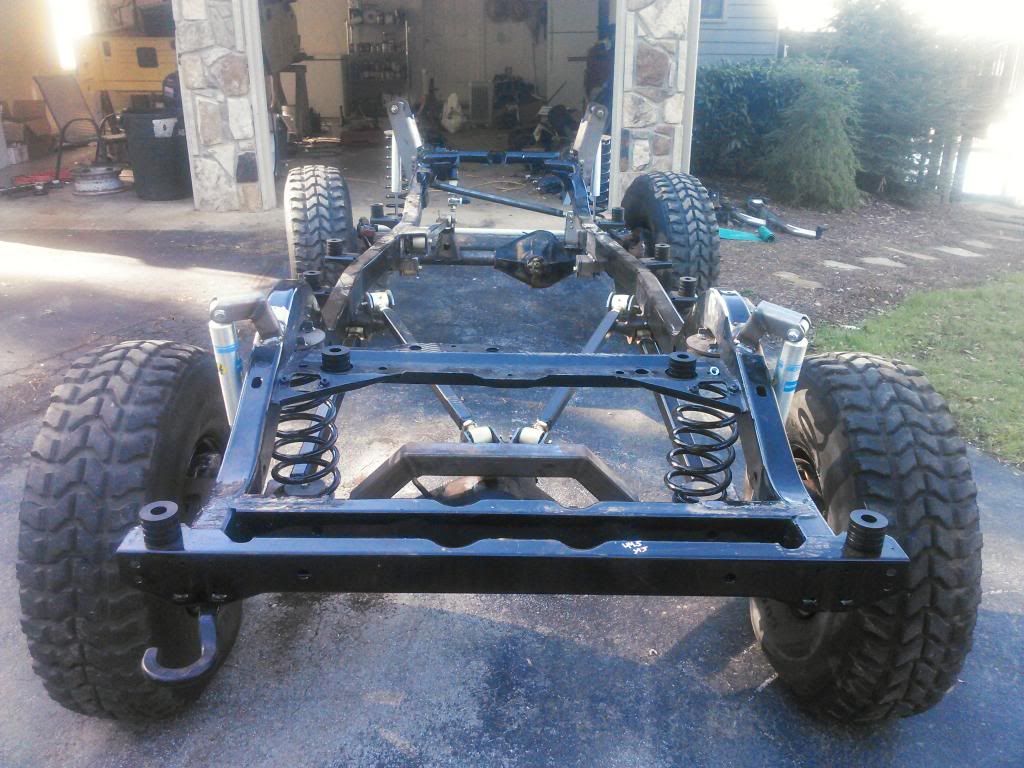
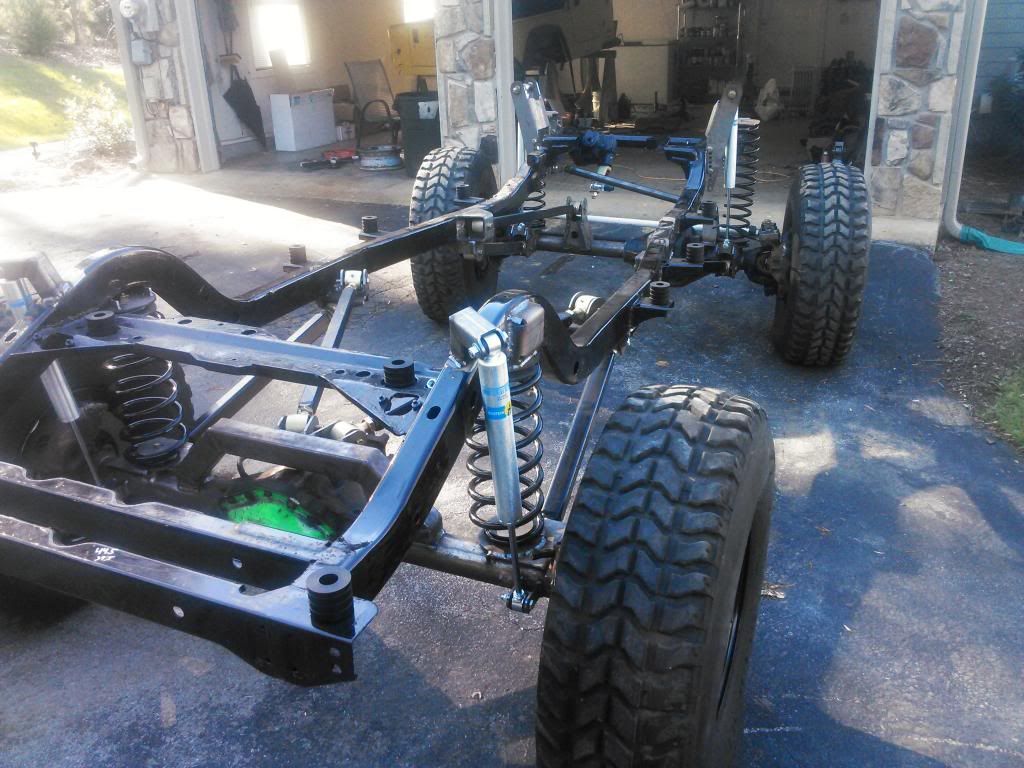
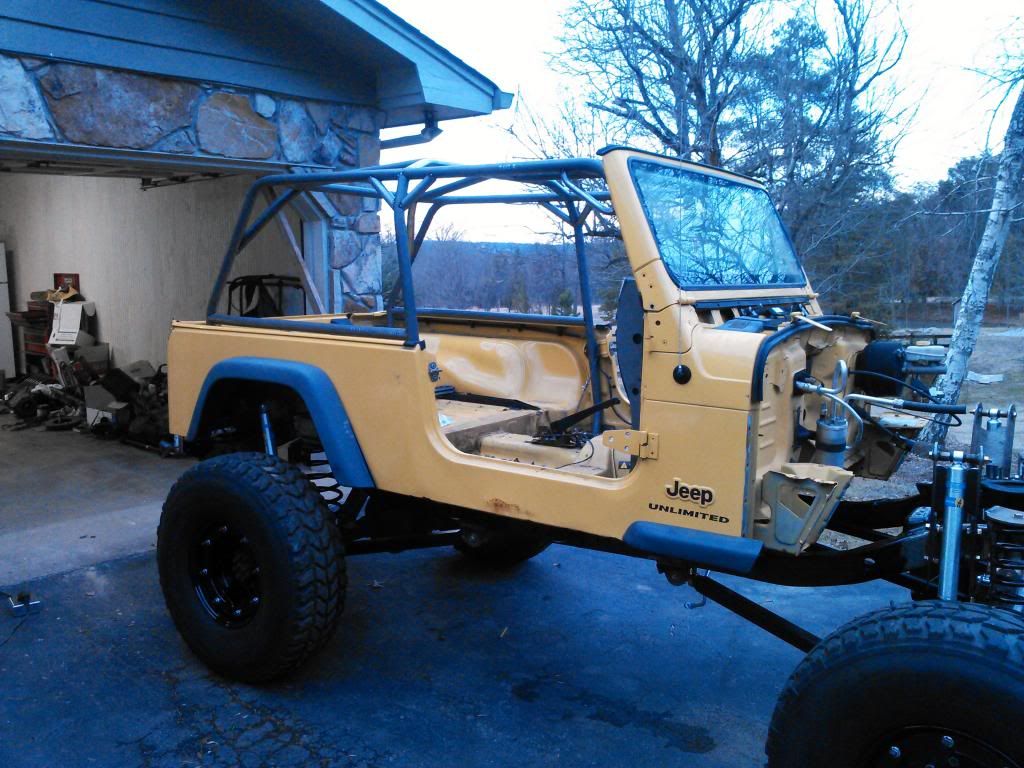
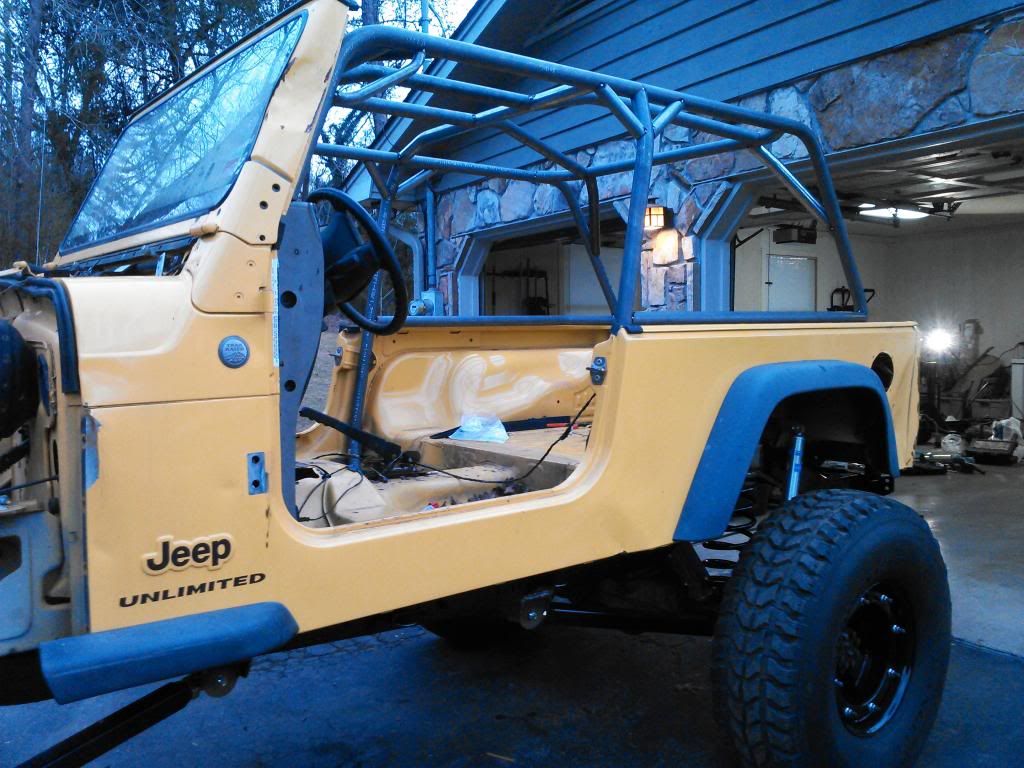
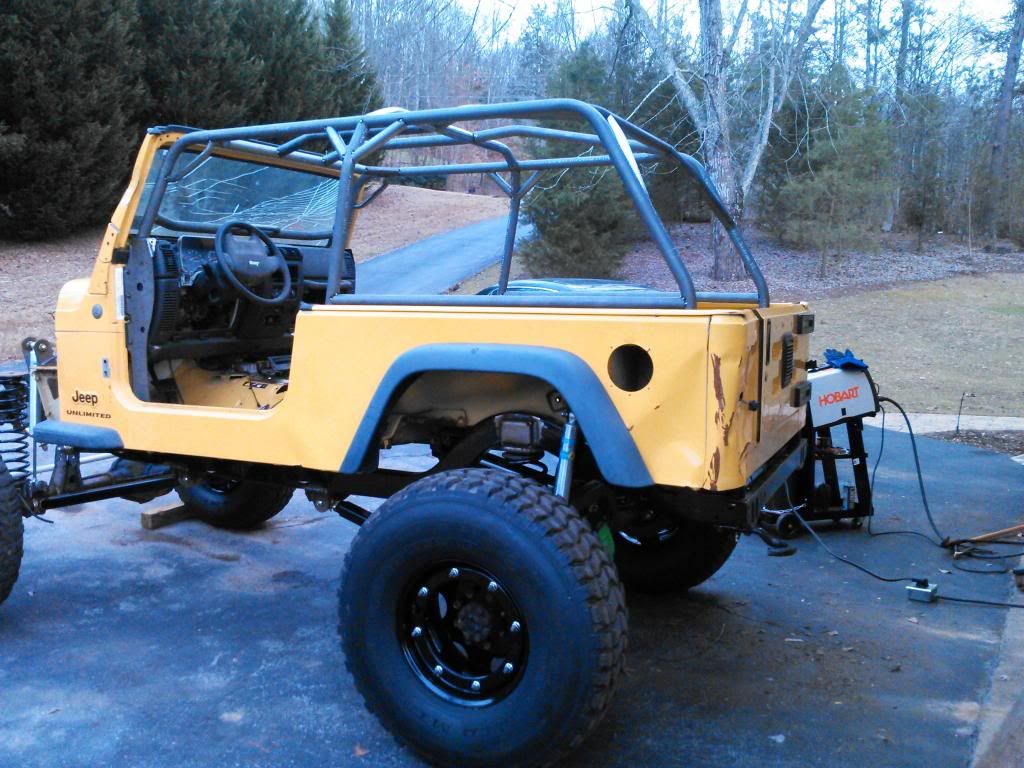
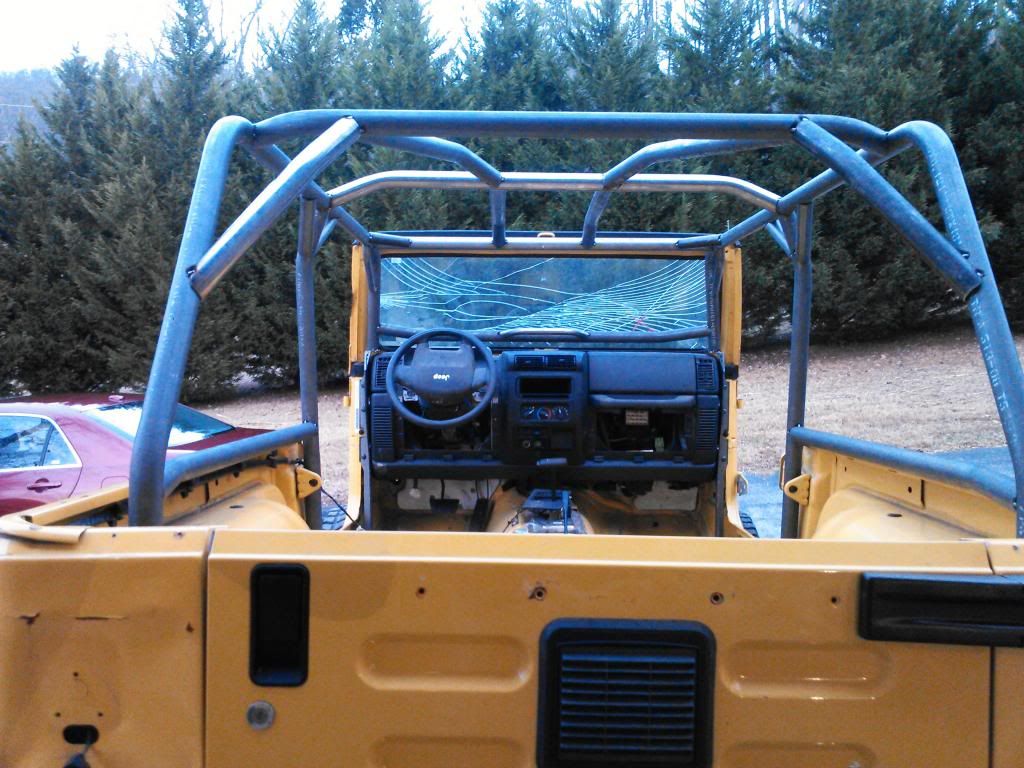
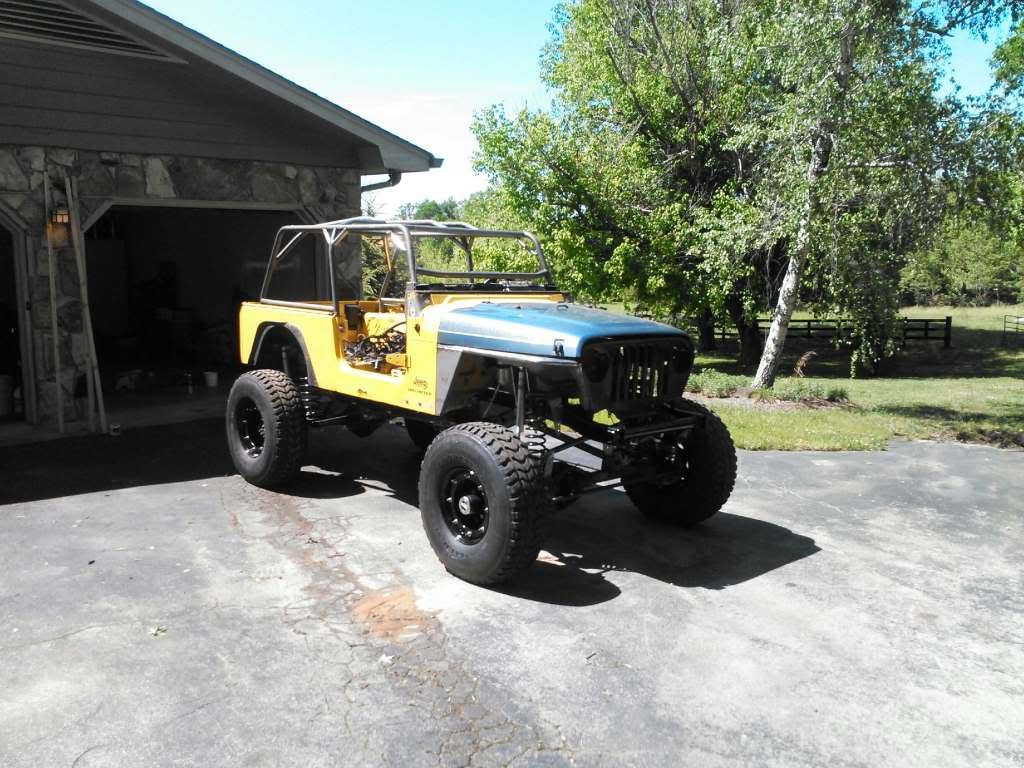
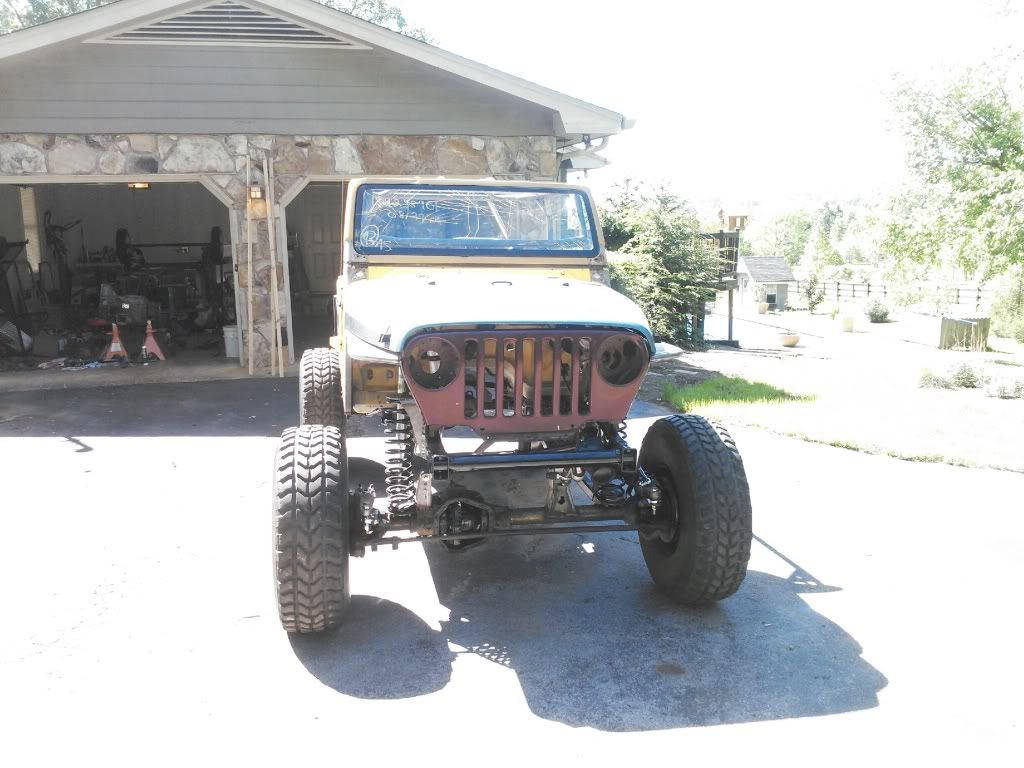
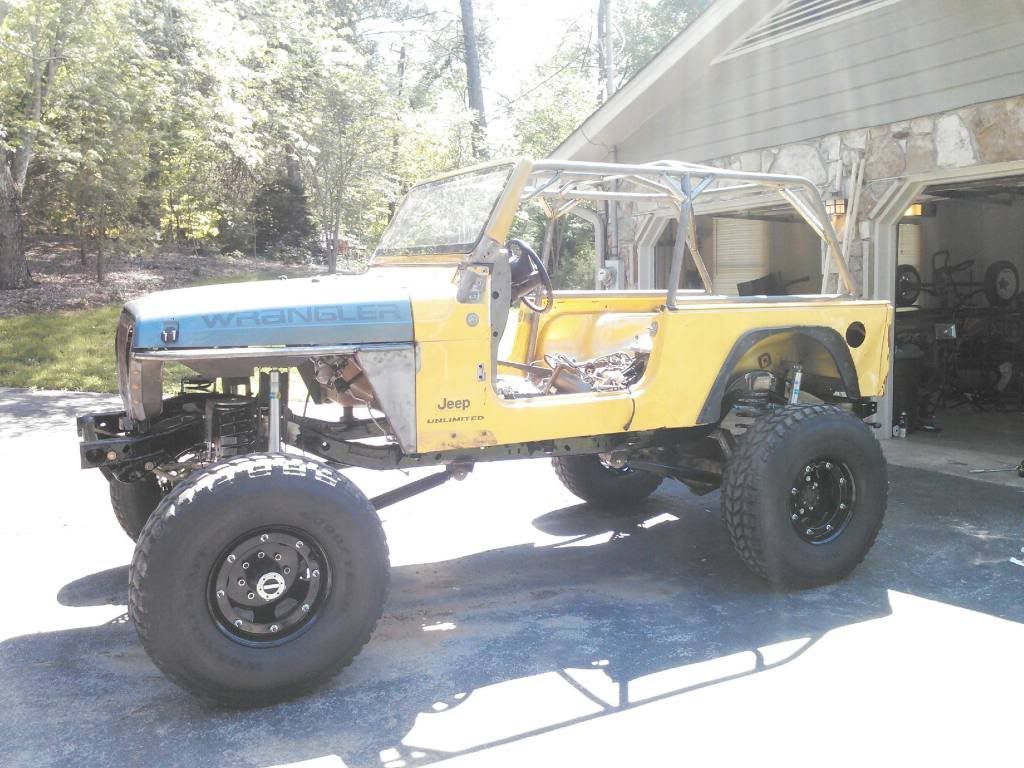
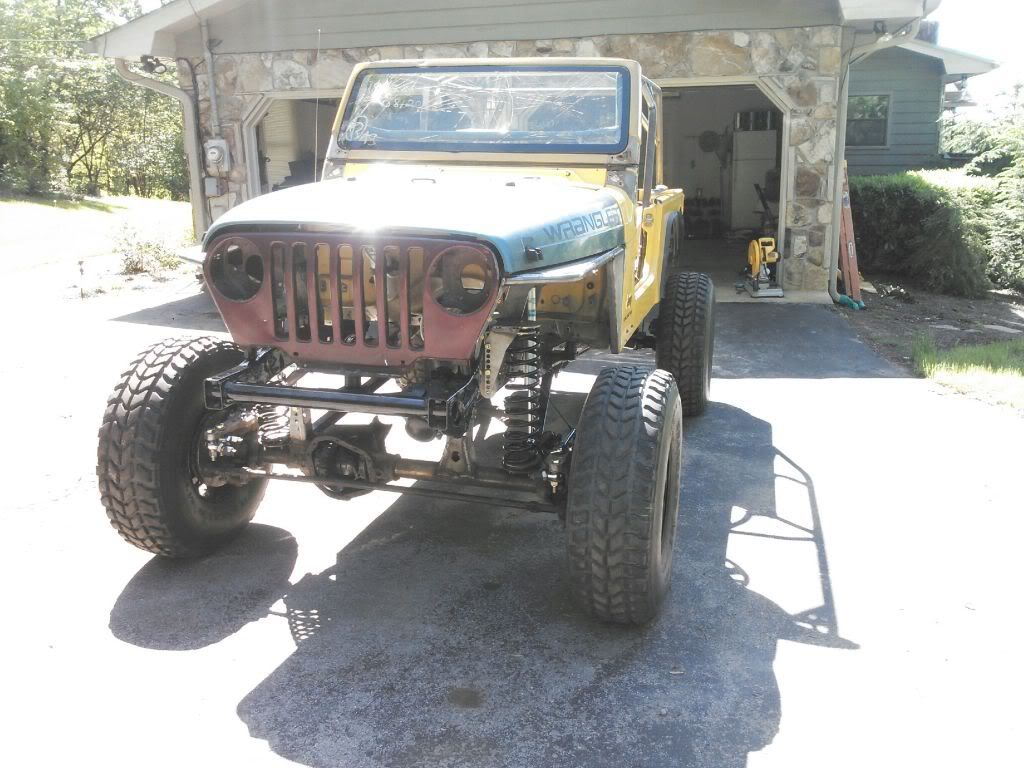
My 2004 Jeep Wrangler LJ With a 4BT Cummins and Some Stuff Build

wmeyer116

wmeyer116
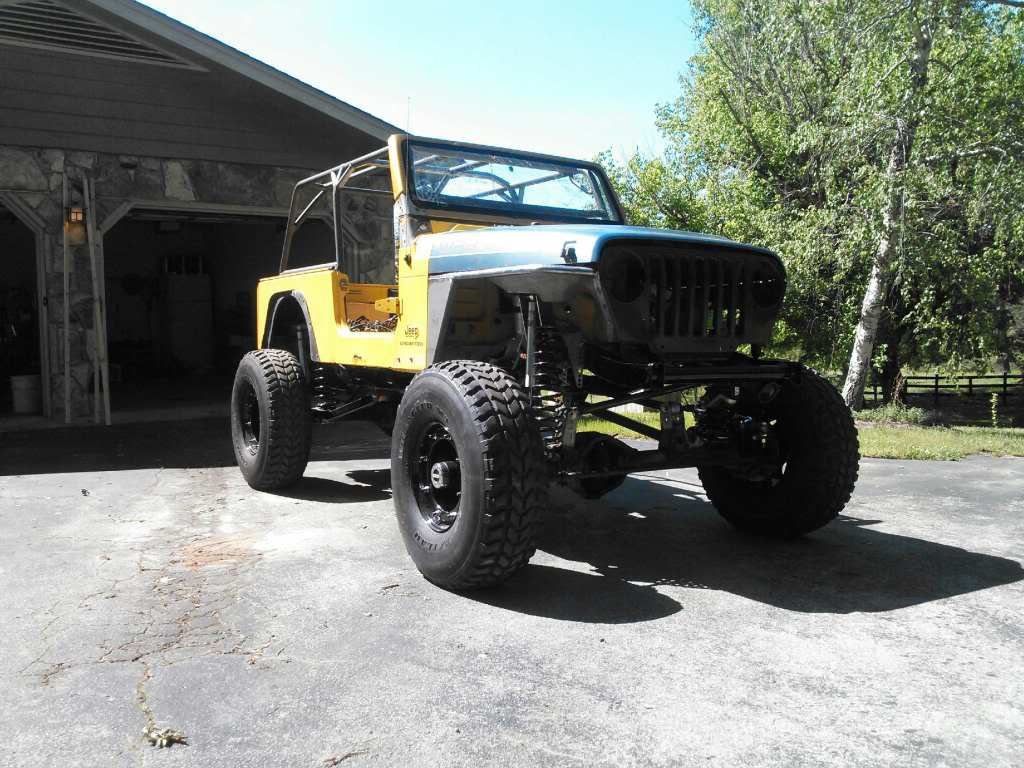
As of posting this on 2/23/15, I've been building my jeep for the last 3 years. I wanted it to take no more than a year at most, but that obviously didn't happen. So, step into my journey of frustration, joy, and reward in seeing my Jeep transform from a totaled mess to what it will hopefully become.

I've always been a jeep guy, I've had a wrangler, scrambler, cherokee, and now another wrangler. For a while I wanted to swap a diesel of some kind into my jeeps, but never had the time or money. To be honest, I still don't, as I attend college full time and work part time, so what little time extra I have I have devoted to my Jeep.

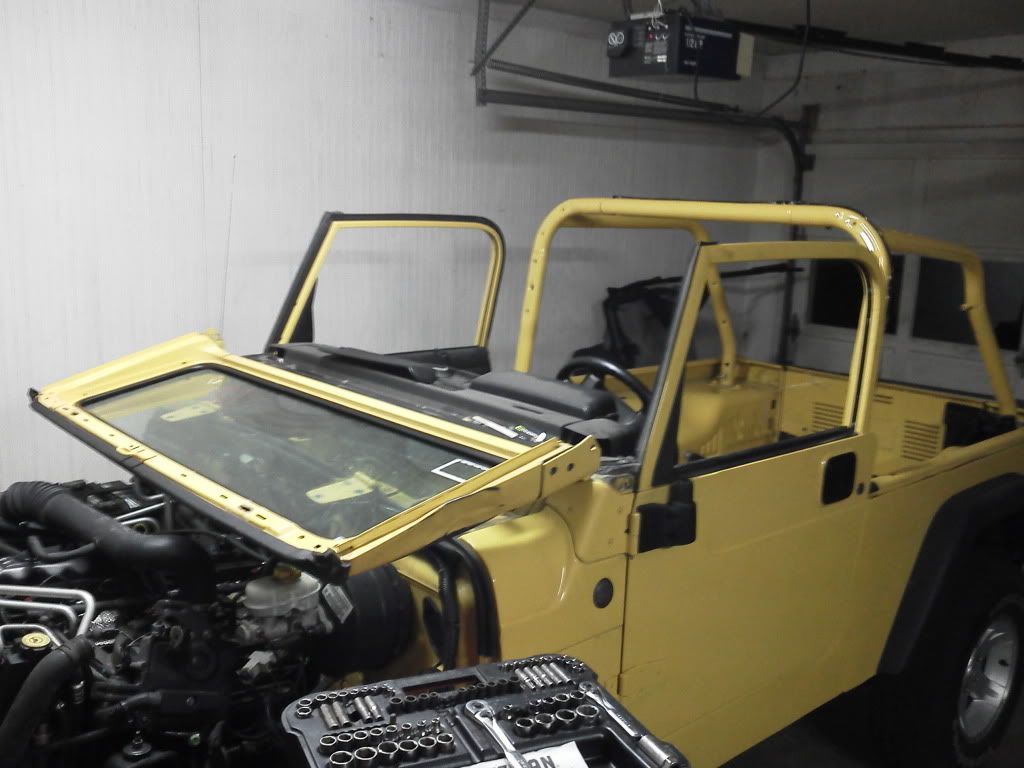
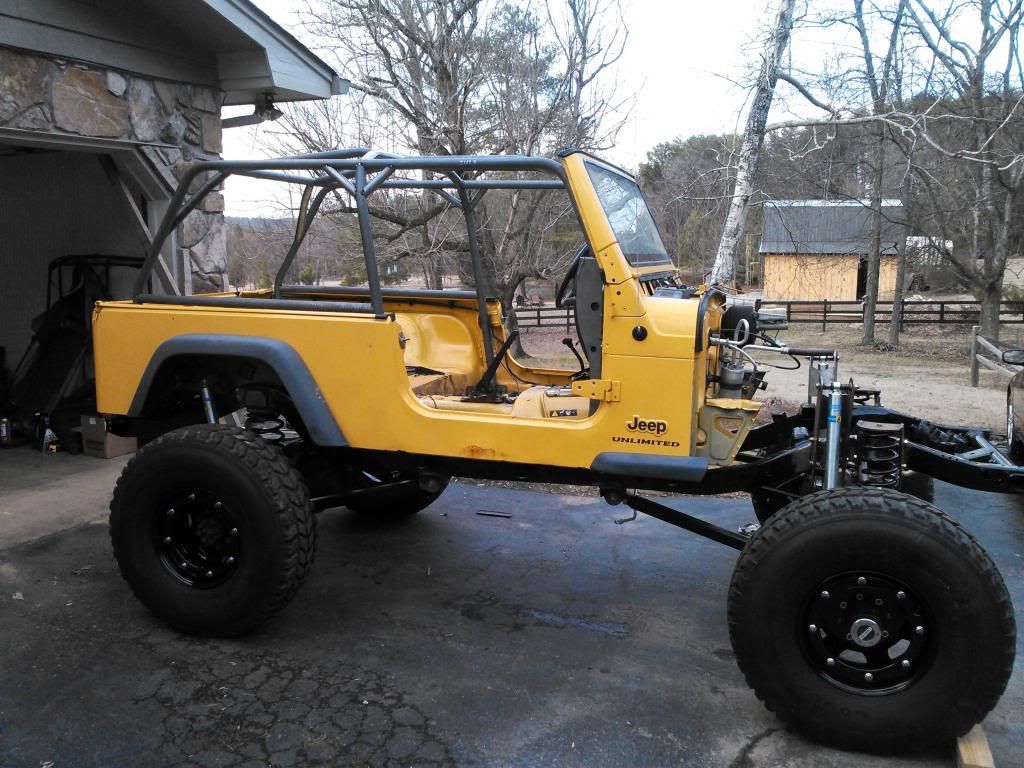
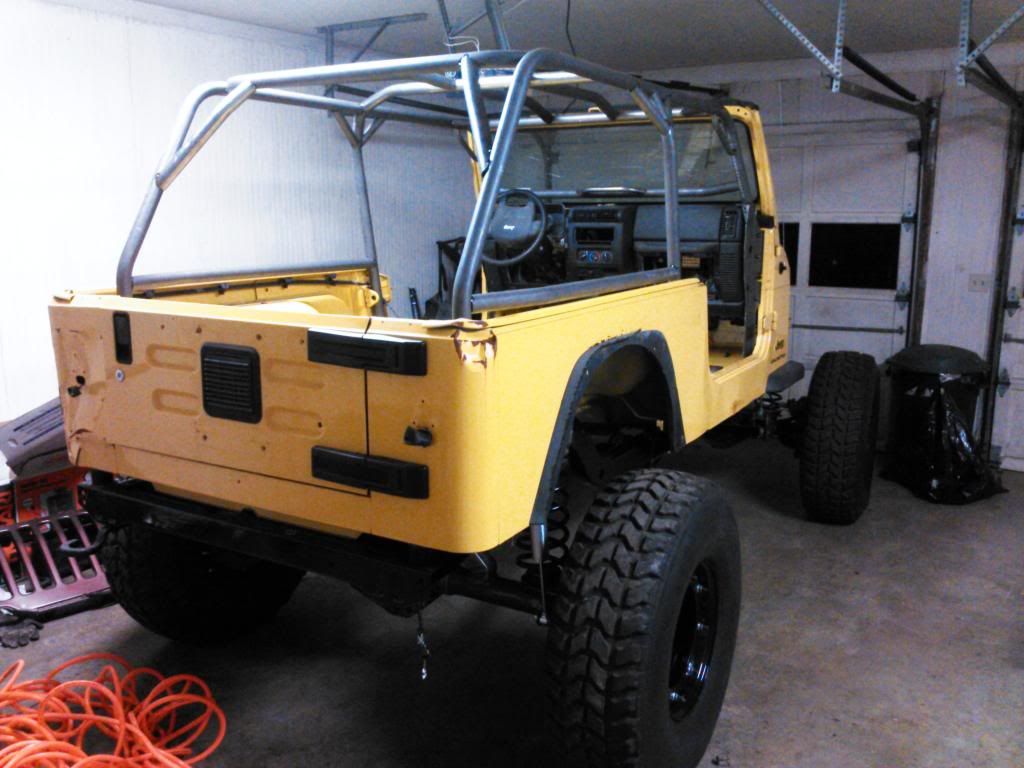
I scanned Davey's Jeep's for a while and finally found a rolled 04' that was mechanically sound, and only had a little body damage, save for the hood, fenders, grill, and roll bar. I ended up selling my cherokee in a hurry and getting the wrangler for a little under 4k. I wanted an LJ for the extra wheel base and space, and I think they look good. This is what I came up with.


I drove up from Tennessee to Ohio with my good friend and trailered it back down here, getting 12mpg up, and a solid 9mpg back down with his Powerstroke f550, haha.

These were the original plans for the build, and they have changed slightly since. This is just the basic setup.

- Cummins 4bt out of a bread van
- Ford ZF5 transmission out of an F250
- Dana 300 transfer case out of a CJ7
- 14bolt and Dana 60 with Detroit lockers out of a CUCV truck
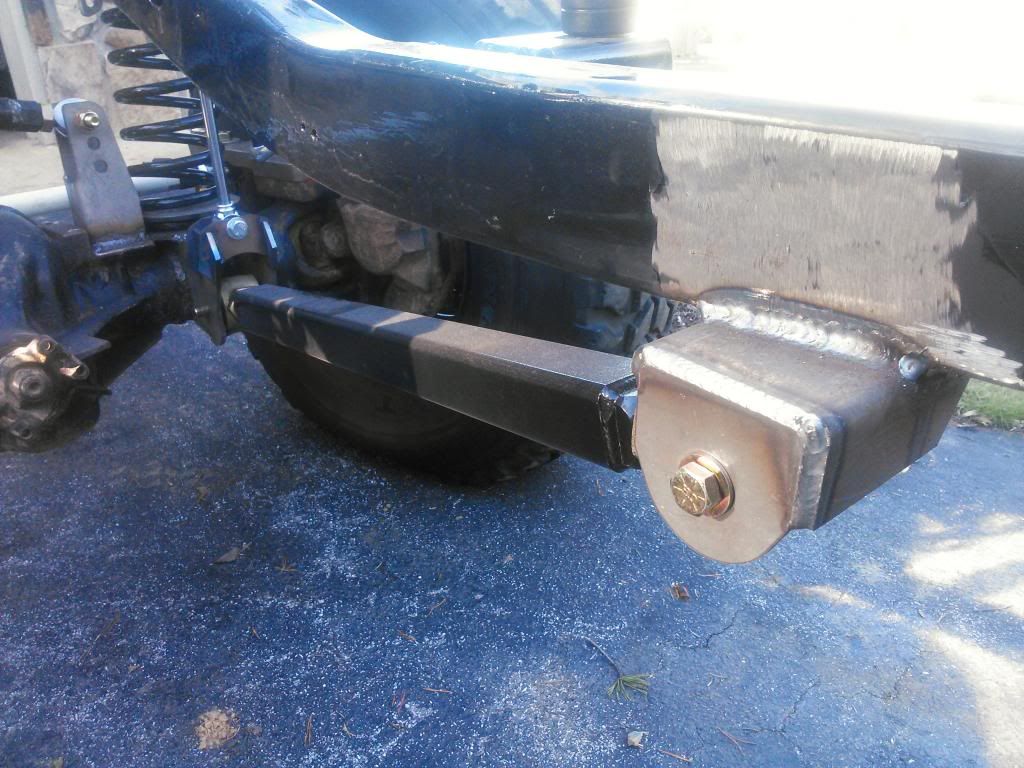
- Clayton Pro series long arms, with 5 inch springs
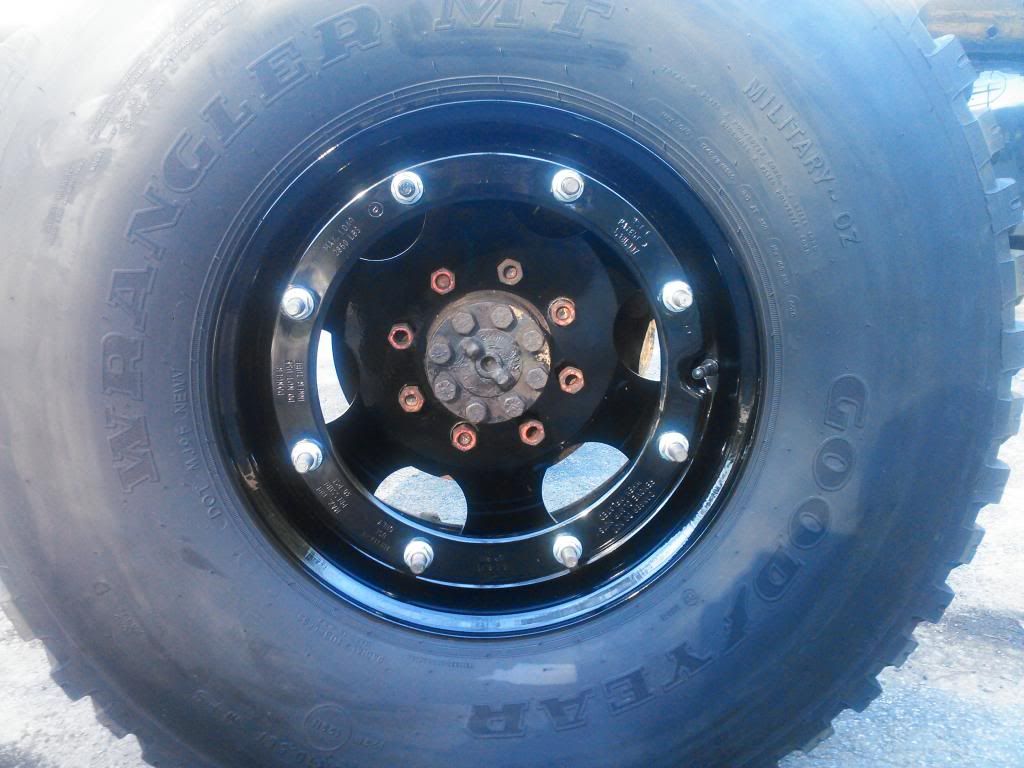
- H1 double beadlocks, recentered, in 37 inch Goodyear Mt's
- Blue Torch Fab Tube fenders, Genright Corner Armor
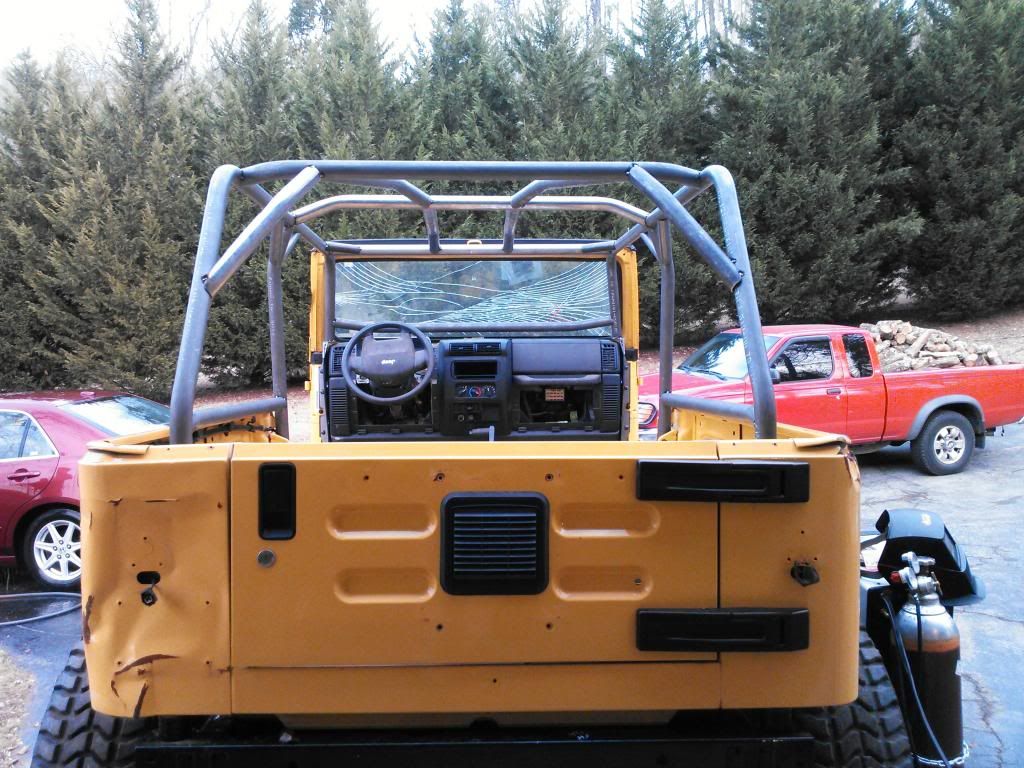
- Genright full roll cage.
- Corbeau Seats and harnesses


I got the jeep home, and I began to disassemble it. I didn't really know what I was doing, so I just started taking things apart and putting them in bags.
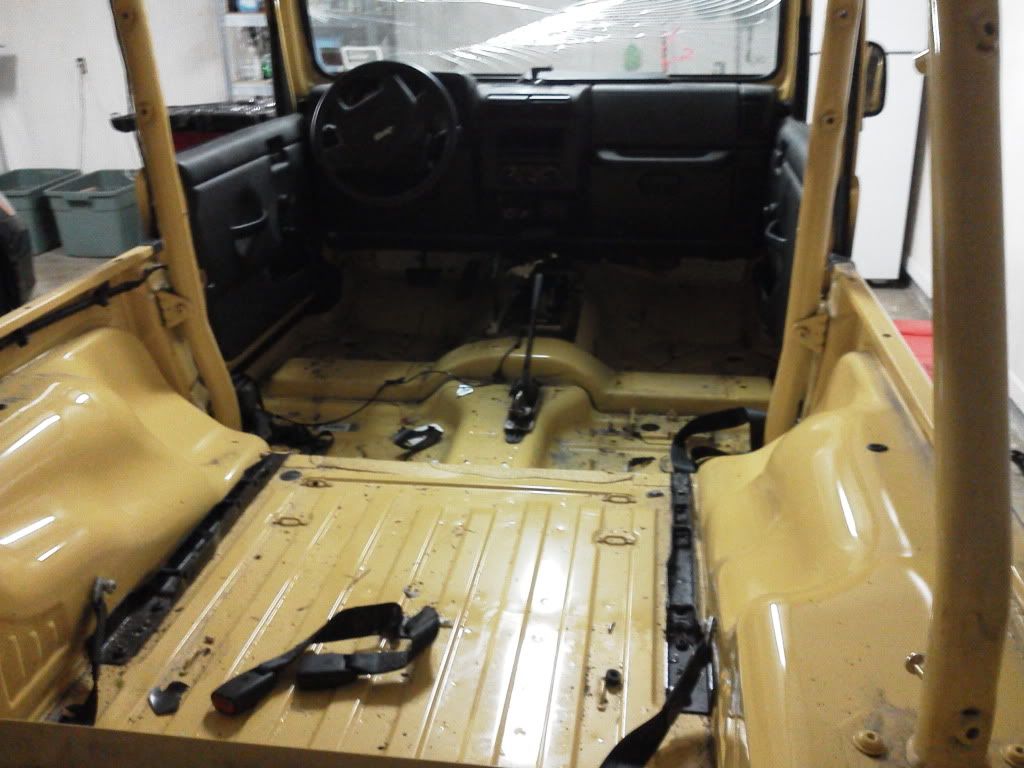


I completely removed the interior, save for the dash.
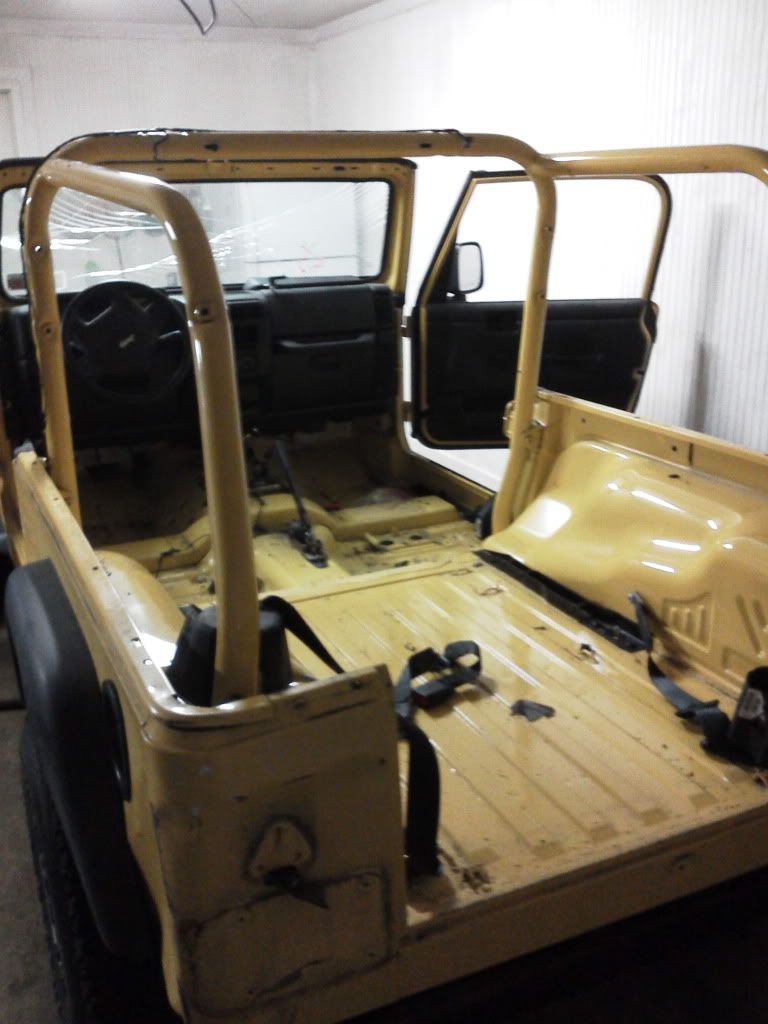


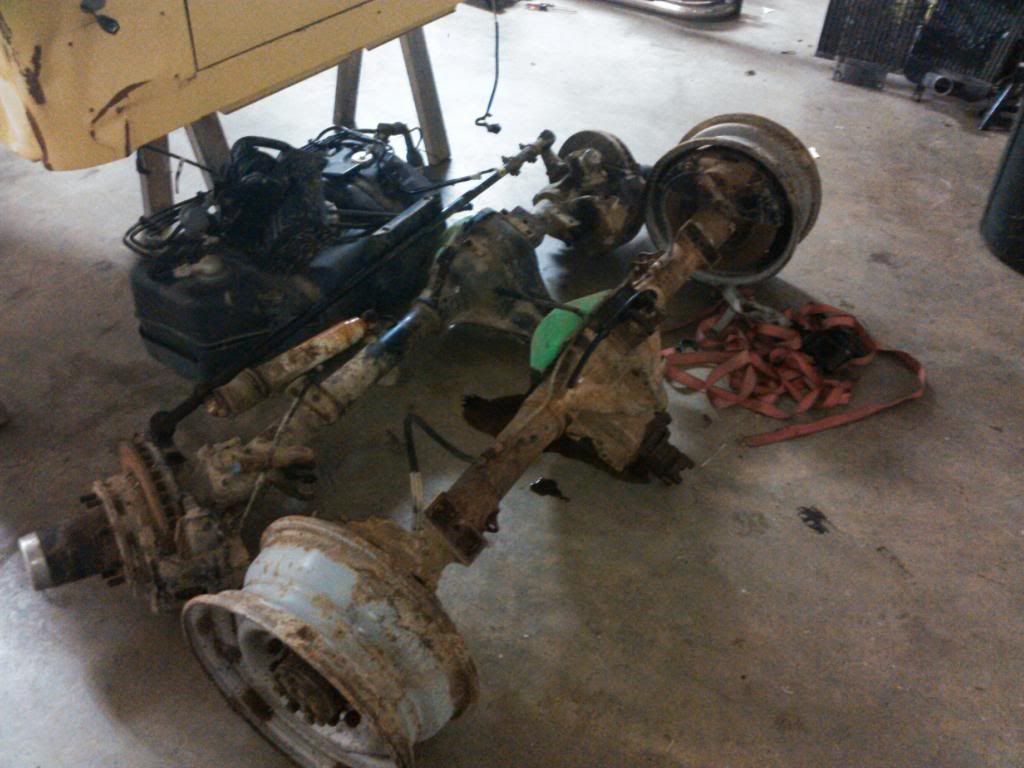
I took out both axles, and sold them for $900 on craigslist.

Sold the engine for $1000

Sold the transmission and tranfercase for $350
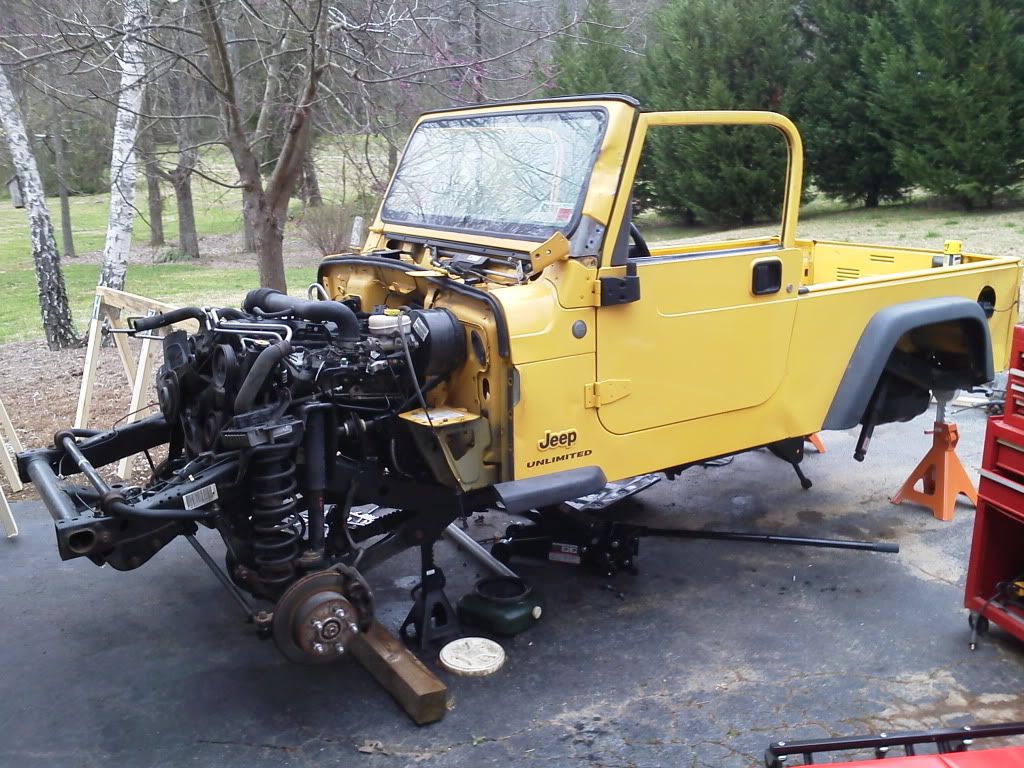


I sold the wheels and tires, roll bar, and just about everything else I didn't need, coming close to breaking even with the original price of the jeep.

My cousin has a construction company in VA, and he had his crane down here in TN, helping remove some of the downed trees during the tornadoes here several years ago. I got lucky and was able to use it to remove the body.
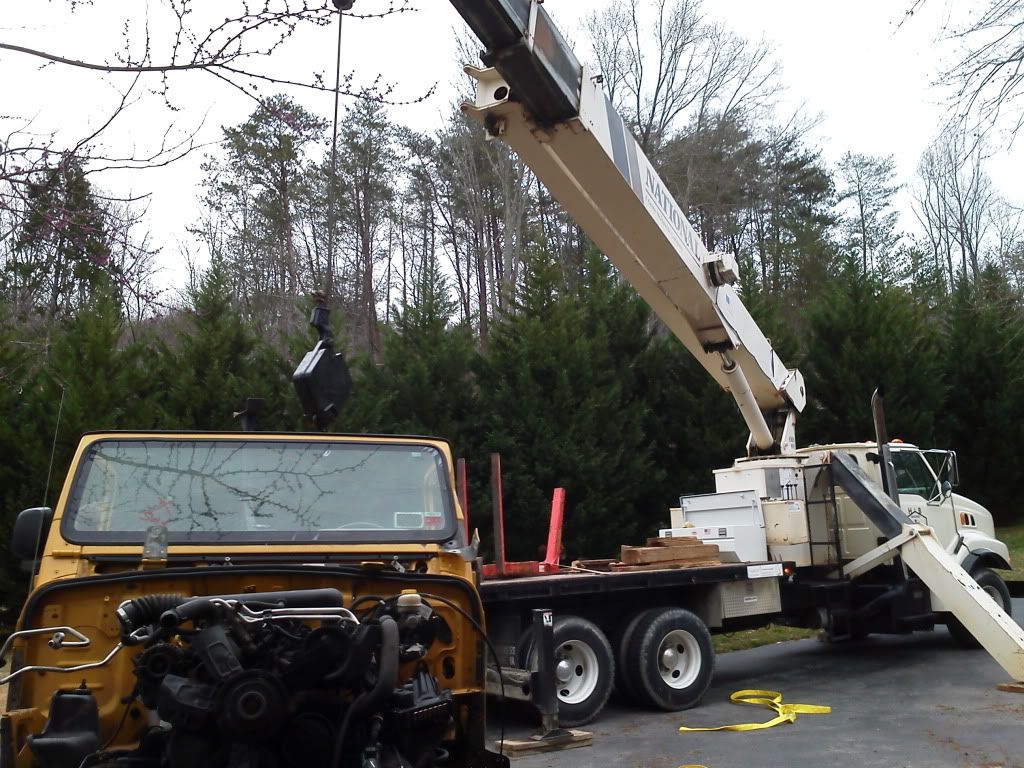

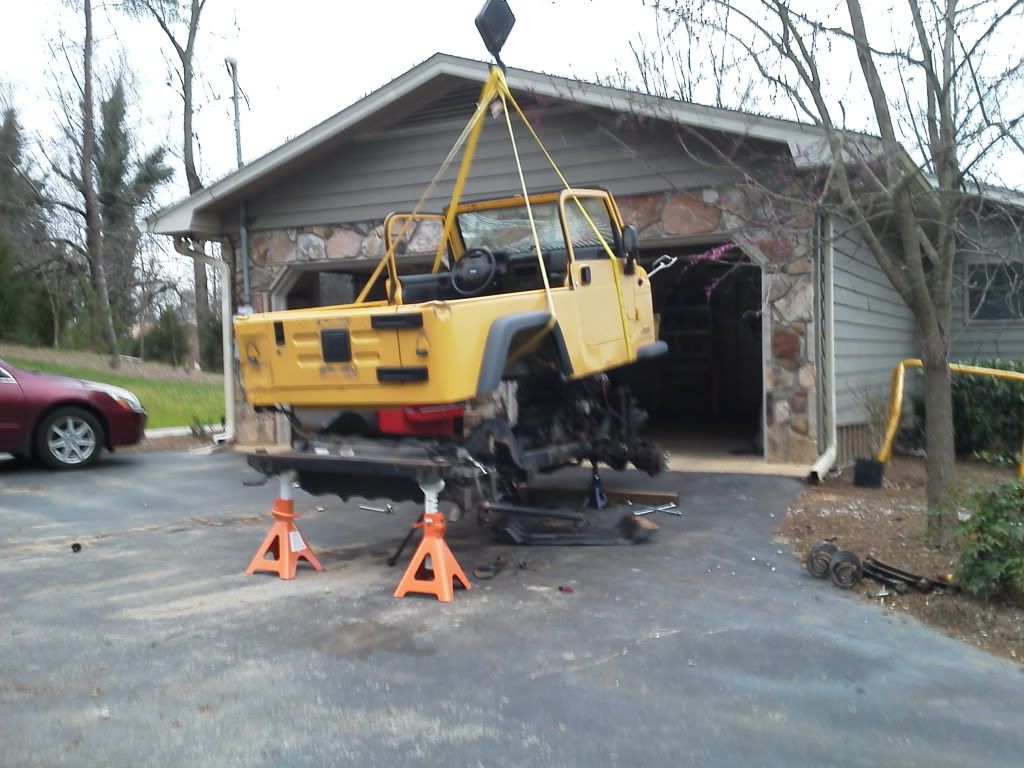
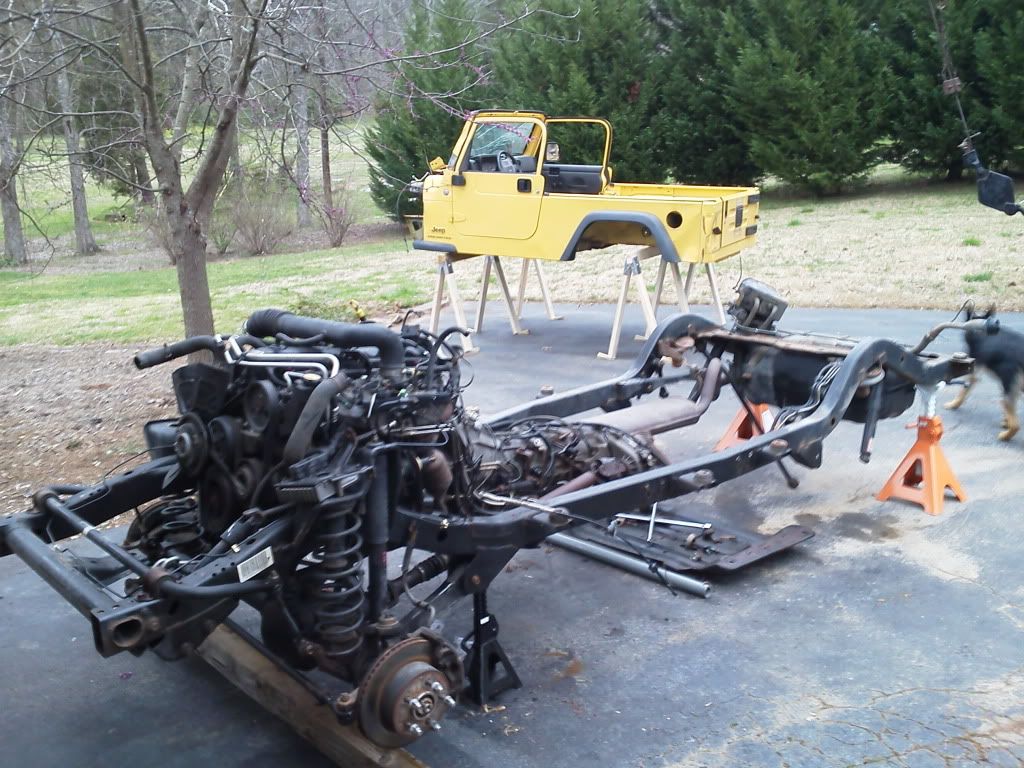


With the two separated, I was ready to begin some work.
 

wmeyer116

wmeyer116
4BT's are rather plentiful as a pulled engine or as a core, but if they are in good condition they can run upwards of $3000, and if they are rebuilt they can be even more then that. Also, the time of year affects the prices as well for some reason. When I looked for them, none were in my price range. The other option is a step van, or "bread van". Most are in the configuration of a Chevy P30 chassis, as well as some Ford or Grumman. They either had a chevy drivetrain or Ford, with the Cummins engine. I waited and scanned all the local craigslists, but no breadvan was found. almost all had the gm diesels, or chevy 350's.

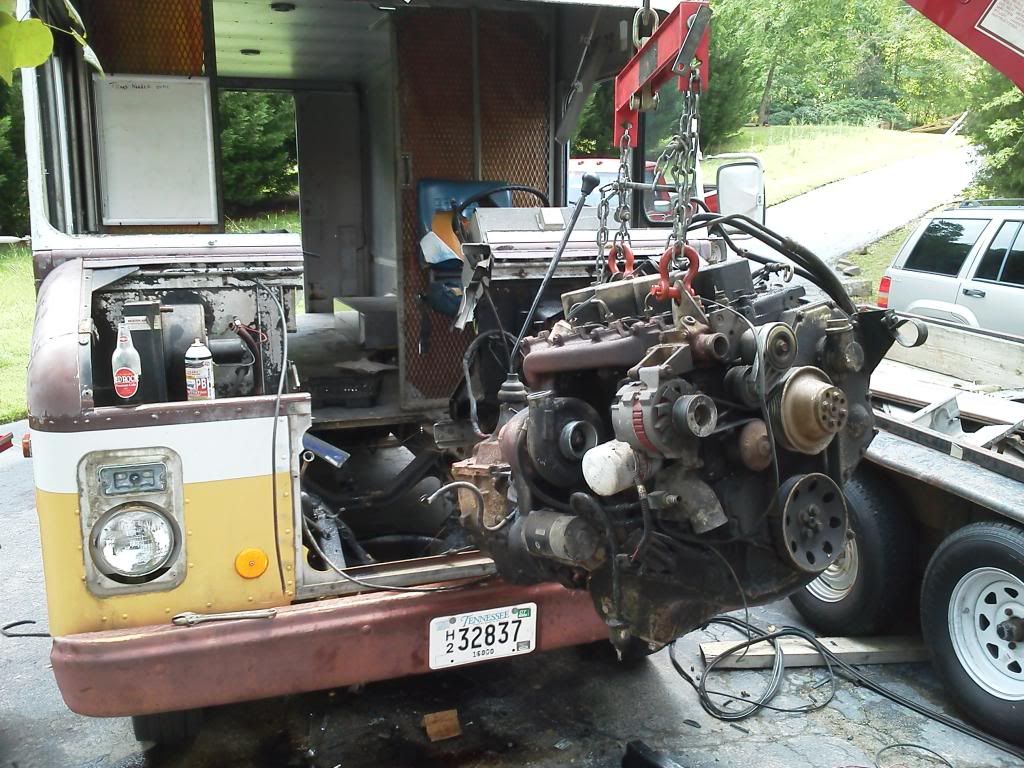
I heard of a website through 4btswaps.com, a place called dovbid.com. They have auctions of vehicles, equipment, etc, and I found several on there. I ended up finding one and getting it for $1800 out the door from a Frito distribution center in Winchester TN, not knowing if it ran or what needed to be done. The advertisement actually stated it was an ISB, which was nonsense, as the picture clearly showed a 4BT. It also stated that it had not been started for several years and it needed to be towed. Well, I drove 3 hours with a buddy of mine and low and behold, it started on the first crank, and ran flawlessly. The shop mechanic has posted a misleading ad so that no one would buy it and he would have time to save up and get it himself.


On the way back though, I blew a rear tire and the bolts were seized up and we had to drive 30 minutes to get a cheater bar at a hardware store. We finally got it home though, and I began surgery to get out my prize, the 4bt


Took out the engine and trans, which was an sm456. Then I cut up the entire body in strips, because it was aluminum, and its a pretty good scrap price. Between the frame, axle, and body, and wheels, I ended up getting about $900 for everything at the scap yard. I wend through probably 20 sawzall blades. So for about $1000 including fuel and whatnot, I had a functioning 4BT.

This is the after I started tearing it down. It ran perfect when I drove it home, but since it is already out of the frame, I thought I would go ahead and do a master rebuild kit on it, which isn't too expensive for some peace of mind.


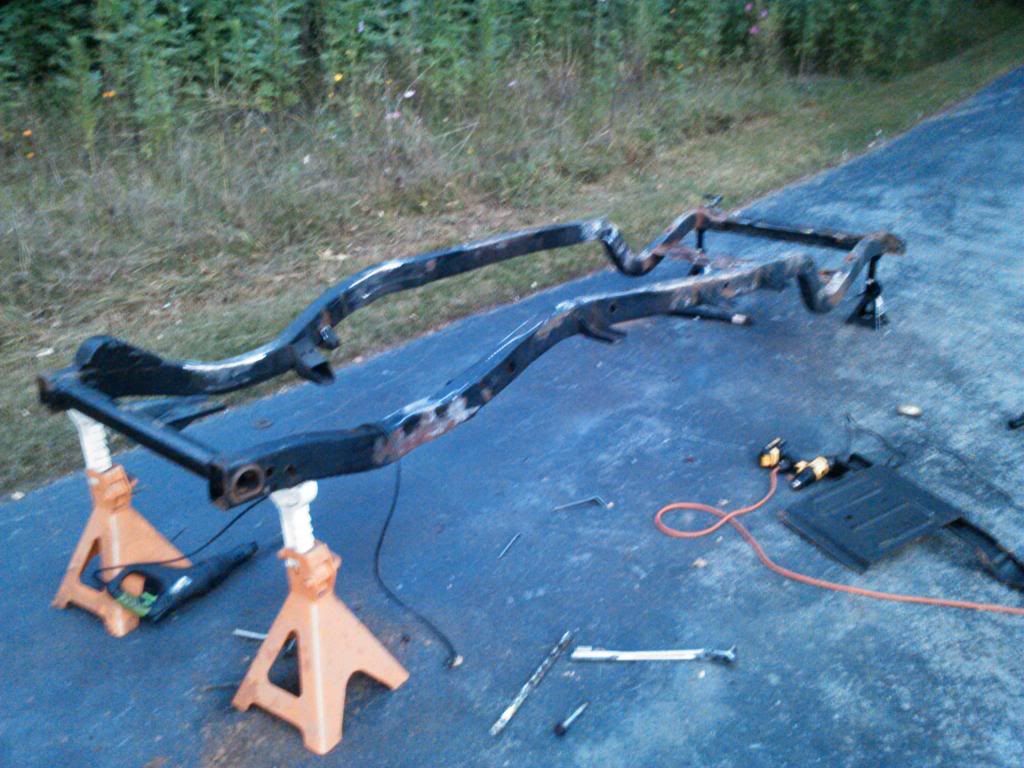
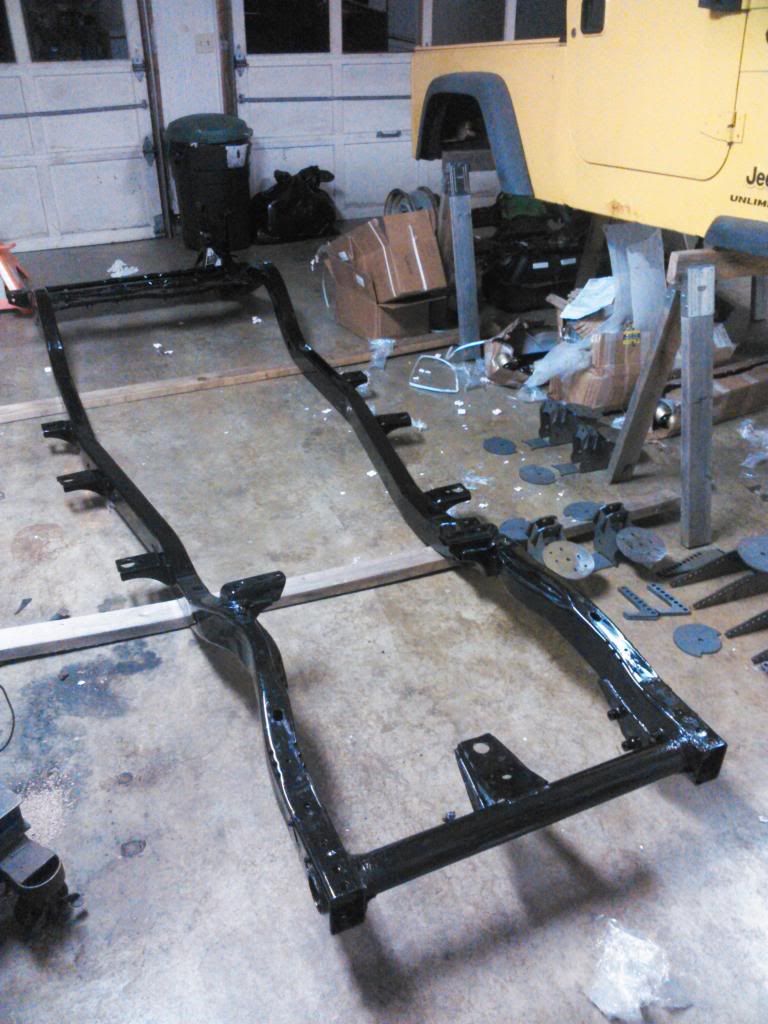
The body had some surface rust underneath, and the frame had some pretty bad rust in certain places, as well as trapped inside the rails. It amazes me how some people literally never wash their frame even once when they live up north and drive through salt constantly.

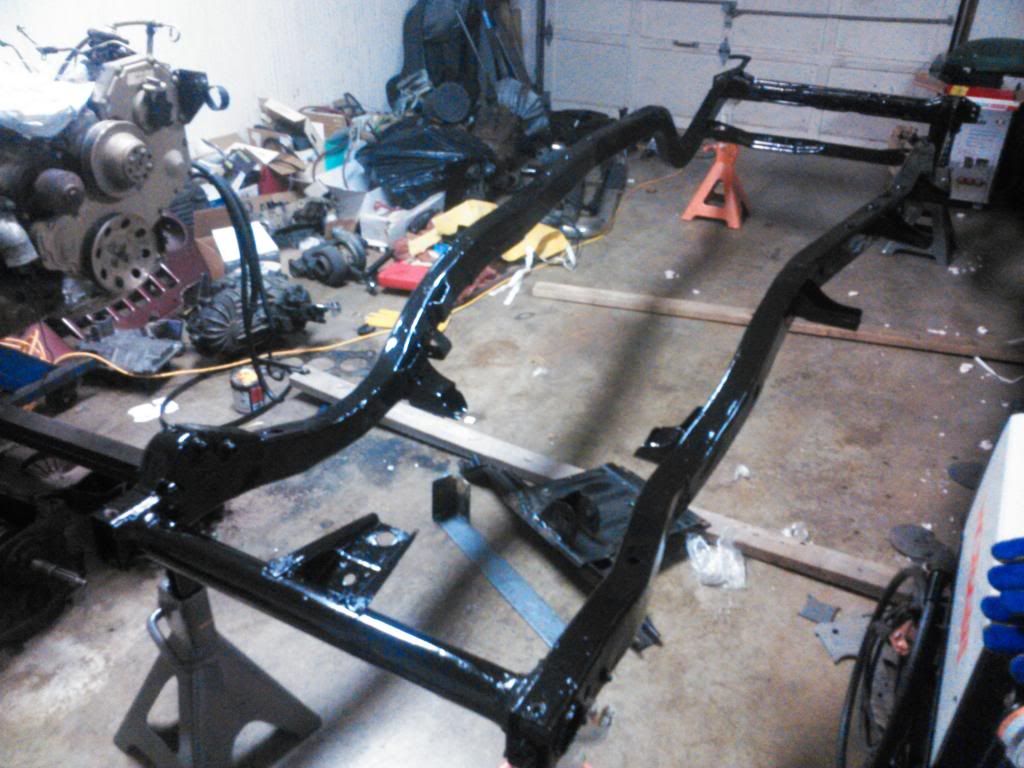
I began by almost completely stripping the frame of all the brackets and etc, and grinded and sanded most of the rust off. I bought a couple quarts of chassis saver, which you can paint directly over rust.


These are some bad quality pictures but you get the idea


wmeyer116

wmeyer116
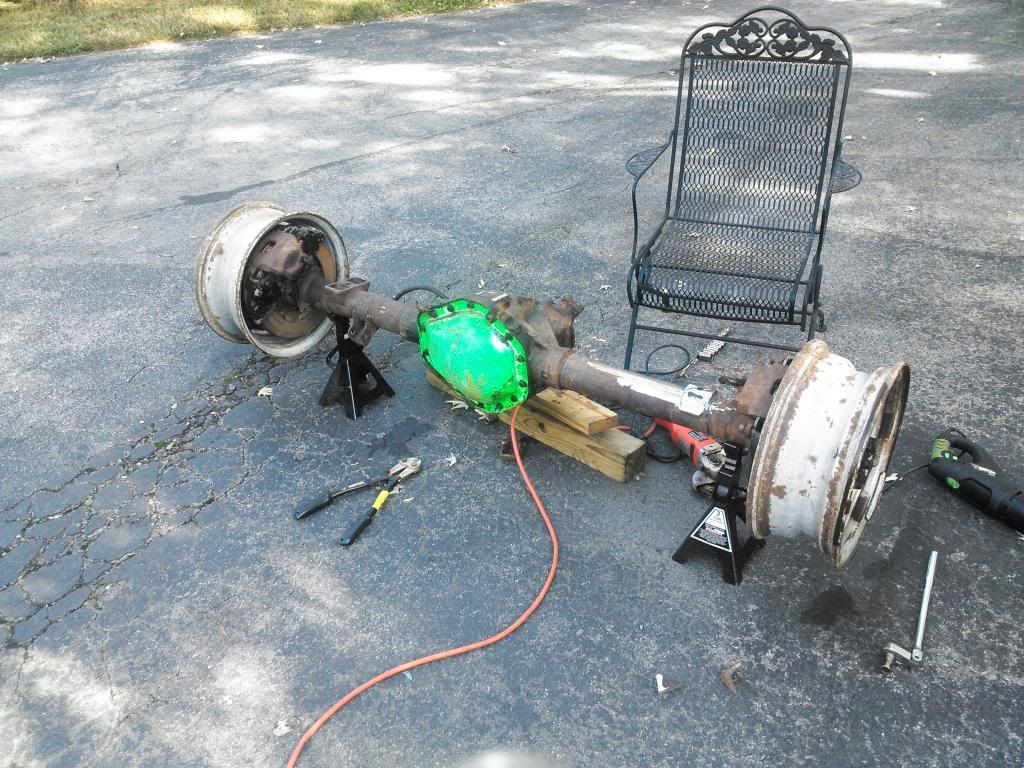
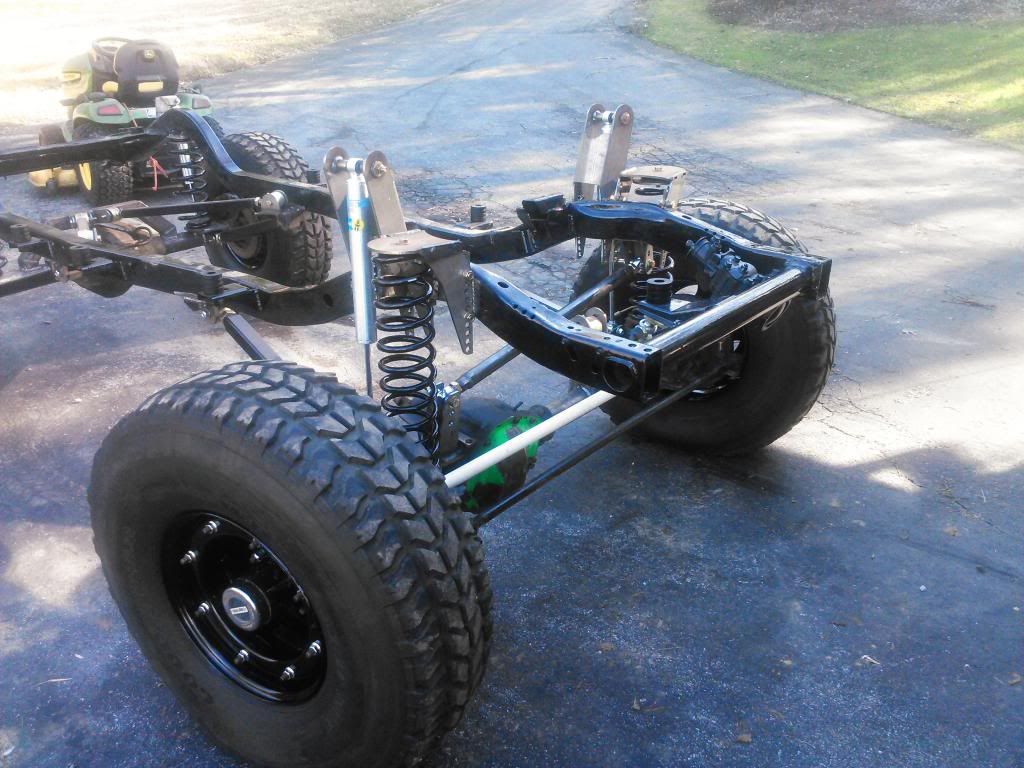
Here are the axles I picked up. I had originally planned on going with a Nv4500 out of a 3500 truck, as it would mate to the adapter that was already on the back of the cummins. But later on, I decided to go with a Ford transmission and adapter instead. I had to get a chevy dana 60, which is a passenger drop axle, because the chevy adapter plate on the engine, as well as the transmission, will only allow a chevy np205, which is passenger side drop transfer case. It makes setting up steering and suspension a lot more difficult, but I have figured it out.


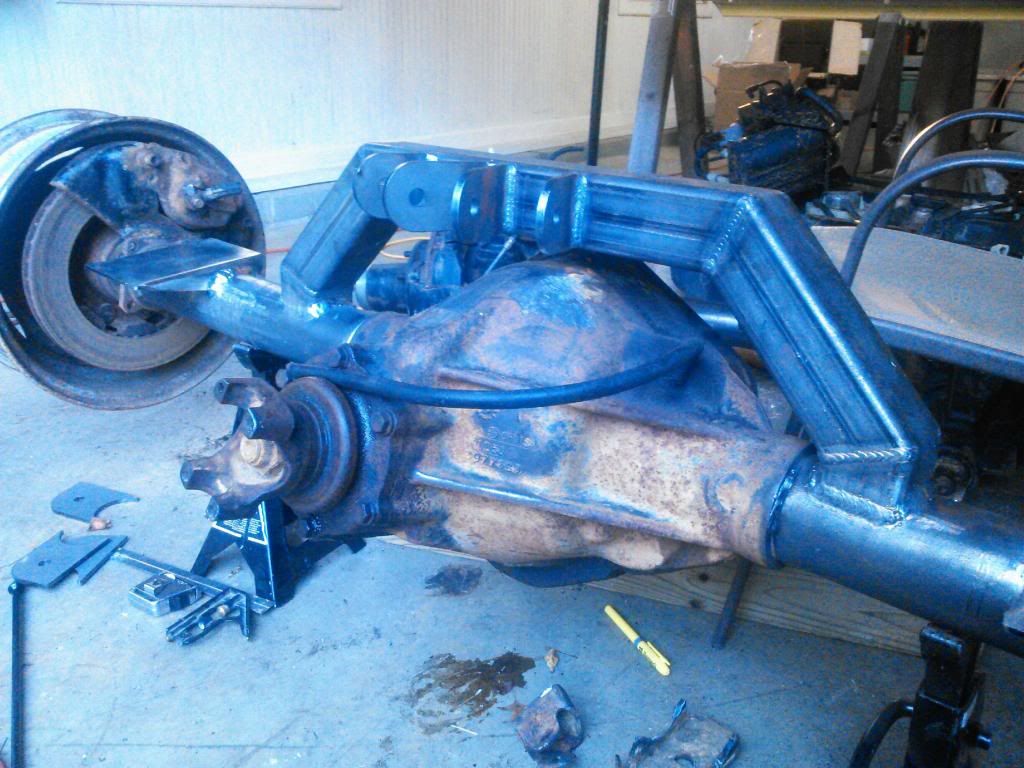
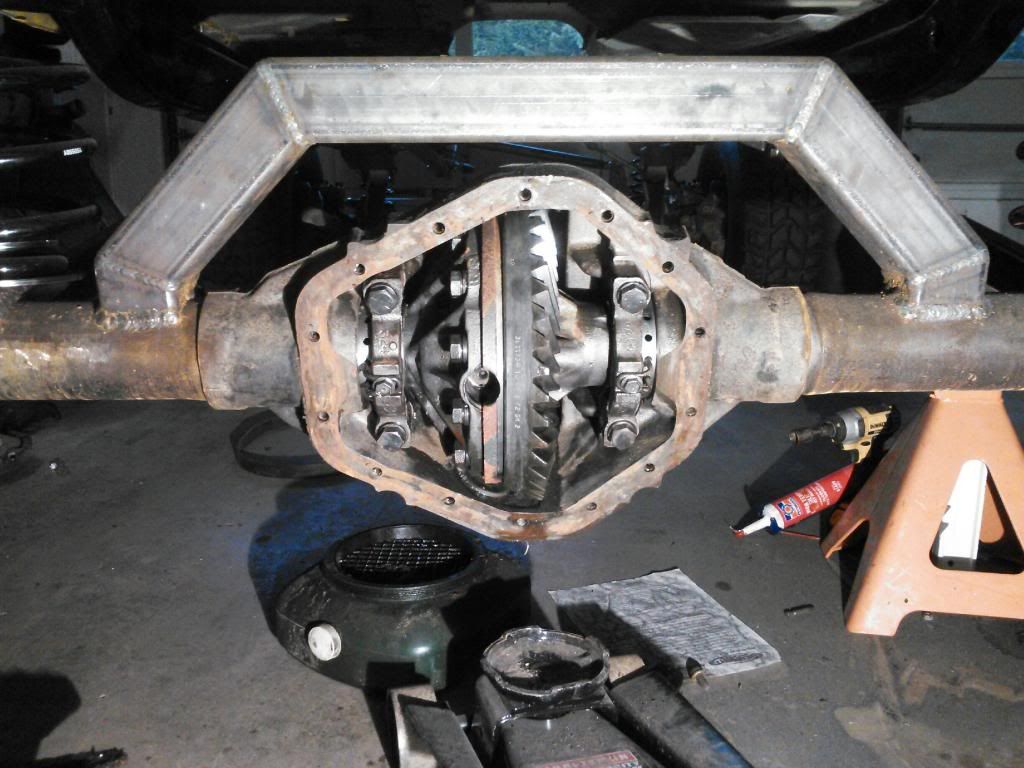
I started work on the rear axle, getting it down to bare metal, and measuring, remeasuring, and finally welding the truss on. It was included in the kit from Clayton. When I started the project I had absolutely no welding experience. I just went out and bought a decent welder and hoped for the best. It turned out okay though.


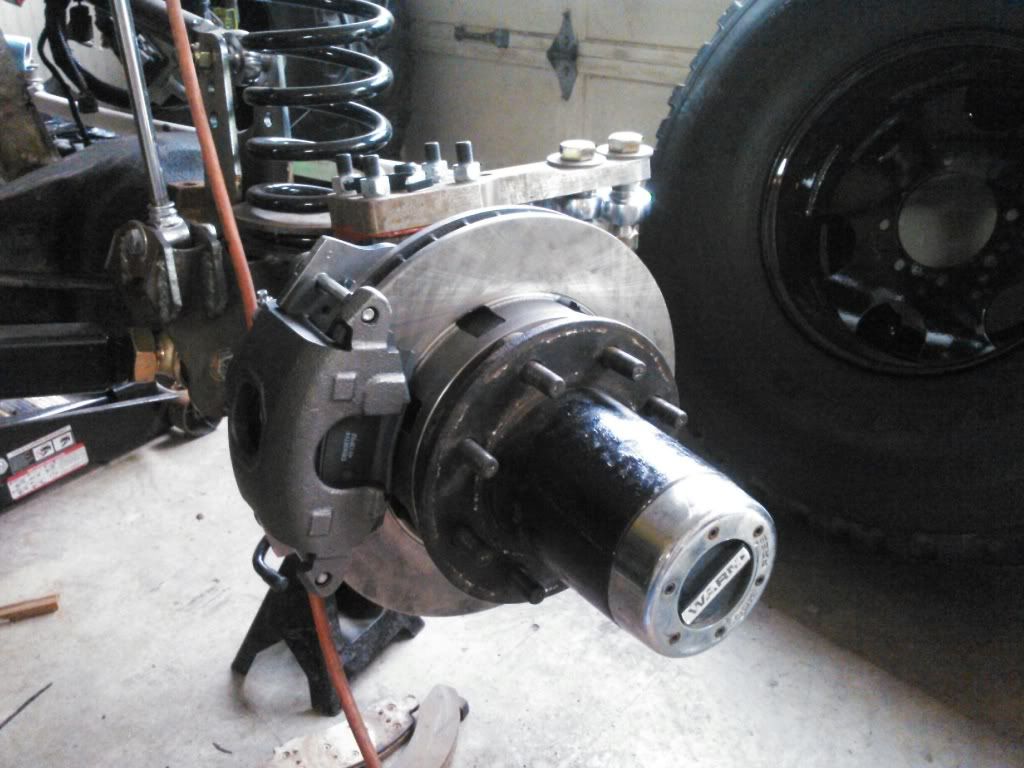
The axles are also in pretty good shape. They have the Detroit gov lockers, and the 60 has Warn lockouts, so that was a nice upgrade.

The steering kit That I was going to use for the 60 was from Ruffstuffspecialties.com Its the 7/8ths kit with Heim joints. I also have their trackbar kit, as well as some high steer arms from Ballistic Fabrication.

After a lot of welding and measuring and difficulties, I came up with this.


2 years down the road, I am not a fan of the front coil buckets and shock towers I went with. They were adjustable ones from Ballistic. The concept is cool, but they are bulky and ugly as hell, and one day I will change them out.

The wheels were from trail worthy fab. They do great work, but their shipping time was a little much.

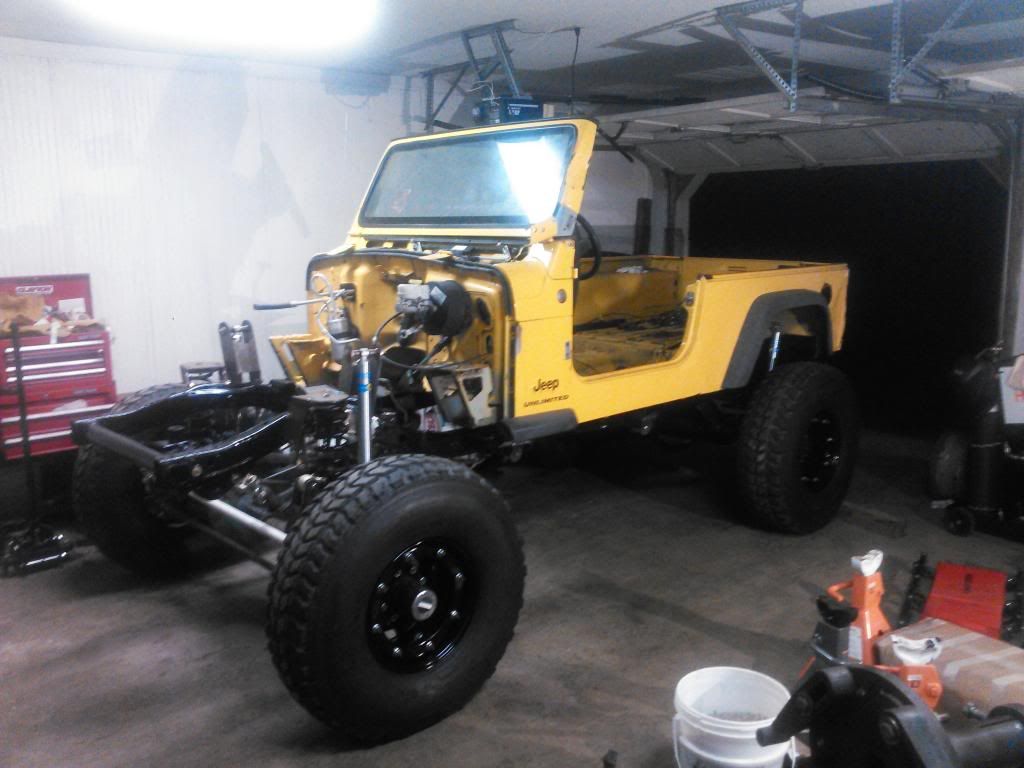
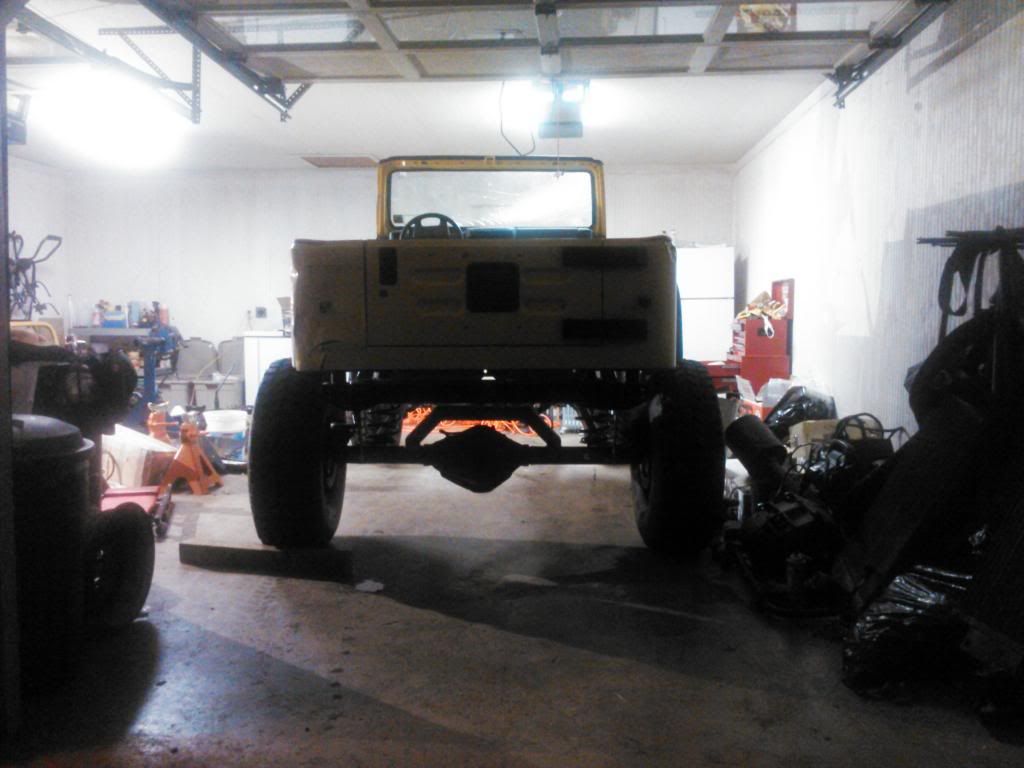
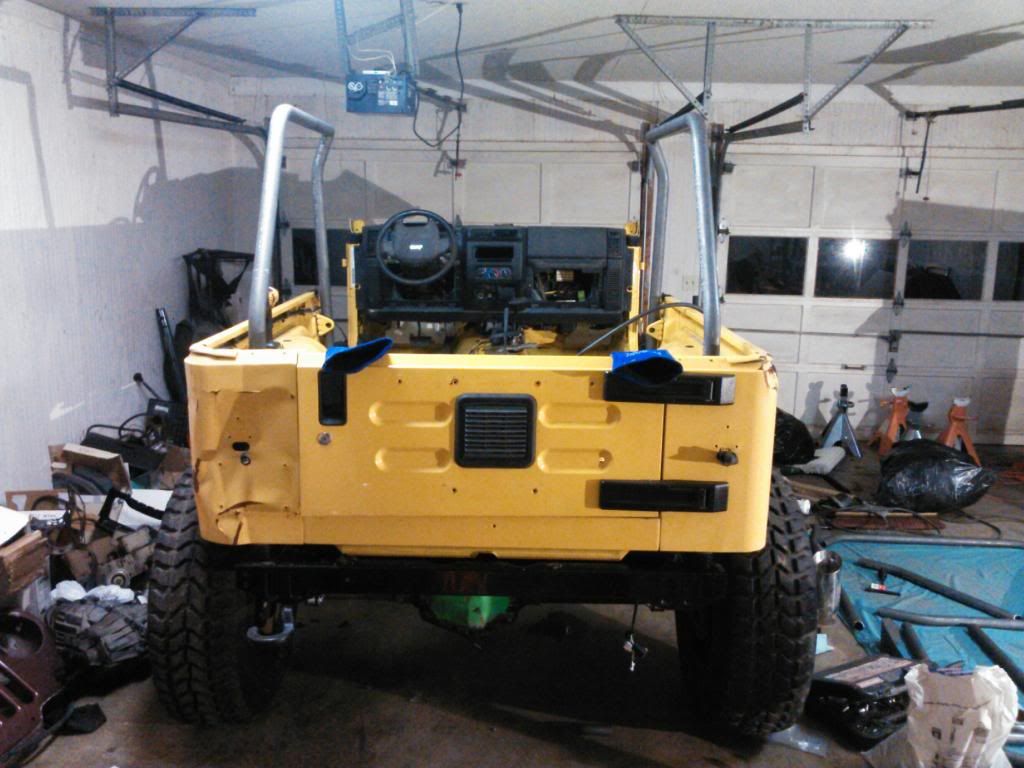
Anyway, After some fine tuning I was able to set the body back on the tub. In hindsight, I should have cleaned it up really well and sprayed the underside with some coating, as well as the outside of the firewall, but live and learn.


Oh yeah haha


At first it sat really high, a lot higher than I wanted. It has since settled with the added weight.
 
Last edited:

wmeyer116

wmeyer116
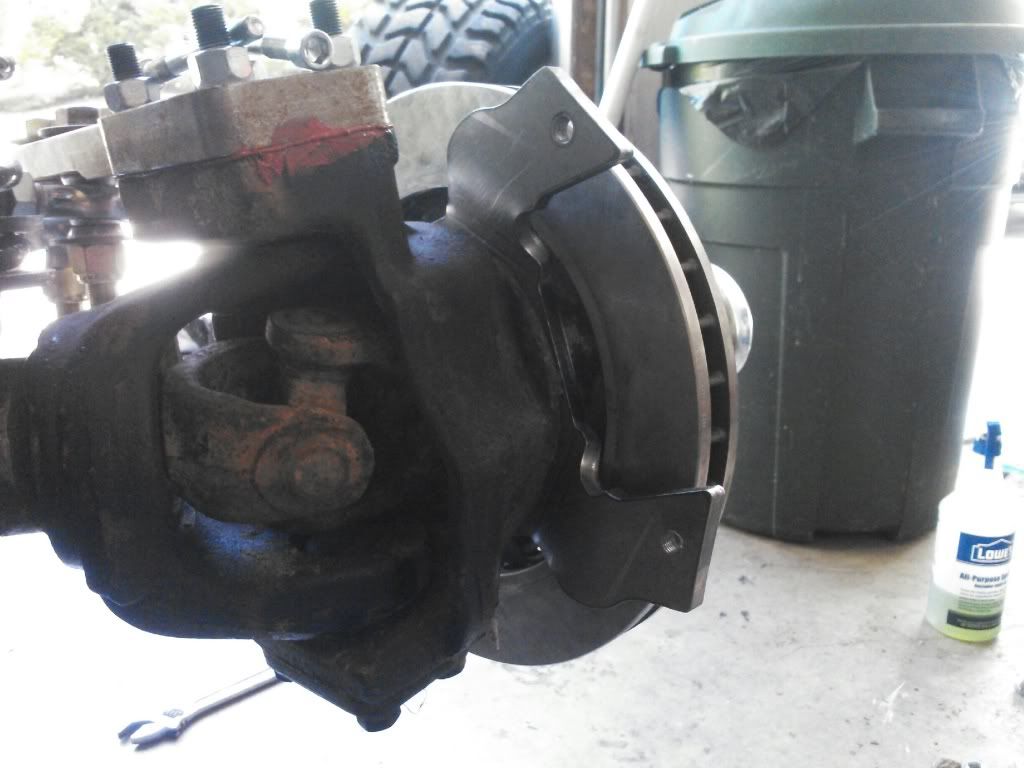
After the Cage was welded up, I decided to work on the brakes some. I wanted to convert the rear to disc brakes. I ended up going with a kit that uses hardware from a chevy k20, a 3/4 ton truck. I also went with a conversion for the 60 as well to the same hardware. It needs less fluid to actuate the brakes, and they are a lot lighter as well.
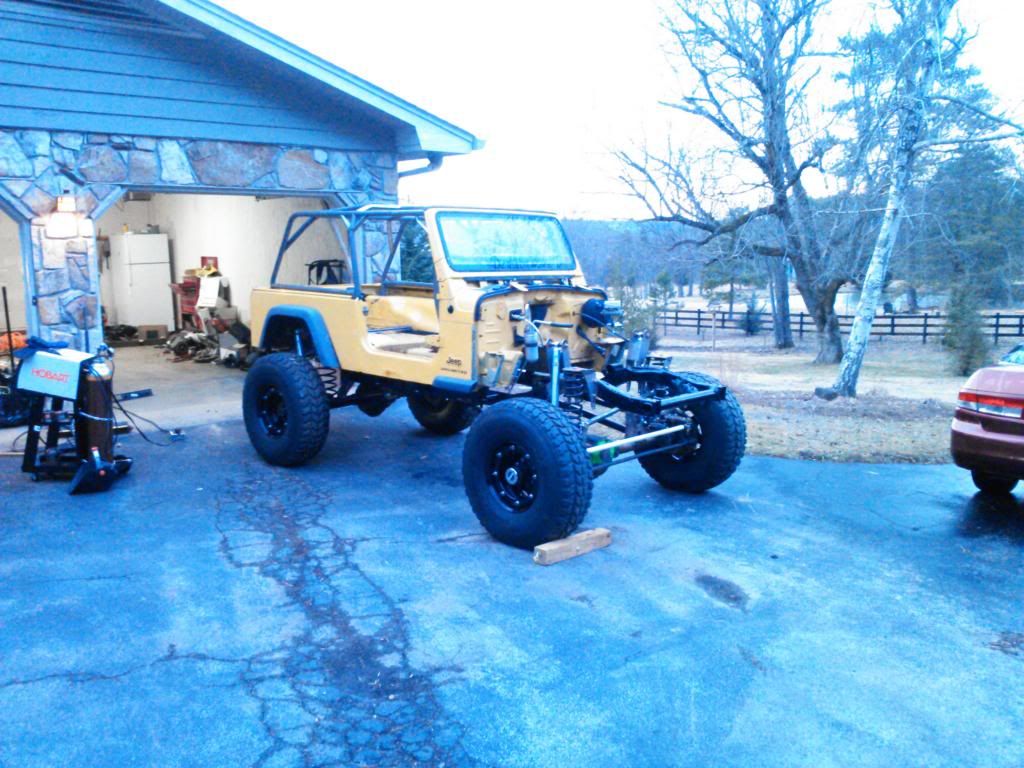
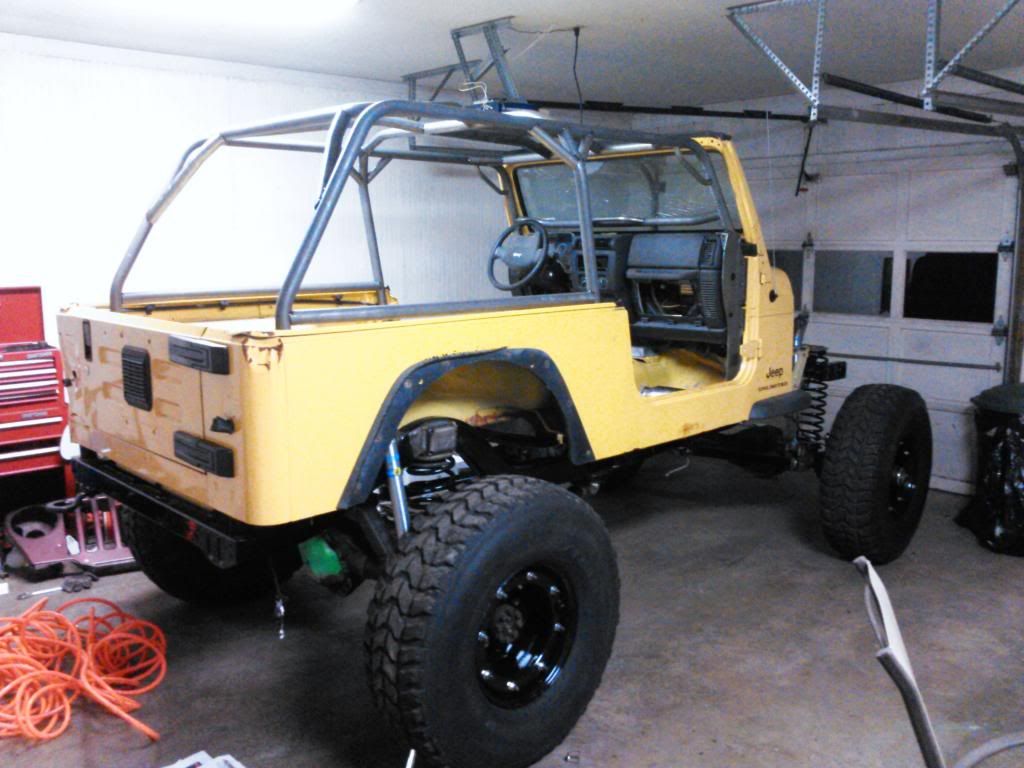


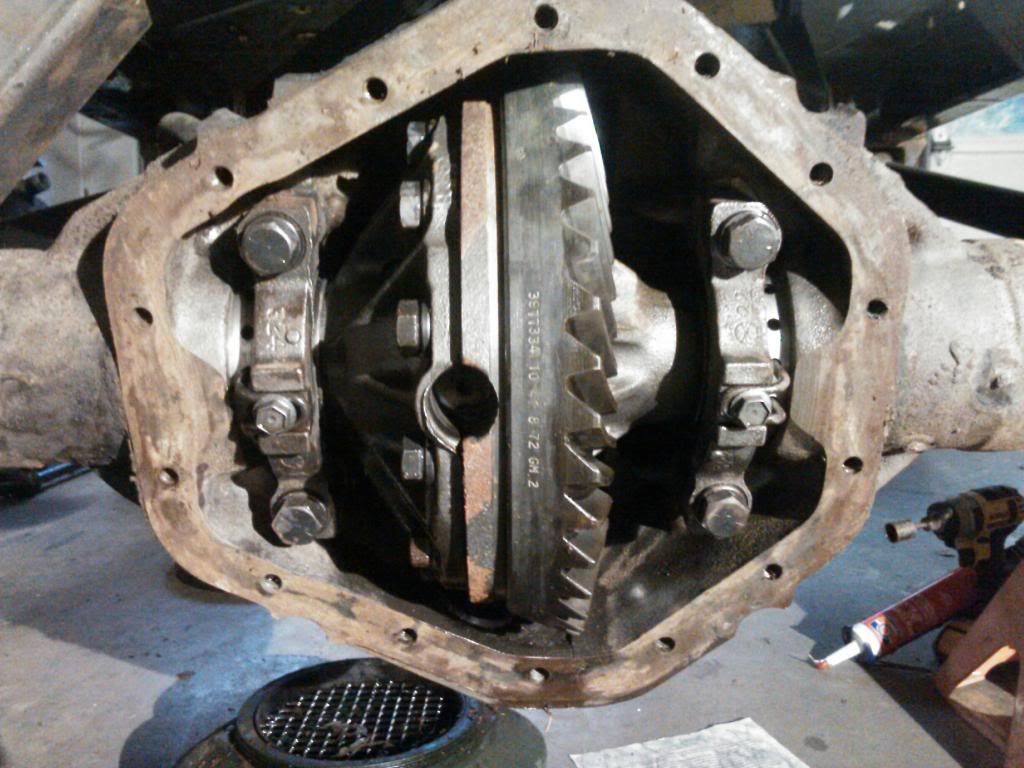
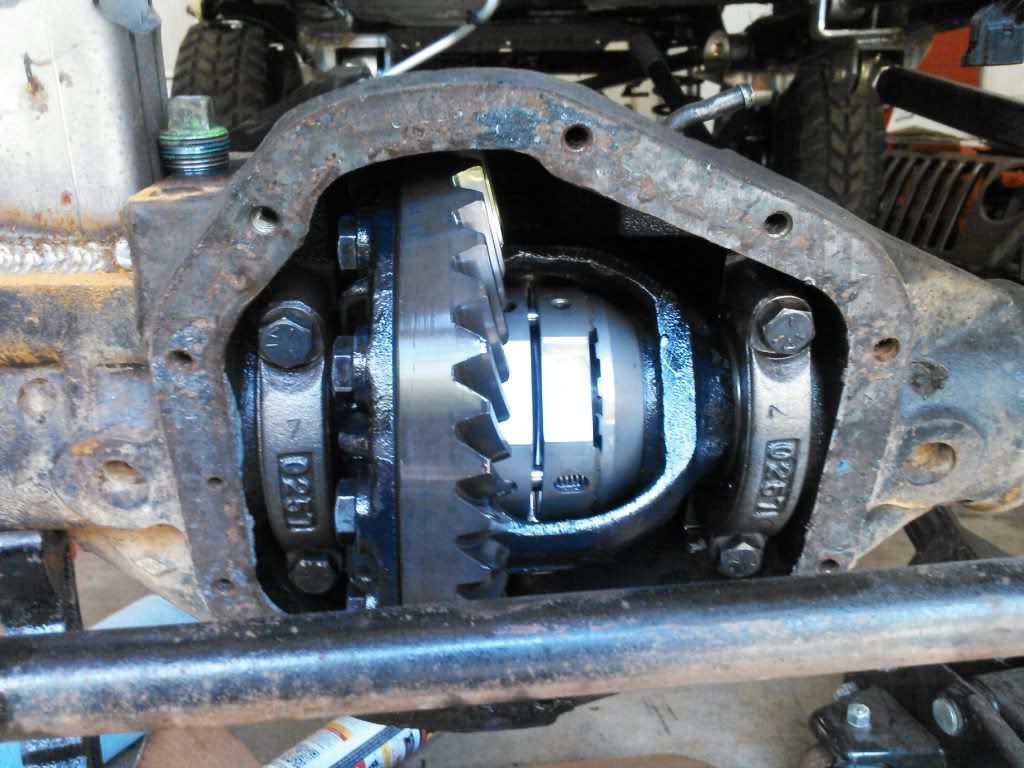
I also got to take the cover off the rear. It was a little dirty and some surface rust, as when I haled the axles home they lost a lot of fluid through the vent. Other than that, the gears and locker seemed to be okay.


This was some of the gunk that was around the magnet...


And here is the front diff drained. It looks almost brand new.


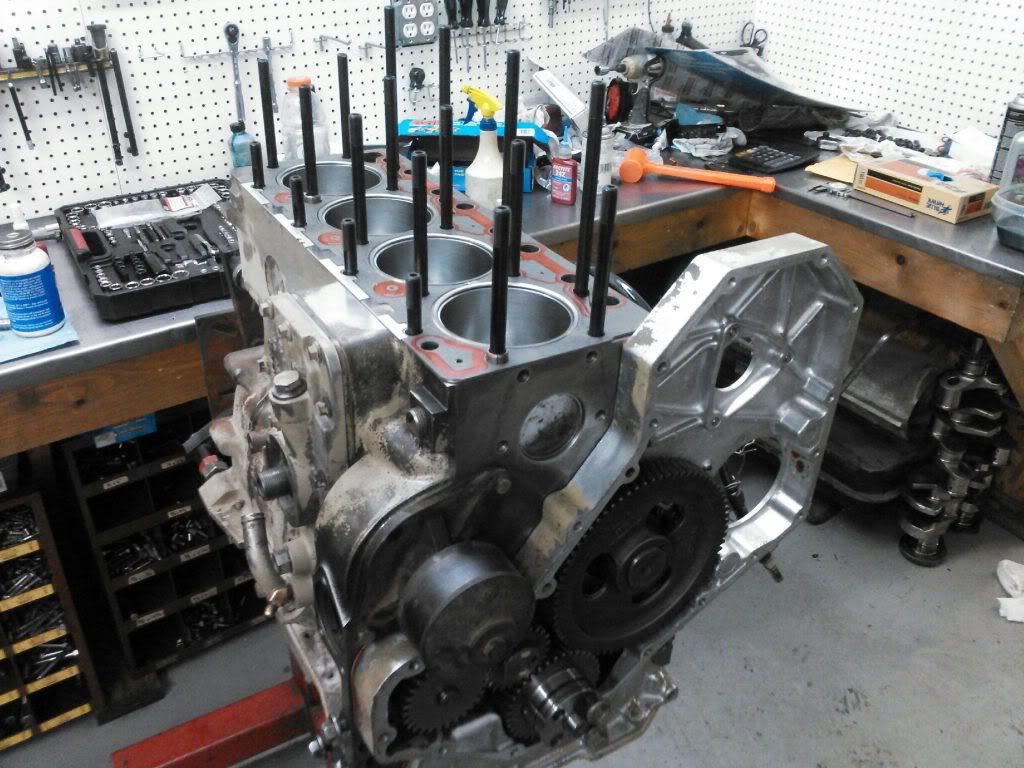
My friend's friend owns a machine shop, and I wanted to have the block worked on. I was going to have it remitted, but it turned out to be a bit more difficult.

He specializes in racing engines, and so he was going to balance all the internals. After he honed the block, he found out that there was an imperfection at the edge of one of the cylinder walls. about the size of a few grains of sand. When he removed about .005" from the top of the block it was uncovered. So, we had to remove an addition .015" to get rid of it. If it was anywhere else it wouldn't have mattered, but it was right were the head seals on the cylinders, and it could have caused a failure.

So, in order to correct the loss of height, we had to get a thicker head gasket, as well as shave off a remaining .010" from each piston, and widen the piston bowls so that the compression would remain the same.

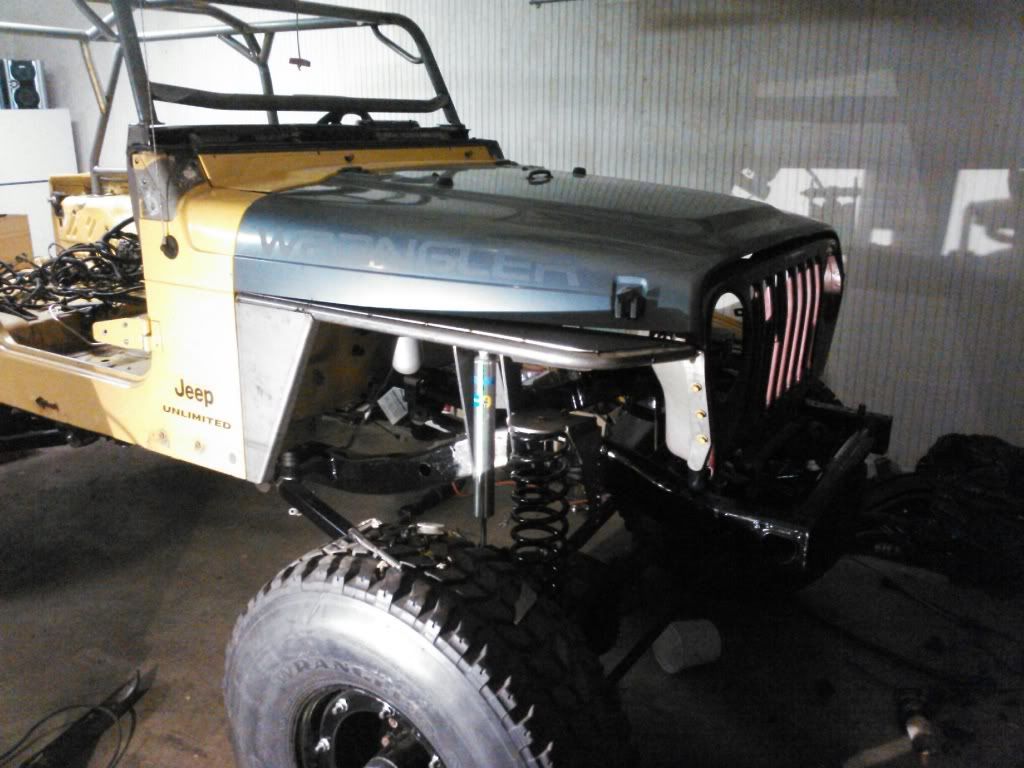
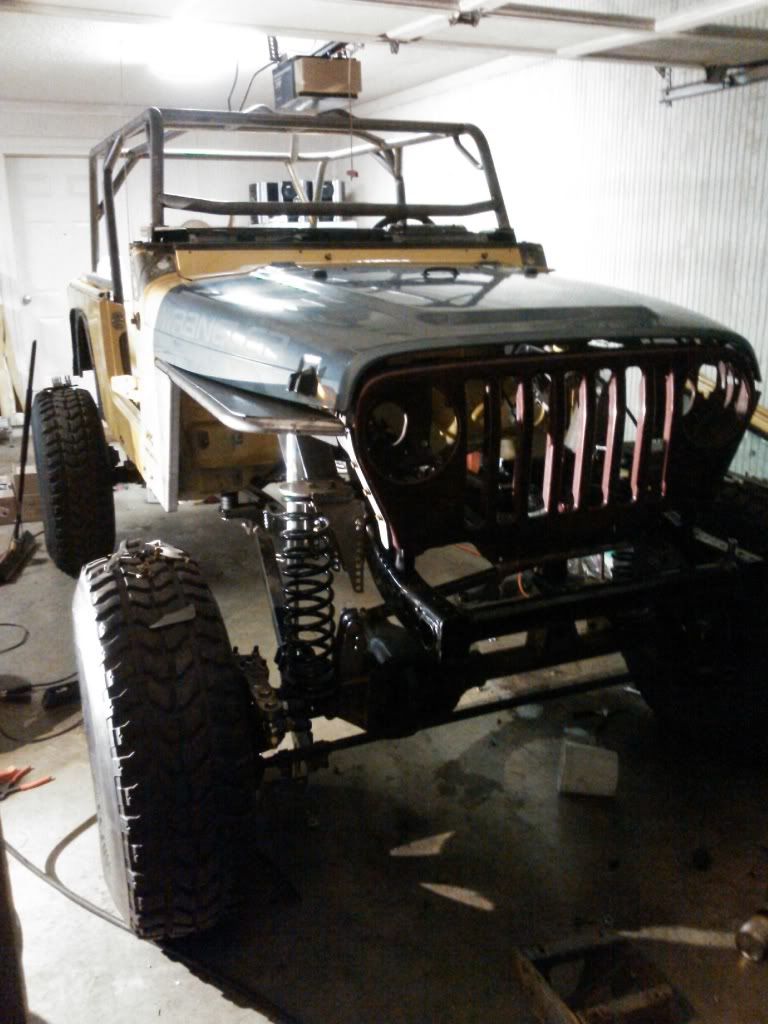
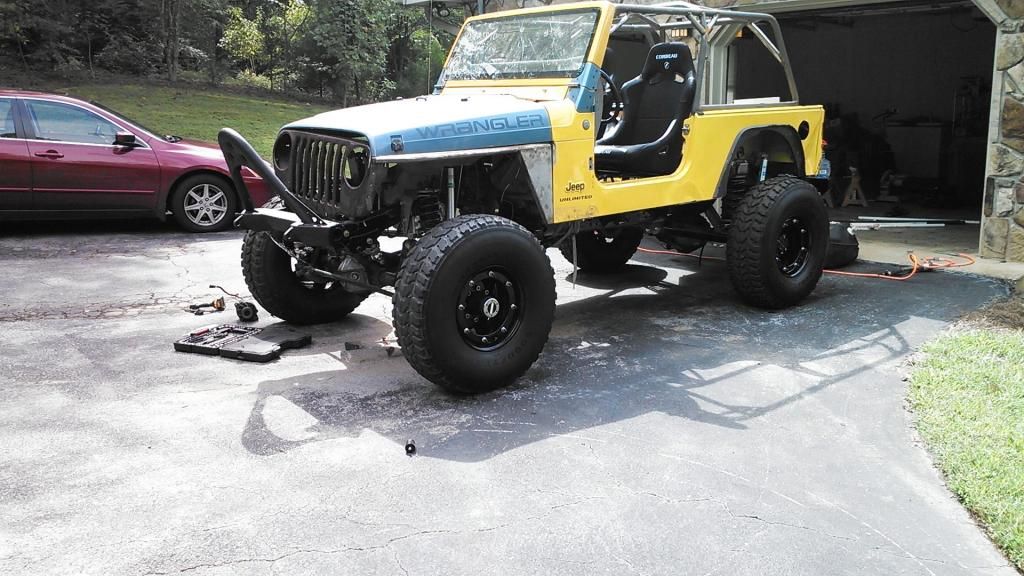
During all of that, I got the front end mostly straightened out as far as the grill and hood go. I also was able to get the tube fenders tack welded. Stupid me for wasting the time, as I had to just remove them to set the engine in.


The fenders make the 37's look like toys. Way to high for my liking.
 

wmeyer116

wmeyer116
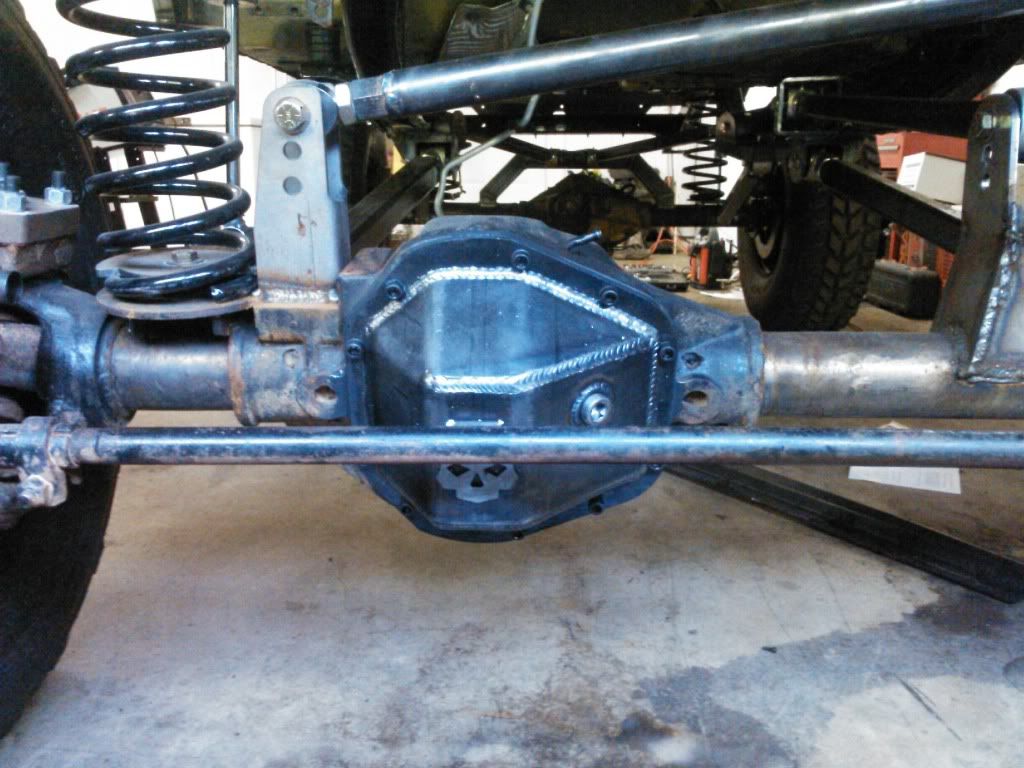
I finished up the fenders and threw a cover on the Dana 60


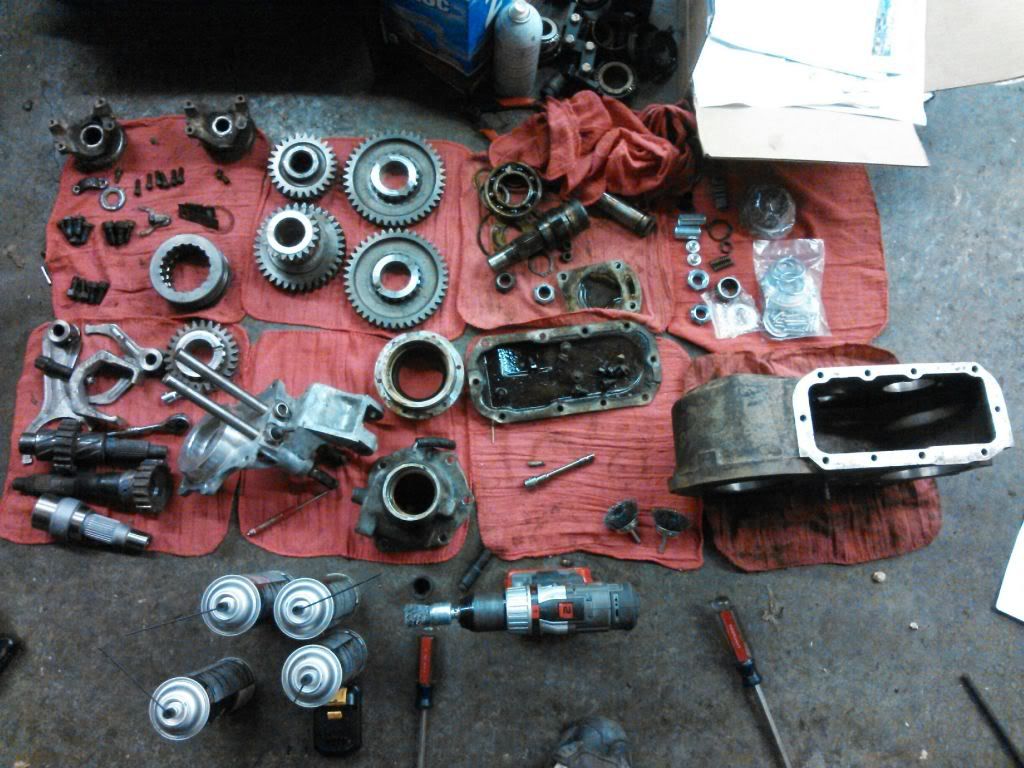
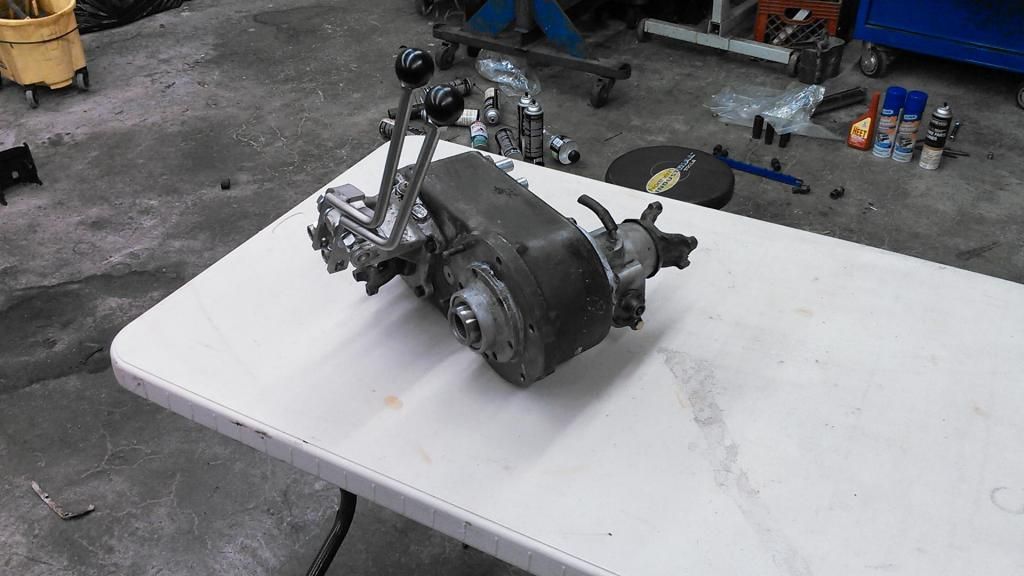
Also, I finished up the Dana 300. It was leaky, and I also had to instal a new input shaft that would mate to the Zf5. Along the way I met some hiccups when I found that the the rear output shaft was warped, so I had to get a new one.


[URL=http://s818.photobucket.com/user/wmeyer1106/media/Unlimited%20Wrangler/NCM_0444_zps0f1a4ae2.jpg.html]


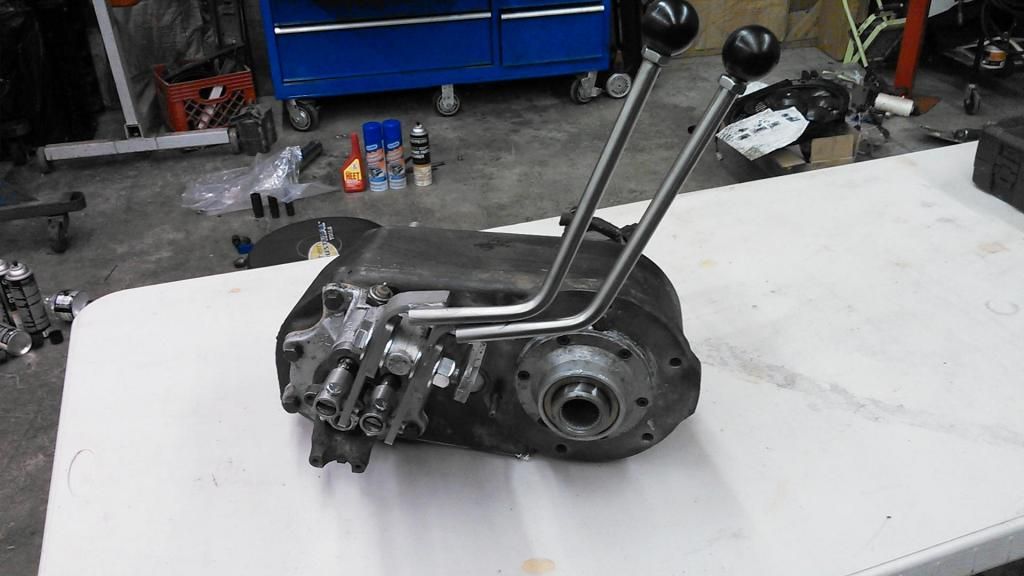
Here it is with the twin stick kit from JB customs. I also did a mod on the shift rails that keep it from going into separate ranges, such as front high and rear low, or the other way around. Now I can have 4 high, 4 low, front high, front low, rear high, rear low. This would come in handy if a driveshaft u-joint failed. Also, it allows "digs", where you engage the only the front axle around tight corners to keep your turing radius to a minimum with the lockers.
 

wmeyer116

wmeyer116
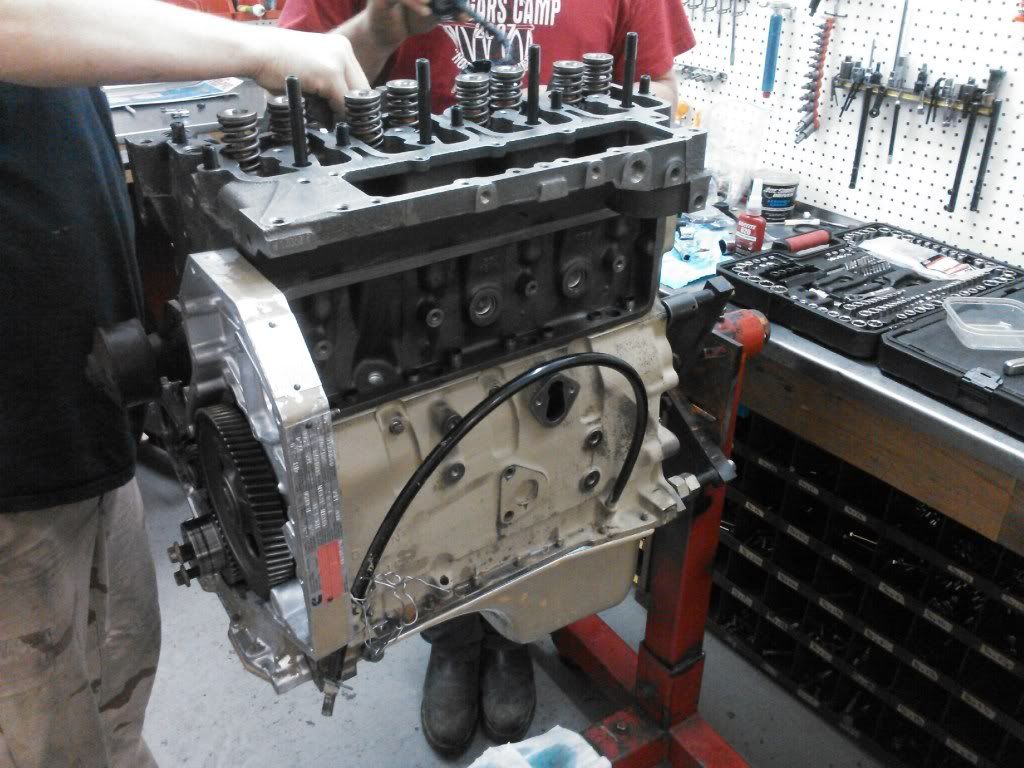
After a lot of effort we were able to put the cummins back together. The upgraded internals included POD injectors, ARP headstands, and a 3200 RPM fuel spring and pin for the fuel pump.

the guys in the picture are my friend and the shop owner. We put it together there.


http://s818.photobucket.com/user/wmeyer1106/media/Unlimited Wrangler/NCM_0400_zps5eaa7cf9.jpg.html


I also got my seats in. I ordered the bar that goes behind the two seats from Genright that I will be mounting the 4 pt harnesses to, as well as a frame tie in kit for the B pillars.


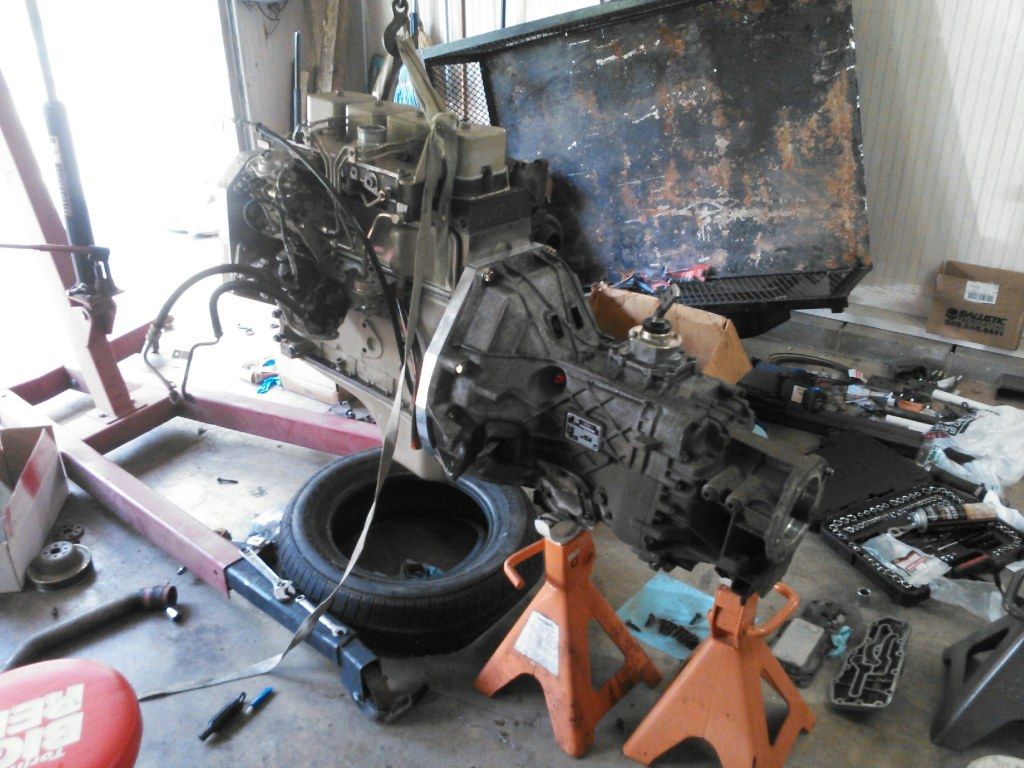
We paired up he transmission and engine:


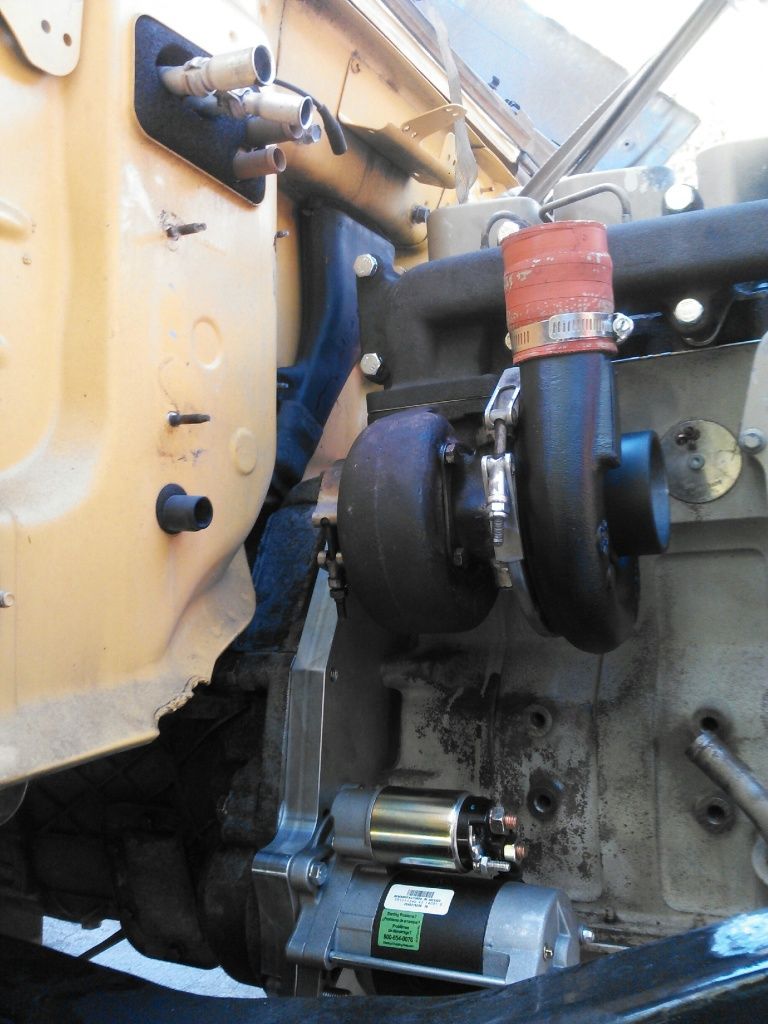
Also, I went ahead and rebuilt the turbo. There was a little bit of play in it and the rebuild kit wasn't that expensive.


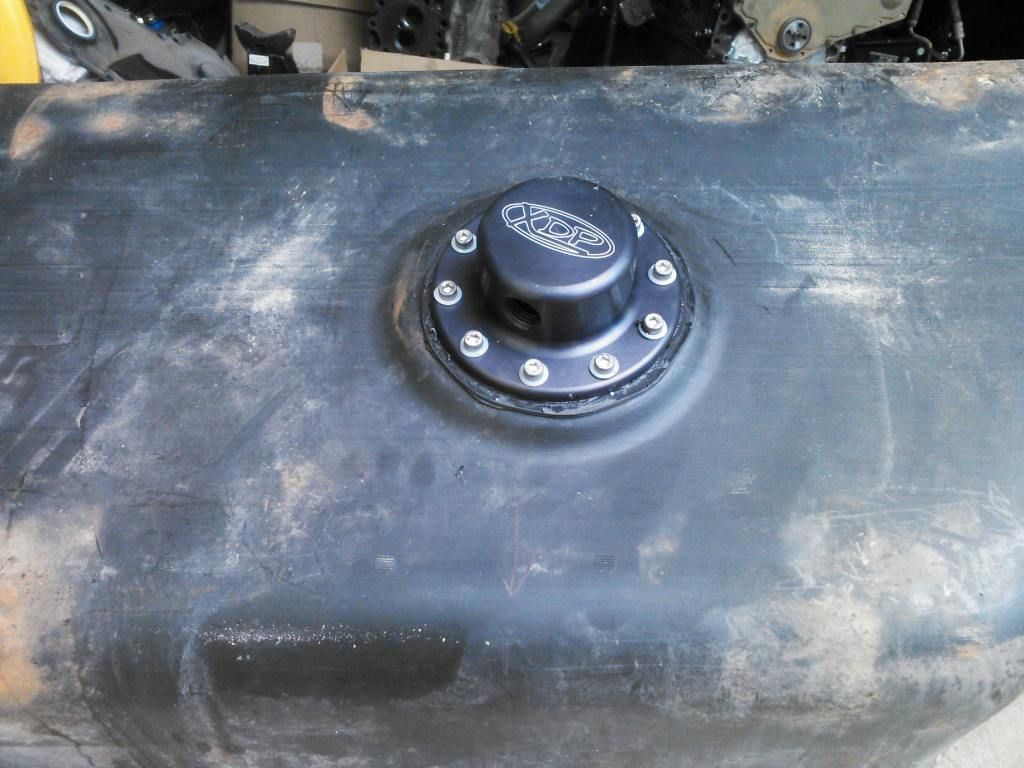
Here is the Sump kit from XDP installed on the tank. It bypasses the original fuel system, and all I'm reusing is the sending unit fuel level gauge.


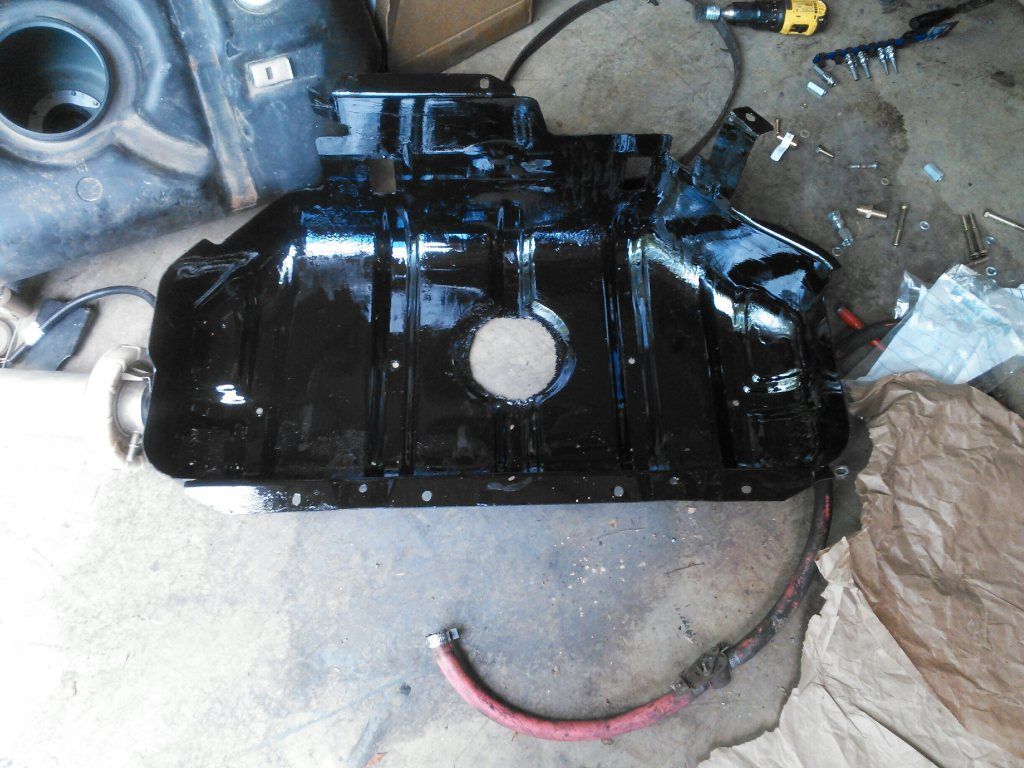
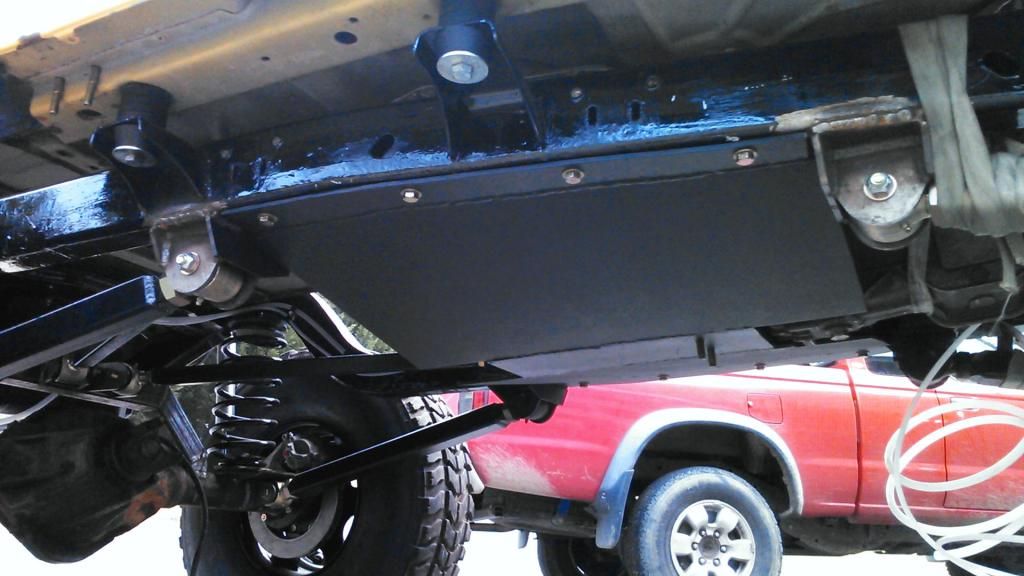
Here is the tank skid painted with chassis saver. It was rusted pretty bad so I thought that would be best. The hole at the bottom is to accommodate the sump sticking out.


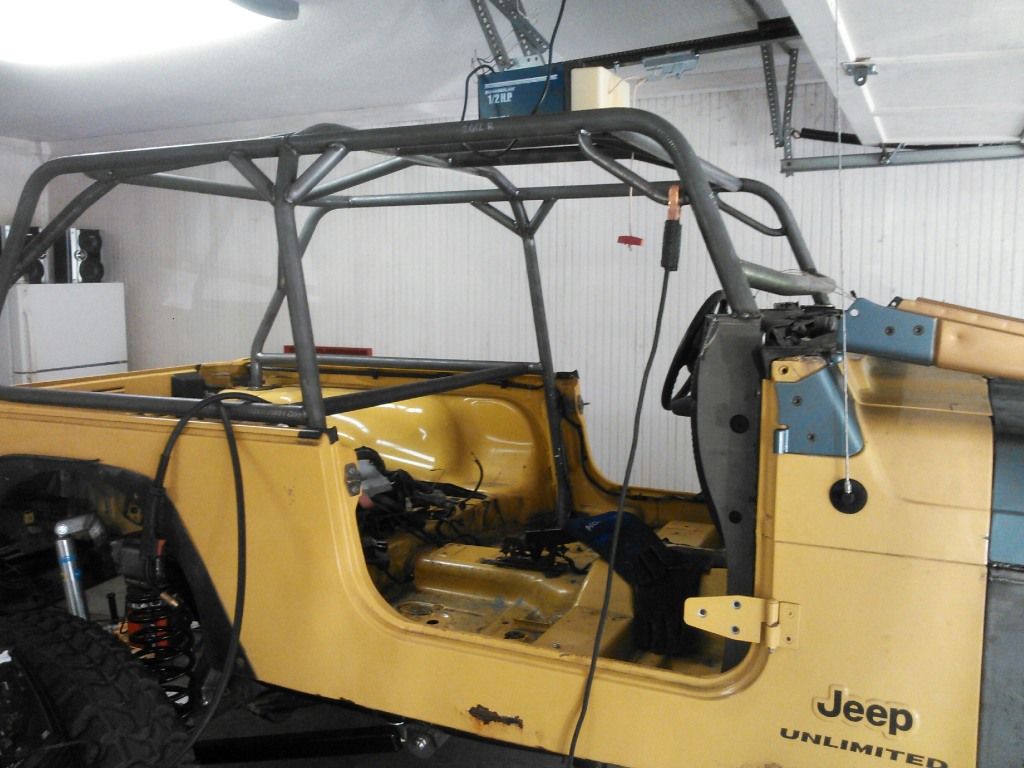
And here is the final part to the roll cage, the behind the seat bar. I'll be attaching the harnesses to it.

[/QUOTE]
 

wmeyer116

wmeyer116
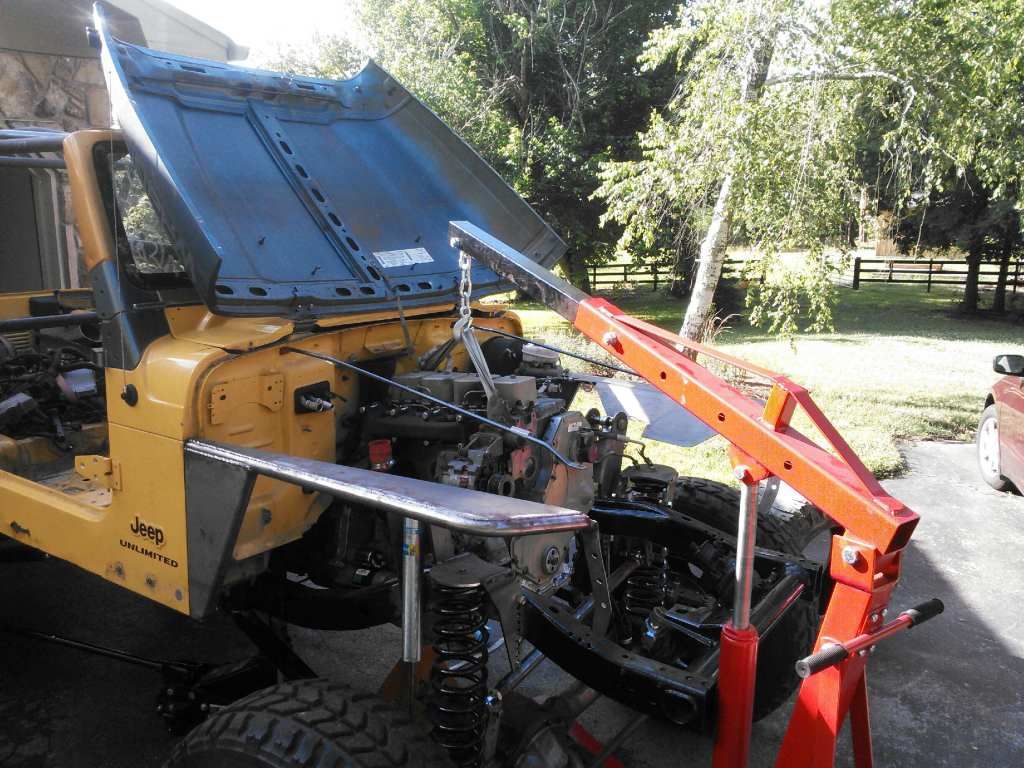
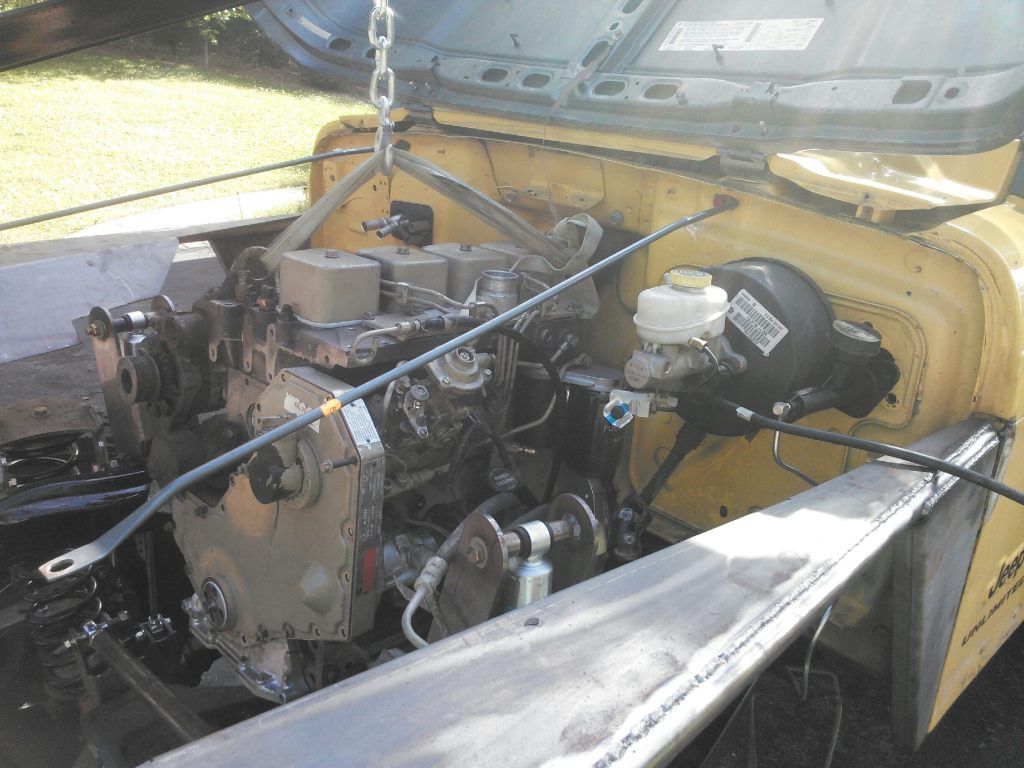
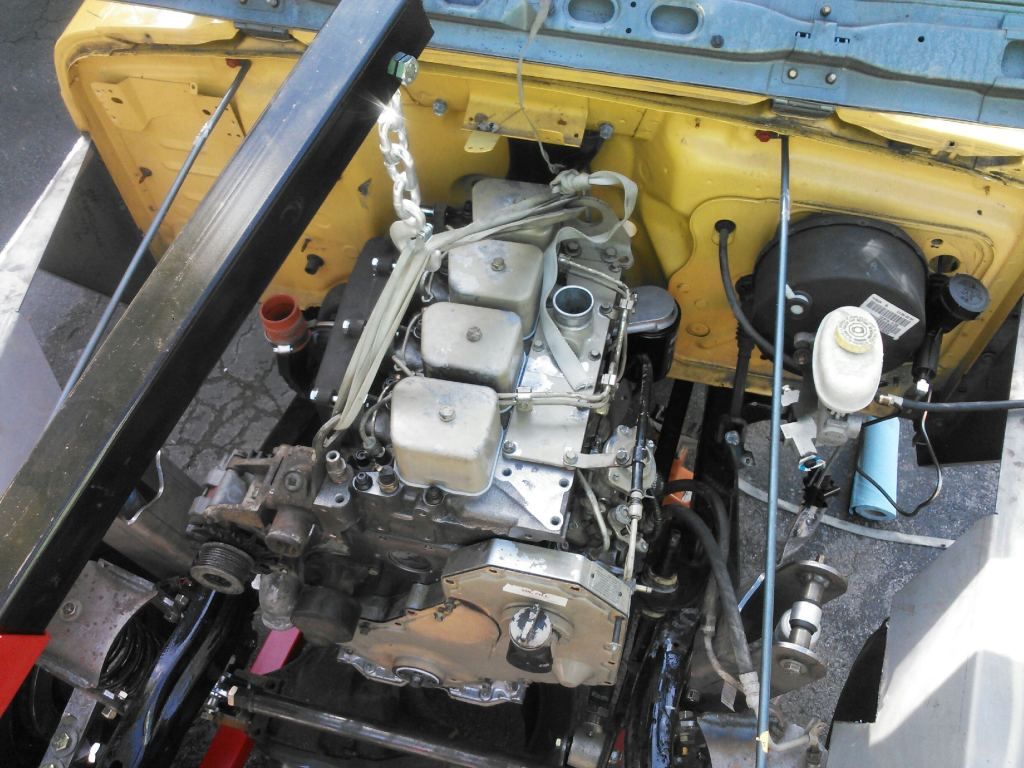
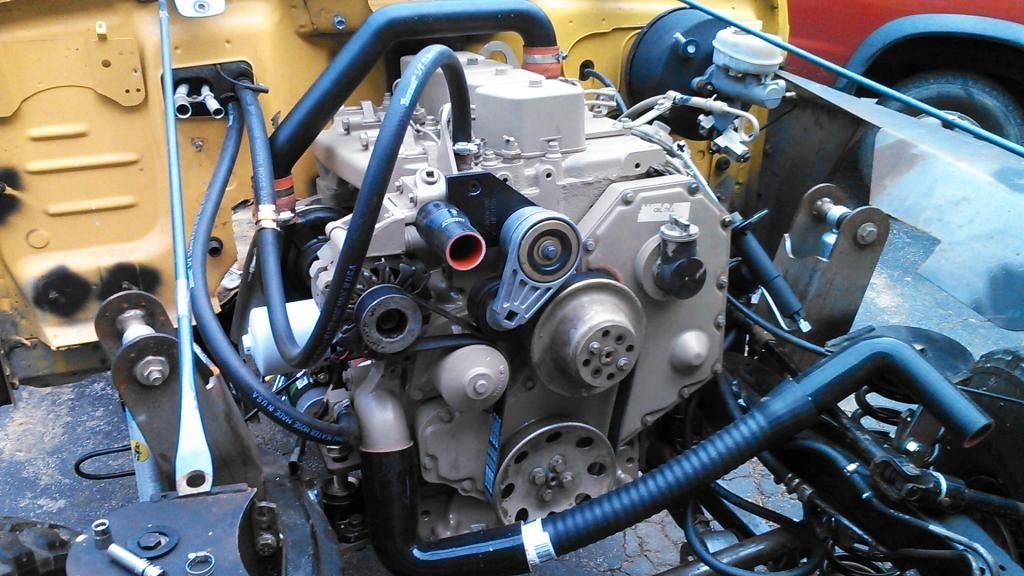
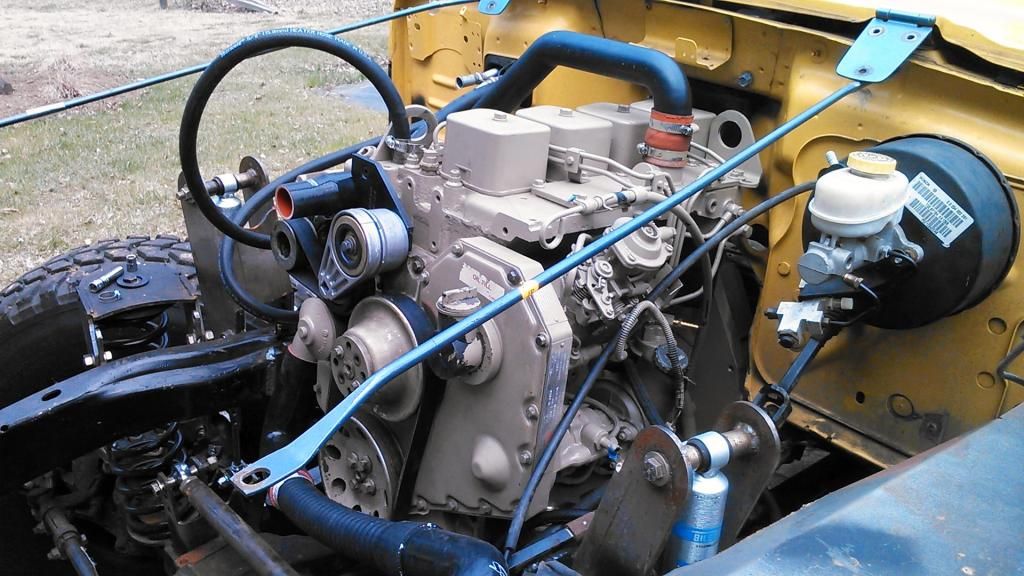
I started to size up the engine and see where I would place it. I repainted it the same color, Cummins Beige. I'm thinking that I am going to paint the jeep some sort of tan color as well.


The ZF5 is a short transmission, and the adapter plate is also short. This, paired up with the low placed turbo and large downpipes, make for an unhappy combination. It was either too far forward, and the stick would hit the dash, or it was too far back and the valve covers and transmission would hit the firewall. So, I went a little crazy and sliced up the firewall with a cutoff wheel. I'll fix it later... haha


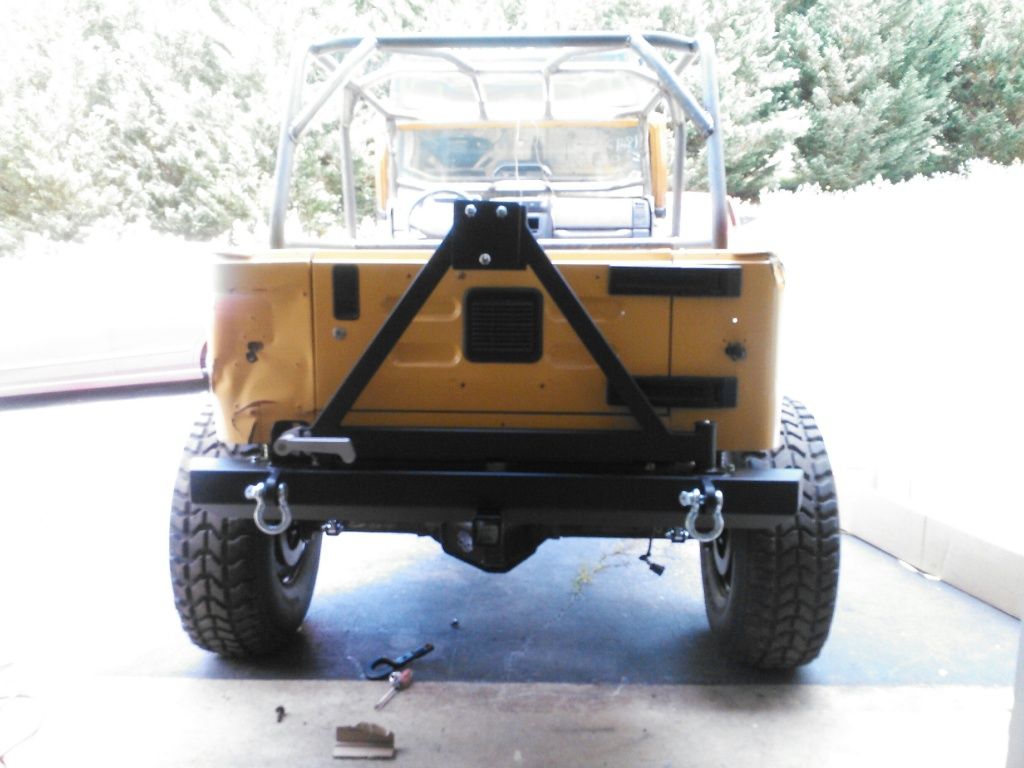
Also I got my rear bumper in. Its the Barricade Classic rear bumper. Its Chinese crap but I gotta cut costs somewhere and I don't want to skimp on the drivetrain lol


wmeyer116

wmeyer116


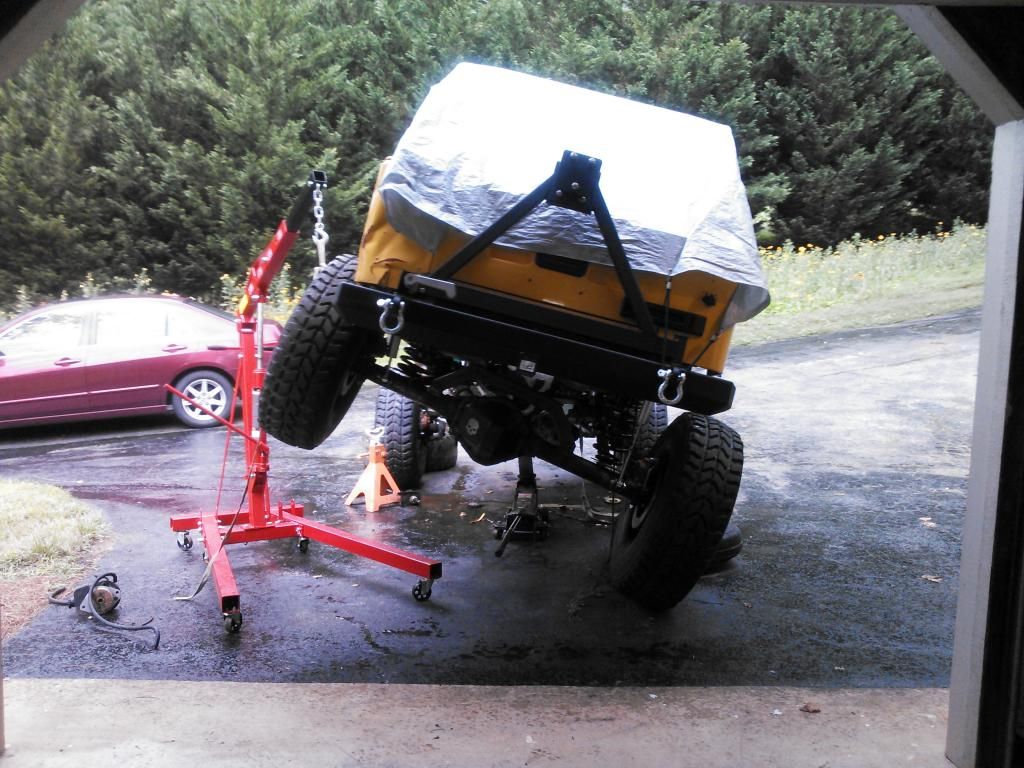
I maxed out the height on my engine hoist, so I still don't know how much farther it can articulate.

I definitely need to add some bump-stops. I also have been holding off on finishing up the steering as I have not been sure of the end ride height.


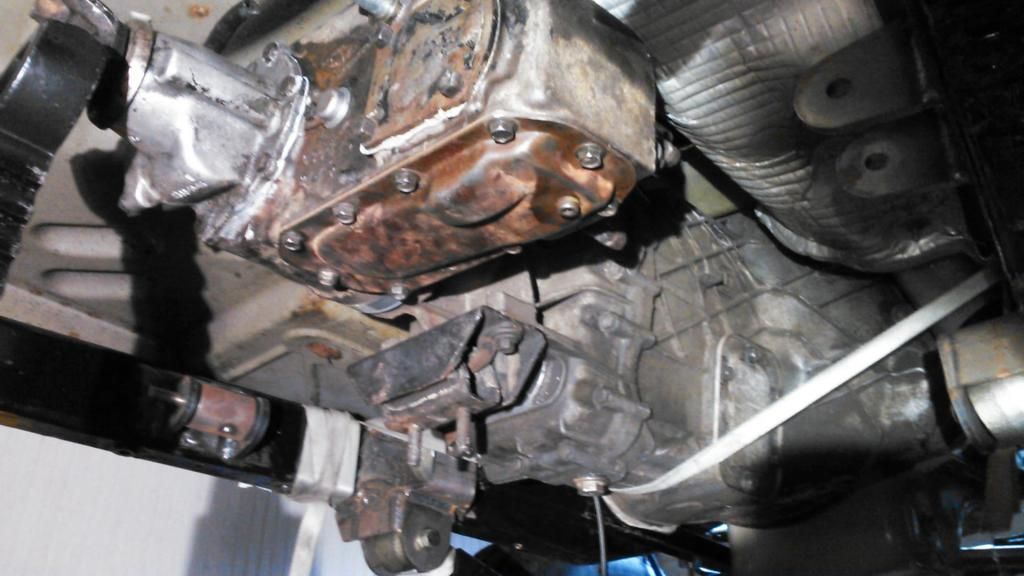
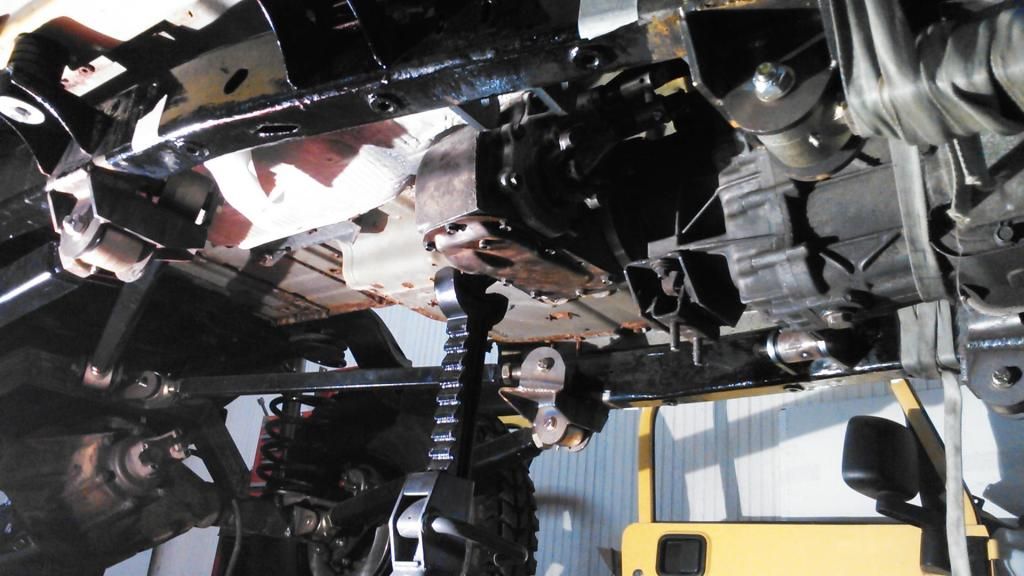
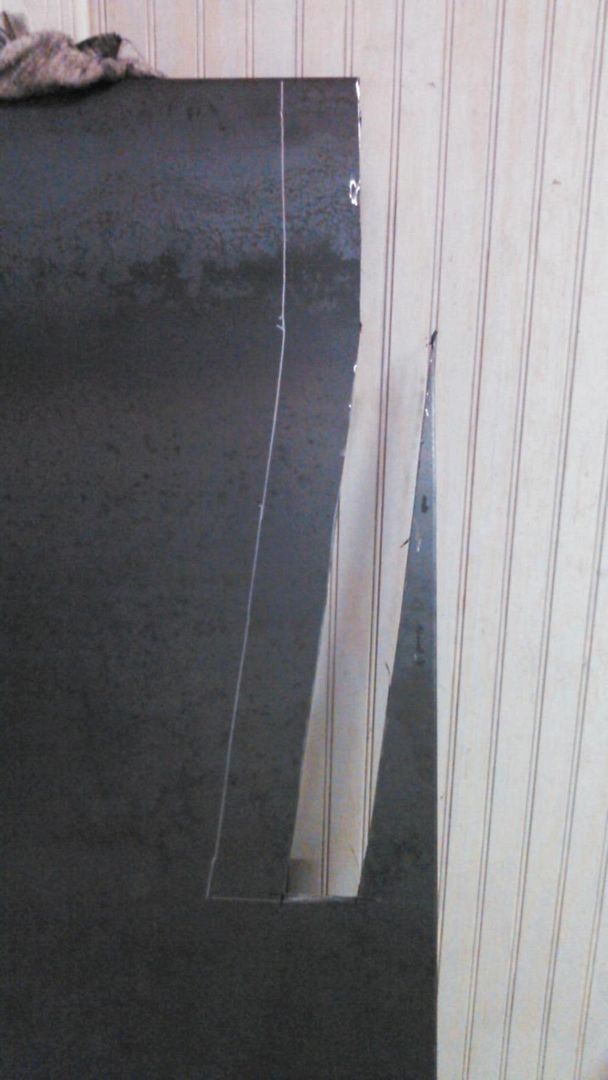
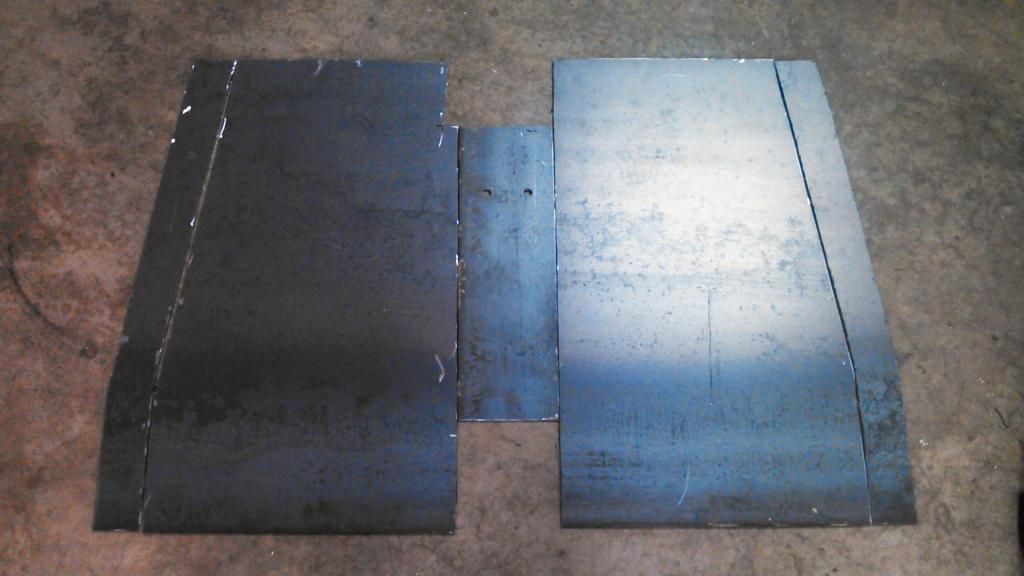
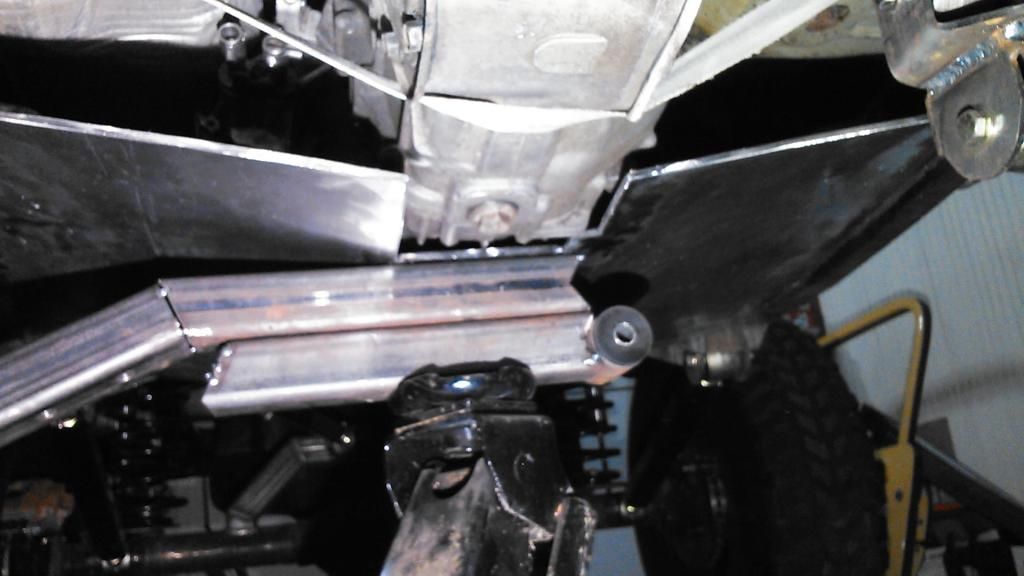
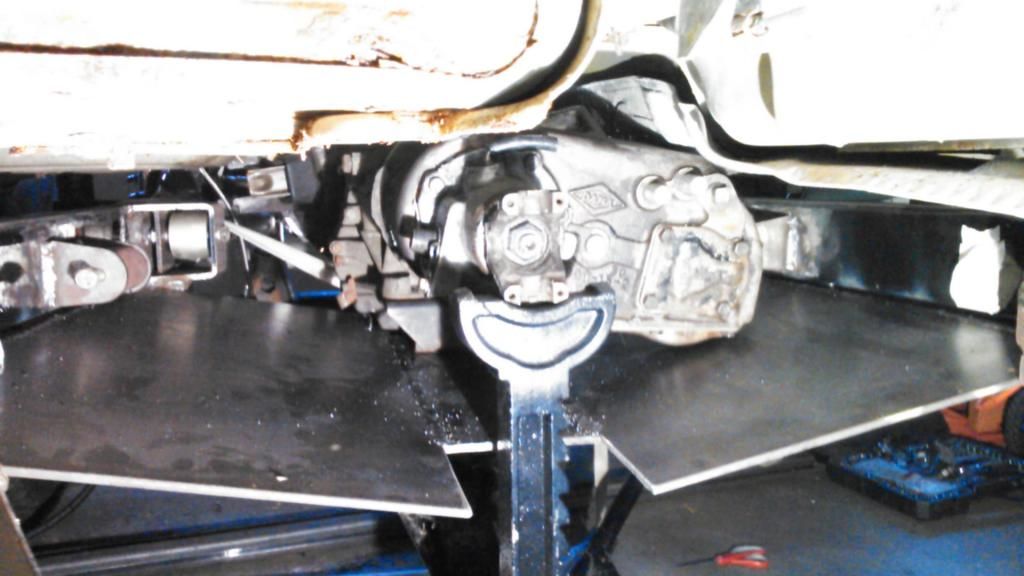
I mounted the transfercase to the transmission, and I drew up a template for the skid plate. first I cut out section from cardboard to get the pieces right and make sure it will fit, then I traced them onto the metal I got earlier. I cut out a few more after taking this picture, and I still have 2 to go. Then I'll be welding them together and and bolting them to the frame and the transmission.

It really sucks not having a plasma cutter. I just don't think its worth it to spend $600+ on a good used or decent new one. I've gone through 5 cutoff wheels so far for the skid lol.


ts pretty damn ugly, but hopefully it gets the job done. You can see in a couple of the pictures the 2 transmission mount bolts that are coming through the plate. I thought I needed to cut out space for the rear driveshaft to come down through but evidently I did not. I guess I can always weld a plate there...


I researched a lot about fuel lines. I was originally going with stratoflex, but when I needed to buy a return line I decided to go a different route. regular fuel hose is not the best for diesel, some guys even saying that their line was rotting and getting mushy after just 5 months. No thanks. In addition to that, using black fuel lines does not allow you to see if there is air in the fuel, which can cause some major issues. Anyways, after a lot of research I decided to go with just plain old polyethylene hose. It's resistant to diesel, clear, and it was dirt cheap. So I routed up the 2 lines, as well as bought new fittings for both ends.

I finished up the fuel tank, and mounted it back up.

I got a lot of bolts for many different things. I finished bolting up the transfer case, and I installed the clutch slave cylinder. I also got bolts to mount the master cylinder to the firewall.

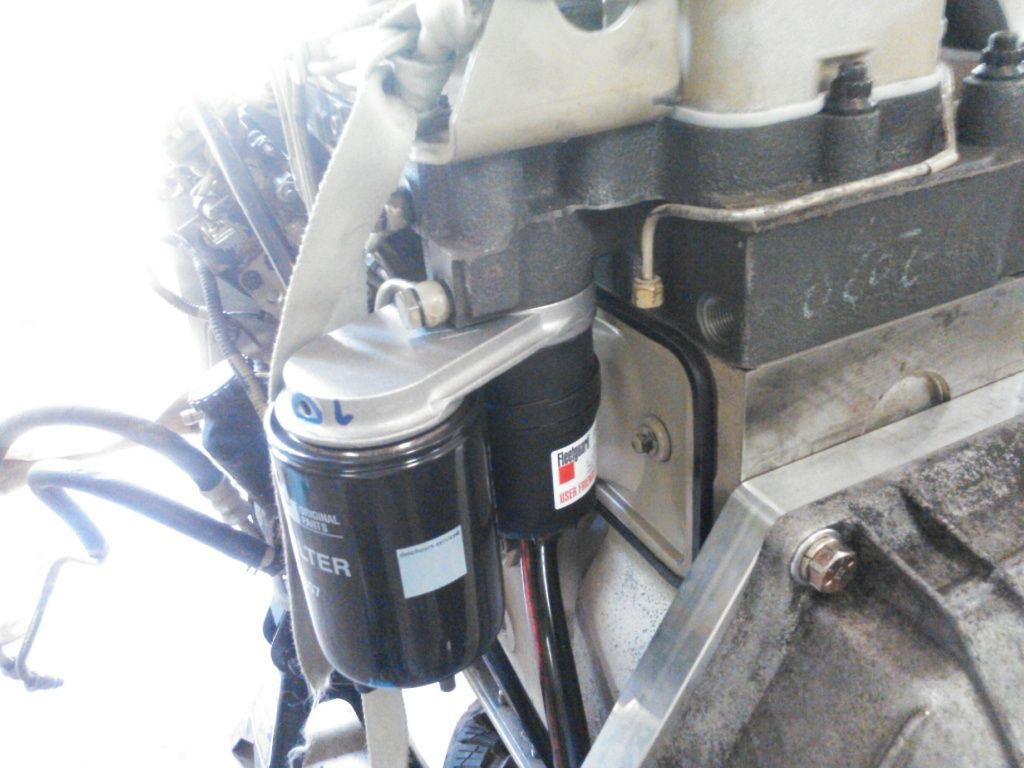
I got a lot of different fittings to plug up the accessory holes in the engine that I don't need, as well as made a makeshift oil pressure gauge to test the pressure when I start the engine.

I ran the heater lines as well, or at least temporarily. They are not cut to length yet, as I'm not sure what way I'll have t route them.

I sealed up the front cover, installed alternator, belt tensioner, and belt.


Last edited:

wmeyer116

wmeyer116
Lucky for me, wiring up the engine is really simple. Only a 12 volt wire running from the starter as the ignition switch, the battery cables, and the fuel solenoid, which is just one wire. I really just wanted to make sure everything ran well before I started re assembling everything, So I went ahead and spent 8 hours checking and rechecking over the engine. I made a makeshift oil pressure gauge, primed the fuel system, filled the engine with oil, temporarily set up my radiator, and gave it a whirl.


Last edited:

wmeyer116

wmeyer116
Well, that is it so far. My progress over the last three years. i'm hoping it will be done early summer, but I've made the mistake of anticipating its completion and I won't again.

Hope you guys enjoy, let me know if you have any questions.
 

unkamonkey

Explorer
I'm impressed, years ago it was all I could do to get to classes and labs, part time job and keep my MB on the road.
 

Forum statistics

Threads
188,216
Messages
2,903,936
Members
229,665
Latest member
SANelson
Top