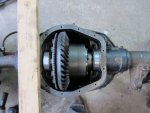
My 96 F250 Powerstroke aka Tiny Dancer

IdaSHO

IDACAMPER
You got a complete, running and driving F350 4WD for $1000? and then you took it apart?

Pretty nearly.

truck was not running. Had a blown 460 in it.

But it was VERY straight and the interior was 100% complete and fairly clean.

The guy that bought the shell from me was pretty damn excited.

Not wanting to clutter this thread with more of my pics, a link to a pic of the truck is here. http://www.bonnefinstudios.com/kwb/forumfiles/350.jpg


Bottom line, the deals are out there. And generally you can get a MUCH better deal on a D60 if you are willing to take a whole truck.
 

Milo902

Adventurer
For those of you who aren’t familiar with Fords, here is a brief history lesson on the front suspension design of F250 and F350’s from the mid 90’s to now as I know it. Some of you may ask why start with the mid 90’s, we all know Ford stopped making trucks in ’79 (or was it ’97)? Well, I have a ’96, and going back even ten more years is well beyond the scope of my limited knowledge and patience. I apologize in advance for the long post and lack of pretty pictures. Those of you whose eyes glaze over Jezza style when James May starts talking suspension; I suggest you skip this post.:coffee:

For the old body style fords (OBS) your options were an F250 w/ a D50 TTB leaf sprung front, or an F350 w/ a D60 leaf sprung solid axle. The D50 TTB is not held in high regard by most Ford fans as most of its selling points (lots of travel, great ride) are negated by the leaf springs which bind as the arms move through their travel. The D50 has great potential for a go-fast style rig, but is severly lacking in stock form and requires a fair bit of suspension knowledge and fabrication to get there (see Baja250, simply awesome). The D60 is generally thought of as the right choice for a truck like this, and after much research I would have to agree. While the Baja 250 is a great example of what can be done with the TTB, for the average shade tree mechanic the D60 is just more appropriate for a heavy truck.

From what I gather, the factory F350 D60 rides like a brick, and this is mainly due to the leaf spring shackle located in front of the axle. Basically when you hit a bump and the leaf springs compress, the extra length is taken up by the moving shackle (in front of the axle). This moves the axle forward slightly as the suspension compresses, and essentially forces the axle into the bump as opposed to away from it. A common mod is a reverse shackle kit (RSK) so that the axle moves backwards away from bumps as it compresses. At the same time, many will install longer springs from a super duty for an even more compliant ride. The combination of an RSK and longer springs together is supposed to yield an excellent ride for a 1-ton truck.

Why Ford chose to use a front spring hanger on the OBS trucks is beyond me as I am not a suspension engineer. They obviously had a reason for choosing a front vs rear spring hanger, but I do not know what it is, bump steer? Negative handling quirks? It’s generally a good idea to not muck up something like factory suspension unless you know what you’re doing, but the RSK seems to be working successfully on many many trucks.

In ’99, the super duties came out, and all 4x4’s had a leaf sprung solid axle. I believe D50 for the F250 up through 2002 or so, and D60 afterwards. All F350’s got the D60 up front. I don't know if these came with a rear shackle configuration from the factory, but I would assume they did as I don’t know of any shackle reversal kits for the super duty. The bolt pattern changed w/ the super duties (8x6.5 to 8x170mm?) so wheels were no longer compatible with the earlier Fords.

The beloved D60 continued much the same as previous years, but axle width and spring perches changed to accommodate a different frame design. The simple and serviceable roller bearings of previous D60’s were replaced with (cheaper?) unit bearing hubs. Unit bearing hubs are non-serviceable, and as I understand can fail without the audible bearing growl we have become accustomed to, leaving you stranded by the side of the road with a large repair bill. Checking for play in the bearings is the proper way to diagnose a warn unit bearing, don’t trust your ears! From what I have read, the aggressive offset on super duty wheels (especially when ran with larger tires and aftermarket wheels) contributed to premature failure of many unit bearing assemblies. How big of an issue this really is I don’t know, but it is brought up pretty regularly as a downside of the first gen super duty. The axles can be converted back to conventional roller bearings for around 1-2k depending on the vendor. The rear axle was changed from a sterling 10.25 to a 10.5, and drum brakes to disks which I’m told is a major upgrade in the braking department.

In 2005 the front D60 was changed over to a coil sprung style with radius arms. The axle as a whole is just beefier than past versions. Bigger brakes, tie rods, and unit bearings along with 35 spline axles. The track width was also widened. The bigger unit bearings and less wheel offset has greatly reduced the number of unit bearing failures from my understanding. I don’t know if that translates it into a non-concern, but certainly less of a concern.

The new coil sprung setup is said to perform very well both on and off road, especially with a lift and link arms in place of the factory radius arms. One big advantage of coils over leafs is the ability to run progressive rate springs, which allow you have a soft initial rate for small bump absorption, and a firmer secondary rate for larger bumps and loaded stability. An offshoot is a much tighter turning radius as you’re not limited by tire to leaf spring clearance. Anyone that owns a larger leaf sprung truck should be able to appreciate this one.

We all know the advantages of the simple tough leaf sprung D60, so why would I be so stupid and try and fit a coil sprung axle with (questionable) unit bearings at a greatly increased cost? Well, aside for my love of biting off more than I can chew, the brake upgrade (4-wheel discs) and tighter turning radius are huge benefits for me. My CCSB has the worst turning radius of any vehicle I have ever driven, and I imagine the CCLB trucks are even worse. I grew up driving ¾ ton OBS fords, but they were regular cab long box trucks, and while they had terrible turning radii as well, it was nothing like this. I try not to drive my truck around town, but on the occasions I need to, attempting to park is a constant reminder that this thing will be a headache on tight trails when I'm out camping.

Swapping the coil axle under an OBS is a large undertaking, but requires minimal fabrication. Mainly I will need to cut off the front leaf spring perches, drill holes to mount the coil buckets and radius arms, and adapt the steering, brakes, trackbar, swaybar and driveshaft. For the rear I will need to adapt the drive shaft, and possibly relocate the spring pads and shock mounts on the axle.

It may be a few months before I gather the parts needed for the swap, and I also intend on going through both axles while they're off the truck. When I get everything together I anticipate the swap taking a few weekends, but in the words of the great Jeremy Clarkson, "how hard can it be?"


(Disclaimer- this is an oversimplified view from an inexperienced web-wheeler. While I have spent many hours in leaf sprung TTB trucks, the last solid axle truck I drove was a ’73 doge power wagon. All of the preceding information was based on interweb research with zero first hand knowledge. Feel free to comment and criticize as needed.)
 

Milo902

Adventurer
Sorry for the long delay, it's been a busy summer.

Moving on...

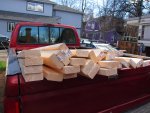
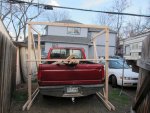
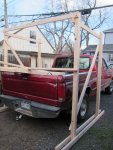
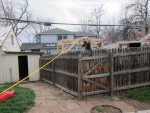
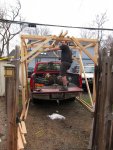
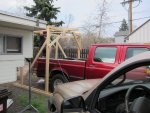
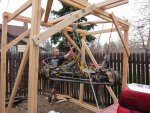
So where was I? Now that I have a truck bed full of iron and rubber, I needed to figure out a way to get them out. I don't own a cherry picker, and the rafters in my garage aren't strong enough to hold that kind of weight, so I decided to build something. After a quick trip to the home depot and an hour of two of work, I cam up with this:

IMG_1461.jpg
IMG_1462.jpg
IMG_1463.jpg
 
Last edited:

Milo902

Adventurer
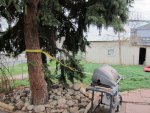
Basically it's just a quickly thrown together and badly built 2x4 & lag screw frame to facilitate hoisting the axles out of my bed. After I put it together my roommate and I rigged up a pulley system with a tree as the anchor and his winch as the lift.

IMG_1464.jpg

IMG_1466.jpg

IMG_1467.jpg

IMG_1468.jpg


This is my roommate posing next to a precarious mix of wood and tensioned wires. Probably not the smartest thing to do w/ how much that axle weighs.

IMG_1469.jpg

The pulley & winch setup worked great, although it still took a few hours to get the two axles out. The rear was the biggest pain as it kept rotating every time we would try and lift it. The many attempts & failures resulted in mangling of the brake lines, 1 parking brake cable, and both backing plates. Oh well, it's only time (and money). The front axle came out w/o issue as the huge radius arms balanced the axle nicely as we lifted it. In retrospect I should have stripped the the axle of the brake and parking lines before I tried to move it, live and learn I guess.

After we lifted them from the bed, I drove the truck forward and let the axles back down to the ground. We then rolled them into the garage, good thing they came with wheels & tires! My home-built rig held up fine, although it was flexing and groaning quite a bit during the whole experience.

IMG_1472.jpg
 

evilfij

Explorer
Why not just push them out of the back of the bed? Dirt would not hurt it. You can get one end off and lower it gently and once on the ground lower the other end? Especially with two guys I think the contraption could have been replaced with brute strength.
 

Milo902

Adventurer
Why not just push them out of the back of the bed? Dirt would not hurt it. You can get one end off and lower it gently and once on the ground lower the other end? Especially with two guys I think the contraption could have been replaced with brute strength.

Pushing it off would have probably just resulted in some mangled axle accessories and maybe a broken foot. Brute strength may have worked, but these axles are heavy! Wikipedia lists the 10.5 rear as 330lbs, not sure if that includes oil & brakes, definitely not wheels & tires. I would bet the rear axle was weighing in well over 400lbs w/ the tires on (if were talking man-handling, gots to leave them on as to not bang up the brake backing plates, which I did anyways). The front was even heavier w/ the radius arms attached.

As haggard as that contraption looks, it was reasonably strong. I took one or two ME classes back in college, didn't help me here though! :ylsmoke: Seriously though, probably not the safest way of getting axles out of a truck, but at least here we could lift & lower remotely and be well clear of the heavy bits if something went wrong (except for pictures, must get close for those of course). If I went the bribe a friend w/ beer and get liftin' route, someone could have lost a few toes.
 

Milo902

Adventurer
So now that the axles are offloaded and moved into the garage, I decided to go through them completely before they go on the truck. On the agenda is new pads & rotors all around, seals, flex lines, radius arm bushings, tie rods, ball joints, parking brake pads, and inspection/replacement if needed of the wheel bearings.

The axles are 3.73 gearing which should work perfect w/ my (distant) future choice of a 2.5" lift and 285/75/R17 Toyo Open Country A/TII tires (about 34" diameter). After opening up the rear axle it was (unfortunately) an open diff carrier. At this point I decided it makes sense to go through both diffs and install traction aids, new bearings, & new pinion seals while they are still in the garage.

I spent wayyy too many hours on this an other forums reading about different traction aid device options (ARB, Detroit locker & Detroit truetrac in particular) and the pros/cons of each. After much debate, I decided on a trutrac rear and either a trutrac or a selectable locker in the front. I'm a really big fan of limited slip diffs in about 98% of the type of driving I will do with this truck (highways, mountain roads, dirt roads, fire roads). The other 2% will include icy side slopes wanting for an open diff and the occasional lifted wheel wanting for an ARB. Given the price difference between a trutrac and an ARB, I'll take the chance (or put the difference towards a nice winch). Open diffs on a day to day basis would annoy me more than having to winch on occasion.

The detroit locker was thrown out because I do a lot of twisty mountain road driving where I'm on the throttle through corners. From what I hear on/off the throttle mid corner (especially w/ a manual trans) will noticeably upset the chassis. Vehicle steering & chassis balance are very important to me, who say's you can't make a 4 ton vehicle dance?

In the end this is all an assumption as I have never driven a vehicle w/ an ARB, Detroit locker, or helical gear limited slip...
 

Milo902

Adventurer
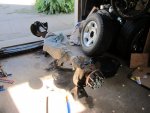
Rear axle getting torn down
IMG_1506.jpg

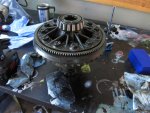
Open differential carrier on the bench
IMG_1504.jpg

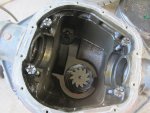
Axle w/ the diff removed
IMG_1507.jpg


Although I'm pretty handy w/ a wrench, I've never tacked a differential rebuild before, so this should be interesting. I ordered the differential book from Randy's Ring & Pinion, it has specs on most diffs & pictures/descriptions on basic maintenance to complete overhauls. It's worth every penny...
 

Milo902

Adventurer
So a little be of CL searching netted me a Sterling 10.5 compatible truetrac, gently used by a grandma to drive to church on Sundays and the grocery store on Wednesdays, for only $180! I was pretty pumped, that is until I got home and realized I had been duped. The ************ sold me an Auburn limited slip (clutch style, non rebuildable, no bueno). I'm not too happy w/ myself for not seeing the obvious springs/clutches in the diff *** opposed to worm gears before I gave that scoundrel my monies. Many many calls, texts, voicemails netted no response from the seller regarding what I had hopped was an honest mistake on his part. I do remember where he lives...

Oh well, live & learn I guess. I can only hope people like that will get theirs eventually.

I guess I will throw it back on CL (with the proper description of course) and see if I can get a few of my dollars back. Not sure what a used Auburn LS in unknown condition is worth though.
 

Milo902

Adventurer
So after my lesson on the used diff, I ponied up for a new truetrac from Summit for $560 shipped, not too shabby. This is approximately $500 less than an ARB to put towards my winch fund (minus the $180 stupid tax for the Auburn of course).

The truetrac (Part #915A550) works for all 35 spline full float sterling 10.25/10.5 axles (late 80's to present) AFIK. I also ordered a master install kit from Just Differentials for the 08-10 sterling 10.5 (mines an '08) including Koyo carrier bearings & races, Timken pinion bearings & races, a new pinion seal, locktite, shims, & marking compounds.

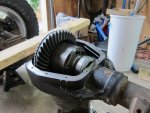
Before pulling the old diff I verified backlash at about 11-12 thousands, factory spec is 11-16 thousands so it was dead on. I pulled the old carrier & pinion assembly & brought them to a local 4x4 shop to swap the ring over to the new carrier, press on the new carrier bearings, and replace the old pinion bearing. The carrier assembly shims on this diff are located outside the carrier bearings, which helps w/ backlash setup as you don't have to pull the bearings to change the shim thickness. The pinion depth shims on the other hand are located between the pressed on pinion bearing and the pinion, so you need to pull the bearing to change shim thickness. As I was replacing the carrier & leaving the same ring & pinion, my hopes were the pinion depth wouldn't change so I had the shop press on the new bearing using the factory shim.

I put in the new carrier assembly using the factory shims, checked backlash, and was at 40+ thousands. Time to make a shim pack. A lot of trial & error later I had backlash down to 11 thousands.

IMG_1537.jpg

IMG_1538.jpg

Afterwards it was time to check the pattern for pinion depth. The marking compound showed that the pinion was barely contacting the ring, so the pinion depth was too shallow and more shims needed to be added. I was hoping to avoid this as the bearing is pressed on and I don't have a press or a bearing removal tool.
 

Milo902

Adventurer
So I brought the pinion back to the shop so they could remove the bearing, and I ordered a second bearing online for $50 to use as a setup bearing. About 5 minutes w/ my dremmel had the new bearing sliding on & off the pinion easily. Setting the pinion depth is a tedious process for sure, you need to install the pinion & torque enough so that there is no movement, install the carrier & get the backlash set correctly, then mark the ring and rotate to check your pattern. I performed this a few times but soon ran out of shims w/ my pinion barely making contact with the ring gear. I don't recall the exact size of the shim pack, but it was somewhere between 70-100 thousands total.

My initial thought was just to order more shims, but that might be a band-aid solution to a bigger problem. I called up Just differentials to ask as they supplied the install kit, and their thought is I have an aftermarket 10.25 R&P in my diff. The 10.25 R&P works fine in these but requires a thicker pinion bearing, which would account for my pinion depth being off.
 

Forum statistics

Threads
186,725
Messages
2,889,390
Members
226,872
Latest member
Supreet.dhaliwal
Top