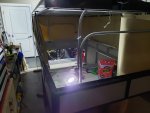
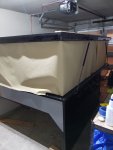
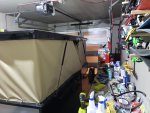
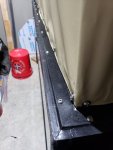
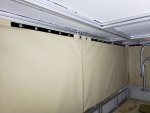
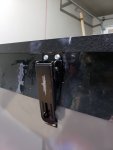
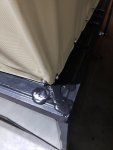
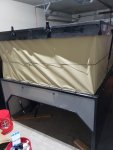
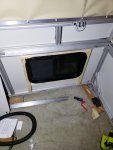
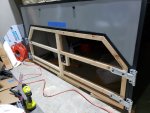
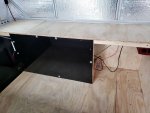
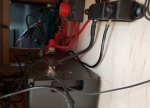
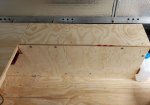
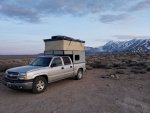
Got quite a bit done over the weekend. More grey vinyl on some of the sides, and all of the trim was glued/taped on. We're also almost done with the popup fabric, just the final seam and a couple bolts on the top and bottom remaining. The fabric has been a tricky process, and its definitely not perfect. There's some uneven tension in a few spots, but I'm happy with it overall.
You are using an out of date browser. It may not display this or other websites correctly.
You should upgrade or use an alternative browser.
You should upgrade or use an alternative browser.
My DIY OVRLND-style Pop Up Camper
- Thread starter evan96
- Start date
ITTOG
Well-known member
It is looking good. How are you attaching it at the top and bottom? Also, it looks like on the bottom you are attaching it to a z-shape metal piece? Where did you get it? I am planning something similar for my build but haven't found this piece yet. Do you have any close-up pictures of the attachments?
It is looking good. How are you attaching it at the top and bottom? Also, it looks like on the bottom you are attaching it to a z-shape metal piece? Where did you get it? I am planning something similar for my build but haven't found this piece yet. Do you have any close-up pictures of the attachments?
The top is attached with sections of 1" flat bar cut from scrap ACM. The top edge of the fabric is folded over with paracord under the fold, then all glued down to help prevent the fabric from tearing out if the bolt holes were to ever wear through.
The bottom is actually two pieces of angle aluminum. McMaster Carr has some z-shaped aluminum, but not in the size that would have worked best for my use. So the outside trim is 1/16" aluminum angle to seal the panel/frame joint. Then the angle the fabric is bolted to is 1/8", and is bolted down to the top slot of the extrusion. I had to notch out the 1/16" trim in areas for the bolts since it overlaps with the t-slot.
The 1/8" angle is 1.5x1 in., and is inset into the camper so it nests inside the roof frame.
I've opened and closed the roof a few times since getting the fabric on, and this system works ok, but it doesn't close as snugly as I hoped. I think it would need to be inset further, but there's other limitations for my particular case. I think it will still work well enough though.
Edit: attached a crude diagram of how this is layered. Blue is the 1/16" 1x1, yellow is the 1/8" 1x1.5, pink is a layer of stick on cork to make up the height difference so the yellow angle sits flat(ish).
Attachments
ITTOG
Well-known member
Brilliant idea on the paracord and the glue. I was planning to slide flat bar or preferably a fiberglass bar of some sort into a hem which would have been more difficult.The top is attached with sections of 1" flat bar cut from scrap ACM. The top edge of the fabric is folded over with paracord under the fold, then all glued down to help prevent the fabric from tearing out if the bolt holes were to ever wear through.
Thanks so much for the reply. I had so much tunnel vision that I never thought about using two different pieces. Duh, or better yet, another brilliant idea you had. I did find a company that said they can bend a piece of 1 gauge aluminum or steel so I will camper that cost with your idea. You can see my design for all of this at https://expeditionportal.com/forum/...6-x-12-trailer-conversion.199414/post-3000870. We had a lot of similarities. I really want to have the internal vertical piece to attach my canvas and to prevent the need for a drip edge on the outside of the camper.The bottom is actually two pieces of angle aluminum. McMaster Carr has some z-shaped aluminum, but not in the size that would have worked best for my use. So the outside trim is 1/16" aluminum angle to seal the panel/frame joint. Then the angle the fabric is bolted to is 1/8", and is bolted down to the top slot of the extrusion. I had to notch out the 1/16" trim in areas for the bolts since it overlaps with the t-slot.
The 1/8" angle is 1.5x1 in., and is inset into the camper so it nests inside the roof frame.
I've opened and closed the roof a few times since getting the fabric on, and this system works ok, but it doesn't close as snugly as I hoped. I think it would need to be inset further, but there's other limitations for my particular case. I think it will still work well enough though.
I did find a company that said they can bend a piece of 1 gauge aluminum or steel so I will camper that cost with your idea.
If bending a single piece into a custom z-shape is cost effective, that might be better than two pieces. It just avoids a seam that water could get into. All in all though it looks like we've got a similar approach to this part.
I spent a lot of time working to get the camper ready to go on the truck this week. After fabric, I bolted on the roof latches and added the drip edge. For the drip edge I used vinyl curtain door strip. It's available in rolls from McMaster-Carr, so I used the 4" width x .06" thickness. It's flexible enough that the roof is able to close and it covers the gap between the roof and rest of the camper. I also added lap sealant to the bolt heads securing the fabric down to the camper so those don't leak.
Attachments
Then the last things to do were to cut out the window hole and attach, finish the grey vinyl on the camper sides, and build the doors. The doors definitely still need some fine tuning. They sag a little more than I thought they would, and they interfere with each other closing a bit. So adjustments are necessary to get the fit just right, but for now they will do. The hinges are 8" trailer door hinges from a retailer called hinge outlet. I spent quite a while digging for the right hinges that would give me 270 degrees of opening, but not be completely overkill.
Attachments
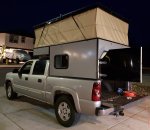
By Friday the camper was ready to be put on my truck. I estimate that it weighs ~400lbs in its current form, so I recruited several friends (6 of us in total) to lift it into position. All in all, it went fairly well. Any fewer people and it would've been pretty heavy for each of us, any more people and they would've been in the way. Each side of the camper is bolted directly to the truck's bed rails with 4 3/8" grade 8 bolts. I also added a gasket from Extruded Solutions, Inc. around the perimeter before lifting it up there.
Today was its maiden road voyage. Its not overnight ready yet, but we took it out to Mt Bachelor for a day of skiing. About 6 hours of driving throughout the day and it felt solid. I checked the bolts after the first drive and everything stayed tight, so that's great. On the way to the mountain (a net uphill drive) I averaged about 12.5 mpg, with generally conservative driving at about 55-65 mph. Without the camper I would average about 15mpg under similar conditions, so I'm fairly pleased with the gas mileage (though current gas prices still make driving any sort of truck kinda painful, i'm glad its not my daily driver). I notice a lot of wind noise though, which is to be expected. I have short term plans to add a wind fairing to a roof rack on the truck, and long term goals to lay up a fiberglass nose cone of sorts that can be attached to the truck. Total frontal area on the cabover section is 15.5" by 69". In hindsight part of me says I should have made the cabover thinner with more fabric pop up, but I think the difference in fuel mileage from a couple inches of frontal area would be negligible.
By this evening, northern Oregon was getting hit with a storm, so we spent about 2 hours driving through heavy rain. I checked the camper for leaks when we got home and found that the doors are the primary source of water intrusion. This isn't surprising, as they aren't really done yet and there isn't a seal between them and the tailgate. The corners of the bed next to cab also leaked, but I'm not sure if that's due to the camper or just the design of the bed. So I'll be investigating that a bit as I drive it more. The only concerning leak was in the cabover section. It looks like after all that driving my drip edge curled upward slightly, which exposed the gap between the roof and camper to the incoming water at 60mph, and at that point its somewhat inevitable that water will find a way in. So my options right now are to either stiffen the drip edge, or get 6" width vinyl curtain material so it has more coverage. I'm a little surprised it curled up though, as I thought the wind resistance would keep it pinned flat against the camper. Anyway, more investigating to do on that part.
So other than fixing all the issues I have with the doors and chasing leaks, its now on to interior, insulation, and electrical.
Attachments
cooper2020
New member
Looks great ,my build has been on hold for a bit ,and will be starting back up to finish ,can I ask what weight /size is the vinyl that you used ?
Looks great ,my build has been on hold for a bit ,and will be starting back up to finish ,can I ask what weight /size is the vinyl that you used ?
Thanks! I used a lot of vinyl-based materials, but I assume you're talking about the pop up fabric. I used 18oz vinyl coated polyester. Here is the exact fabric I used. I bought the 75 inch width fabric because it allowed me to cut the fabric in half, meaning I only had to buy 6 yards instead of 12 to go all the way around. You can also get it in 61inch width if that's not a consideration though. And the thread I used is the Sunstop polyester thread also from mytarp.
VanIsle_Greg
I think I need a bigger truck!
Nice work!
Been a while since I updated this. Last month I spent a solid week working late nights on the interior to get it ready(ish) for a big trip. So far I have an insulated floor platform, a cabinet against the back wall, and one on the passenger side wheel well. The electrical system is contained in the back cabinet, and the diesel heater is in the side cabinet. I ran the intake and exhaust for the diesel heater out holes in the wheel well. Fuel tank is temporarily mounted inside. Long term I want to put it in a pelican case mounted to the outside of the camper.
A couple weeks ago we took it on its first maiden trip (leaving town at 10pm after finishing the last couple things I wanted to get done). We drove from Oregon, to Utah, Mammoth, then back north. There's a few issues to work out, like the vinyl strip I used to make a drip edge likes to curl up in the front from the air hitting it while driving, which then exposes the gap between the roof and camper, and rendering it useless. Luckily the whole trip was dry, so no leaks. The electrical system still needs more interior lights and phone charging outlets added, but the heater and fan worked great. All in all, I'm really pleased with it. Feels pretty luxurious to be able to sleep on a memory foam mattress pretty much anywhere we can park.
A couple weeks ago we took it on its first maiden trip (leaving town at 10pm after finishing the last couple things I wanted to get done). We drove from Oregon, to Utah, Mammoth, then back north. There's a few issues to work out, like the vinyl strip I used to make a drip edge likes to curl up in the front from the air hitting it while driving, which then exposes the gap between the roof and camper, and rendering it useless. Luckily the whole trip was dry, so no leaks. The electrical system still needs more interior lights and phone charging outlets added, but the heater and fan worked great. All in all, I'm really pleased with it. Feels pretty luxurious to be able to sleep on a memory foam mattress pretty much anywhere we can park.
Attachments
mobile007
New member
Is there any dust instrusion into the bed when closed and driving? Also, how does it perform when camping in cold weather?Been a while since I updated this. Last month I spent a solid week working late nights on the interior to get it ready(ish) for a big trip. So far I have an insulated floor platform, a cabinet against the back wall, and one on the passenger side wheel well. The electrical system is contained in the back cabinet, and the diesel heater is in the side cabinet. I ran the intake and exhaust for the diesel heater out holes in the wheel well. Fuel tank is temporarily mounted inside. Long term I want to put it in a pelican case mounted to the outside of the camper.
A couple weeks ago we took it on its first maiden trip (leaving town at 10pm after finishing the last couple things I wanted to get done). We drove from Oregon, to Utah, Mammoth, then back north. There's a few issues to work out, like the vinyl strip I used to make a drip edge likes to curl up in the front from the air hitting it while driving, which then exposes the gap between the roof and camper, and rendering it useless. Luckily the whole trip was dry, so no leaks. The electrical system still needs more interior lights and phone charging outlets added, but the heater and fan worked great. All in all, I'm really pleased with it. Feels pretty luxurious to be able to sleep on a memory foam mattress pretty much anywhere we can park.
RJ Howell
Active member
Welcome to the world of DIY truck campers! I'm still tossing around the idea of doing a foldable hard side. In the Nor'east we have plenty of wind protection (trees) that is not present in the southwest desert, especially Baja.. I had never encountered such winds before! Has me thinking/designing again. One of the beauties of building it is you know to re-build to better suit your wants/needs.
Nice build!
Nice build!
97heavyweight
Well-known member
I can confirm that the canvas does help with the front to back movement. I recently moved my struts to the sides as well. The camper is looking great.Yeah we ended up going with struts on the side to complement the lifting bars in the front/back. Lifting bars help give lateral stability, opposing struts on the side give longitudinal stability. I'm using 60lb struts, 36" extended length with a 15" stroke. 60lbs is overkill right now in the development stage, but I'm going to be putting a roof box and skis up there so I wanted the extra strength. Might need to downsize to 40 or 50lb during summertime trips when we have less stuff on the roof.
The only downside I've experienced to the struts on the side is that it tends to push the roof forward or backwards when lowering, so it makes getting the roof lined up more difficult. I'm hoping that tendency goes away when there's more weight on the roof and fabric attached to help keep things aligned.
You could try running bungee material in the drip edge to keep it tight.
Similar threads
- Replies
- 28
- Views
- 5K

