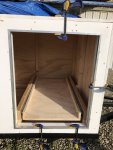
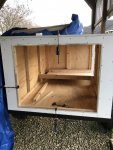
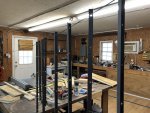
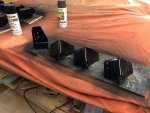
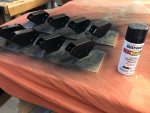
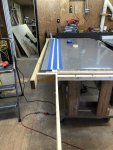
Still slow going, I guess the cool weather has slowed me down. So, as you can see I've cut my door frame trim pieces, drilled and chamfered the screw holes, and painted them Massey Ferguson Gray. This gray is really close and almost a perfect match to the skin. I've painted the tent rack parts that I purchased from compact camping concepts. When I get home i'll buy my tubing needed to complete the rack. Also bought my painted roofing flat sheets ($125 for three sheets 41.5 inches wide by 10 feet long) and began cutting out the various pieces. Had to return to work so when I get back home the first order of business will be to buy the tubing needed for the tent rack, cut the pieces to lengths needed, and then paint black. Next I will finish cutting the sheet metal, the only remaining cut is the door from the back piece. I've just been using a jig saw with a high quality metal cutting blade and cuts have been really clean. So, yeah, when I get home I should be able to skin the box, attach doors and trim pieces, and add the rack and tent. If i'm lucky I'll be able to run my trailer wiring.
You are using an out of date browser. It may not display this or other websites correctly.
You should upgrade or use an alternative browser.
You should upgrade or use an alternative browser.
My first Adventure Trailer Build
- Thread starter Charley
- Start date
So, I continue to make slow progress. However, as you can see, the box is completely skinned and trim pieces in place. I taped all the corners and edges with extra wide Gorilla tape as an extra precaution against any small leaks that may present themselves (that stuff is really sticky). Once I had my metal in place, I taped over those exposed edges with some “Seal-Tite” butyl tape. This stuff was actually thinner than the Gorilla tape but it has a waterproof backing. I then secured the aluminum trim pieces over this and will be caulking the edges with clear Lexel. All the screw holes were injected with Lexel also. My thinking behind all of this is that, if any water should get past the lexel edge caulk then the waterproof barrier of the butyl tape should prevent any leakage to get behind the metal. Hence, the additional barrier of Gorilla tape also. So, I did have surprises during this last section. The trim pieces are aluminum… uh yeah, paint does not readily adhere to that stuff. So, I had to put the orbital sander to all of my previously painted trim pieces to remove all of the paint and scuff up the finish so that the paint would have something to grip to. The other issue I had was with the installation of the door trim and doors. First the door trim pieces… I had precut all my trim pieces for the door jambs and doors prior to adding the layers of waterproofing (gorilla tape and butyl tape). Yes, it did add to the overall dimensions of the door themselves thereby causing my trim pieces to be a wee bit short. So, I found some Dynaflex 230 that was close in color to seal the corners with but after drying, it was noticeable, so I taped off the trim and door with painter’s tape and painted over the caulk. Now it’s not that noticeable. Installing the door for the cooler slide turned out better than I thought it would but still had to trim the outer edge to allow for the ¼ inch gap on the hinge side…no problem. The back door…pure, well, you know. Anyway, it’s on and I had to return to work but when I get back home, I plan on buying new aluminum angle so that I can cut them to fit the doors and not have a noticeable gap where each corner meets, I’m really unhappy with how that looks. Sorry about some of the picture quality. I don't know why some of the edges in the pics are jagged like that. Also, please let me know what you think of the fenders. They are on there temporarily til I get home from work. Should I leave the full length that is below the trailer frame? I am thinking that if I cut them flush with the trailer frame, it may make them look kinda smallish. Please give me your thoughts.
Attachments
-
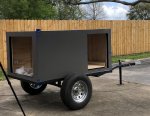 Skinning.jpg216.9 KB · Views: 56
 -
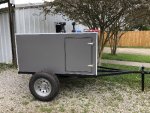 Sealing edges with butyl tape.jpeg111.8 KB · Views: 58
 -
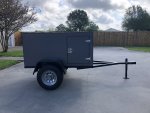 Skinning completed 1.jpeg189.4 KB · Views: 54
 -
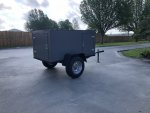 Skinning completed 2.jpeg212.9 KB · Views: 55
 -
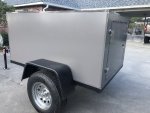 Skinning completed 3.jpeg202 KB · Views: 61
 -
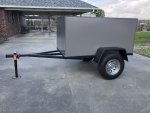 Skinning completed 4.jpeg232.6 KB · Views: 64
 -
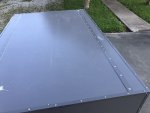 Skinning completed roof.jpeg157.7 KB · Views: 59
Brianj5600
Member
Nice!
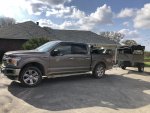
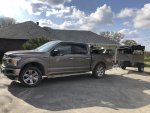
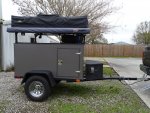
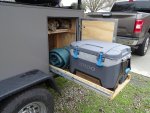
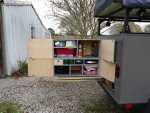
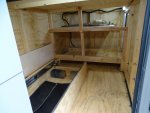
Well, I'm not very good at keeping folks posted on the progress. Hard to believe I haven't updated since March! I finished the trailer a few weeks ago and I took it on an overnight at my hunting leasae to make sure everything functioned as planned because the following weekend, my wife and I took it on a 2 night camping trip. It was her very first "tent" camping experience, we're in our 50's so it was a shock that she would actually come with me. She has always been too terrified to sleep in a ground tent but since the RTT is 6 feet off the ground, she made an exception. It didn't hurt that my two boys and their better halves were camping with us, in their own tents of course, so she felt even "safer". She absolutely enjoyed herself and commented how much more comfortable the tent was then what she thought it would be. She was not concerned about any "critters" scratching on the side of her tent! LOL! Anyway, I've attached a few final pics below. Also, this was more of a personal challenge and a project to keep me busy. It is very satisfying to accomplish something like this that I have never attempted before. But... it's for sale! Yep, time for another project trailer. I'm thinking of tackling a teardrop this go 'round. I'll be posting the specifics of the trailer and the price in the classified section, please check it out. You or someone you know may be interested in it. Also, the entire build process is on my youtube channel "Evangeline Outdoors" for anyone wanting more info on the build was completed.
Attachments
high-and-dry
Active member
That was a fast sold. Now Build a large tear drop, about 12 foot long with an inside bed and out side kitchen
Similar threads
- Replies
- 2
- Views
- 908
- Replies
- 1
- Views
- 515
- Replies
- 15
- Views
- 1K
- Replies
- 1
- Views
- 599
- Replies
- 3
- Views
- 845

