So I am new to this kind of project out of aluminum.
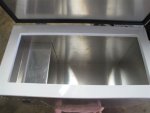
Do the doors all have a welded perimeter frame of 25mm square tube? I see the inner skin is riveted.... is it glued as well? And outer skin is only glued? The door frames are made from 25mm RHS & the inner & outer skins are both bonded to the frame using Fixtek MPS-190
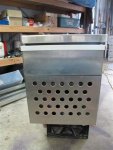
I see a C channel finishing the doors openings... I think...... is that correct? Incorrect, the doors are sealed using Durometer door seal from UES Int. The seal looks like a large rubber h, the bottom of the h fits over the door frame, and the top of the h makes the seal on the outer body of the camper
So the outer edge of the doors.... is it some special T shaped aluminum extrusion that provides the overhang for the door seal as well as sealing over the edge of the outer door skin?
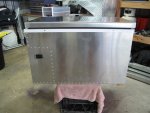
How are these fastened on.... glue, rivets or both? The door seal is fastened using Fixtek MPS-190 with rivets to hold in place until polyurethane is set.Also cannot see any hinge details..... what sort of hinge setup did you use? The hinge is Centalaflex continuous hinge from Ues Int. This hinge is plastic with a polyester flex section rated to over 50000 cycles. It is also fastened using MPS-190 with the rivets.Also wondering about the finish detail of the corners where you outer skin panels meet. It looks very professional but cannot quite make out what you did. Both the end skins where folded around to meet the side door openings then bonded in place. A fill strip was then bonded along the bottom of both the side openings. The roof section was last piece to be bonded in place; the skin was folded down to meet the side door openings & is concealed by the plastic hinge. None of the skin is welded or riveted fixed to the main frameThanks for any answers or photos you are able to provide.....
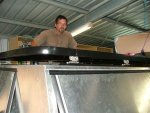
Very impressed with your result... I just started welding and am pondering mig welding a frame.... but still need to buy the aluminum gun. I had a very good friend TIG weld the frame for me, the rest of the work I hired his equipment & shed with payment in beer & bundy rum. Seeing what you and others create inspires me.... but it will be a long project. I may hire out the welding part. Good luck with you project, the best tip I could give is invest loads of time to designing & laying out what you require from your project. My camper was on paper for nearly 10years before I cut any alloy RHS. The build to date has taken about 3years & still not finished, the hold up as always is the $$$$’s.
Cheers
David
David


")