Frank
Explorer
A little late, but I finally have a few minutes to update. As mentioned, my fork seals let go a few weeks ago after some riding down some 'roads less travled'. I knew in the back of my mind that the seals probably needed attention, I just didn't do it. This is why I am a fix it before it breaks kinda person, it shouldn't have happened this way. I probably could have cleaned them and gotten away with a few more miles, but lets face it...they needed servicing.
Quite honestly, I was pretty nervous about tackling this project but hey, we all learn somehow, right?
Things are always better when you have the proper tools. I probably could have found someone on a forum to rent or borrow the tools from, but between my father in law and a few other local 950/990 friends, (oh, and we are on the hunt to find another 950/990 for my brother in law, and I see my other brother in law drinking the cool-aid by summers end too) the tools will be used more than one time. I found everything on Amazon for $68 shipped.
Motion Pro 08-0290 CR Seal Retainer and KTM Fork Cap Tool
Motion Pro 08-0493 48mm Ringer Fork Seal Driver
Motion Pro 08-0332 Orange 48mm Fork Seal Bullet Set
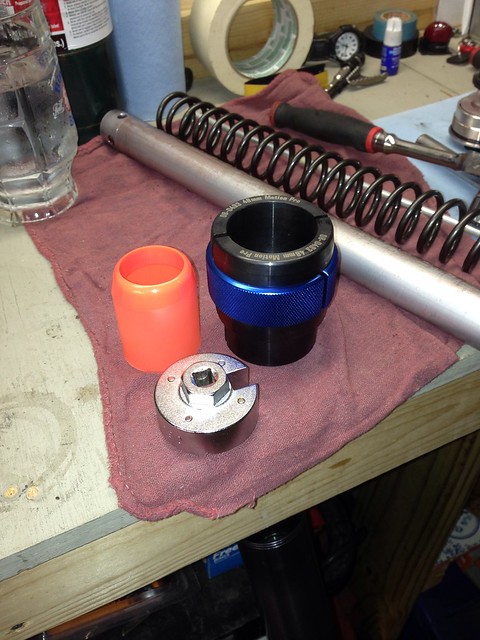
KTM 950 Adventure fork seal replacement by Frank Vest, on Flickr
The new seals came from SKF. There is lots of discussion on seals, so I found the closest guy who had something in stock and clicked order. There is no better way to develop an opinion about a product than trying it, right? well...maybe not all of the time...but whatever.
Did I just jump into this project, heck no. I searched the internet for others who have done the project and used their techniques. There are a few things I did differently than what this write up recommends. I didn't use an old tripple clamp to hold the forks while I worked on them. A bucket with some rags piled up worked great. To bust the cap loose from the tube, I cracked it before I pulled the forks from the tripple clamp. To bust the cap loose from the spacer, I took an old wrench to the grinder and made it considerably thinner to slip between the springs. I didn't need heat to pull the fork tubes apart. -There is a snap ring inside of the dust cover and once that is out, slide the fork tubes against each other (gently) and they will pop apart. I think that is about all I did differently. All of this information might sound very foreign to anyone who hasn't done the process, but once you are in and doing it, it will make perfect sense.
http://www.ktm950.info/how/Suspension Shop/Forks/seals/fork_seals.html
Searching the internet, little info can be found about how much fork oil and what weight should be used. The KTM owners manual is probably one of the best manuals out there, yet this information seems to be absent.
I used 10w oil and set it to 120mm. Why did I choose 120mm...because Mr. Slavens mentioned the number in his video about filling the forks with oil. So far it seems fine. Why did I choose 10w oil, it's what my local KTM dealer recommended, and I had an extra bottle on the shelf. The forks took almost 2 bottles. Really, this was a shot in the dark.
http://youtu.be/glG3gUjxjEU
When doing the forks, a few other things should be present. Brake cleaner, lots of rags, some paper towels (I prefer the blue shop paper towels, they are lint free and cheaper than decent kitchen paper towels) synthetic water-proof grease, and of course various tools. Really, not much is needed for the job, and if you get desperate, 99% of the tools (with the exception of the special tools I choose to purchase) can be found in the KTM tool bag. I say 99% of the tools because I ended also used a few picks to clean and pull some seals down during the rebuild. Also, I like to use a torque wrench when possible while putting things back together.
So onto some pictures:
Bike tore down, ready for install
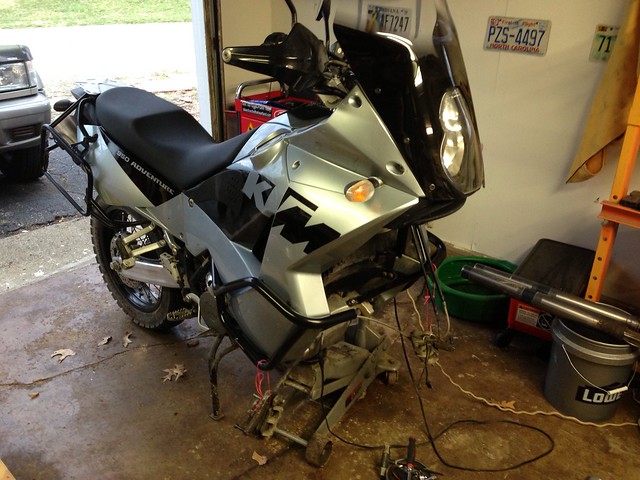
Ktm 950 fork seal replacement by Frank Vest, on Flickr
Forks off of the bike. One thing I would like to mention is that you want to pull these down and apart a few hours before doing the seal change. Turn everything upside down in a bucket to drain the oil out of the tubes. Also, clean these BEFORE you pull anything apart. Starting with clean forks will ease things later when you are cleaning everything anyway.

Ktm 950 fork seal replacement by Frank Vest, on Flickr
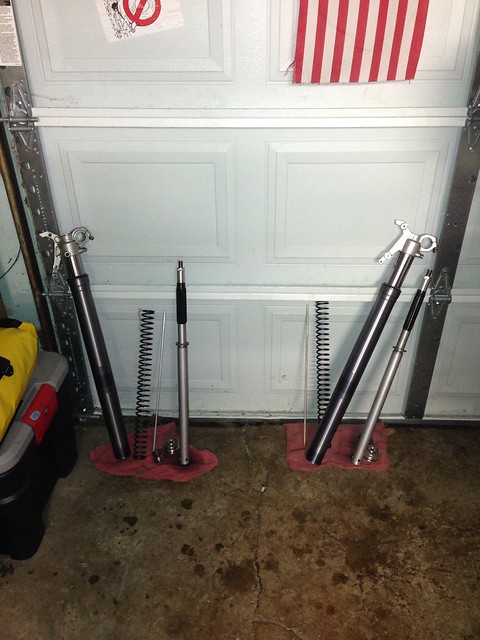
Here is a picture of everything out of the fork tubes
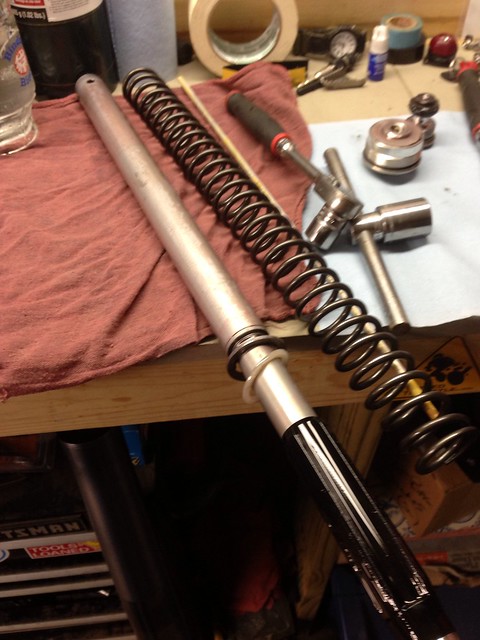
KTM 950 Adventure fork seal replacement by Frank Vest, on Flickr
KTM 950 Adventure fork seal replacement by Frank Vest, on Flickr
Pay very special attention to the way things come apart. I recommend taking a few pictures of the way seals and rings go on/come off. Clean and mark everything. In case you dont take a picture because you are too excited about how easy this is to do, here is a shot for you
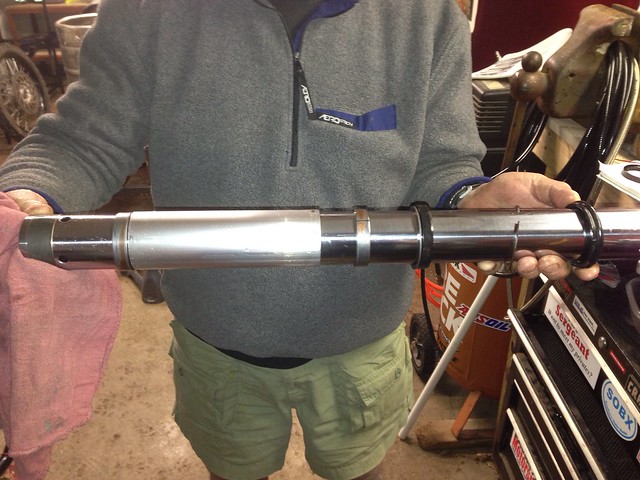
KTM 950 Adventure fork seal replacement by Frank Vest, on Flickr
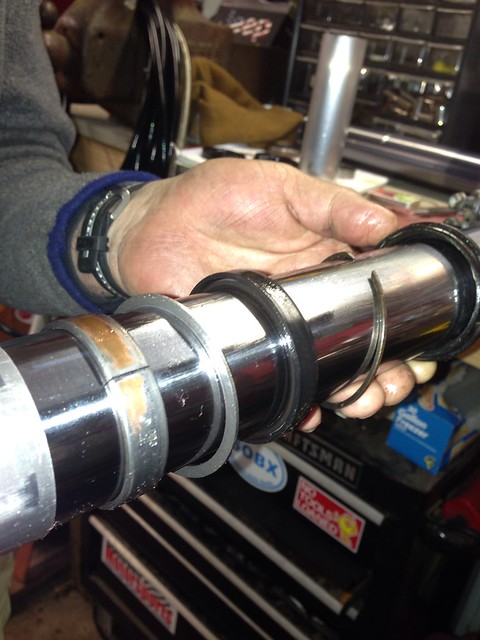
KTM 950 Adventure fork seal replacement by Frank Vest, on Flickr
Unfortunately, that is all of the pictures I have. Your hands get very greasy and oily while you are doing this, so taking pictures isn't something that is on the top of your mind.
Reassembly is pretty straight forward but pay attention to the front brakes when assembling them. If you put them on without running the brake line around the front of the tube, it will create about an hours worth of head scratching when its time to put the fender back on. Dont ask me how I know. :bigbossHL:
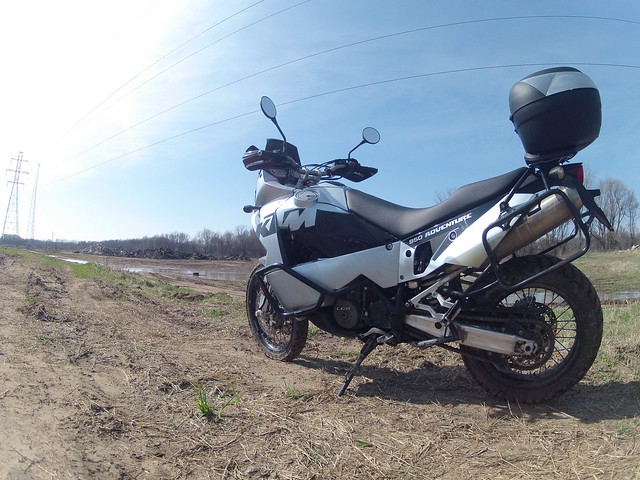
I did this video the day after rebuild. Its a really boring video with no sound but its pretty neat to watch the suspension work.
http://www.youtube.com/watch?v=goMyGj7iyIo&feature=share&list=UUZsgYcyWghcH1zr21mAAAuw
GOPR0002 by Frank Vest, on Flickr
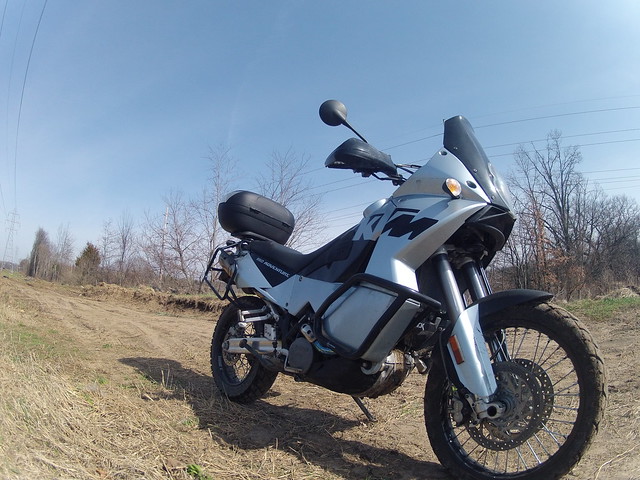
GOPR0004 by Frank Vest, on Flickr
Until next time
GOPR0001 by Frank Vest, on Flickr
Quite honestly, I was pretty nervous about tackling this project but hey, we all learn somehow, right?
Things are always better when you have the proper tools. I probably could have found someone on a forum to rent or borrow the tools from, but between my father in law and a few other local 950/990 friends, (oh, and we are on the hunt to find another 950/990 for my brother in law, and I see my other brother in law drinking the cool-aid by summers end too) the tools will be used more than one time. I found everything on Amazon for $68 shipped.
Motion Pro 08-0290 CR Seal Retainer and KTM Fork Cap Tool
Motion Pro 08-0493 48mm Ringer Fork Seal Driver
Motion Pro 08-0332 Orange 48mm Fork Seal Bullet Set

KTM 950 Adventure fork seal replacement by Frank Vest, on Flickr
The new seals came from SKF. There is lots of discussion on seals, so I found the closest guy who had something in stock and clicked order. There is no better way to develop an opinion about a product than trying it, right? well...maybe not all of the time...but whatever.
Did I just jump into this project, heck no. I searched the internet for others who have done the project and used their techniques. There are a few things I did differently than what this write up recommends. I didn't use an old tripple clamp to hold the forks while I worked on them. A bucket with some rags piled up worked great. To bust the cap loose from the tube, I cracked it before I pulled the forks from the tripple clamp. To bust the cap loose from the spacer, I took an old wrench to the grinder and made it considerably thinner to slip between the springs. I didn't need heat to pull the fork tubes apart. -There is a snap ring inside of the dust cover and once that is out, slide the fork tubes against each other (gently) and they will pop apart. I think that is about all I did differently. All of this information might sound very foreign to anyone who hasn't done the process, but once you are in and doing it, it will make perfect sense.
http://www.ktm950.info/how/Suspension Shop/Forks/seals/fork_seals.html
Searching the internet, little info can be found about how much fork oil and what weight should be used. The KTM owners manual is probably one of the best manuals out there, yet this information seems to be absent.
I used 10w oil and set it to 120mm. Why did I choose 120mm...because Mr. Slavens mentioned the number in his video about filling the forks with oil. So far it seems fine. Why did I choose 10w oil, it's what my local KTM dealer recommended, and I had an extra bottle on the shelf. The forks took almost 2 bottles. Really, this was a shot in the dark.
http://youtu.be/glG3gUjxjEU
When doing the forks, a few other things should be present. Brake cleaner, lots of rags, some paper towels (I prefer the blue shop paper towels, they are lint free and cheaper than decent kitchen paper towels) synthetic water-proof grease, and of course various tools. Really, not much is needed for the job, and if you get desperate, 99% of the tools (with the exception of the special tools I choose to purchase) can be found in the KTM tool bag. I say 99% of the tools because I ended also used a few picks to clean and pull some seals down during the rebuild. Also, I like to use a torque wrench when possible while putting things back together.
So onto some pictures:
Bike tore down, ready for install

Ktm 950 fork seal replacement by Frank Vest, on Flickr
Forks off of the bike. One thing I would like to mention is that you want to pull these down and apart a few hours before doing the seal change. Turn everything upside down in a bucket to drain the oil out of the tubes. Also, clean these BEFORE you pull anything apart. Starting with clean forks will ease things later when you are cleaning everything anyway.

Ktm 950 fork seal replacement by Frank Vest, on Flickr
Here is a picture of everything out of the fork tubes

KTM 950 Adventure fork seal replacement by Frank Vest, on Flickr

KTM 950 Adventure fork seal replacement by Frank Vest, on Flickr
Pay very special attention to the way things come apart. I recommend taking a few pictures of the way seals and rings go on/come off. Clean and mark everything. In case you dont take a picture because you are too excited about how easy this is to do, here is a shot for you

KTM 950 Adventure fork seal replacement by Frank Vest, on Flickr

KTM 950 Adventure fork seal replacement by Frank Vest, on Flickr
Unfortunately, that is all of the pictures I have. Your hands get very greasy and oily while you are doing this, so taking pictures isn't something that is on the top of your mind.
Reassembly is pretty straight forward but pay attention to the front brakes when assembling them. If you put them on without running the brake line around the front of the tube, it will create about an hours worth of head scratching when its time to put the fender back on. Dont ask me how I know. :bigbossHL:
I did this video the day after rebuild. Its a really boring video with no sound but its pretty neat to watch the suspension work.
http://www.youtube.com/watch?v=goMyGj7iyIo&feature=share&list=UUZsgYcyWghcH1zr21mAAAuw

GOPR0002 by Frank Vest, on Flickr

GOPR0004 by Frank Vest, on Flickr
Until next time

GOPR0001 by Frank Vest, on Flickr
Last edited:


