bobwohlers
Overlander
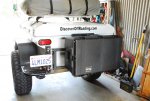
To begin my project, I shopped and shopped for the right trailer tub, lid, and frame from which to build my overland trailer. Whether the trailer had a suspension, axle, wheels and tires on it was of no consequence to me as I was willing to add a suspension to the trailer myself. Also, I wanted a new trailer, not a used military model.
My objective was to let a trailer manufacturer do the hard fit and finish work of welding the tub, lid and frame, plus painting it to match my vehicle. If I found all of this from one manufacturer, plus a suspension and axle set up that is simple and straight forward, I'd buy it. I did not want a proprietary-style suspension system (with airbags, etc., etc.). I wanted a trailer with leaf springs, perches, solid axle, and shocks that I could get in practically any remote location.
Further, I wanted to add all the customization to the trailer myself, to make it “my” overland trailer. I figured that this approach would not only be fun, but I could make the trailer “I” wanted at a good price-point.
With this approach in mind, I looked at practically all the new trailers on the market. A couple of manufacturers would not even sell me a “blank” trailer without all the “goodies” on it. They were great trailers, but those manufacturers simply didn't fit my approach. Of those manufacturers that would sell me a relatively “blank” trailer, I started researching their craftsmanship, and builds. Some of these trailers I saw at off-road shows, others I actually went to the factory to meet the owners and see how they build their trailers. Of all I examined, I went with Sierra 4X4 Trailers. Now, it took me a while to get my trailer from this small manufacturer, but I was patient, knowing he was essentially a one-man shop. Sierra 4X4 makes a solid trailer; it's a quality product. I've now owned mine for 3 years and put it through hell; no problems at all.
Now for my build:
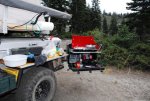
- Sierra 4X4 frame, tub, lid, axle, and suspension
- 35” Tires to match tug vehicle
- Max Coupler for trailer hitch
- Uhaul Hitch extension (between tug vehicle and Max Coupler; allows rear tug vehicle tailgate to be opened)
- Electrical connection to tug vehicle via: 4 gauge wiring, Anderson PowerPoles, IBS Intelligent Battery System (went with IBS so solar system would charge tug vehicle battery also)
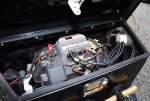
- Steel nose-box from Harbor Freight (1/4th the price of nose-boxes from the trailer manufacturers; but very solid and it's locking)
- In the nose-box: Werker AGM 100AH battery in battery box, ProStar-15 solar controller, RV 12-volt water pump, assorted circuitry, fuses, 2 marine grade cigarette outlets, outlet for solar panel wires
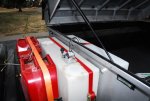
- Two 5 liter Gas Cans
- 20 gallon Ronco exterior water container with manual hand pump; 20 gallon Ronco water container on interior of trailer (both water containers are plumbed together with RV 12-volt water pump)
- Propane Bottle with locking support
- Rhino Racks to support ARB Simpson III roof top tent
- One, 135 Watt Kyocera Solar Panel (strapped under tent; to sit on top of trailer lid, between Rhino Racks)
- “Kitchen” Table (also mounted under ARB tent, on top of solar panel; strapped down with solar panel; panel has a stand build on the back so it can rest at an angle on the ground)
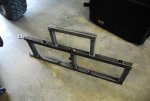
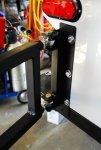
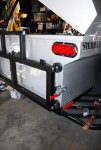
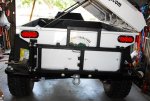
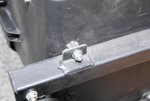
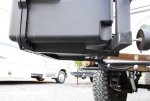
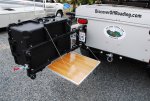
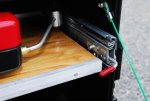
- Kitchen Box – Pelican IM2975 Storm Case mounted on custom fabricated trailer “tail gate”
- Custom folding table off the backend of kitchen box tail gate
- ARB Touring Awning – mounted on custom fabricated aluminum support, and bolted to Rhino Racks
- Miscellaneous boxes and fluid containers (water, motor oil, coolant, gear oil) mounted on trailer nerf bars on both sides of wheel fenders


Attachments
Last edited:


