PHASE 1
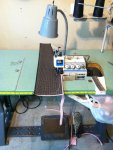
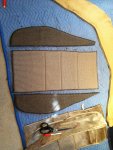
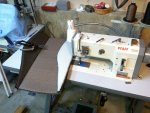
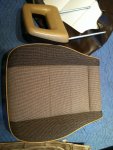
Long time syncro owner/wrencher here that has owned many over the years and sold his last one (#5-svx powered westfalia) a while ago to dabble in the "build your own sportsmobile" arena. somethings i loved about the E350, RB, 7.3psd, colorado camper van top, but i sold it anyway and got into a four wheel camper Hawk that went into the drop dead reliable 02 tundra that i already owned. we love that darn camper and it isnt going anywhere, BUT, i still will always have a soft spot in my heart for the VW Vanagon Syncro. I got one offered to me through a buddy who didnt have time for it, and since it was becoming my slow season for parts of what i do for $ (graphic designer for the apparel industry who would rather not be at a computer any longer and has opened a small motorcycle resto/service shop specializing in EU/japanese brands including custom upholstery), i figured--why the hell not build another one. I really enjoyed my last SVX build out afterall.
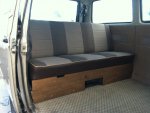
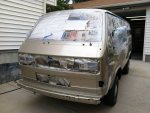
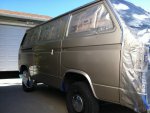
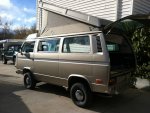
so, deal was made for a really solid 87 syncro tin top that had some character flaws, locker tranny was in good shape, drove fairly nice, motor i dont care about at all ran fairly well. still it was 3 hrs away and i decided to tow it home which allowed me to grab a westfalia roof section as well for phase 1 of my evil plan--build a Westfalia Weekender by swapping over the pop top. list correlates to the pics
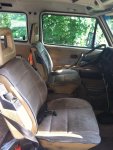
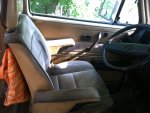
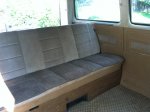
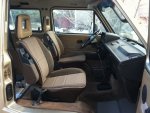
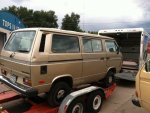
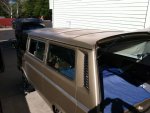
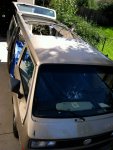
1. van as i brought it home
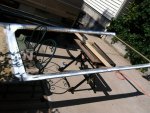
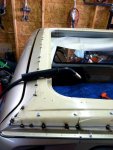
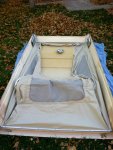
2. prepping the donor roof section from an 86 westfalia. im doing it the way the westfalia factory did it (westfalia's were not made by VW afterall). 100's of spot welds i drilled out so i could swap the skin over to the van and weld it to the roof structure.
3. syncro tin top, which has a domed roof, not aware of its fate
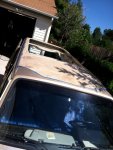
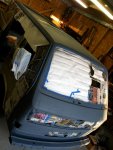
4. created the worlds largest sunroof. the domed center structure need to be removed and replaced with the flat westfalia one
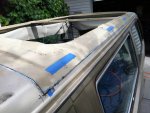
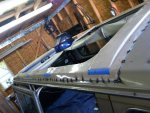
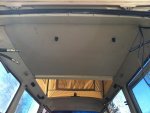
5. test fitting westfalia roof section, marking mount locations for the luggage rack
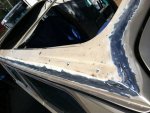
6. more test fitting, getting the cuts just right, this went on for a while
7. and finally structural spot welds every couple of inches
8. continued, and them rotating areas so as to not warp the metal with heat, seal the seam with a stitch weld
9. and then the long process of smoothing out the seam and body work, body work, body work
10. lots of body work later and in primer--finally
more in next post (10 pic limit)
Long time syncro owner/wrencher here that has owned many over the years and sold his last one (#5-svx powered westfalia) a while ago to dabble in the "build your own sportsmobile" arena. somethings i loved about the E350, RB, 7.3psd, colorado camper van top, but i sold it anyway and got into a four wheel camper Hawk that went into the drop dead reliable 02 tundra that i already owned. we love that darn camper and it isnt going anywhere, BUT, i still will always have a soft spot in my heart for the VW Vanagon Syncro. I got one offered to me through a buddy who didnt have time for it, and since it was becoming my slow season for parts of what i do for $ (graphic designer for the apparel industry who would rather not be at a computer any longer and has opened a small motorcycle resto/service shop specializing in EU/japanese brands including custom upholstery), i figured--why the hell not build another one. I really enjoyed my last SVX build out afterall.
so, deal was made for a really solid 87 syncro tin top that had some character flaws, locker tranny was in good shape, drove fairly nice, motor i dont care about at all ran fairly well. still it was 3 hrs away and i decided to tow it home which allowed me to grab a westfalia roof section as well for phase 1 of my evil plan--build a Westfalia Weekender by swapping over the pop top. list correlates to the pics
1. van as i brought it home
2. prepping the donor roof section from an 86 westfalia. im doing it the way the westfalia factory did it (westfalia's were not made by VW afterall). 100's of spot welds i drilled out so i could swap the skin over to the van and weld it to the roof structure.
3. syncro tin top, which has a domed roof, not aware of its fate
4. created the worlds largest sunroof. the domed center structure need to be removed and replaced with the flat westfalia one
5. test fitting westfalia roof section, marking mount locations for the luggage rack
6. more test fitting, getting the cuts just right, this went on for a while
7. and finally structural spot welds every couple of inches
8. continued, and them rotating areas so as to not warp the metal with heat, seal the seam with a stitch weld
9. and then the long process of smoothing out the seam and body work, body work, body work
10. lots of body work later and in primer--finally
more in next post (10 pic limit)
Attachments
Last edited:

 Nice work!