MYTACO
Adventurer
Just over a year ago (November 2012), we began the ordering process for our Phoenix Pop Up Camper…and ultimately picked it up in March 2013. Prior to November 2012, we researched the heck out of what we wanted--literally for more than three years. Having gone through the process painstakingly, we thought it might be helpful to share what we've learned throughout the last year.
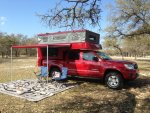
BACKGROUND: I am an Army vet/retired after 26 years. My last tour was in Afghanistan, and while there one of the posters on the wall was of the U.S. and various pictures of famous places: Mount Rushmore, Statue of Liberty, Golden Gate Bridge, Grand Canyon… After staring at it for almost 12 months, I realized that I had seen more of the world than my own country. We knew we didn't want to fly, and we certainly did not want to confine ourselves to the interstate system. That being said, I also did not want to "rough it" with a ruck sack… So in 2009, we started researching with that foundation. We looked at Class B RVs and ultimately looked at the pop up camper selections. We've owned Tacomas throughout the years…and wanted to build on that vehicle.
Initially I started with the 2009 Tacoma, TRD, Off Road, V6, 4x4. Shortly after placing the order, I got a new 2013 Tacoma because of the new technology it offered (primarily hands free devices). With the exception of the Sirius satellite antenna, I don't think there were many modifications that needed to be made.
So knowing that we were torn between a class b and the pop up, it should be no surprise that we didn't spare any detail or option. In fact, I think we initially ordered every option that was available on the Phoenix "build your own" website.
My first contact with Phoenix was a quick email to inquire about the weight allowances for a Tacoma. I received a reply (albeit short and curt) that they had several years of experience of building custom campers and knew what they were doing. [At the same time, I had also contacted another dealer in the Denver area to inquire about customization--and never received a response. In all fairness, it would not likely have made a difference because we were already sold on the looks and design of the Phoenix.]
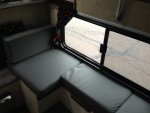
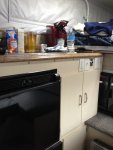
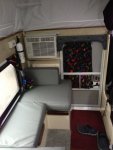
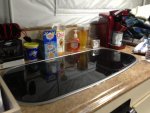
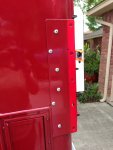
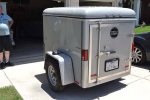
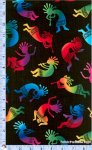
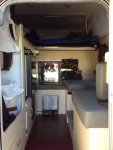
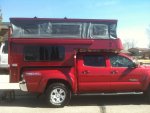
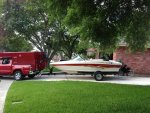
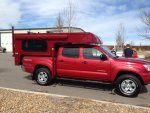
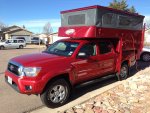
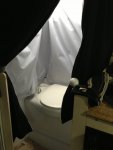
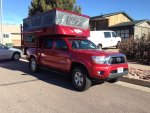
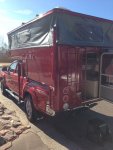
A few weeks later, we mailed in our deposit and began the order. As stated above, we spare no detail. We added: custom paint (to match the Tacoma), ladder, solar panel, roof rack, commode/shower, outdoor shower, water heating system, AC, heater, larger fridge, stove, sink, 300 watt inverter, outdoor plug/cable hook ups, awning, gray leather seats (Katskin to match the Tacoma), the step ladder, and even picked out the fabric from another site for the bed cushions and curtains (tossed rainbow Kokopellis). Finally, when we visited the shop where they build the campers, we selected cork flooring (we have three dogs who travel with us), a table top with the map of the US, and darker interior cabinetry. While there, we made it very clear of our intended uses for the camper. As a practical matter, we planned on spending little time inside--and more sitting outside under the awning listening to music and enjoying the scenery. We also let Rob know that I had a boat, so he added an 8 prong plug on the back of the camper that would facilitate towing it up to the lake. Because of all of the features, we had the overhang from the back of the truck, necessitating the removal of the tailgate.
My research didn't stop after the order and left Denver. Because of the overhang, I knew I would lose the rear camera feature that I had grown to love--as well as a tight fit between the bow of the boat and the truck. As such, I eliminated the steps from our order. I also did some extensive research on the modifications needed for my truck. I knew that I would need to adjust the suspension to accommodate the weight and provide a better ride. Rather than add springs, I opted for Air Lift bags. [I would have preferred Sumo, but they were not made for Tacoma]. At the time I started the process, I had envisioned quickly taking the camper on/off, so I wanted the ability to easily adjust the air bags. This meant an on board compressor with a device/gauge inside that allowed me to just touch a few buttons [much easier than finding the zert and going from side to side…]. This also allowed me to compensate for a heavier side should the weight distribution require. All in all, with the mail in rebates, the Air Lift package with compressor and cab gauge was about $750.
I also still wanted a back up camera, which was going to be problematic since I lost the tailgate. I had asked Rob about adding that to the camper, but that was not a modification he was willing to make. I again conducted some extensive research, and even went to Toyota to price additional cameras. They were out of this world on prices (close to a $1000), and just as I was about to give up, I stumbled upon some great guidance for other options. In short, I found an OEM backup camera on eBay for about $50 and ultimately mounted it to my license plate. After using it none months, I have had no problems so far! I will post the links on another entry later…
Finally, I also bought a thick rubberized cargo mat from Toyota to "save" the bed of my truck and stop slippage. That was about another $100.
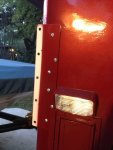
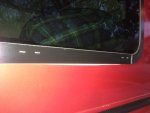
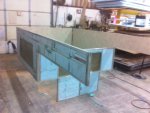
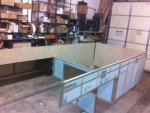
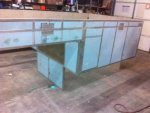
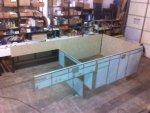
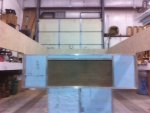
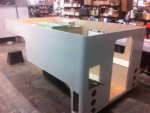
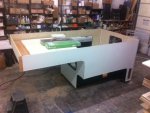
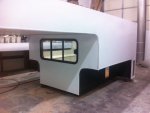
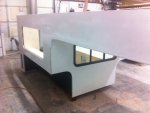
By the time I was done with all of my add-ons with the camper, it came to just over $27k. As March grew closer and closer, we became more excited. Occasionally, Rob and Cari would send us "in-progress" pics, which I've attached.
I know we bugged them several times between the order and pick up. Part of me wishes I had been more persistent on keeping track of what I ordered. In the end, we didn't get quite everything we thought we had ordered; specifically the dark wood cabinetry and three of the cushions lacked our fabric.
A week before our scheduled pick up, the final payment was due and we made the final arrangements for pick up during the week of Spring Break.
View attachment 200349View attachment 200348View attachment 200347View attachment 200346
Attachments
-
 IMG_0377_2.jpg114.8 KB · Views: 514
 -
 IMG_0373_2.jpg132.4 KB · Views: 391
 -
 IMG_0374_2.jpg120 KB · Views: 339
 -
 IMG_0378_2.jpg122.2 KB · Views: 343
 -
 IMG_0376_2.jpg108.2 KB · Views: 326
 -
 IMG_0010_2.jpg104.7 KB · Views: 325
 -
 IMG_0011_2.jpg118.7 KB · Views: 328
 -
 IMG_0012_2.jpg98.4 KB · Views: 336
 -
 IMG_0013_2.jpg111.4 KB · Views: 406


")