Electrical: Blue Sea Systems aux fuse, Hella relay block, flat panel swith
I'm still debating a 2nd battery for this truck. At present it seems unnecessary given how she is used, but there is a possibility that upon return to the US if she turns into a tow rig for either the D1 or an eventual series acquisition the role as base camp truck may necessitate it. Regardless I knew that wiring in the bumper lights, the LED light bar, the fridge, and any other add-on components would make having something in place worthwhile. Before leaving the US we ran power wirer from the engine compartment down along the frame rail and up through a grommet in the back where the jack is stored. I didn't want to deal with the firewall and was primarily interested in getting constant 12v back there on a scale sufficient to power the fridge.
For awhile I toyed with the idea of mounting an aux fuse box to the inside of the panel that accesses the stock jack but in the end I decided I wanted to use the right rear cubby as the hub for both 12v constant fused power as well as relays for the lights:

The trim is removable, albeit not necessarily easy. I messed around with a panel popper and a flat head for awhile till I figured out how the various tabs and such integrated with that portion of the rear cargo area trim to make sure I wouldn't break it. Then-having learned my lesson about working in the heat, the bulk of the fitting and small connections was done in the comfort of the kitchen:


The two electrical add-ons are the standard Blue Sea Systems fuse block (
Blue Sea Systems Fuse Block) and a Hella 4 way mini relay block (
Hella Relay Block) This should provide enough for any additional requirements beyond the fridge, existing lights, and a planned 12v accessory bank & some more cargo area lighting. The fit & finish of both products is what you'd expect, though the Hella doesn't really come with any instructions it is fairly self evident if you are familiar with relays. I would note that I managed to place them too close together, i.e. I have to remove the clear cover on the relays to subsequently remove the fuse panel's cover but that's a small matter.
Here is how it looks 'in nature' where you can see that I use the bin for some spares such as the mandatory extra brake switch, belt(s) (the other one sits on top and was removed for the picture) as well as taillight bulbs, JB weld, etc.

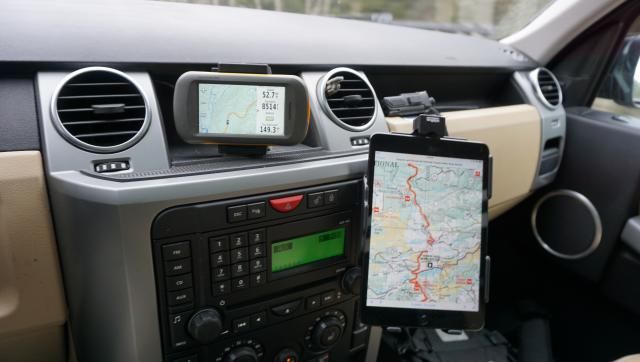
As the electrical work progressed I also struggle a bit with switching for the Hella 4k's I put on the bumper to replace the LED aux lights Icon installed as well as a switch for the LED light bar on the roof rack. While I like the OE look of the aux switches I wanted the ability to switch independently and really didn't want to tear off the area around the binnacle if I didn't have to. Conversely I was pulling the surround from the stereo a fair amount and knew that I had space back aside the HVAC controls and such to utilize if needed. Not wanting to mess with carling switches nor mount stuff overhead resulted in long hours on the internet trying to find a viable solution. What I went with was a $20 gel panel switch off Amazon that gets mixed reviews but so far seems to be working pretty well (
Flat Panel Switch). Pardon the crappy initial instal picture:

The panel is mounted via velcro vice the provided double-sided tape (which doesn't stick well there anyway). The flat control wire is only about 18" long so it has a short run to the switch unit which resides under the vent basically to the left of the radio controls in the space that is free back there. 12v in is via a tap in the cigar lighter's wiring, 12v out runs out to the relay block to turn on the hella's and the light bar. Two switches are currently un-used. I wasn't happy with the silver/gray apperance so for now I used a little electrical tape and a sharpie to make it stand out a lot less. Not terribly elegant but it fell into the not just good, but good enough category. At $20 I'd happily by another just to be able to play with making its apperance better.

The above pic also illustrates the transition from the temporary Garmin 650T setup to the hardmounted/hardwired install with a RAM mount and the rugged AMPS cradle. This is the exact same setup I have in my other truck (the GPS goes with me) and it works well. In retrospect I regret that the vehicle didn't have navigation nor does it have bluetooth in the radio or the ipod hookup but in the end this is a small thing and some follow up posts will illustrate the work-arounds I've used.