You are using an out of date browser. It may not display this or other websites correctly.
You should upgrade or use an alternative browser.
You should upgrade or use an alternative browser.
New M101A2 expo trailer build
- Thread starter brussum
- Start date
brussum
Adventurer
Down to three big pieces...
Upcountry, I'll have to clear some tools, trailer pieces, and other junk off the lid so I can open it, but I'll get you some better snapshots.
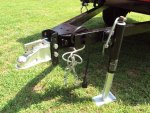
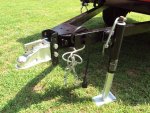
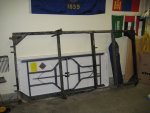
I'm probably the slowest trailer project guy out there, but it's a tough balance between three kids, a wife, a job, other hobbies, and...oh, yeah, that budget. Nonetheless, I tore the trailer apart into the various pieces so I could get the frame sandblasted and repainted a nice, durable black. I also took the surge brake system off and bought an adjustable channel unit from etrailer (thanks to Mark and a few others for that idea). Anyway, here are a few pics of the trailer pieces.
While the frame is getting repainted, I'll be purchasing some replacement shocks and some new tires. I already got new wheels for it that will match my F350 (with lug adapters, unfortunately). Then, I'll put the axle and frame back together, run all new electrical wiring (incl. some pigtails for the electric trailer brakes I plan to install), and work on getting the stripped, primed, and painted to match my truck.
Cheers,
John
View attachment 73738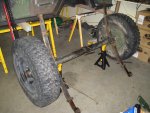
Ah yes. That is EXACTLY what I want to do to mine. Thank you for inspiring me. If you don't mind when you have a minute could you take a pic of the underside of the lid? I am curious howbyou designed the support structure. Thanks! And, good work.
Upcountry, I'll have to clear some tools, trailer pieces, and other junk off the lid so I can open it, but I'll get you some better snapshots.
I'm probably the slowest trailer project guy out there, but it's a tough balance between three kids, a wife, a job, other hobbies, and...oh, yeah, that budget. Nonetheless, I tore the trailer apart into the various pieces so I could get the frame sandblasted and repainted a nice, durable black. I also took the surge brake system off and bought an adjustable channel unit from etrailer (thanks to Mark and a few others for that idea). Anyway, here are a few pics of the trailer pieces.
While the frame is getting repainted, I'll be purchasing some replacement shocks and some new tires. I already got new wheels for it that will match my F350 (with lug adapters, unfortunately). Then, I'll put the axle and frame back together, run all new electrical wiring (incl. some pigtails for the electric trailer brakes I plan to install), and work on getting the stripped, primed, and painted to match my truck.
Cheers,
John
View attachment 73738


Mark Harley
Expedition Leader
John:
Nice work on the trailer, I don't have brakes on mine but I went with a 7 pin plug to charge an auxillary battery.
It is heavy duty and looks better than just a 4 pin connector. Keep us posted on the build " more pictures"
Nice work on the trailer, I don't have brakes on mine but I went with a 7 pin plug to charge an auxillary battery.
It is heavy duty and looks better than just a 4 pin connector. Keep us posted on the build " more pictures"
Attachments
Last edited:
koolex11
Observer
Looks like you are doing it right Brussum. Just take everything apart, strip, repaint and add your own flair as you go! It's much easier in the long run and the hardware always could use replacing. A nice, fresh start so you won't have to worry about rust for a long time! Keep the pics coming...
brussum
Adventurer
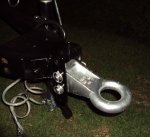
Never one to turn down a great idea, I decided to ditch the surge brake setup and opt for an adjustable height unit. One of my local welders did a great job reinforcing the hitch and welded it all together.
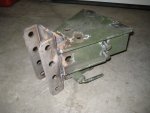
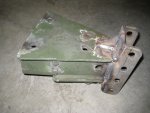
I anyone is interested in any of the stock brake components (lunette, booster, brake lines, etc.), then let me know. We can work out a deal. Otherwise, I'm going to do some metal recycling.
My next step is to prep and paint the hitch, tongue, and frame, then put it all back together and run a wiring harness.
Mark Harley
Expedition Leader
derekrayhall
New member
Hey John! Sweet lid bro! What did the lid cost you if you dont mind? I need to get one made.
Derek in Dallas
Derek in Dallas
brussum
Adventurer
Derek, it was pretty darn pricey...about $1200. It's tough living in remote parts of Alaska where there the materials cost a fortune and skilled welders are few and far between. Still, the welder did a great job and it's strong. Definitely no issues standing on it or mounting a roof-top tent in the future. I just wish I'd had the welder make it a little longer so the lid covered the tailgate pins and prevented the back end from being opened. Next time maybe...
brussum
Adventurer
Long time since updated...
Okay, so apologies for the long delay in updating my trailer progress. Between the snowy, cold winter and the bothersome job of mine, I haven't been making much progress during the past few months. Still, the nice spring weather in Alaska has allowed me to get quite a bit done on the trailer.
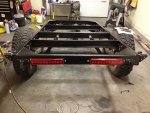
After disassembling the frame and removing every nut and bolt, I primed and painted the entire frame black. Then, I made a few online purchases to order new hardware for the reassembly. I ditched the old, worn out shocks and replaced them with a Monroe product. Once the paint had some time to cure in the heated garage, it was time to reassmble the whole unit. It actually went really well. The chassis went back together without any issues and the new hardware worked well...much better than fighting with the previous bolts with corrosion and twelve coats of paint.
The final step was to wire it for the new LED lights and backup lamps. I bought a couple of coils of wire in the various trailer colors (blue, brown, red, black, yellow, green, and white). I routed the wires along the frame, gave myself a couple feet of extra wire on each end, and cut the wires to length. Then, I routed everything through black shrinktubing and ran the heatgun over it all. It made a nice, solid wiring harness that should help preserve the wires better. I ran the new wiring harness back through the frame and secured it using wire clamps. A little time and solder was all that was left to finish the wiring.
Here are a couple pictures of the chassis with all of that work complete (or nearly complete):


brussum
Adventurer
The "finished" product...
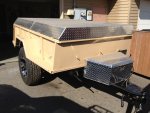
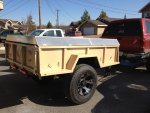
The weather was finally nice enough outside that I could paint the trailer body. I really wanted to follow suit with Mark and paint the trailer to match my pickup, but getting a match to that dark Toreador Red isn't easy. So, I opted to keep a slight military look and paint the trailer a nice gloss tan. I think it looks pretty good and I can always change the color later if I want to.
So, once I got the chassis reassembled and wired, I mounted the body back onto the chassis. I was concerned about getting the front and rear bolt holes to line up correctly, but it didn't seem to be a problem. I took two of the original bolts (I replaced all hardware here as well) into the holes at the front of the body so I could see where the holes were in relation to the holes on the chassis. Then, I just lined up the chassis underneath the body while it was supported by sawhorses and used my hi-lift to lower it down onto the chassis. Probably the best part of the chassis is the hand brakes, which kept the trailer from moving around while I fiddled with the body. Once in place, all the bolts were threaded and torqued.
Next, I just rolled the entire unit outside and started the painting. I sanded any loose paint off (as well as the stickers and tape residue from the Army) and primed any bare metal a few times. Then, I masked off the lid, data plate, and anywhere overspray might hit the frame. A couple coats of gloss tan later and the finished product looked pretty good.
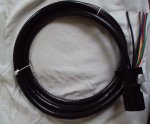
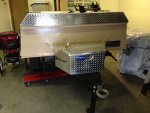
While the entire trailer was already wired (including a blue pigtail for an electric brake option), I hadn't finished the plug on the front of the trailer. I wanted to make the trailer theft resistant and do something kind of unique (okay, I did borrow the ideas elsewhere). Instead of just putting a 7-pin plug on, I bought a tongue storage box and ran the wiring harness into it. I bought a 7-pin junction box and connected the wiring harness to it. Then I ran a short line from the junction box to a female 7-pin receptacle flush mounted to the driver's side of the storage box. I built a short cable with two male ends to connect the female plugs on the trailer to the rear of my pickup. It worked like a charm and hopefully makes it more difficult for someone to drive off with my trailer (especially with the removable pintle hitch). I'm currently at overseas for work, but will post better pictures when I get home.
The final thing to do was to get rid of the original steel wheels and dry rotted tires. I wanted wheels to match my truck, but they're out of production and every effort to find the right size and lug pattern was unsuccessful. Grrrr. So, I bought a similar wheel in brushed aluminum and black. I mounted some Toyo E-rated 35" tires so my truck and trailer can share spares. Unfortunately, the truck is a Ford with 8x170 lugs and the trailer has GM-style 8x6.5 lugs. So, while I'm not a big fan of them, I had to use lug adapters. I don't plan to load too much into the trailer and will just periodically check the torque on ALL lug nuts. Between the wider tires and the lug adapters, the tires were pushed out to fill out the wheel well extensions I had put on the trailer. It looks good and tracks almost right behind the tires on the truck.
I hooked it all together and took it for a test drive and got plenty of looks. I live on a military base, so seeing M101-series trailers isn't rare. But, seeing one nicely painted with 35" tires and nice wheels doesn't happen too often. I did pass a bunch of troops having a meeting in the motorpool and the entire group stopped what they were doing and watched the trailer drive by. Pretty funny.
Anyway, here's the "finished" product:


brussum
Adventurer
By the way, the trailer's not hooked up to the truck in the pictures above. It actually sits fairly level once connected to the hitch and I can always move the pintle to get a level ride. I also need to reattach the reflectors and install some small LED side marker lights that will go into the 3/4" holes drilled in the side steps.
Let me also ask the opinion of the group on something. My wheels are similar to my truck except they're brushed aluminum and black instead of solid chrome. I was pondering painting the aluminum either flat or gloss black. I figured this would look good with the tan body and black chassis, but I also thought it might look better since the aluminum and chrome look odd together. I know, I know...the trailer's not supposed to be a fashion statement. Nonetheless, I'd like the truck and trailer to look good as a package. What are your thoughts? Any advice on painting the rims? Special paint recommended or just rattle can? Thanks!
Let me also ask the opinion of the group on something. My wheels are similar to my truck except they're brushed aluminum and black instead of solid chrome. I was pondering painting the aluminum either flat or gloss black. I figured this would look good with the tan body and black chassis, but I also thought it might look better since the aluminum and chrome look odd together. I know, I know...the trailer's not supposed to be a fashion statement. Nonetheless, I'd like the truck and trailer to look good as a package. What are your thoughts? Any advice on painting the rims? Special paint recommended or just rattle can? Thanks!
Mark Harley
Expedition Leader
John, The trailer is awesome, Cool how some suttle changes can totally change the look.
I like the diamond plate as is and I would see if you could get a chrome powder coat done.
Great job!
As for the tailgate pins being able to be lifted, What about a flat piece of 1/4" aluminum plate welded on above so
you could not remove them without lifting the lid.
I like the diamond plate as is and I would see if you could get a chrome powder coat done.
Great job!
As for the tailgate pins being able to be lifted, What about a flat piece of 1/4" aluminum plate welded on above so
you could not remove them without lifting the lid.
Last edited:
brussum
Adventurer
Thanks, Mark. I think the next major step is to paint the inside with a rhinoliner-type of product and the start building the inside components (galley, water storage, etc). I think my wife is just breathing a sigh of relief that my $700 ugly trailer actually turned out to look pretty nice.
Similar threads
- Replies
- 32
- Views
- 5K
- Replies
- 32
- Views
- 5K
- Replies
- 0
- Views
- 377
- Replies
- 2
- Views
- 1K
- Replies
- 0
- Views
- 366

