mikes350
New member
Hey Everyone
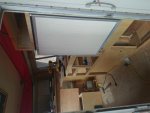
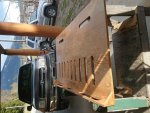
Have been a browser for a few years here and thought it was time to start a thread of my new project. I do a fair amount of off grid camping , Mountain lakes forest service access sites mostly around BC. I have a 2002 Tundra so I needed a camper that was light and could take a bit of abuse. I had decided at the beginning of the summer to build a camper using boat building methods , ply and fiberglass, I got into it a ways and had built up the tub and back wall. Then other projects side tracked me a bit , mostly fishing , but a deck project also , so the camper sat.
Last week I came across a Sportsman Pop up Camper. I had been looking into pop ups before I decided to build my own and had never come across this model. I'm not sure how many of you have seen them either. I haven't been able to find much info on them , they where built by Wright mfg out of Port Coquitlam BC. If anyone could shed some light on them that would be great.
This Camper was very close to what I was building and the price was right. So I drove a few hours and picked it up , Right away I could see it needed a new floor and tub sides , they where plywood , the rest of it is fiberglass, and in decent shape. so since I had the floor and sides built for the other camper that is where I started.
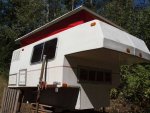
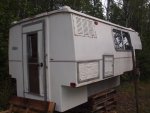
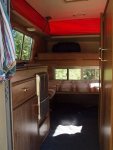
As I found it


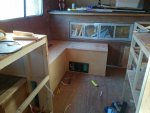
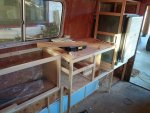
Gutted the interior and removed the old plywood, some previous owner had done some interesting silicone and ply repairs. There doesn't seem to be any wiring in it , there was a fridge at some point , the furnace did work, and the water tank looks reusable. The canvas is newish, but the lift shocks are weak. Overall not to bad.
The floor and sides I had built didn't exactly match the one that was previously installed. The camper was ment to fit an import truck and I had built the new one to fit a regular size short box . So I had to make a few adjustments The camper sat about 1.5 inches too low on my truck and the floor I had built was 2 1/4 inches, previous floor was 3/4 ply , so the new floor actually worked out perfectly height wise. The sides lined up height and width wise almost perfectly. Once I had them in place I used epoxy and screws to pull it all together. Then covered the whole tub in two layers of fiberglass.


The next step is one I'm still debating , what would you guys go with ?
gel coat, body filler, paint
body filler, paint ,
body filler, gel coat
I want something that is easy to touch up and fix. Any thoughts? Any one ever seen one of these before?
More to come
Have been a browser for a few years here and thought it was time to start a thread of my new project. I do a fair amount of off grid camping , Mountain lakes forest service access sites mostly around BC. I have a 2002 Tundra so I needed a camper that was light and could take a bit of abuse. I had decided at the beginning of the summer to build a camper using boat building methods , ply and fiberglass, I got into it a ways and had built up the tub and back wall. Then other projects side tracked me a bit , mostly fishing , but a deck project also , so the camper sat.
Last week I came across a Sportsman Pop up Camper. I had been looking into pop ups before I decided to build my own and had never come across this model. I'm not sure how many of you have seen them either. I haven't been able to find much info on them , they where built by Wright mfg out of Port Coquitlam BC. If anyone could shed some light on them that would be great.
This Camper was very close to what I was building and the price was right. So I drove a few hours and picked it up , Right away I could see it needed a new floor and tub sides , they where plywood , the rest of it is fiberglass, and in decent shape. so since I had the floor and sides built for the other camper that is where I started.


As I found it


Gutted the interior and removed the old plywood, some previous owner had done some interesting silicone and ply repairs. There doesn't seem to be any wiring in it , there was a fridge at some point , the furnace did work, and the water tank looks reusable. The canvas is newish, but the lift shocks are weak. Overall not to bad.
The floor and sides I had built didn't exactly match the one that was previously installed. The camper was ment to fit an import truck and I had built the new one to fit a regular size short box . So I had to make a few adjustments The camper sat about 1.5 inches too low on my truck and the floor I had built was 2 1/4 inches, previous floor was 3/4 ply , so the new floor actually worked out perfectly height wise. The sides lined up height and width wise almost perfectly. Once I had them in place I used epoxy and screws to pull it all together. Then covered the whole tub in two layers of fiberglass.


The next step is one I'm still debating , what would you guys go with ?
gel coat, body filler, paint
body filler, paint ,
body filler, gel coat
I want something that is easy to touch up and fix. Any thoughts? Any one ever seen one of these before?
More to come


