Oakland/Bigfoot 20' Class C 4x4

GNTY

Adventurer
What kind of mileage were your parents getting on theirs and what are you getting? Also, did you buy an exhaust or build one?
My parents were getting about 9 mpg (imperial) and now they are getting 16. I'm not sure where i'm at yet, still on the first tank.
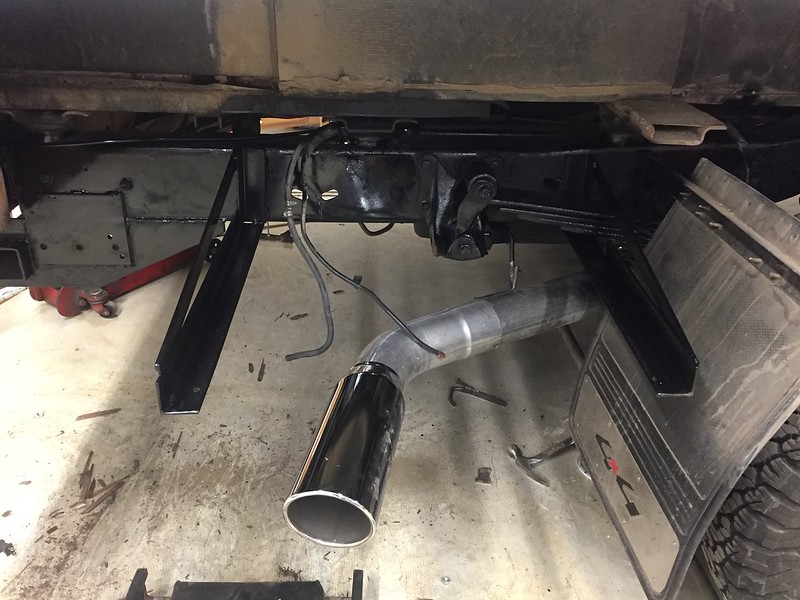
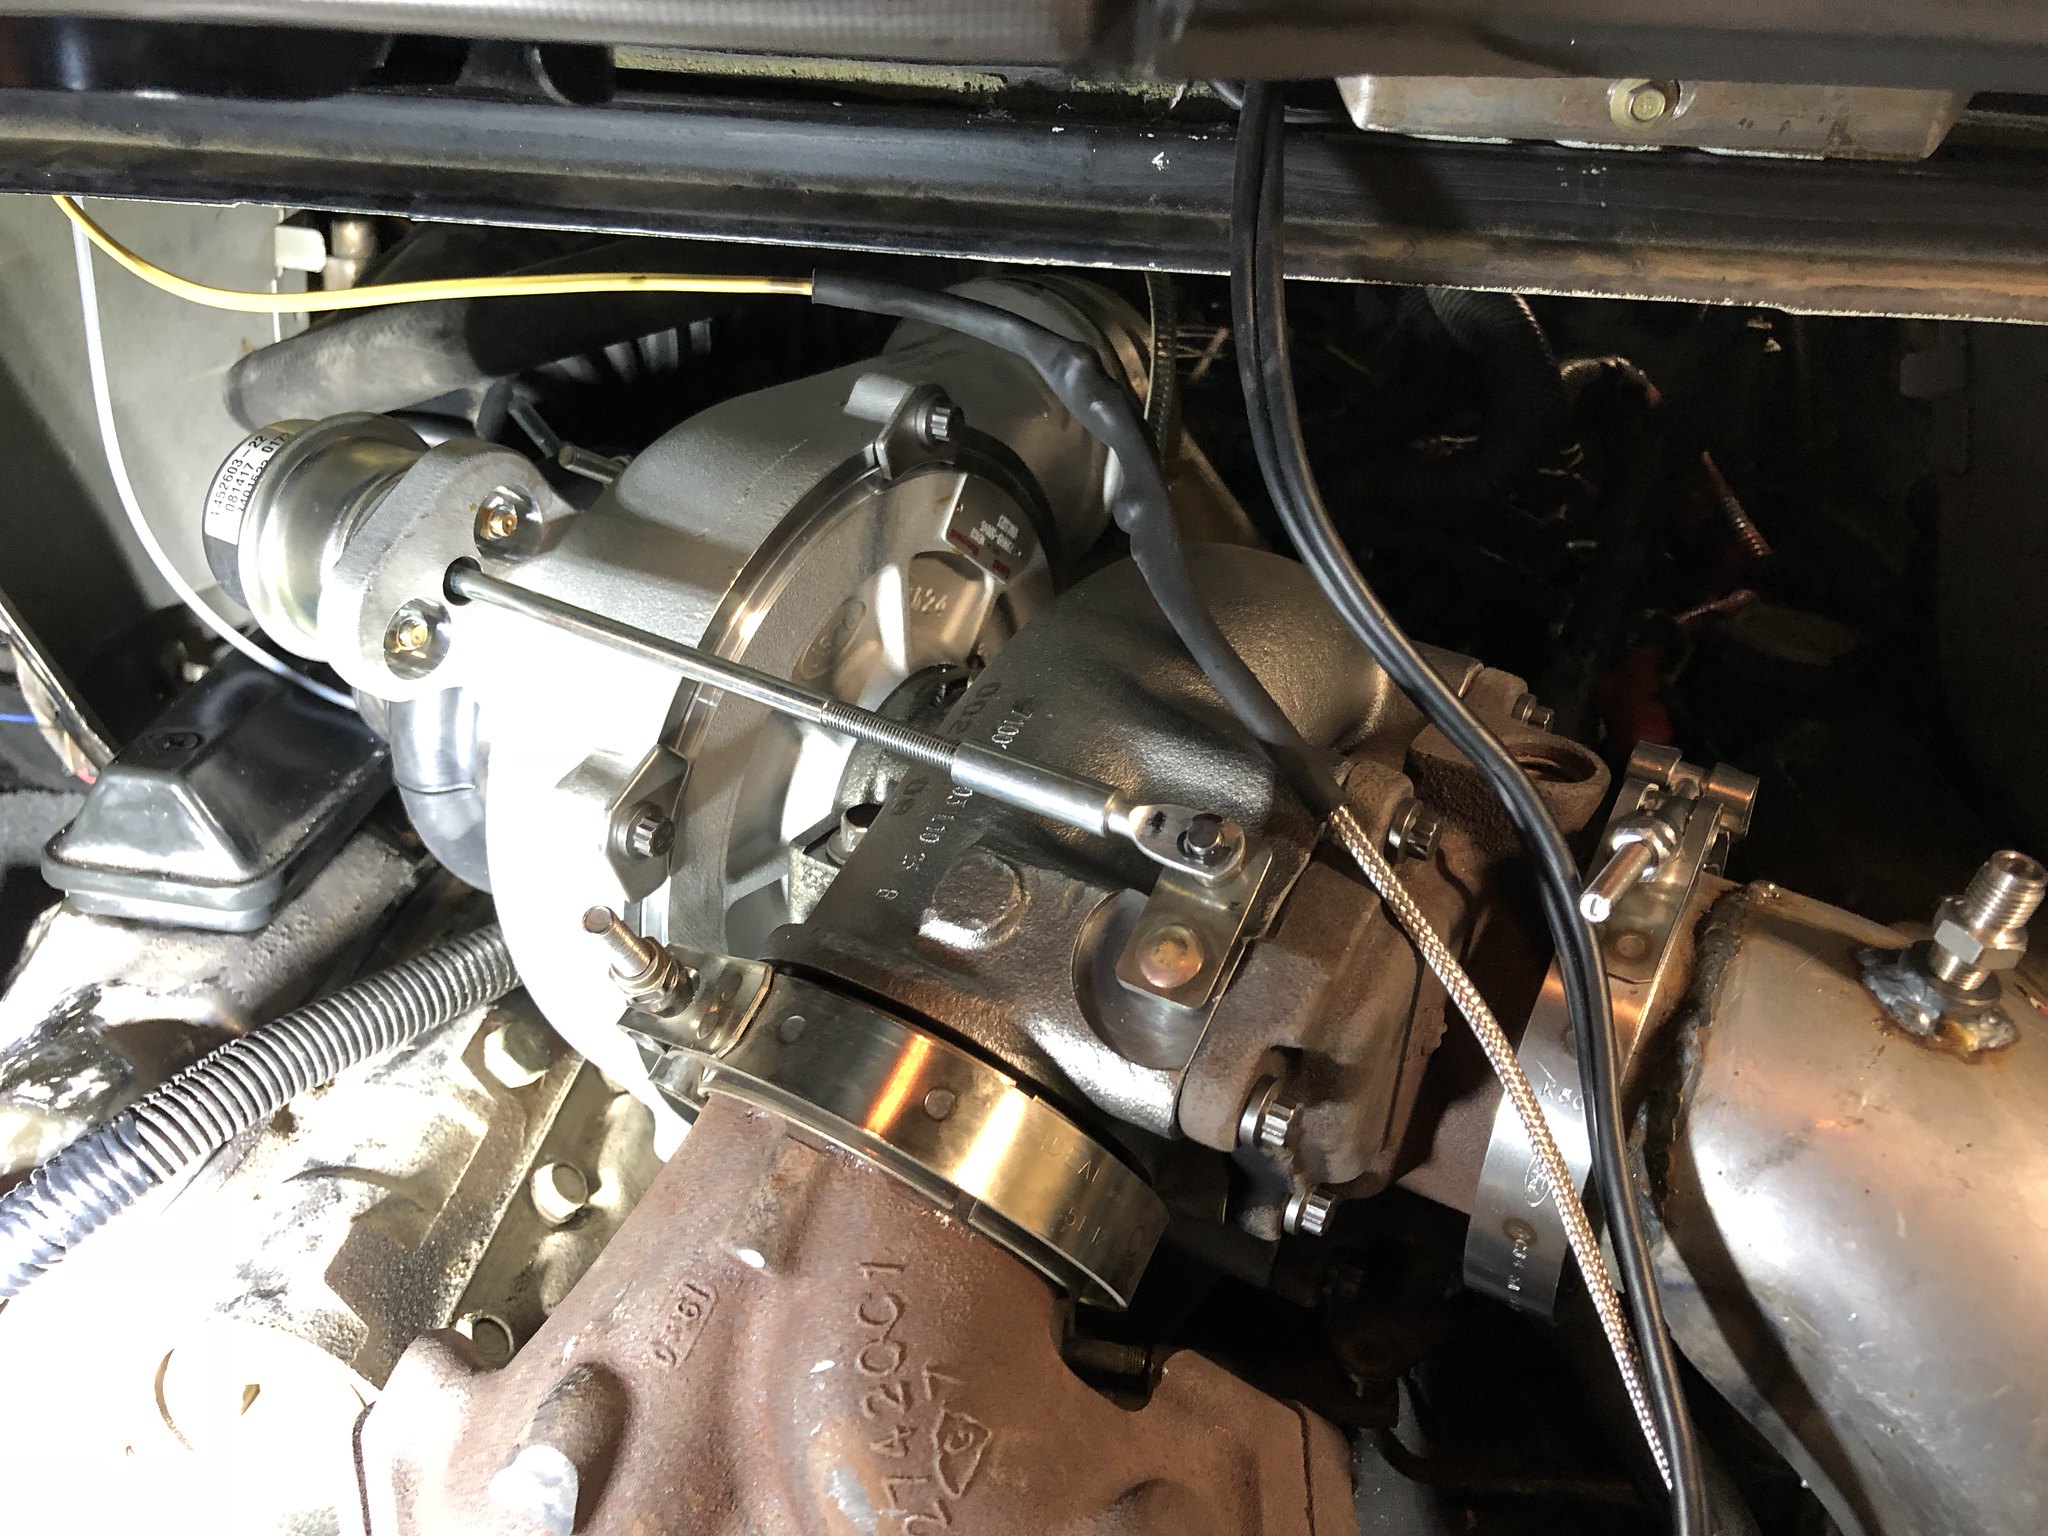
This exhaust is built front to back. But typically we buy the MBRP cat back system for our other vans and then build the turbo back system.
 

GNTY

Adventurer
My generator is located in a lower compartment on the rear passenger side. I started to notice some sagging of the box from the upper body section. After pulling the water heater which is located directly above this storage box, I reached in and discovered that the floor in that are was rotted. The water heater must have been leaking slowly for years leading to the sagging of the heavy storage box below. Obviously I wanted it all fixed properly so we began to pull out the rear kitchen area and discovered how extensive the damage really was. So what I initially thought to be a quick small fix lead to a total gut fest.
28945732898_201a602ae7_z.jpg

Repaired all the wood ribs and wall section.
41917806045_b948e9d90b_c.jpg

41917808375_14c2cf143c_c.jpg

42819048331_cd63ccb071_c.jpg

Removed lower storage boxes and build a supporting cradle for both the Generator and propane, taking all the weight off the upper body.
27949830777_76d64c91a0_c.jpg

42819026021_2825def401_c.jpg
 

GNTY

Adventurer
Instead of what felt like forever demolition, finally came time to re-assemble. Covered the factory 90's wall paneling with tweed, man did that ever make a difference. Designed all new cabinetry in CAD and cut on the CNC. All baltic birch ply laminated. All new appliances, on demand hot water tank, Smev toaster oven, front seats, upholstery, custom flip up/hide away bunk bed to fit our family better and so on. A few more little things to wrap up but she's getting close!
42770100582_1c0ffbed6a_c.jpg

41917845615_f8ce95ce68_c.jpg

41917996235_19344a9552_c.jpg

41917995285_144bbb1412_c.jpg

41917997265_e8a947878c_c.jpg

28945874888_f59347b97e_c.jpg

41918335415_8bbf0caa16_c.jpg
 

GNTY

Adventurer
Thanks, Been following your thread and very impressed with all you've done.
heres the before.

28140926997_18b97f5476_c.jpg
 

eporter

Adventurer
Wow, great work. Quite the refresh. Is the tweed fabric a standard auto/rv upholstery type of item?

I see there's a "step" down to the cab. Is that to allow clearance for the outside storage? My 2000 Chinook is flat from the cab all the way back, they just bolted the whole RV part to the frame.

And is that spray foam insulation between furring strips on the floor? I'm thinking about adding a thin layer of foam insulation and then 1/2" ply over the existing 1.5" thick ply floor on mine.

Nice work on the CNC cabinets. I've done a lot of CNC/CAD work, but when I look at my gutted chinook I just overthink it too much. I'm just mainly planning on building as I go with birch ply.
 

Vandit

Observer
Wow. That interior re-work just turned this really cool rig into a dream rig. Nice work and super tasteful choices for the interior finishes. Amazing.
 

GNTY

Adventurer
Thanks for all the kind words, its sure been a labor of love. New GTP38R turbo and custom tuner from DP Tuner should be here any day. They sure know their vans!
 

Forum statistics

Threads
188,510
Messages
2,905,999
Members
230,547
Latest member
FiscAnd

Members online

Top