OBS F250 slow adventure build

amgvr4

Adventurer
I have been running the 37/12.5/16.5 military take offs for several years but they are getting pretty hard to find and can be a pain to keep smooth after 30k miles so I ended up switching to some normal rubber this time. I looked at a lot of tires and ended up with the Cooper STT Pros in 37/13.5/17 and since 16.5" wheels are unobtanium I upgraded to a set of Method NV305 while I was at it. I was a little worried that they might not fit the vintage of the truck well but they ended up pretty awesome in my opinion

They are much taller and wider than the old tires and very quiet considering how aggressive they are. Unfortunately Shortly after I got them on the injector o-rings went and I started burning through oil like it is going out of style! I ordered full rebuild kits with stage one intensifier pistons from Bitterroot Diesel and a Hydra chip with custom tunes for my setup. I have all the injectors out and the last of the parts showed up today so now I got to get them rebuilt and the truck back on the road. We havent made it out camping yet this year and summer isnt going to last forever!
 

notaduc

New member
Great thread. Im going down a very similar road with a 96. Would you happen to have the specs you gave Tom Woods for your front driveshaft?
 

amgvr4

Adventurer
I got the injectors all rebuilt and put back in and with relatively little drama to boot! The only issue was when I lost one of the needle spring stops and had to order a new one from Matt at Bitterroot Diesel. While I was in there I replaced the valve cover gaskets and harnesses just to be safe, the glow plugs worked and looked just fine so I reused them.

I also painted the valve covers and had to replace my glow plug solenoid as it burnt out when cranking the engine over for what seemed like an eternity purging all the air out of the oil and fuel galleys in the head. Next I added my Glowshift 3-1 gauge to see what my boost and EGTs were before adding the PHP Hydra tuner. The boost was pathetic at a max of 11 psi as my turbo needs a rebuild pretty bad and the up pipes are leaking for sure but EGTs were fine as long as I didn't lug it up hills of keep the foot planted for too long. Next I installed the Hydra and boy what an improvment! So much more power below 2000 rpms and I really like the stealth and high idle modes. The gains should be even better with the turbo refreshed and a 1.0 ar hot side, but I can now get 22psi above 2500 rpms.
 

amgvr4

Adventurer
Finally I needed to replace my radius arm bushings and tie rod ends as they were shot and contributing to my excessive body roll and steering play. They were shot! I want to revamp the front end this winter and switch to a 3 link with sway bar to get better flex without having to replace bushings all the time. I can correct the tire rub on the radius arms at that time as well, the new Coopers are much wider than the old Goodyears so it is even more of a pain now.
 

notaduc

New member
Not off the top of my head, but I can measure my driveshaft and let you know lengths. I will try and get them for you tomorrow.


Thats not necessary, I figured you may have a record of it. Ive measured mine, was just curious as yours seems to be working.
 

mtnbiker4evr13

New member
Been following your build from the start, it has inspired me to build my OBS the way I want for family adventures as well!
The gains should be even better with the turbo refreshed and a 1.0 ar hot side, but I can now get 22psi above 2500 rpms.
I was just forced to update my original turbo after the inducer tried to become the exducer. I recommend checking out the RiffRaff hybrid pedestal setup (Which big shoutout to Clay the owner, returned my call 2hrs after closing to ensure I got what I needed and parts shipped out ASAP since my truck was needed 48hrs later to move my family.).
TP38 Hybrid Turbo
Uses a EBPV deleted E99 pedestal so you can use your existing up pipes, 1.0 exhaust housing but has a super duty center cartridge so it unbolts from the top and no longer requires unbolting the pedestal. I figured I would have better luck finding a super duty center cartridge in the boonies if needed and service will be a breeze compared to the OBS setup. If you have questions feel free to PM and I will be happy to help!
 

amgvr4

Adventurer
Thanks for the advice mtnbiker4evr13, I love ordering from RiffRaff. Thats exactly what I was going to do for a turbo upgrade... until I came across a deal of a lifetime last week. More about that later.

Java, yeah I noticed you then as well. Funny how we randomly pass each other every now and then!

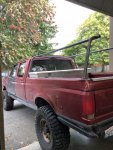
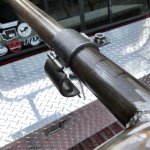
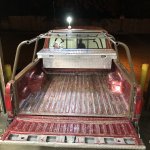
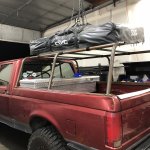
Lots of updates with new adventures and parts added to the old battleship. First off I have been wanting to build a new taller RTT rack for some time to get more space under the bed and provide more room in the annex. I also wanted to be able to leave the rack on and remove the tent easily so I could have a mini lumber rack as well. I started with the forward hoop to get angles and height where I wanted it.

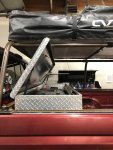
I still wanted to keep the tool box so I test fit it with the hoop. I will probably get a different one that fits between the bed rails so it an slide all the way back

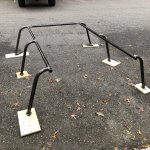
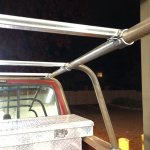
I had some tube flanges laying around so I used them for the two other hoops. The best part of having the 3/16" angle on the top of the bed is being able to drill and tap at any point to add new attachments.
 

amgvr4

Adventurer
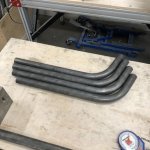
Then I bent up the other legs and added the top bars
IMG_0827.JPG
IMG_0828.JPG
IMG_0832.JPG

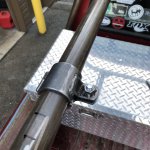
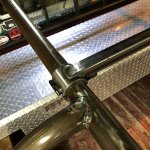
It took a bunch of time looking at other clamps and trying to decide wither to build some or buy an existing system. In the end I just made my own since I couldn't find anything that fit the bill
IMG_0839.JPGIMG_0842.JPGIMG_0865.JPGIMG_0866.JPG
 

amgvr4

Adventurer
Sorry for the crazy photo size, I am trying to figure out the best way to attach images and Flickr was a total pain in the butt! The image embed is ok but you end up with giant pictures. Moving on...

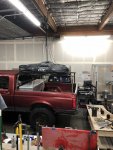
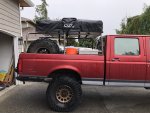
I welded up the crossbars to the clamps and mounted the tent. I didn't have any helpers so I had to use the hoist to get it up on top of the new rack. The tent is only about 1.5' higher but it sure looks like a lot more!
IMG_0868.JPG
IMG_0869.JPG
IMG_0873.JPG
IMG_0877.JPG

Here is is the next day all loaded up and ready for our trip to Idaho. I still need to add some gussets with holes for tied down points and to add some strength, however it it pretty robust as is.
IMG_0880.JPG
 

Forum statistics

Threads
188,025
Messages
2,901,303
Members
229,411
Latest member
IvaBru
Top