Fergie
Expedition Leader
So, MUD is a great resource, but there is so much information to wade through, and some of it is old enough that links have died or people have forgotten the knowledge.
I'm doing this write-up, this very basic write-up, to help people out and give them some pointers and pictures as reference.
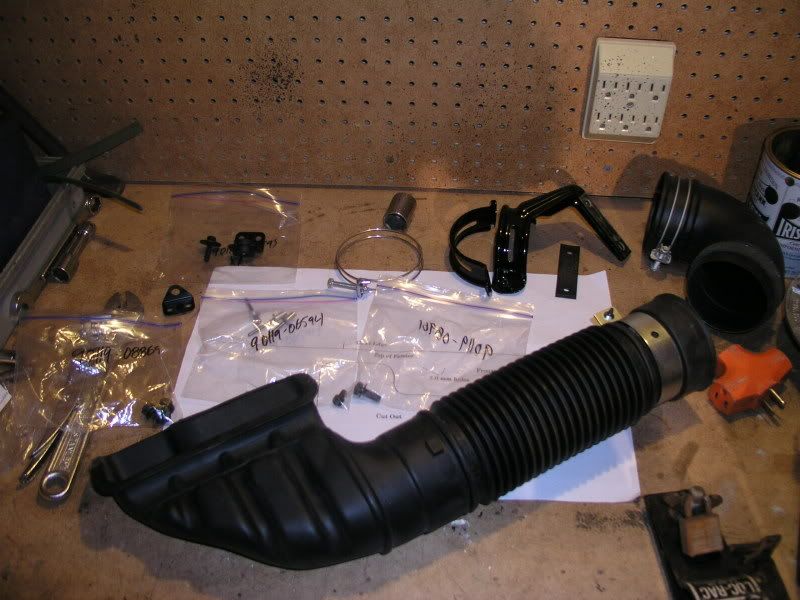
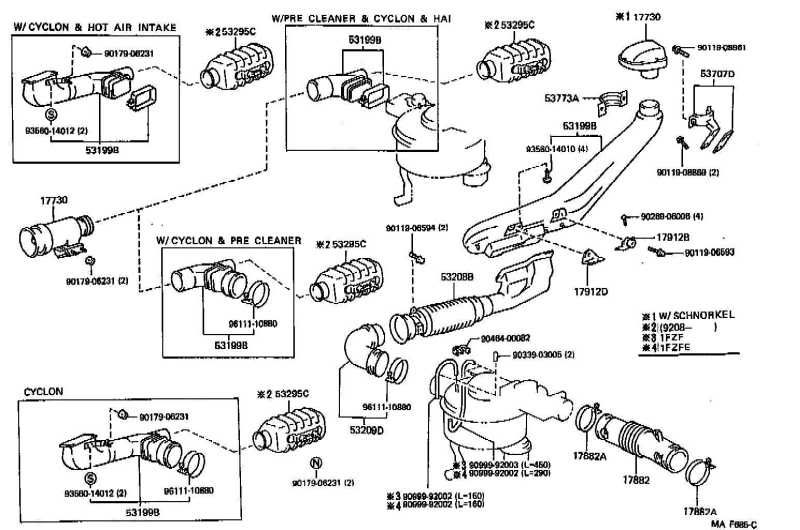
So first off, this is the pieced together kit that forum member Whoisthecoolguy brought together. Aside from some rivets that I chose to use, he has a complete kit, including template. There are no directions for this, so you have to be a bit mechanically inclined to assemble everything properly.
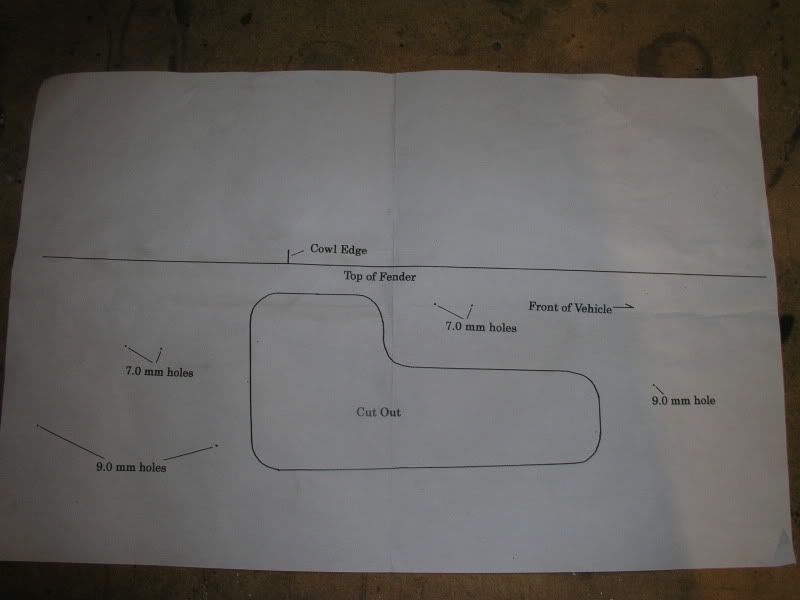
Here is the template; I've made a few extra copies of it, so if someone else ever needs a copy, I can mail you one, just PM me.
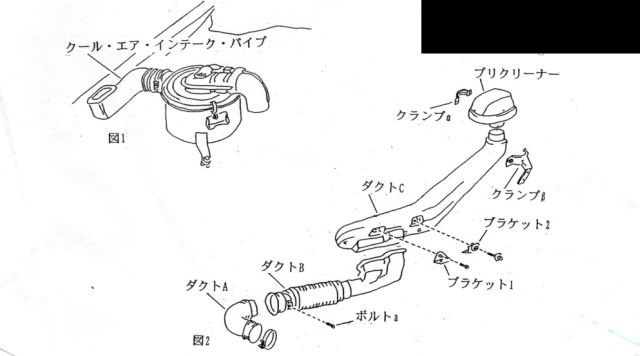
These are two diagrams that might be helpful to someone; they were so much to me, but you may find them useful.
Most folks will find a fractional equivalent to the metric bits that are needed; Flagstaff has a very knowledgeable machine shop supplier in town, and the guy was able to find me two high quality bits; one is 7mm, the other 9mm.

The most useful tool I had on this project was this sucker:

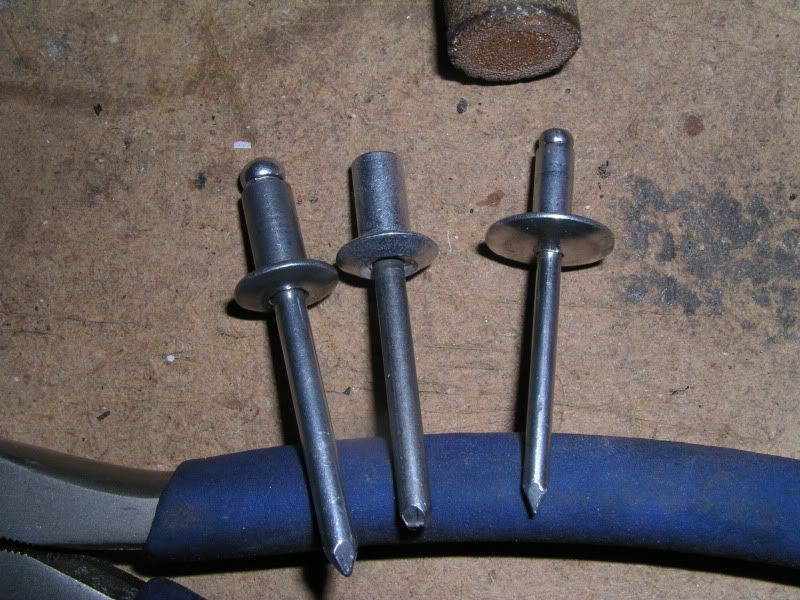
The problem that some will run in to is that the rivets supplied with the kit have a larger pin diameter than most manual rivet guns will handle. The rivets are 7mm, or close to 1/4". When stepping up from the 3/16" to 1/4" size, the pin diameter increases as well, making installation difficult. I was able to borrow this tool, but if I had not, I had also bought some wide flange 3/16 to use instead. You can see the differences in the rivets below:
The rivet on the right is similar to the supplied one, but is not a sealed end. The sealed end is not required in my opinion. The middle rivet is the supplied one, and the far right is the smalled, wide flange.
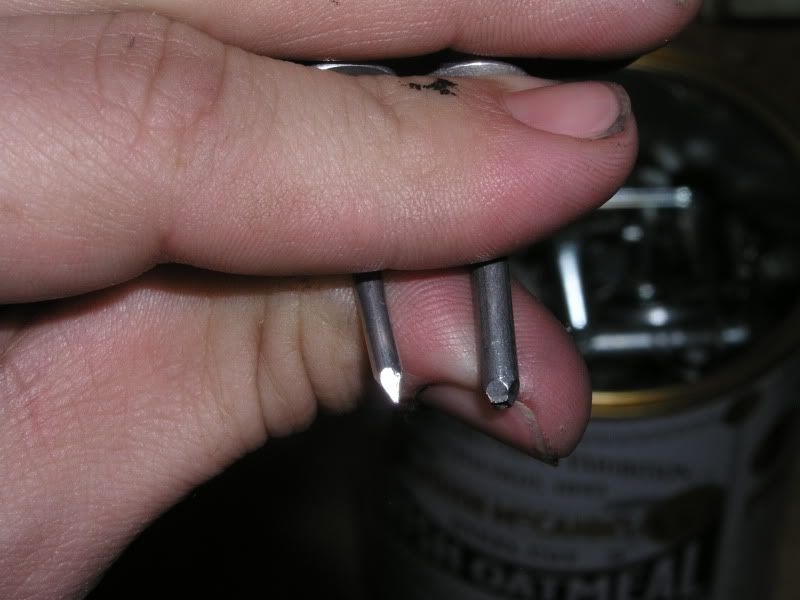
Pin diameter difference:
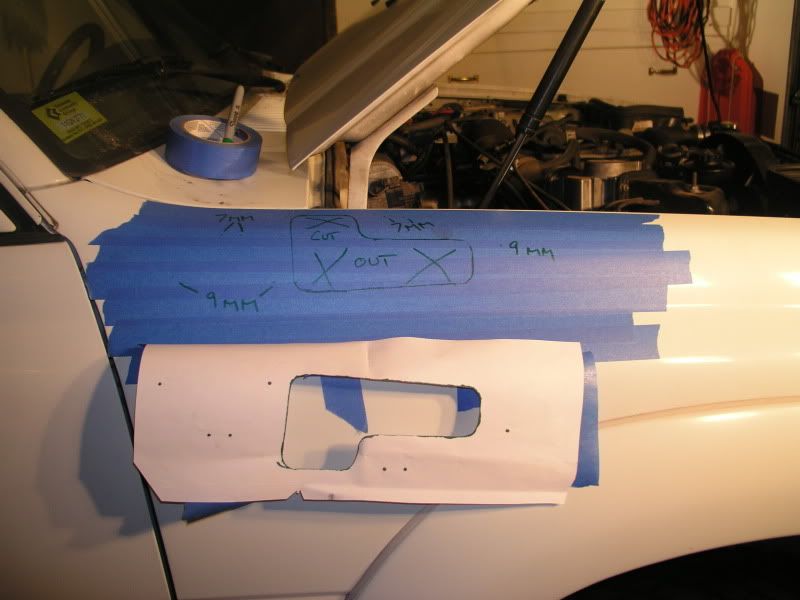
So, start by aligning the marks on the template with the body, namely the fender and cowl. Once you get the general idea, tape off the section of body to avoid damaging the paint anymore than you will, and to prevent flaking. Realign the template, tape it down an start marking. Prior to installing the template over the tape, cut out the "cut ou" portion for the snorkel, and poke some hole to mark the 7mm and 9mm holes.
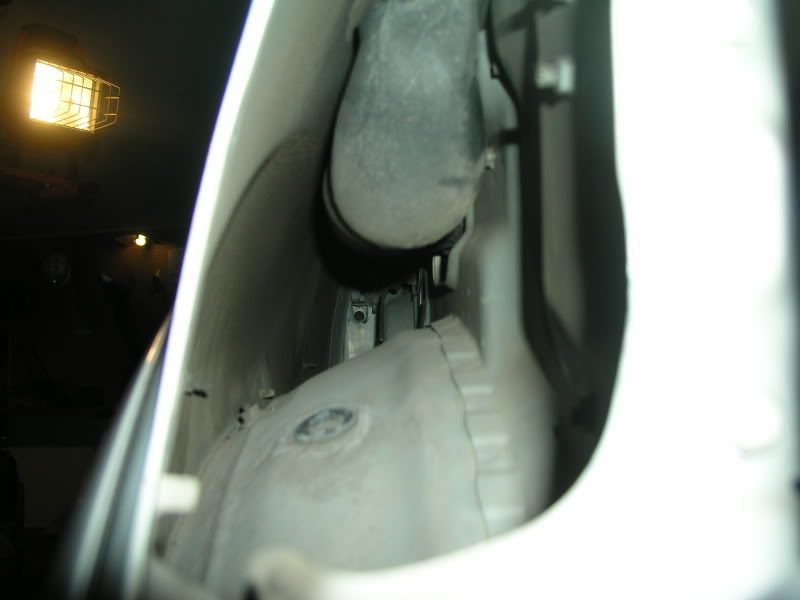
You'll also want to pull your side marker lamp to access the void, and make installation a snap.
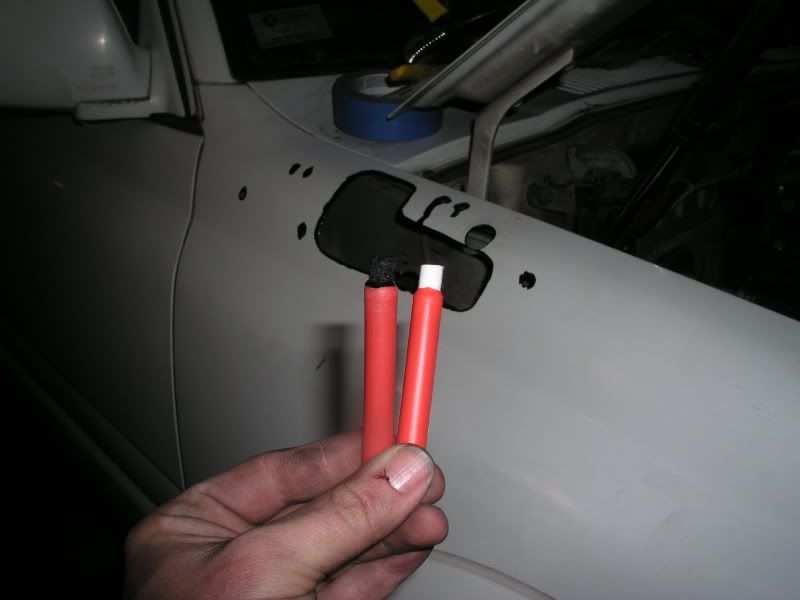
Without going in to too much detail on cutting drilling, cut the "cut out" portion out with your cutter de jure, and drill the holes...it is that straightforward. Once done, debur everything, and smooth the edges out. After that, you need to protect the bare metal; especially those of you that don't live in nice dry climates. For this, I went down to the local windshield replacement shop, and got some small tubes of the epoxy coating they use for windshield installation. This stuff is a big deal for them as far as installtion goes due to previous class action lawsuits, and rusted window frames, so I figure it will work here.
Break the glass in the tube, squeeze it out and apply.
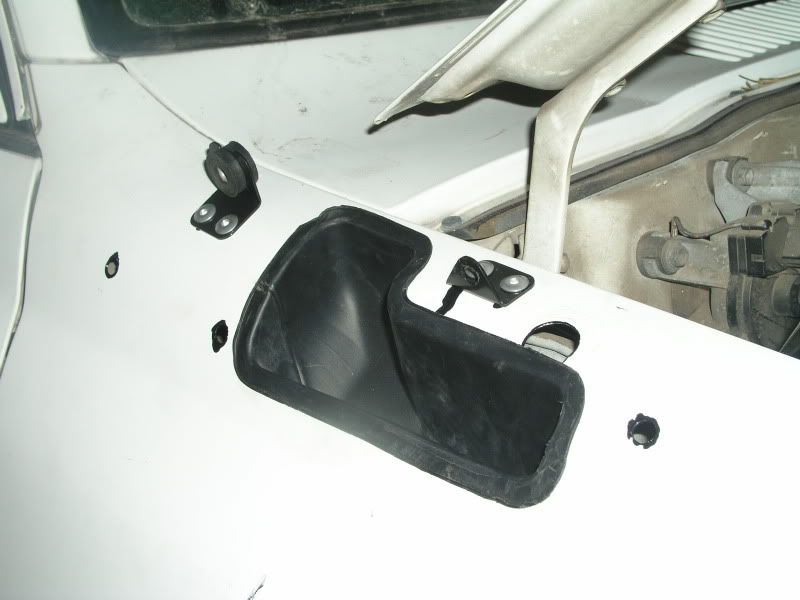
You will see in the picture below that I have test fit part of the assembly, and that all the bare metal has been coated. Next, install the two fender brackets, not the which one goes where, and in what orientation:
The installation of those brackets was as simple as pressing the trigger on the rivet gun....damn near silent operation too.
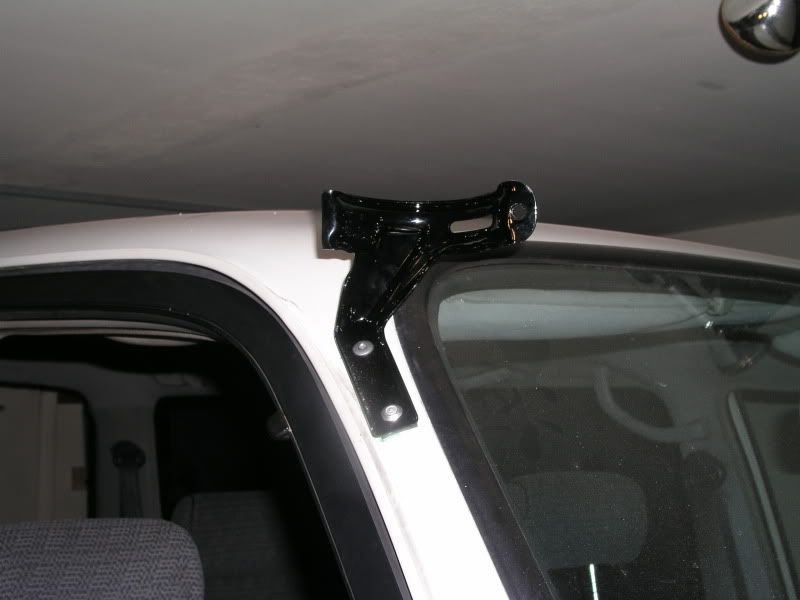
Once the body brackets are installed, test fit the snorkel body, and mark the upper bracket, drill, coat, and rivet.
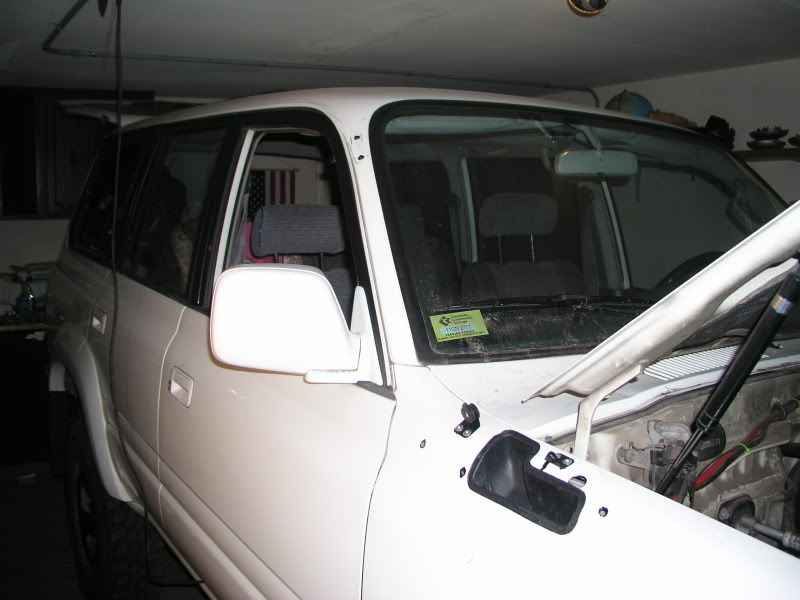
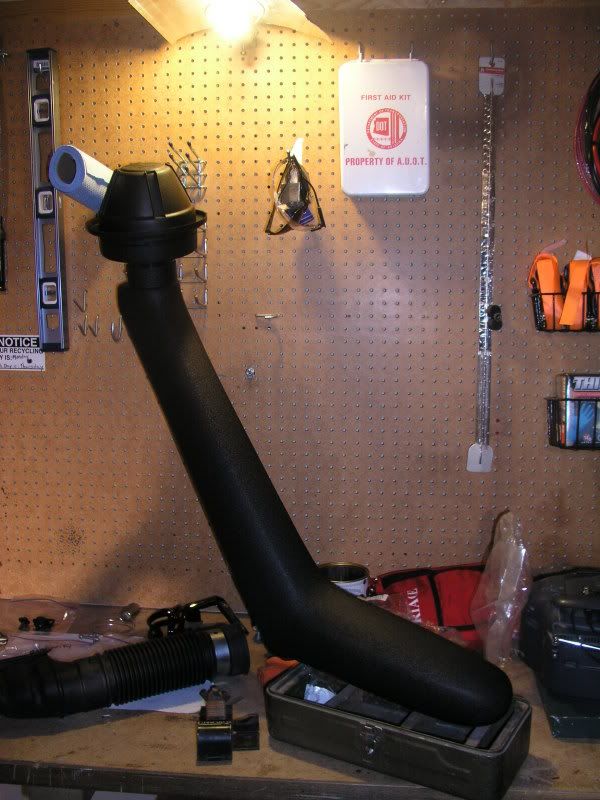
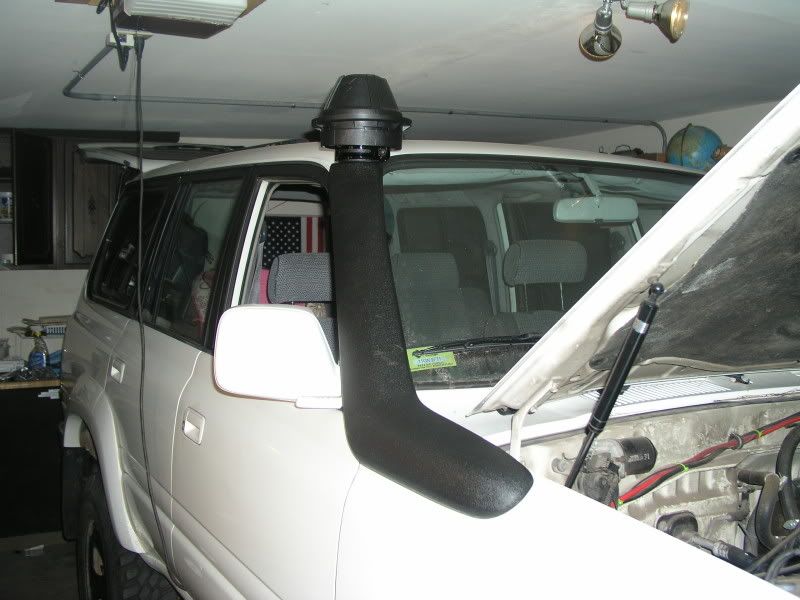
After that, install the snorkel boy, make your connections to the airbox, and call it good!
I'm doing this write-up, this very basic write-up, to help people out and give them some pointers and pictures as reference.
So first off, this is the pieced together kit that forum member Whoisthecoolguy brought together. Aside from some rivets that I chose to use, he has a complete kit, including template. There are no directions for this, so you have to be a bit mechanically inclined to assemble everything properly.
Here is the template; I've made a few extra copies of it, so if someone else ever needs a copy, I can mail you one, just PM me.
These are two diagrams that might be helpful to someone; they were so much to me, but you may find them useful.
Most folks will find a fractional equivalent to the metric bits that are needed; Flagstaff has a very knowledgeable machine shop supplier in town, and the guy was able to find me two high quality bits; one is 7mm, the other 9mm.
The most useful tool I had on this project was this sucker:
The problem that some will run in to is that the rivets supplied with the kit have a larger pin diameter than most manual rivet guns will handle. The rivets are 7mm, or close to 1/4". When stepping up from the 3/16" to 1/4" size, the pin diameter increases as well, making installation difficult. I was able to borrow this tool, but if I had not, I had also bought some wide flange 3/16 to use instead. You can see the differences in the rivets below:
The rivet on the right is similar to the supplied one, but is not a sealed end. The sealed end is not required in my opinion. The middle rivet is the supplied one, and the far right is the smalled, wide flange.
Pin diameter difference:
So, start by aligning the marks on the template with the body, namely the fender and cowl. Once you get the general idea, tape off the section of body to avoid damaging the paint anymore than you will, and to prevent flaking. Realign the template, tape it down an start marking. Prior to installing the template over the tape, cut out the "cut ou" portion for the snorkel, and poke some hole to mark the 7mm and 9mm holes.
You'll also want to pull your side marker lamp to access the void, and make installation a snap.
Without going in to too much detail on cutting drilling, cut the "cut out" portion out with your cutter de jure, and drill the holes...it is that straightforward. Once done, debur everything, and smooth the edges out. After that, you need to protect the bare metal; especially those of you that don't live in nice dry climates. For this, I went down to the local windshield replacement shop, and got some small tubes of the epoxy coating they use for windshield installation. This stuff is a big deal for them as far as installtion goes due to previous class action lawsuits, and rusted window frames, so I figure it will work here.
Break the glass in the tube, squeeze it out and apply.
You will see in the picture below that I have test fit part of the assembly, and that all the bare metal has been coated. Next, install the two fender brackets, not the which one goes where, and in what orientation:
The installation of those brackets was as simple as pressing the trigger on the rivet gun....damn near silent operation too.
Once the body brackets are installed, test fit the snorkel body, and mark the upper bracket, drill, coat, and rivet.
After that, install the snorkel boy, make your connections to the airbox, and call it good!