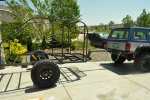
"Old Man's Toy" offroad teardrop trailer

old_man

Adventurer
I snagged 4 military type fuel cans for a labor trade. These are the ones that have the screw in cap. Now I need a spout. Does anybody make one that would be compatible with a no lead filler door? If not I probably will score a 12 fuel transfer pump and just pump directly from the trailer into the Jeep.

As it turns out I was able to score a external fuel pump for $25, so I will just use some hose and a pump to transfer the gas. That way I don't have to stress my old beat up shoulders holding a can.
 

old_man

Adventurer
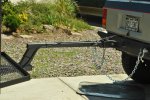
Finally got some time to work on the trailer. I got the temporary lights wired up and fabricated the flippable tongue and the offroad hitch. Both are working great.

DSC_0031.jpg
The tongue can be removed from the trailer and flipped upside down so you can pull the trailer with a normal height vehicle.

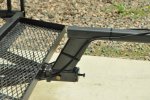
DSC_0027.jpg

The pin that holds the tongue has a tension bolt to prevent rattling.

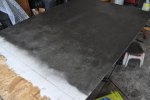
DSC_0028.jpg

I have cut the flooring and did a coat of Zinzer followed by a coat of enamel followed by a coat of rubberized undercoating before I install it.

DSC_0035.jpg
 
Last edited:

Aspen Trails Trailers

Supporting Sponsor
What is the width and heigth, it appears to be about the same size as mine, or maybe even bigger. Mine is 80 inches with the fenders actually setting at 80 3/4 due to addtions on inner frame, will cut down the fenders on the next one.

I have found that width and heigth works pretty darned well on all trails, still have not tackled the Rubicon, but plan to. I did see some close calls on Kokopelli with the shelf roads, with rocks to crawl over the top getting close to the cliff. Luckily did not hit, but was ever so close, my upper is at about 51 1/2 wide, and about 81 inches tall. Thinking yours looks close to my same size, I thought that information might be helpful down the trail.

Good looking build, and feel you have done the right thing with the steel frame, just keep everything low and the added weight of the frame will no be a factor. Again great looking build and some great fab work on the hitch.

Bob
 
Last edited:

old_man

Adventurer
What is the width and heigth, it appears to be about the same size as mine, or maybe even bigger. Mine is 80 inches with the fenders actually setting at 80 3/4 due to addtions on inner frame, will cut down the fenders on the next one.

I have found that width and heigth works pretty darned well on all trails, still have not tackled the Rubicon, but plan to. I did see some close calls on Kokopelli with the shelf roads, with rocks to crawl over the top getting close to the cliff. Luckily did not hit, but was ever so close, my upper is at about 51 1/2 wide, and about 81 inches tall. Thinking yours looks close to my same size, I thought that information might be helpful down the trail.

Good looking build, and feel you have done the right thing with the steel frame, just keep everything low and the added weight of the frame will no be a factor. Again great looking build and some great fab work on the hitch.

Bob

The actual bed is 96" long and 62" wide. Haven't measured the track width yet but it appears to be about 2" wider than my rig. The front shelf where the propane and gas cans go is 14" deep. IIRC the overall length from hitch to tail is 13'. The body portion is 47.5" tall. IIRC the frame is 21" from the ground and the receiver in the Jeep is at 31"

I may shorten the tongue about 8 inches, but right now I can turn the vehicle a touch more than 90 degrees to the trailer.
 

old_man

Adventurer
Sorry I haven't gotten back to this but I have had some major medical problems and that is leading to lack of funding. Hope to be back on track in a week or two.
 

old_man

Adventurer
Life can be a mean *****. I got lured away from a good job in Boulder to go to work for a guy I have worked for several times. He was the CEO of a NASDAQ company. A week after I started, the company was hit with a hostile takeover. Shortly thereafter half the projects and half the employees were shown the door, along with me. I had to cancel two surgeries I reallly need. I have been looking for a new job, but in the meantime I have some time to work on the trailer.

I'm a Test Engineer and do work for Fortune 500 companies. Here is a link to what I normally do. A trailer is a simple project compared to what I normally do.

www.testengineeringconsultants.com


I hope to get some pix up tomorrow. Things are moving along. Sad thing is that I may have to end up selling it to pay bills once it is finished.

I have been thinking of doing a fully annotated set of plans and diagrams, along with a ton of guidance on how to fab everything and put it together. What do you guys think of that idea?
 
Last edited:

Titanpat57

Expedition Leader
Sorry to hear of the humps and bumps....but its a new year and a great time for a fresh perspective.

Hang in there..some trailer work may be therapeutic.

Good luck
 

old_man

Adventurer
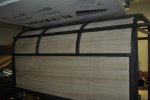
Here are some update pix. In order to get the 1/4 ply to form to the radius, I added some radius supports.
TrailerFrontPly.jpg

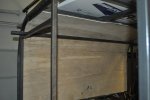
I screwed the inside ply to the frame. I will be taking the 1" styrofoam and cutting it to fit in the pockets.

TrailerFrontInside.jpg

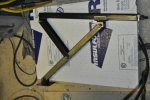
Since the trailer will be used offroad, getting it level when you stop is an issue. The other problem is that the frame is almost 25" off the ground. Finding a leveling jack that was that tall, that didn't hang down too much, and didn't break the bank was a problem. Being an engineer, I used an old school design and simply fabricated them from scratch and made them taller. The foot pads keep it from sinking into the ground, but will be held on with a quick remove linch pin setup so they will be removed before moving.

The main portion of the jack is galvanized heavy gauge unistrut. The lead screw is .5" Acme threaded rod. While they turned out nice, they were a time consuming project.

A jack will be mounted in each corner. The design allows the foot to be right at the corner giving it stability without making it too much of a tripping hazard.

TrailerLiftFloor.jpg

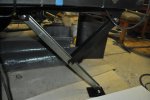
Here it is placed up under the frame. It could be bolted, but I will weld it in place.

TrailerLiftFull.jpg

The jacks will go high enough to allow me to change a tire or to camp on very uneven ground.
 
Last edited:

old_man

Adventurer
I will probably carry a battery powered impact wrench and just use it to run the jacks up and down.

Once I get the four jacks mounted, I can stand inside to start finishing the rest of the interior ply. The rear hatch is made from 3/4" tubing to save weight while the rest of the trailer is 1". The hardest design issue was figuring out how to really seal the hatch and get it to fit since the hatch is a flush mount.

Once the trailer is skinned, I can then mount the hatch hinge. From there I can finish the custom cut and bending of the 3/4" tubing for the hatch. Once that is done, I can work on fabricating the ledge where the gasket will mount.
 
Last edited:

TheThom

Adventurer
Looks great. I put the same jacks on my camper trailer - I had them welded onto each corner as well.

On a side note, I have an XJ and am mulling over taking a job in Colorado - not that this fact has anything to do with this thread.
 

old_man

Adventurer
Where in Colorado? What line of work are you in?

We have a rule here in Colorado.....if you come in from out of state, you have to bring your own job ;-)
 

Forum statistics

Threads
188,343
Messages
2,905,847
Members
229,959
Latest member
bdpkauai
Top