On The Road Home, Gelandewagen Ambulance Build Thread

devonojas

Member
ACCESS PANELS

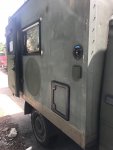
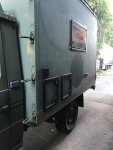
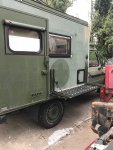
I installed three Dometic small size hatches. These are the standard opening for cassette toilets, so you've seen them a million times. There are fancier access door solutions for sure, but I am happy with this option because they're so light, cheap and readily available.

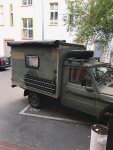
I have one hatch on the passenger side to access the water heater, furnace and a small storage area that is very difficult to get to from inside the box. On the driver side I have on in the very front that opens to the batteries and electrical panel and a second to remove the toilet cassette.

Installation is very straight forward on sandwich panels. Of course, nothing is straight forward on this build. The doors come with two templates. The larger template is the cutout to mount the frame. Then you take the piece that you cut out and with the second template you trim it to the size that simply glues and snaps into the frame. Where things got complicated for me is that there's a thickness range that fits into the door frame, and the 50mm super thick aluminum and foam panel is way too thick. My solution was to cut the outer skin off of the rest of the piece, sand all of the foam and glue off of it, and then glue it to a 30mm thick sheet of rigid insulation. It worked perfectly once done, but it sure would have been nice if I didn't have to go to all of the extra trouble.

IMG_9530.jpeg
IMG_9551.jpeg
 

devonojas

Member
DROP DOWN TABLE / SAND LADDERS

IMG_0056.jpegIMG_9989.jpeg

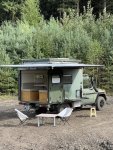
I found that the most intimidating parts of this project were consistently the most straight forward and in many ways the easiest. This was the case with my sand ladder brackets that double as a table on the side of the box. We've all seen this done many times, but I could not find an commercially available product. So I got back into Sketchup and designed my own bracket. Here's a video of how it works:


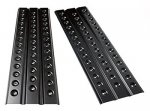
First I ordered the heavy duty aluminum sand ladders in black from Amazon.de. Unfortunately the item doesn't seem to be available anymore.

51Lwril0wIL.jpg

Once I had them in hand I could design a bracket with the appropriate spacing for the existing holes in the ladders.

Screen Shot 2018-12-05 at 11.17.45 AM.png

I designed a two piece bracket that's stamped and bent 8mm thick aluminum. The two pieces hinge at the bottom, using a 10mm bolt as a bushing. Adjustable nylon straps hold the ladders horizontal for use as a work surface where we sometimes cook outside.

There are two fancy parts that I ordered from ganter-griff.com: a locking star knob that locks the ladders onto the bracket, and a spring loaded indexing plunger that holds the bracket closed.

Screen Shot 2018-12-05 at 12.02.56 PM.pngScreen Shot 2018-12-05 at 11.21.33 AM.png

The whole thing is through bolted through the wall of the camper below the bench seat inside, so there's no exposed hardware in the living space. I'm really happy with how this turned out.
 

Attachments

  • Screen Shot 2018-12-05 at 11.21.46 AM.png
    Screen Shot 2018-12-05 at 11.21.46 AM.png
    280.4 KB · Views: 19

devonojas

Member
AWNING

IMG_0056.jpegIMG_0712.jpeg

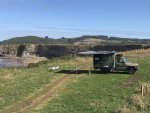
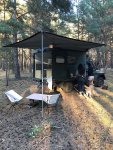
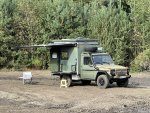
Mounting a 270 degree awning was an obvious choice since the camper is rear access. I decided to go with the AluCab awning, which I'm sure needs no introduction here. The size is perfect for my box, as you can see in the first pic of my Sand Ladder post above. The only thing that isn't prefect is that when it's open it doesn't quite extend the whole width of the box. I plan on making some kind of velcro on extension sometime down the road.

Mounting the awning was so straightforward. I couldn't simply through bolt it because it needs to be up very high to clear the rear doors and through bolting would put the bolts right into the roof. Earlier in this thread I mentioned that the box has lifting points in each upper corner for craning or heli-lifting the box. These things must br strong, right? So I decided to drill and tap holes in these things to hold a bracket for the awning.

The bracket is 10mm stainless steel. The awning is supposed to be fine without the leg, but I get a little sag without it, so I always put it down. I'm not sure but I think that the super thick stainless flexes a little when the whole awning is just cantilevered.

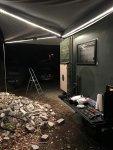
I was really happy with the awning as soon as I had it on, but then I had the idea to add LED light tape on each arm. Now we have an incredibly well lit outdoor area.

IMG_0316.jpegIMG_0193.jpeg
 

Franc

New member
How interesting!!!! thank you very much for this information! I am thinking of buying one like yours and it has been very useful!
Finally, you went to Morocco? it would be interesting to know how the vehicle behaved.
If in the end you didn't go and you had in mind to go soon, I live in Spain and I know Morocco very well, if you need something I will be happy to help you!
Thank you!
 

devonojas

Member
How interesting!!!! thank you very much for this information! I am thinking of buying one like yours and it has been very useful!
Finally, you went to Morocco? it would be interesting to know how the vehicle behaved.
If in the end you didn't go and you had in mind to go soon, I live in Spain and I know Morocco very well, if you need something I will be happy to help you!
Thank you!

The truck is very slow stock. We did this whole trip with the stock engine and gearing. It is definitely in its prime in Morocco, and if you live in southern Spain you might be fine with the speed limitations. The only place we struggled was in the soft sand trying to climb dunes. Offroad performance is great but not enough power to climb a steep incline when the ground is very soft. Steep and rocky you’re fine in low gearing. But if you go to Marzouga and try to cross you will have power envy.

We will eventually import the vehicle to the USA, where even European highway speeds won’t keep up with traffic, so when we got back to Germany we decided to do some engine work to increase HP and changed the axle gearing to higher speed ratios.
 

ExpoMike

Well-known member
This is an awesome build! It seems just a little smaller than my M1010 ambulance but not much. Reading through your thread, I have not seen any pics or info with top popped up and soft side (which is what I am assuming it will be). Do you have any pics and info about that yet? I have been thinking of doing something very similar as my height is 5'5" and would like to do a popup like our FWC had.
 

devonojas

Member
This is an awesome build! It seems just a little smaller than my M1010 ambulance but not much. Reading through your thread, I have not seen any pics or info with top popped up and soft side (which is what I am assuming it will be). Do you have any pics and info about that yet? I have been thinking of doing something very similar as my height is 5'5" and would like to do a popup like our FWC had.

Thanks Mike!

If you go back to the very first post in this thread you can see a pic of the truck with the top popped up, but not with the fabric sides installed. I actually have yet to do that. It took us forever to make them and Covid has created a barrier between us in NYC and the truck in Germany :_(

Have you considered just making a sort of box on top of your camper box to give you the extra ceiling height? I don't know how you felt about the FWC, but we had one for a long time as well and I honestly have come to the conclusion that I don't like pop ups. At least with the ambos we don't need to pop up to have a quick lunch and enjoy the inside of the camper. But I had major issues about the difficulty of popping up our flat bed FWC. This one is easy to pop up, but very difficult to get down. Maybe I will be able to fine tune this one because I plan on owning it for a lifetime.

Or camper is very small, 6'x8'. Yours must be significantly wider at least?
 

ExpoMike

Well-known member
Thanks Mike!

If you go back to the very first post in this thread you can see a pic of the truck with the top popped up, but not with the fabric sides installed. I actually have yet to do that. It took us forever to make them and Covid has created a barrier between us in NYC and the truck in Germany :_(

Have you considered just making a sort of box on top of your camper box to give you the extra ceiling height? I don't know how you felt about the FWC, but we had one for a long time as well and I honestly have come to the conclusion that I don't like pop ups. At least with the ambos we don't need to pop up to have a quick lunch and enjoy the inside of the camper. But I had major issues about the difficulty of popping up our flat bed FWC. This one is easy to pop up, but very difficult to get down. Maybe I will be able to fine tune this one because I plan on owning it for a lifetime.

Or camper is very small, 6'x8'. Yours must be significantly wider at least?
Yeah, I am hoping to build our dream rig. We actually had really good luck with our Grandby FWC. I found the popup was easy to put up and down. Our unit was a 2001 model so the over cab bed was thin so we were limited on the thickness of the mattress and still put the roof down. Even with trying a custom made mattress (inner spring/memory foam) it just wasn't comfortable enough and we didn't sleep well. That was likely the biggest reason we moved away from it. I have been looking at a non pop raised roof but at 8 1/2' tall without any solar panels or roof vents, I would like to keep this as low as I can. Still weighing the pros and cons between them.

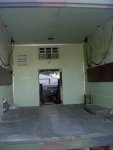
As for size, we are not much bigger. Inside of the box is 109"x75"x65". Only a foot longer and a few inches wider and taller. Here's a pic from my first M1010 I had, after removing all of the inside items.


PICT6066.jpg
 

greg.potter

Adventurer
Thank you for such a great account of your build ...... so far. Hopefully the C-19 situation will work itself out so that we can all return to a more normal life and you can get on with completing your build and on to some adventuring.
 

devonojas

Member
Pop top completed!

Just realized that I never updated this thread after my last short trip! About one year ago I went to Germany for one week to see some friends and check on the truck. Unfortunately the camper was doing as badly as you might fear, frozen plumbing had burst pipes and the camper batteries were dead as a door nail.

I went to my friend Michael’s place to fix her up. While there I managed to finish the pop top con as install. The full story is kind of classic: the way the canvas installs on this extrusion there is really no tolerance for a bad fit. So back in 2019 when we were in Morocco my friend Michael made me a template to rest fit so we could be certain a more elaborate tent walls would fit. The fit was perfect!

So during Covid Michael made a very nice set of canvas walls complete with FWC style three layer windows and a bungee synching system.

The biggest problem with this lifting mechanism is that when it’s all the way up it’s EXTREMELY difficult
to get back down—unless you don’t pop it all the way up. Just before returning with my new fancy walls I heard someone say that the key is to install shorter walls so it doesn’t go all the way up ? All I had to do was shorten the walls!

So even with the new walls I opted to just use the template that already had in the truck from back in 2019. I rut them down to less than half the height of the scissor lifts, but more than high enough for me to stand ?.

The canvas is held in with this silicone strip that I sourced back here in NY and pre cut into thin strips.

Another advantage of this shorter pop up is that there’s very little canvas to deal with when popped down. It’s not an issue at all.

I think this is going to be a really great set up with a totally usable height when popped down, and a necessary slight increase when popped up.

We’re headed back to Europe next month and lots more adventures coming on instagram.com/ontheroadhome soon I’m sure.
 

Attachments

  • DEAEAA7D-D0C6-49B7-B7E9-6CF13C72CA7E.jpeg
    DEAEAA7D-D0C6-49B7-B7E9-6CF13C72CA7E.jpeg
    1,009 KB · Views: 26
  • 449CC559-D2EB-48CC-B009-915AEC6086EA.jpeg
    449CC559-D2EB-48CC-B009-915AEC6086EA.jpeg
    255 KB · Views: 27
  • 2CE97EAD-2CCD-4A9B-B2DD-54B7ED13CF78.jpeg
    2CE97EAD-2CCD-4A9B-B2DD-54B7ED13CF78.jpeg
    955.3 KB · Views: 31
  • CF768A2E-9ADA-4D23-A178-E263E96D0399.jpeg
    CF768A2E-9ADA-4D23-A178-E263E96D0399.jpeg
    1.7 MB · Views: 32
  • 5C819BF5-51CD-4B3C-A1B6-69470711E8E5.jpeg
    5C819BF5-51CD-4B3C-A1B6-69470711E8E5.jpeg
    1.7 MB · Views: 31
  • BA48B0F4-DD51-4A23-9C5D-34708A52326E.jpeg
    BA48B0F4-DD51-4A23-9C5D-34708A52326E.jpeg
    581.9 KB · Views: 27

ExpoMike

Well-known member
Very cool. Nice to see it out being used. I decided to do a fixed height roof raise. Added 8" which is enough to stand up in, so that's good. Build has been going slow though. :(
 

Forum statistics

Threads
188,029
Messages
2,901,371
Members
229,411
Latest member
IvaBru
Top