Oregon Trailer Inspired build on a M116A1 platform (Updated Pullout Kitchen 2020)

andrew22ha

Member
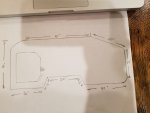
This picture is not to perfect scale but here are the measurements. The overall width of the trailer is 66" wide. Big mistake in the width when trying to source sheets of aluminum. I have called 10 places and only have 48" widths and I need 66" width. if anyone knows of a source please let me know. Willing to deal with shipping so I don't have seams.

Those are inches measurements, I know some look like a single ' mark, just sloppy handwriting

20180129_204010.jpg
 

krazz

New member
Looks awesome!!!! I have an M116A4 that has been sitting for well over a year, and I can't get motivated to start working on it. This shape and look of yours is perfect. Do you have any further dimensions for the kitchen or interior, or are you designing as you go?
 

andrew22ha

Member
Thanks Krazz, I am designing as I go. The main thing was starting with the cooler that will go on the left side and the making adjustments. I can do some measuring for you on the galley. The overall width of the trailer is 66".
 

andrew22ha

Member
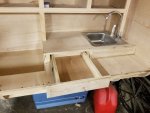
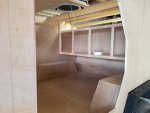
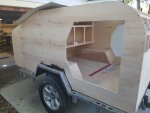
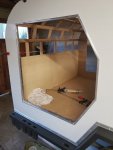
Slow progress this weekend with putting a skin on the hatch and installing the latches and a drawer under the sink. Not a bad weekend, just not very productive. I did order the fan and the aluminum skin so I can start getting it weatherproofed. Then I will figure out the doors.

20180204_180107.jpg

20180203_190150.jpg
 

krazz

New member
Slow progress this weekend with putting a skin on the hatch and installing the latches and a drawer under the sink. Not a bad weekend, just not very productive. I did order the fan and the aluminum skin so I can start getting it weatherproofed. Then I will figure out the doors.

View attachment 434205

View attachment 434206
I see that you're designing your bed area between the wheel wells. Will that be a decent sleep area? How many are you anticipating sleeping there?

Sent from my SM-N920V using Tapatalk
 

andrew22ha

Member
I have about 46" between the wheel wells. It is tight for two people but I didn't have much choice without sacrificing the headroom or making the trailer too tall. I plan to have a RTT so with 3-4 camping, we will have two in the trailer and two in the tent. One of the things I have learned in this build is to choose wisely on the platform because it pigeonholes you into certain decisions. I think I have a great platform, just had to make some sacrifices along the way
 

andrew22ha

Member
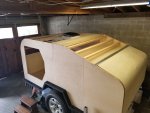
This weekend's progress includes cutting one door out, installing the fan and some additional cross braces. I am close to being able to start the outside skin. My goal is to have the shell complete so I can use it and make some test runs in April before summer hits. Want to head to the Smokey's and hit Banning Mills Zip Line Excursion on the way.

I can still make changes with the inside not having the skin installed with electrical and plumbing, plus I am broke and I still have some significant purchases yet to do. This way I can make changes over the summer and be ready for fall and all hopefully completed.

Next weekend to do:
- Cut passenger door
- finish the cross braces
- Caulk edges where wood meets metal
- Paint the fenders and metal lips gunmetal metallic color
- The White aluminum skin is laying under the trailer ready to install. Shooting for middle of March

20180225_141849.jpg

20180225_141919.jpg

20180225_141901.jpg
 

krazz

New member
Any updates? I started working on my frame and am starting to get nervous on how I'll be building the topside.

Sent from my SM-N920V using Tapatalk
 

andrew22ha

Member
Hoping to have some updates today. I failed to order the correct amount of aluminum trim as well as ordering the wrong gas struts for the hatch. Have been on hold until they finally came in this past week. Today I hope to get the hatch mounted with struts and work on the doors. Will caulk the edges today so I can paint the trim before installing the aluminum skin. I am nervous to install the skin because I want to make sure everything is buttoned up before putting it on. I keep thinking I am missing something or it is my deliberate stalling before jumping in the deep end.
 

andrew22ha

Member
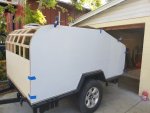
Got a little sidetracked the past few weeks but I was getting all the cross braces buttoned up prior to putting the skin on. Finally jumped into the deep end and put the first sheet of aluminum on. Got the doors cut out and trim installed on one side. Had to buy a grinder to fix the metal fenders. Once I primered them, it showed how bad they were. So hit them with the grinder, sander, silicone sealed where the wood meets the metal and then filled some holes with bondo and a final sand. Primed the one side and painted black. Bondo the other side tomorrow, sand and primer, then paint black. Friday I will get the other side aluminum on and should be ready to put the rood aluminum on. If all goes well I should have it under skin by Sunday.

20180328_182204 (1).jpg

20180328_182056.jpg

20180328_192629.jpg
20180328_192641.jpg
 

andrew22ha

Member
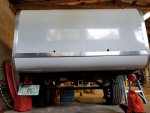
Today has been a long but successful day. Got the hatch trimmed out, the bottom rear, and started working my way from the rear to the front with the roof. I should have the roof complete tomorrow along with one of the doors. I was short on the door trim which really sucks and the hinges I ordered were flush instead of offset. So now I need to figure out if I am going to have to build a insert for the hinge to overcome the offset or order new hinges.

20180331_165158.jpg
20180331_165134.jpg

20180331_165315 (1).jpg
 

andrew22ha

Member
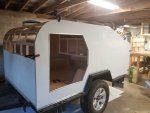
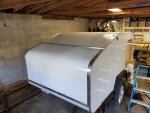
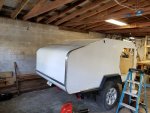
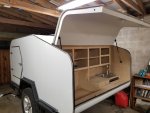
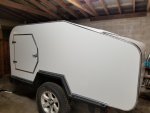
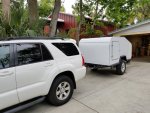
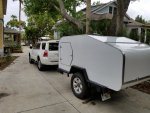
After a long weekend, sun up to sun down I finally have it under skin and water tested. Two small leaks, nothing unmanageable. I am so glad I did the exterior first so I could check for leaks before I put the interior skin on. Anyway, here is the weekend work, finishing with 1st road test.

Rear Hatch installed, interior skin painted. I think I have decided to paint the interior galley white as well, just like how clean it looks. I will say that out in the wilderness will probably make me rethink that, which is the reason I will take it out in the wild a few times before painting white.
20180407_201848.jpg

Driver side door installed. I should have listened to other people and bought the prefab door. I really didn't want to pay $370 per door which is why I built them myself, but that was the worst job ever and I still have to install a window with screen. Haven't decided whether to install the window in the door or the walls. We shall see.
20180407_201909.jpg

Hooked up to the 4Runner and ready to roll. Soaked it with the hose and it did pretty well. One leak at the hatch corner where the water runs off a screw in the ceiling I forgot to silicone in. Fixed those two spots and hopeful that tomorrow will bring a successful water test.

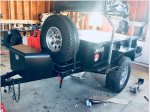
I will be building a tongue box and maybe putting diamond plate on the front wall half way up, for some added protection.
20180408_173945.jpg

20180408_173959.jpg
 

Forum statistics

Threads
188,036
Messages
2,901,453
Members
229,411
Latest member
IvaBru
Top