DirtTrailsWanted
Active member
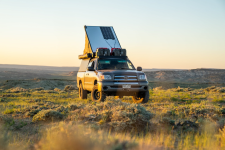
Let’s talk about power, more specifically solar power, and how we keep all our toys and tools charged up while working and traveling in our 2003 Toyota Tundra, Dolores.

We designed the solar system in Dolores with simplicity and efficiency in mind and started by examining three main areas: what do we need to charge, how much energy storage do we need, and how much do we want to spend?
The solar system that we initially installed in Dolores (Version 1.0) taught us a lot of lessons and our new solar system (Version 2.0) is treating us quite well! Check out the details of each below!
1) Renogy Flexible Solar Panel 100 Watt Solar Panels
We again went with the same panels that we had used earlier. However, our plan with them this time was to combine 3 panels together in parallel to make a total of 300 watts on the roof. This would allow us to charge our system faster than we were able to previously. We also chose to wire them in parallel rather than in series so that in the event that one panel becomes shaded from a tree or telephone pole it only affects the output of that single panel rather than the whole set of panels. There are pros and cons for stringing in series vs parallel but I believe that for the majority of systems, parallel makes the most sense.

2) Goal Zero Yeti 1500X Portable Power Station
We decided also to stick with the Goal Zero line of batteries for the same reasons that we had chosen to go with our previous 500x battery. One of the real perks of this system is its relatively small size compared to a system built of individual components. Having the charge controller, battery, inverter and all the needed plug ports built into the battery vastly simplifies the system and reduces the space needed. Aside from offering 3 times the energy storage of the previous battery that we used the feature that really sets this one apart from the previous is the max input for charging. The 500x has a max input of only 120 watts where as the 1500x has a max of 600 watts. That difference means that we can build a larger solar system that will hopefully allow the battery to charge more quickly than it’s being depleted and also means that on cloudy days we have a larger system that will still generate a low but acceptable amount of power. The battery also has the ability to be rapidly charged from a wall outlet at 600 watts and could be fully charged from dead to full in just over 3 hours.

3) 3M VHB Heavy Duty Mounting Tape
Like before we used this to mount the solar panels to our roof. We also learned just how strong this stuff truly is because we had to remove the previous panel so that we had space to add the 2 new panels. It is tenacious, to say the least, and let’s hope that this is truly the last time we need to remove anyone of these panels again! After this component, the new system starts to get a bit more sophisticated than the previous one.

We designed the solar system in Dolores with simplicity and efficiency in mind and started by examining three main areas: what do we need to charge, how much energy storage do we need, and how much do we want to spend?
- Electrical Demands - Since the build-out in Dolores is currently quite simple we knew that this could be a much smaller, simpler solar system than the one we built in Peanut, but we still need to charge our laptops, drone, many camera batteries, and wifi tools that we rely on for work, including our Starlink satellite internet.
- Energy Storage - In general, we spend the majority of our time recreating around Colorado and the desert southwest where there is an abundance of sunshine! Storing energy isn’t much of an issue there when we have amazing solar production. However, we knew that we’d also be traveling to less sunny areas (like Alaska) so our battery system needed to be efficient and large enough to last a few days potentially without solar input.
- Cost - Based on the simplicity of the build-out in Dolores, we knew that we wanted to keep the cost of this system as low as possible and get the most bang for our buck.
The solar system that we initially installed in Dolores (Version 1.0) taught us a lot of lessons and our new solar system (Version 2.0) is treating us quite well! Check out the details of each below!
Solar System Version 2.0 - October 2022 (Current)
So, after our first solar installation in May of 2022, we learned some valuable lessons. Generally speaking, the system that we had installed worked flawlessly for us over the whole summer. It did however have two downsides for us. The first was that the battery bank was simply too small for our energy needs, and the second is that the Goal Zero 500x had a max charge input of only 120 watts, which prevented us from just simply adding more solar panels to the system so that we could have charged the battery more rapidly than it was being depleted. So after our rainy and cloudy summer in Alaska, we started to consider how we might improve this system, while still keeping the main guiding principles of simplicity and affordability at heart. What we came up with was a blend of the system that I had built on Peanut a few years ago and this newer system that we were just running in Dolores. Below is a list of the parts that we used and a little more detail about how it all works together now.1) Renogy Flexible Solar Panel 100 Watt Solar Panels
We again went with the same panels that we had used earlier. However, our plan with them this time was to combine 3 panels together in parallel to make a total of 300 watts on the roof. This would allow us to charge our system faster than we were able to previously. We also chose to wire them in parallel rather than in series so that in the event that one panel becomes shaded from a tree or telephone pole it only affects the output of that single panel rather than the whole set of panels. There are pros and cons for stringing in series vs parallel but I believe that for the majority of systems, parallel makes the most sense.

2) Goal Zero Yeti 1500X Portable Power Station
We decided also to stick with the Goal Zero line of batteries for the same reasons that we had chosen to go with our previous 500x battery. One of the real perks of this system is its relatively small size compared to a system built of individual components. Having the charge controller, battery, inverter and all the needed plug ports built into the battery vastly simplifies the system and reduces the space needed. Aside from offering 3 times the energy storage of the previous battery that we used the feature that really sets this one apart from the previous is the max input for charging. The 500x has a max input of only 120 watts where as the 1500x has a max of 600 watts. That difference means that we can build a larger solar system that will hopefully allow the battery to charge more quickly than it’s being depleted and also means that on cloudy days we have a larger system that will still generate a low but acceptable amount of power. The battery also has the ability to be rapidly charged from a wall outlet at 600 watts and could be fully charged from dead to full in just over 3 hours.

3) 3M VHB Heavy Duty Mounting Tape
Like before we used this to mount the solar panels to our roof. We also learned just how strong this stuff truly is because we had to remove the previous panel so that we had space to add the 2 new panels. It is tenacious, to say the least, and let’s hope that this is truly the last time we need to remove anyone of these panels again! After this component, the new system starts to get a bit more sophisticated than the previous one.


