You are using an out of date browser. It may not display this or other websites correctly.
You should upgrade or use an alternative browser.
You should upgrade or use an alternative browser.
Overland Trailer Build
- Thread starter joelN
- Start date
joelN
New member
Attachments
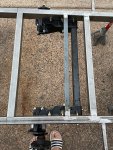
Good move, if you don't need the extra clearance for sure the easiest way to lock the two sides in to be /stay parallel as well as rigidity against torque flexing.
Read the data / install sheet, watch the videos etc from etrailer too before you think all done
The triangulation off the ball center in particular, get better tire lifespan ensuring alignment, beyond just the mount point rails being parallel.
Read the data / install sheet, watch the videos etc from etrailer too before you think all done
The triangulation off the ball center in particular, get better tire lifespan ensuring alignment, beyond just the mount point rails being parallel.
joelN
New member
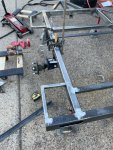
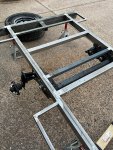
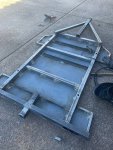
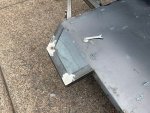
After choosing to have the floor extend over each of the outriggers I decided to finish the edge with a piece of thin 2x2 angle iron. Instead of mitering the angles I bent and welded them. This gave a smooth radius with no sharp edges.
I think it gives it a nice finished look while adding a little more protection in the event i accidentally clip a tree or some brush.

The next phase will start this weekend with constructing the aluminum upper body. The upper will be constructed of 2x2 verticals and 2x1 horizontals of .125” 6061. I have never welded aluminum (I do have a spool gun but not a tank of 100% argon). So I am leaning towards using a combination of corner braces, rivets and some braising. I have had terrific luck braising aluminum in the past but it takes SO MUCH time.
I think it gives it a nice finished look while adding a little more protection in the event i accidentally clip a tree or some brush.


The next phase will start this weekend with constructing the aluminum upper body. The upper will be constructed of 2x2 verticals and 2x1 horizontals of .125” 6061. I have never welded aluminum (I do have a spool gun but not a tank of 100% argon). So I am leaning towards using a combination of corner braces, rivets and some braising. I have had terrific luck braising aluminum in the past but it takes SO MUCH time.
Last edited:
billiebob
Well-known member
Looking fabulous,
Before going too far, bolt it together and tow it to be sure it tracks straight.
Being in a dry climate, and with the thickness of the steel, I doubt corrosion will be an issue.
Store it under a roof. Sunshine and heat are catalysts for rust.
Before going too far, bolt it together and tow it to be sure it tracks straight.
Being in a dry climate, and with the thickness of the steel, I doubt corrosion will be an issue.
Store it under a roof. Sunshine and heat are catalysts for rust.
Last edited:
joelN
New member
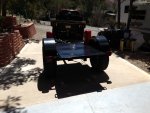
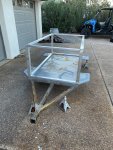
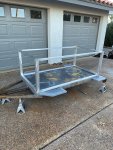
This past weekend I started to frame up the aluminum container. Most of it is riveted using angle I cut as corner braces. welding would have certainly been faster. Now that I have the frame square I will start to add cross members and get ready for siding. My plan is to attach the aluminum container to the steel frame using stainless bolts and stainless blind rivet nuts as well as a rubber gasket to protect the two different metals from touching.


NMBruce
Adventurer
Hey man, keep at it, looking good.
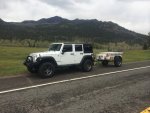
I have a home built trailer, based off of a M416, it’s got over 60k highway and off road miles. I built a wood box for it, that way I can use it for different stuff. I have done a few trips that would not be possible without it. Plain trailer, box with my old JKUR and with my old GX470. I change vehicles, but I plan on this trailer will be around a long time
I have a home built trailer, based off of a M416, it’s got over 60k highway and off road miles. I built a wood box for it, that way I can use it for different stuff. I have done a few trips that would not be possible without it. Plain trailer, box with my old JKUR and with my old GX470. I change vehicles, but I plan on this trailer will be around a long time
Attachments
joelN
New member
I had an initial design where I wasn’t using external fenders and I was building it into the trailer. Ultimately to extend it was going to cost a lot more in aluminum So I simplified it. the the rear one I will put a propane tank on outriggerWhy not bring the habitat width to the outside of the outrunner wings?
For outside accessible storage, if nothing else?
joelN
New member
Looks terrific.Hey man, keep at it, looking good.
I have a home built trailer, based off of a M416, it’s got over 60k highway and off road miles. I built a wood box for it, that way I can use it for different stuff. I have done a few trips that would not be possible without it. Plain trailer, box with my old JKUR and with my old GX470. I change vehicles, but I plan on this trailer will be around a long time
joelN
New member
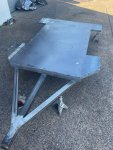
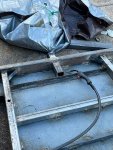
After some additional feedback from users on another forum I decided to extended the tongue to the 3rd support and add a few corner gussets to ensure we stay solid on the trails. Some will say it over built while others will question the design, but I am pretty happy with how it turned out. I hope to paint the frame next week. 


Similar threads
- Replies
- 1
- Views
- 678
- Replies
- 1
- Views
- 540
- Replies
- 2
- Views
- 923
- Replies
- 2
- Views
- 821


