OVRLND CAMPERS ONLY : Post your OVRLND Camper build here or a link to your build thread to inspire others!

dstefan

Well-known member
Cool to see the changes and upgrades they’ve made
Yeah -- I really like the look of Jay's new solid cabover with a contrasting color. Much nicer. I really wanted to do that, but went with the extra height instead so I could sit up in bed. The penalty of being tall . . .

Since dust is a current topic, I'll continue my build posts with a couple of things I did not mentioned so far. First, this stuff is really great, if you haven't used it.


It's not just for tailgates! I think I've bought at least three of these. BTW, I'll show links sometimes, but I have no affiliation and don't make money on any of them.

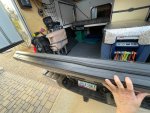
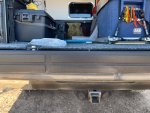
Jay's bulb sealing on the barn doors and windoors is very good, but not perfect. If you want dust free, gotta add some. I used the ESI tailgate seal in several places, especially the barndoor/tailgate cap border (and of course the tailgate). The outer seal is Jay's, the inner one is added.
1641077955964.jpeg

1641078009013.jpeg
I still got a bit of dust under the doors when I was blowing the back off with the compressor, so I added this:
1641078114961.jpeg
The ESI adhesive is really good, but it didn't hold that well on my tailgate cap initially after a few uses, so I put a new one on and used this:

It's for VHB tape on what 3M calls low energy surfaces (basically not metal or glass). I've used it a lot and it really works for a nearly permanent bond. Works great on the ESI seal adhesive.

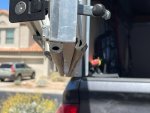
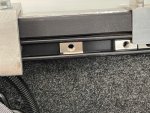
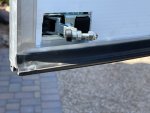
The hatches/windoor seals are fine, but after a year, I've tightened up the clamp arm (?) on latches (not sure what to call it, but you can see it in the first picture of this post on the back of the barn door) to eliminate a very small gap.

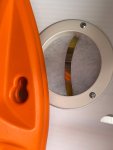
The other thing I did that I think has really helped get to nearly zero dust is a positive pressure vent (PPV). Here's the outside:
1641078827868.jpeg
and the inside:
1641078882048.jpeg
Because our campers are big square blocks in the back, they create a lot of aerodynamic drag and and backdraft that showers the back doors in dust. With any speed (>10mph) on long dusty roads we are also creating low pressure inside the camper that sucks dust through any gap. The PPV allows clean(ish) air to be sucked/blown in from the front and stops the vacuum effect, including when we get on the highway after being offroad. Driving at high speeds further sucks in the dust without some equalization.

The PPV is a marine vent for boat hatch covers.
https://www.westmarine.com/buy/lewmar--cabin-hatch-vent-trim-kit--P024_720_004_502?pCode=2678175

I talked to Jay about this and he had me bring it up and installed it when my camper went on the truck. It's a simple install -- 3" hole saw and four screws to fasten the inner section through the wall to the outer vent with a bead of sealant. This is completely waterproof and has a O-ring plunger type closure from the inside. I just added some inch thick dacron aquarium filter material I had hanging around and found some spring steel strips to hold it in. Stays very clean and breathes well.

Here's an example after 25 miles of offroad. You can see where the dust stops, and this is before I beefed up the tailgate to barndoor seal. I'm always in totally dusty conditions and it's really been worth it for me. YMMV.
1641080716057.jpeg

Next post -- electrical . . .
 

Attachments

  • 1641078297019.jpeg
    1641078297019.jpeg
    239.5 KB · Views: 91

aaaslayer

Active member
Yeah -- I really like the look of Jay's new solid cabover with a contrasting color. Much nicer. I really wanted to do that, but went with the extra height instead so I could sit up in bed. The penalty of being tall . . .

Since dust is a current topic, I'll continue my build posts with a couple of things I did not mentioned so far. First, this stuff is really great, if you haven't used it.


It's not just for tailgates! I think I've bought at least three of these. BTW, I'll show links sometimes, but I have no affiliation and don't make money on any of them.

Jay's bulb sealing on the barn doors and windoors is very good, but not perfect. If you want dust free, gotta add some. I used the ESI tailgate seal in several places, especially the barndoor/tailgate cap border (and of course the tailgate). The outer seal is Jay's, the inner one is added.
View attachment 699496

View attachment 699497
I still got a bit of dust under the doors when I was blowing the back off with the compressor, so I added this:
View attachment 699498
The ESI adhesive is really good, but it didn't hold that well on my tailgate cap initially after a few uses, so I put a new one on and used this:

It's for VHB tape on what 3M calls low energy surfaces (basically not metal or glass). I've used it a lot and it really works for a nearly permanent bond. Works great on the ESI seal adhesive.

The hatches/windoor seals are fine, but after a year, I've tightened up the clamp arm (?) on latches (not sure what to call it, but you can see it in the first picture of this post on the back of the barn door) to eliminate a very small gap.

The other thing I did that I think has really helped get to nearly zero dust is a positive pressure vent (PPV). Here's the outside:
View attachment 699500
and the inside:
View attachment 699501
Because our campers are big square blocks in the back, they create a lot of aerodynamic drag and and backdraft that showers the back doors in dust. With any speed (>10mph) on long dusty roads we are also creating low pressure inside the camper that sucks dust through any gap. The PPV allows clean(ish) air to be sucked/blown in from the front and stops the vacuum effect, including when we get on the highway after being offroad. Driving at high speeds further sucks in the dust without some equalization.

The PPV is a marine vent for boat hatch covers.
https://www.westmarine.com/buy/lewmar--cabin-hatch-vent-trim-kit--P024_720_004_502?pCode=2678175

I talked to Jay about this and he had me bring it up and installed it when my camper went on the truck. It's a simple install -- 3" hole saw and four screws to fasten the inner section through the wall to the outer vent with a bead of sealant. This is completely waterproof and has a O-ring plunger type closure from the inside. I just added some inch thick dacron aquarium filter material I had hanging around and found some spring steel strips to hold it in. Stays very clean and breathes well.

Here's an example after 25 miles of offroad. You can see where the dust stops, and this is before I beefed up the tailgate to barndoor seal. I'm always in totally dusty conditions and it's really been worth it for me. YMMV.
View attachment 699510

Next post -- electrical . . .
Love that positive pressure vent! Thanks for sharing
 

aaaslayer

Active member
Jay suggested using Butyl bead/tape to me. We used 1/4“ bought off Amazon. Worked really great to plug holes. doesn't fully harden (and crack), is tenacious and stands up to heat and cold well, but can get softer with heat. Can be peeled off easier than caulk if needed. Not a caulk substitute, not for weather exposure, but better for big hidden holes and irregular shapes. Our roof seams are sealed with this, plus an external sealing of 3m magic caulk of some sort. You knead it it and shape it by hand.

I used Gorilla tape on my Tacoma and regretted it. Doesn’t handle heat well and migrates, leaving a god-awful residue. Try Gaffer tape over Butyl bead stuffed in the hole. Works well.
I wound up using black silicone. I used gorilla tape and put a layer of silicone over it. Very few holes have gorilla tape though.
 

dstefan

Well-known member
I wound up using black silicone. I used gorilla tape and put a layer of silicone over it. Very few holes have gorilla tape though.
That’ll work great. I‘ve had the Gorilla tape work well on clean metal. The migration problem seemed mostly to occur on plastic surfaces.
 

dstefan

Well-known member
Continuing on with electrical . . .

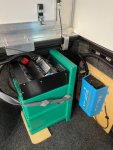
I ran my non-camper 2nd Gen Tacoma with dual Odesseys with my 50qt ARB as the primary draw on the aux battery. Weight management is a big issue for me so wanted LiFePo for weight to amp hour ratio. Plus figured I'd have other other draws in the camper, so a 100 AH Battleborn gives me 3x the AHs for half the weight of my old Odyessy.

Decided on the National Luna DCDC Powerpack (AKA green box). Got some good holiday deals last year, but it may not be the cheapest way to go. I seriously researched the Jackery and others. Lack of good non-solar charging option along with skepticism about Li-ion durability and handing high Phoenix heat as well as the superior amount of amp hours available put me squarely in the Battleborn LiFePo camp. I also don't want to have to install constant rooftop solar if I can avoid it.

1641160364009.jpeg
1641161574968.jpeg
Pro's:
-- Easy to remove (necessary in Phoenix summers where the camper outside can easily get over 120;
-- has 4 50amp Anderson Power Ports (2 for either input or output, 1 for connection to starter battery for charging, 1 for solar input through built in MPPT controller)
-- multiple other USB ports, 12v cigarette ports and 1 Hella port (sometimes called Powerlet), which is higher amp (15 I think) and snaps tight vs normal 12v cigarette ports
-- came with 25 feet of 16mm (~6AWG) cable for the battery connection with fuses and pre-done Anderson plug
-- 25 amp DCDC charger, with Li profile that fits Battleborns
-- MPPT Solar controller
-- On/Off circuit breaker
-- Ports are all pretty easy to switch out can customize, except for the Andersons
-- Year end deal last year included a hardwired monitor, which is pretty useful to watch the solar charging on my portable solar panel when I use it.
-- I could take it out easily and use it in my 4Runner as well
-- I think it's cheaper and/or more versatile than one of the solar generators for the power

Cons:
-- several $100s more expensive than building my own system
-- Stuck with the box configuration. Can't separate components (well, can't do so easily)
-- No inverter as with Jackery's , etc. I used a Victron Phoenix 500amp inverter as you can see in the picture above. Don't really have much heavy duty AC power needs.

Rest of configuration:
I ran the charging cable in a heavy duty loom out the OEM grommets in the Tundra cab bulkhead passenger side and followed the existing P-side electrical lines to the engine bay and starter battery. You can see the cable under the bedrail and then velcro'd to the Bedrug down to the exit in the right corner.
1641161823967.jpeg
My wiring run is kinda long as I'm putting my water cans in the P-side corner to be opposite of the 38 gallon gas tank for weight distribution and didn't want the battery box around the water. Plus, Toyota puts their batteries on the D-side, so I had to add about 8' more 6AWG cable to the supplied cable, but it worked out great.

My camper electrics are in the rear D-side
1641162156456.jpeg
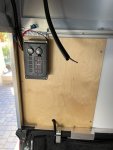
I rive-nutted two bolts on the right side and used a self tapping lathe screw on the left in the corner (where it's too tight for a rivnut) to attach a 1/4" baltic birch panel. Used 8AWG from the battery cable tied under the bedrail to go up to the Bluesea switch box. I really like the Bluesea box. Water resistant with 4 15amp breaker switches. I found a great gasket sealed plastic box on Amazon that the panel fits perfectly into a cutout I made on the lid so I can just open the box for wiring or changes without pulling the panel board. My Maxxair fan goes to one switch, a set of 5 Led lights for the cabin goes to another, the built in 12v port and dual USBs are switched from the top switch (comes that way) and I have one left for future use.

And, it's mounted upside down :oops:. . . I actually did that on purpose to put the USB port up high for an out of the way plug-in for a Luminoodle I have which we attach under the awning at night.

FYI -- Bluesea makes a 6 switch version of this little panel which might be more useful -- gives you 3 more switches than this since there's no 12v or USB on that one.

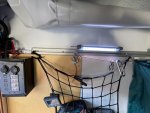
We've really liked these little lights, which I found on Powerwerx. https://powerwerx.com/pwrbrite-led-light-strip
They draw only milliamps, are clip mounted, can be rotated and have an on-off switch. They come with 6ft of cord and and Anderson plug.
1641163320039.jpeg

I mounted two inside the cabover hinge for reading lights. They work great with the ability to aim the light, which also allows managing the intensity by rotating into the wall or bounce off the ceiling ,etc.
1641163551606.jpeg
There's another over my fridge on the D side at the tailgate Also wired in an Anderson plug to the main light switch in the panel and got a 5th light that I put velco on the mounts so I can move it around and stretch it out under the awning over my stove at night (sorry no pics yet). You can supposedly get colored tubes for them, but they're always out of stock, so I bought a sheet of photo flash gel and scotched taped my own for a bug light.
1641163809552.jpeg
Finally the fridge . . .
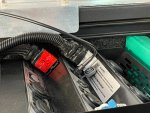
I didn't want to have my fridge go through the ports on the front panel of my Powerpack. The 12v ports aren't secure enough to guarantee the connection won't come loose off-road and I didn't want to have the on/off switch turn the power off to the fridge. I could have used one of the 50amp output ports, but that's overkill, plus I use them all. So, I drilled a hole in the side of the box and wired ARB's 10awg fridge loom with it's in-line fuse directly to the battery using a15-45amp Anderson plug. I really like the loom as it has a screw-in plug on the other end for the fridge, so nothing can rattle out. Anderson plugs CAN separate, but I'm using one of their clips to secure it so there's no chance of the fridge disconnecting anywhere in the circuit.
1641164454502.jpeg
You can also see I put in a Victron smart shunt (upper right corner) so I can monitor amps in an out, voltage and charging via Bluetooth on my phone. Very useful.

Finally, I cut a hole in the P-side and wired in a Noco external plug, so I can just plug external power through the wall. Lets me pre-cool the fridge (now that I have to park outside) all night with the camper locked. Just pull the extension cord and the fridge switches over to DC and we can head out.
1641164829944.jpeg
I eventually bought a Victron charger for the battery. One really unexpected benefit was that it turns out that it has a setting for using it as a 12v power source. I just cut off their plug, put a 50amp Anderson plug on it and now I can either charge the battery or run on DC without the battery by connecting to the input plug for my camper wiring. I used this feature a lot when finishing the build out. I haven't used it camping, but if I know I'm going to have shore power it gives me the option, though mostly we're fully off grid.

At this point I'm really happy with the electrical system. It's real easy to work with and performs well. If I was doing it again, I'd have to think real hard about making my own battery box and using a separate DCDC charger and MPPT controller.

There's some advantages of the custom system, but it's a PITA to design and configure, especially without some background in it. I'm used to AC electric work around the house and have done some limited DC work, but wasn't really versed in cabling, crimping, etc and didn't have the tools. I thought I could do the NL Powerpack as simple plug and play and avoid buying a bunch of crimpers, etc.

I did order some premade cables from Powerwerx, but in the end it's expensive to go that route, and I kept finding things I wanted to do, so I just bit the bullet and bought the tools to DIY, and I'm glad I did. I still think, given my level of skill and knowledge at the beginning, the NL Powerpack was the right decision, but if I was doing it in the future again, I'll do my own, now that I'm past the initial learning curve.
 
Last edited:

aaaslayer

Active member
update:

last night I got a chance to bolt down my camper and remove the c clamps, using grade 8 hardware. bolted half of it, 4 bolts per side. Today I'll finish up the other side of the camper and remove ALL c clamps and put them up for sale.

Much cleaner look for sure, and I don't have to work around them when doing the walls and bench/storage.


Question regarding insulation. I've been looking for dual aluminum faced 1" thick poly iso foam board, can't seem to find anything. only single faced aluminum board. The only double faced one I found was 2 inches thick.

I was thinking of doing 2 boards back to back of 1/2" so I have aluminum facing on both sides. What is everyone doing? Single faced? Double?
I was thinking of just doing a 1" single faced, facing outward, and the inward part will by styrofoam, but I'll face it with reflectix so I have both sides faced with foil. Looking to retain heat in winter, and keep heat out in the summer.


What are ya'll doing for insulation? Share your ideas and what you did please.


Thanks!
 

dstefan

Well-known member
I was thinking of doing 2 boards back to back of 1/2" so I have aluminum facing on both sides. What is everyone doing? Single faced? Double?
From doing a ton of reading on insulation, especially on van-life blogs and threads, it seems like the foil does nothing much unless it has an air gap facing the direction of the infrared gain. So, double faced probably doesn't matter, UNLESS, you have a radiant heater inside. It'll bounce the the infrared back and maybe heat up other things inside.

When I tested my Wave 3, I could measure temps around 130 or 140 degrees on my Fridge top (too) near it with a thermometer gun (which measures infrared). When I put a piece of scrap Reflectix over the fridge top the temp underneath dropped to the 80s but the thermometer measured 300 degrees bouncing off the Reflectix. It wasn't that hot to my hand, so I assume it's picking up the infrared spectrum bouncing up. Reflectix has only about a R1 value, so I think it's the blocking of the infrared that works.

SO, having an air gap to the outside between the foil and skin probably makes some difference in heat. Living in Phoenix, I was worried that my 1/4" closed cell foam double foil faced wouldn't help much. But to my surprise it's really effective with the heat (and the cold) to the touch. Mine is all mounted on the frame, so there's a large airgap behind.

Solid foam board will be better for cold for sure, but there's so much thermal bridging you can't control, and the tent sides, even with the thermal liner let in a lot of cold. It seems to me that being comfortable in the cold in our campers is pretty much clothing and heater dependent.

@Wrathchild may have some better cold weather observations and a different experience. Hopefully, he'll chime in here.
 
Last edited:

dstefan

Well-known member
Continuing the build posts with built-ins and organization:

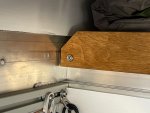
But first, random, insulation related note, since others are in that stage. I pulled the wooden rail off the bed and cut the corners down. Made a big difference in not grabbing my insulation/siding when I slide it out. Jay's newer cabover design may not need it, but for those getting the older design for more headroom, it helps.
1641413491981.jpeg

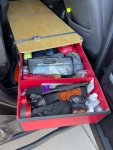
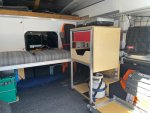
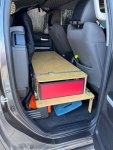
One of the biggest goals with my build was to keep weight down, but we needed organization. Started with the back seat using 1/2" baltic birch plywood for a platform, then added a second story for a slide out drawer. Despite Toyota's inability to put in a flat floor in the double cabs this adds a ton of space down low and centered. The DC seats fold up really flat and I just drilled through the steel supports in three places for rivenuts. The whole thing comes out with 6 bolts and a screw and my seats are usable. May eventually take the seats out, but so far no need. I know the legs don't look strong, but I can lay down on top and it doesn't budge. No shifting offroad either.
1641413738134.jpeg
I keep all my recovery gear and my tire/Safejack kit under the front seats and sides of the platform when I'm packed. Still trying to get comfortable leaving gear in my truck since I can't get it in garage anymore.

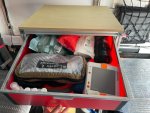
The drawer is 18x24" and holds the contents plus of one of my Plano boxes that used to be in the camper. We slide a hanging compartmented pack bag into the space on the D side opposite the box. I'll show that later inside the camper.
1641413962507.jpeg
It's made from leftover Coroplast from another project that's been in my garage for ten years (hence the color). No runners, just easily slides out, but the legs and door contain it off road. Box itself weighs nearly nothing -- maybe 2 lbs. Coroplast boxes are easy to make, light, cheap, and durable. Used some thin angle aluminum, and VHB. Happy to describe how to make these further if anyone wants to know more.
1641414137037.jpeg

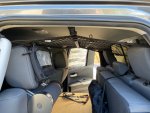
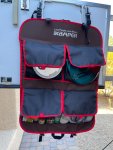
I'm a big fan of Blue Ridge Overland Gear bags. I put in two of their headrest 1st Aid bags, one for a minor first aid kit, and one for misc gear I didn't want to hunt for (flashlights, multitool, sunscreen, etc. The round thing is an airfilter. Really helps when the air gets smokey.

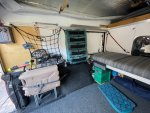
Unlike Tacomas, it's hard to find a gear loft made for Tundras, especially the doublecabs. Used an Amazon sourced cargo net and the nice folks at BROG sold me two clip things that hold the middle strap from their Tacoma loft. The loft has been great for reducing clutter by holding jackets, hats, rail or warmer jackets, etc. If someone wants to make one of these for a doublecab Tundra, let me know and I'll post sources and a few more pictures of how it's anchored.
1641416175062.jpeg

Building the final structure in the camper next post . . .
 

Attachments

  • 1641413710215.jpeg
    1641413710215.jpeg
    208.9 KB · Views: 31

dstefan

Well-known member
OK, now the camper built-ins.

After dust sealing the truck bed, the two things I did before getting the camper and putting in the Bedrug that I was really glad to have done first were:
1-- Take pictures of the naked truck bed with measurements for where the ridges, flat spots, bed bolts and other features were. This has been super helpful as I've added things and needed to know where to anchor them and where flat spots, etc were. Don't forget interior bedsides too. Of course, if you're not doing a Bedrug or are laying a baseplate over, never mind . . .

2-- Fitted the fridge slide and drilled holes in my truck bed to through bolt it, as well as rivnut and VHB'd short pieces of L-track to spots on the bedside where I planned to have some cam straps terminate (Rollercams -- really great product. Holds way better than others I've used). I also VHB'd a couple of 12" long, 1/2" single lot 8020 pieces to the floor in front of the wheel wells. All this was covered with the Bedrug, but then easily accessible through slots and very useful later. Bedrugs, BTW are tough to cut through, though no problem, and you end up making some big flaps. You can add rivnuts or VHB that way, but if you can plan out anchor points, etc its just a LOT easier.

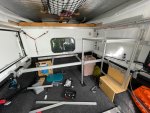
I knew I wanted a shelf/bench across full the bed width that allowed the full 78 inches of bed length to be used. Most builds I had researched built a free-standing structure with legs, put it in place and stabilized it against the bedwall or bedrail. I decided to make a hanging bench from the Toyota bedrail system (which I added). It's rated for 800lbs, kept the build light, and could be made pretty stout with 8020. I purposely avoiding tying any structure to the camper. It's quite rigid, but the Tundra beds flex, as do most truck beds, though the Tundras flex more. Having structures anchored to both is a bad combo off road. Even with bed stiffeners.

We purposely keep the P-side corner of the bench and cabinet open for storing tall vertical things -- full sized Maxxtrax, shovel, camp chairs, etc.

1641423638499.jpeg

I bought the all the extrusions and hardware from Tnutz, not 8020. 8020's website and catalog are great for research, but their prices and wait times (this was Aug/Sept '21) are ridiculous. Tnutz has a more limited, but still great selection, they are a 1/3 to half the price, the extrusions are the same and they were shipping within 2 weeks or less vs 80 to 90 days from 8020.

I went with 10 series extrusion and standardized all hardware to 1/4-20. Many people will say use 15 series, but I've worked with it and it's unnecessarily heavy and expensive.
For the attachment ledger strips to the Toyota bedrail system, I used 1"x 2" 10 series and on the D-side 1"x3". For two reasons:
1-- I trialed a scrap piece of 1" and it was just barely too narrow to securely bridge the Toyota bed rail width and would slip under pressure.
2 -- My 1"north/south crossbars could be held with a gusset on each side AND one underneath in the second or 3rd slot. They easily hold the combined 300lbs of me and my wife on the bench

The front rail of the bench that stretches completely across the bed is 1x2" as it has a long unsupported span. 8020 has a great deflection calculator that you can model stuff like that with.

I decided to keep the plywood "step" over the P-side wheel well as it's very stout and I could avoid legs.
1641424747611.jpeg

Got these bed rail nuts on Amazon. Bomber! 3/8" tapped stainless. Had to shim them up for my ledger rails with 1/8" aluminum bar. I used Grade 8 bolts in holes drilled through the extrusion. It's all very stout, no deflection and still pretty lightweight. ALL of the extrusion and hardware from Tnutz was 40lbs (I weighed the package) and that included 18' of additional extrusion for another project Plus, I cut a lot down (using a table saw). I estimate the weight of 8020 in the project was about 30lbs, plus the plywood, which weighs 43lbs for a 5x5 12mm sheet. I used a sheet and a half. So all told about 90-ish lbs.

I've worked with 8020 before (rack system), but never something complicated. This wasn't hard, but took a lot of planning and multiple revisions on paper. The time spent ahead is worth it, as well as living with a minimal build for a few trips to figure out what we really wanted.

Also, either a chop saw or table saw is critical if you're going to custom fit pieces as you go (I did for several reason). A drill press or drill stand is also super helpful if you're drilling though the extrusion. It tends to catch a hand drill for larger holes.

Made the bench top liftable to access the battery.
1641425768827.jpeg

Here's the final finished product
1641425886161.jpeg
1641426066347.jpeg
1641426166188.jpeg
Made the counter extension a flip up so the heater is still usable where it is. We also found it's very handy to have a surface reachable from the pulled out bed, sort of like a night table. Also put a very low shelf for the propane to allow my slide out tailgate cooking counter to fit under. Used a large quick fist with a 1" ratchet strap laced through the quick fist.

The middle compartment has 1/4" baltic birch cutouts slid into the 8020 slots with a liner from my wife's unused yoga mat. I made another coroplast drawer, using an even easier technique. The stove is sitting on top of the counter since that's where we store it strapped down while traveling.

Here's the pack bag I mention we put under the rear seat platform. We love this thing. Holds a ton, very organized. It's like a lightweight chest of drawers. Hangs from the camper bedrail. Also, you can see where I move a water jug for gravity feed water. The spigot hose isn't attached. Works great. If it's freezing no pump or plumbing to worry about. I also use a Rollercam strap vertically to hold the jug to the platform. I can leave the hose/spigot attached and it's solid enough to bounce around offroad and off camber.

I should also say the bench cushions were custom cut 3" medium firm foam from https://www.foamorder.com/ with a Dacron wrap. We got the sunbrella fabric from https://www.sailrite.com/ (great DIY resource). It's super durable. Very easy to cover your own cushions IF you use a solid base so you wrap the fabric around and staple the bottoms. No sewing!

If we need to stealth camp or close down the top, my wife can sleep on the bench and I can sleep north/south under with my Thermarest. Our goal with this was NOT to have it built out inside like a FWC, but to be able to retreat inside as needed for a day or two. Mostly it's tailgating for us, sitting outside, and retreating in for bed. That said, the bench is comfortable seating with a pillow behind us, and there's enough room with the top down to clear my head, so I'm sure we'll hang out inside more than we think.
1641426723691.jpeg

One last organizational issue is the kitchen.
1641427710346.jpeg
This lives on the inside D-side barn door that's reinforced. You can see it stowed in my electricals post. This is ALL of our kitchen stuff. Saw it on iKamper's website, and hoped it would work. The pockets surprised us with the roominess. Holds our pot set, dishes two Yeti mugs, a GSI skillet plus everything else. Eliminates need for more storage construction and super handy.

I'll post a little more I'm sure on odds n' ends, but that's the bulk of it. I left out some details, sources, links, etc so as not to hog this thread (at least too much!:rolleyes:). Happy to answer questions or provide more info. Just ask.

We're going somewhere in about 3 weeks (still figuring where). I'm going to try to force myself to get it weighed again fully loaded, and I'll post that if I do.

Good luck on your builds!
 

Attachments

  • 1641423360983.jpeg
    1641423360983.jpeg
    201.4 KB · Views: 97
Last edited:

aaaslayer

Active member
I'll catch up on everyone's posts later but before I leave work, just wanted to post these real quick.........

removed all C clamps, and bolted it all down. And ran out of day light and sun, but Bedrug is in the bed, not VHB'd yet, just sitting there for now. Until tomorrow; we're supposed to get 73 degrees in Socal so I'll finish bedrug tomorrow on my lunch hour.

20220105_140939_resized.jpg20220105_140939_resized.jpg20220105_165110_resized.jpg
 

aaaslayer

Active member
OK, now the camper built-ins.

After dust sealing the truck bed, the two things I did before getting the camper and putting in the Bedrug that I was really glad to have done first were:
1-- Take pictures of the naked truck bed with measurements for where the ridges, flat spots, bed bolts and other features were. This has been super helpful as I've added things and needed to know where to anchor them and where flat spots, etc were. Don't forget interior bedsides too. Of course, if you're not doing a Bedrug or are laying a baseplate over, never mind . . .

2-- Fitted the fridge slide and drilled holes in my truck bed to through bolt it, as well as rivnut and VHB'd short pieces of L-track to spots on the bedside where I planned to have some cam straps terminate (Rollercams -- really great product. Holds way better than others I've used). I also VHB'd a couple of 12" long, 1/2" single lot 8020 pieces to the floor in front of the wheel wells. All this was covered with the Bedrug, but then easily accessible through slots and very useful later. Bedrugs, BTW are tough to cut through, though no problem, and you end up making some big flaps. You can add rivnuts or VHB that way, but if you can plan out anchor points, etc its just a LOT easier.

I knew I wanted a shelf/bench across full the bed width that allowed the full 78 inches of bed length to be used. Most builds I had researched built a free-standing structure with legs, put it in place and stabilized it against the bedwall or bedrail. I decided to make a hanging bench from the Toyota bedrail system (which I added). It's rated for 800lbs, kept the build light, and could be made pretty stout with 8020. I purposely avoiding tying any structure to the camper. It's quite rigid, but the Tundra beds flex, as do most truck beds, though the Tundras flex more. Having structures anchored to both is a bad combo off road. Even with bed stiffeners.

We purposely keep the P-side corner of the bench and cabinet open for storing tall vertical things -- full sized Maxxtrax, shovel, camp chairs, etc.

View attachment 700295

I bought the all the extrusions and hardware from Tnutz, not 8020. 8020's website and catalog are great for research, but their prices and wait times (this was Aug/Sept '21) are ridiculous. Tnutz has a more limited, but still great selection, they are a 1/3 to half the price, the extrusions are the same and they were shipping within 2 weeks or less vs 80 to 90 days from 8020.

I went with 10 series extrusion and standardized all hardware to 1/4-20. Many people will say use 15 series, but I've worked with it and it's unnecessarily heavy and expensive.
For the attachment ledger strips to the Toyota bedrail system, I used 1"x 2" 10 series and on the D-side 1"x3". For two reasons:
1-- I trialed a scrap piece of 1" and it was just barely too narrow to securely bridge the Toyota bed rail width and would slip under pressure.
2 -- My 1"north/south crossbars could be held with a gusset on each side AND one underneath in the second or 3rd slot. They easily hold the combined 300lbs of me and my wife on the bench

The front rail of the bench that stretches completely across the bed is 1x2" as it has a long unsupported span. 8020 has a great deflection calculator that you can model stuff like that with.

I decided to keep the plywood "step" over the P-side wheel well as it's very stout and I could avoid legs.
View attachment 700306

Got these bed rail nuts on Amazon. Bomber! 3/8" tapped stainless. Had to shim them up for my ledger rails with 1/8" aluminum bar. I used Grade 8 bolts in holes drilled through the extrusion. It's all very stout, no deflection and still pretty lightweight. ALL of the extrusion and hardware from Tnutz was 40lbs (I weighed the package) and that included 18' of additional extrusion for another project Plus, I cut a lot down (using a table saw). I estimate the weight of 8020 in the project was about 30lbs, plus the plywood, which weighs 43lbs for a 5x5 12mm sheet. I used a sheet and a half. So all told about 90-ish lbs.

I've worked with 8020 before (rack system), but never something complicated. This wasn't hard, but took a lot of planning and multiple revisions on paper. The time spent ahead is worth it, as well as living with a minimal build for a few trips to figure out what we really wanted.

Also, either a chop saw or table saw is critical if you're going to custom fit pieces as you go (I did for several reason). A drill press or drill stand is also super helpful if you're drilling though the extrusion. It tends to catch a hand drill for larger holes.

Made the bench top liftable to access the battery.
View attachment 700313

Here's the final finished product
View attachment 700314
View attachment 700316
View attachment 700317
Made the counter extension a flip up so the heater is still usable where it is. We also found it's very handy to have a surface reachable from the pulled out bed, sort of like a night table. Also put a very low shelf for the propane to allow my slide out tailgate cooking counter to fit under. Used a large quick fist with a 1" ratchet strap laced through the quick fist.

The middle compartment has 1/4" baltic birch cutouts slid into the 8020 slots with a liner from my wife's unused yoga mat. I made another coroplast drawer, using an even easier technique. The stove is sitting on top of the counter since that's where we store it strapped down while traveling.

Here's the pack bag I mention we put under the rear seat platform. We love this thing. Holds a ton, very organized. It's like a lightweight chest of drawers. Hangs from the camper bedrail. Also, you can see where I move a water jug for gravity feed water. The spigot hose isn't attached. Works great. If it's freezing no pump or plumbing to worry about. I also use a Rollercam strap vertically to hold the jug to the platform. I can leave the hose/spigot attached and it's solid enough to bounce around offroad and off camber.

I should also say the bench cushions were custom cut 3" medium firm foam from https://www.foamorder.com/ with a Dacron wrap. We got the sunbrella fabric from https://www.sailrite.com/ (great DIY resource). It's super durable. Very easy to cover your own cushions IF you use a solid base so you wrap the fabric around and staple the bottoms. No sewing!

If we need to stealth camp or close down the top, my wife can sleep on the bench and I can sleep north/south under with my Thermarest. Our goal with this was NOT to have it built out inside like a FWC, but to be able to retreat inside as needed for a day or two. Mostly it's tailgating for us, sitting outside, and retreating in for bed. That said, the bench is comfortable seating with a pillow behind us, and there's enough room with the top down to clear my head, so I'm sure we'll hang out inside more than we think.
View attachment 700322

One last organizational issue is the kitchen.
View attachment 700329
This lives on the inside D-side barn door that's reinforced. You can see it stowed in my electricals post. This is ALL of our kitchen stuff. Saw it on iKamper's website, and hoped it would work. The pockets surprised us with the roominess. Holds our pot set, dishes two Yeti mugs, a GSI skillet plus everything else. Eliminates need for more storage construction and super handy.

I'll post a little more I'm sure on odds n' ends, but that's the bulk of it. I left out some details, sources, links, etc so as not to hog this thread (at least too much!:rolleyes:). Happy to answer questions or provide more info. Just ask.

We're going somewhere in about 3 weeks (still figuring where). I'm going to try to force myself to get it weighed again fully loaded, and I'll post that if I do.

Good luck on your builds!


I like what you did with the coroplast drawers. I'm thinking for my benches/storage, I was going to frame it out of 2x2 and sheath it with thin plywood to keep it strong where needed, and cut weight where I can. But I imagine sheathing with coroplast is much lighter?

I would do coroplast walls all around the frame of my benches, and only use thick plywood on top since that will be used for sitting and sleeping and I'll be attaching L track up there too. Great idea on coroplast sheathing your drawers ?

Insulation is my next step. I did read about leaving a gap between the skin and foam board to trap air in there. I may do 1/2" foam perhaps, to leave a gap between aluminum skin and the foam board.
 

Wrathchild

Active member
“there's so much thermal bridging you can't control, and the tent sides, even with the thermal liner let in a lot of cold. It seems to me that being comfortable in the cold in our campers is pretty much clothing and heater dependent.”

Could not agree more.

Insulating def made it cooler when hot, and keeps some heat in when it’s cold. My r value is low I’m sure, but that’s what good sleeping bags and clothing is for.

A couple windows open and Running the fan when warm out is the bees knees.

Edit: I used 1” double foil faced polyiso. Cut each piece to press fit into each frame section. Then used aluminum tape to seal to the frame. I read over air gaps as well, but seemed like unless you totally eliminate thermal bridging is doesn’t add a whole lot. Adding air gaps was an opportunity to trap moisture in my mind. Especially since I live in and spend much of my time in damp climates.

Haven’t noticed any fridge heat issues with with my wave 3 right over it. But my Snomaster lives w the travel cover on it. I figure that the wave 3 is designed to be used on the ground with its included stand. And I met all the clearance reqs Per the instructions. So I’m not worried about it.

How useful is the wave in cold climates? I’ve found it does well enough if the density altitude is low as well as humidity.

Am I going to install a forced air/dry heat heater?Absolutely. Wave performance window is pretty narrow and I want to expand our comfort into more environments.
 
Last edited:

aaaslayer

Active member
My current build is a Hallmark Brand Ford Bronco Specific Pop-Top Camper I am transferring from my Tan 1982 2 Door Bronco to my 1990 Centurion 4 Door 1 Ton Diesel Bronco.

Will be complete this spring.
nice build, there is a dedicated thread to all pop tops. This thread is OVRLND CAMPERS specific only for those who have OVLRND CAMPERS brand pop tops.
 

dstefan

Well-known member
But I imagine sheathing with coroplast is much lighter?
Very definitely, though if you use 1/4" (really 5mm) baltic birch plywood that's pretty light too and def stronger. Coroplast will give you rigidity along the flute/chanel lines, but can be flexible. If you anchor the walls on the side it would be pretty impact forgiving. It's just much easier, cheaper and quicker to work with. No sawing, dust, sealing, finishing, etc. I'm using 4mm but there is a stronger, still light 6mm available, but not at Home Depot.

Great idea on coroplast sheathing your drawers
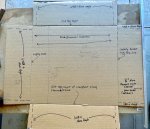
Thanks! Not sure exactly how you mean "sheathing" WRT the drawer, but just to be clear, the drawers are actually completely made of coroplast, but with some corner and edge reinforcement which actually can be optional. There's no inside frame. The strength comes from the folding. Don't have construction process pictures, but I was garage cleaning this morning and found my cardboard drawer template so I marked it up quickly:
1641496349478.jpeg

Here's a quick how to:

1) Layout and cut the drawer blank (I like a quick cardboard mock-up to verify it's gonna fit first)
2) Slit the top layer ONLY of the two fold lines that go in the direction of the channels/flutes
3) Lightly score with a utility knife the other two fold lines that go across the flutes. (I also run a rotary pizza cutter along the line using a straight edge to break down the little walls). ALL the cuts/scores of the fold lines are done inside the box only. Gives you smooth bottom edges and corners.
4) Fold it up and tape the corners.
You could stop here for a really light duty box if you use good tape. I've made boxes with 2" Gaffer tape that have held up for years. Read on for a more durable one . . .
5) Clean the inside corners with isopropyl alcohol and lightly scuff with ~120 grit sand paper (using the VHB primer as well is even stronger)
6) Apply VHB tape to the corners (dashed lines in the picture) and roll it or press for a good adhesion
7) Fit 4 corner braces of hardware store 3/4' alum angle that you've cut to the box height in the corners and roll/press again. Oh, first clean and scuff the alum angle too. No need for primer on it.
8) If you want real side rigidity, you can buy some hardware store/Home Depot 1/4"aluminum plywood trim channel for edging. You can just press fit this. It will be held by the alum corner braces plus the coroplast

No need for a frame otherwise. The bottom fold lines on each side give rigidity. The drawer I made for my back seat platform is holding 20lbs of stuff and I take it out to store in the house, so I VHB'd another full piece of coroplast on the inside bottom of the drawer for a little more bottom support as its quite long.

I made the drawer in the camper exactly as described and its quite rigid.

If you're gonna work much with coroplast, get one of these:

Makes it real easy to cut either 1 or both layers along the flutes. You can also use it to make coroplast hinges, and you can make corner reinforcements with it.
 
Last edited:

Forum statistics

Threads
188,201
Messages
2,903,726
Members
229,665
Latest member
SANelson
Top